The older the house becomes, the more difficult and expensive it is to carry out repair work on it - in almost all cases the repair will be major. And it’s not only the aging of materials that influences this, but also how finishing was previously approached in general. There were no technological materials, everything was made of cement and alabaster, and no one paid much attention to the evenness of surfaces. And so, when you remove the old cracked plaster from the ceiling, you find floor slabs with solid seams gaping between them, from which, in fact, cracks appear on the surface. Today we will look at how to seal the seams on the ceiling between the slabs. The information will also be useful when building a new house with similar floors.
What to do if...
The need to eliminate defects
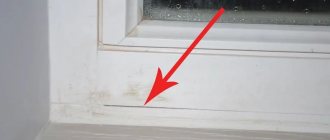
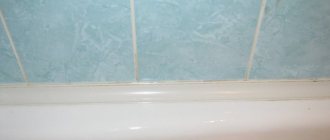
Often on the ceiling surface there are visible seams between the floor slabs, which can ruin the look of the most original and expensive interior design. This also applies to the seams between the decorative tiles chosen as the ceiling design. To prevent this from happening, it is important to know how to properly repair these defects and not leave this stage of repair work unattended.
As for floor slabs, defects in visible seams may occur due to shrinkage of the building or seasonal soil movements. This problem is solved by finishing with suspended or tension structures. If this is not possible, then careful correction of the defects that have arisen is necessary.
Visible seam on the ceiling
What to pay attention to before starting work
If your apartment is located on the top floor of a multi-storey building, and there is no technical floor above, then before proceeding with the sealing it is necessary to check the condition of the roof. It is quite possible that moisture will soon begin to flow through the cracks. Gypsum is a mineral base with a beneficial environment for the proliferation of microorganisms that only need humidity and above-zero temperatures. With the described leak, all conditions will be met and the ceiling will soon bloom.
Excess moisture leads to the appearance of fungus
The second important point is heat loss. A draft can literally “walk” through large gaps, making it uncomfortable to be in the room. But even in the absence of air movement, a good cold bridge is created, through which heat from the radiators will be transferred to the street.
Advice! This will not be a problem if there are also heated rooms above you.
A cold bridge means that there will be practically a dew point in the room, since the boundary of heat and cold moves inside the room. This is another reason for the appearance of a large amount of moisture and the problems that accompany it.
To eliminate all these troubles, you will need to insulate the seam, which will be discussed in detail below.
If the slab does not lead to the roof, its preparation and sealing is greatly simplified, but it is also important as other problems may arise.
- The sound insulation of the room is compromised;
- Dirt and dust will constantly fall out of the crack, which is unpleasant for suspended ceilings, which, when the door is opened sharply, can act as a membrane, lifting it all into the air.
- The integrity of the ceiling covering will also be compromised, because nothing will resist the movements of the house that occur as a result of shrinkage and seasonal soil fluctuations.
Now let's talk about everything in more detail.
Sealing the seams of tiled ceilings
Before the start of the main work, a preparatory period follows, including the preparation of the necessary materials and tools. To work you will need:
- if the seams are of small depth, cement of the NTs brand is suitable, which expands when hardening and fills any seams as much as possible;
- if the seams are wide, it is better to use sealing materials;
- primer;
- putty (it is better to choose latex);
- serpyanka (width should not be less than 20 centimeters);
- preliminary and finishing ceiling putty.
It is better to use wide and narrow spatulas, a spray bottle and a brush as tools.
Required Tools
Serpyanka
The work process consists of the required stages:
- After removing the coating from the ceiling surface and thoroughly cleaning it with a spray bottle of water and a spatula, it is necessary to widen the seams as much as possible. If doing this manually is problematic, then you should resort to using a hammer drill. As a result, the recess should take on a U-shape, which will allow the putty to be better secured;
The seam must be thoroughly cleaned of dust and debris.
- if the resulting seam is not deep in depth, then it can be sealed using ordinary polyurethane foam. The seam is moistened and foam is applied. When the foam hardens, its excess is carefully removed with a knife. For a not wide but deep seam, it is better to choose polyethylene foam. For this, the recess is primed and dried, after which the seal is fixed into it using a moisture-resistant sealant;
The solution is applied with a wide spreader
- the resulting seam must be puttied. It is better to choose a latex material, leveling it flush with the tiled surface when applying. It is convenient to use two spatulas for work;
- After about a day, when the applied solution is completely dry, proceed to putty. To do this, apply a preliminary putty layer and attach the serpyanka. After this layer has dried, it is leveled using sandpaper and a layer of putty is applied. The next stage is applying the finishing putty. After it has dried and treated with fine sandpaper, you can begin painting;
Preliminary putty using serpyanka
- if there is a large difference in the floor slabs, then you cannot do without plaster. You will need a gypsum-based composition and reinforcing painting mesh.
Required Tools
To eliminate the gaps between the slabs on the ceiling, it is not necessary to hire workers. Repairs can be carried out efficiently and on your own. To do this, you just need to stock up on knowledge, the necessary tools and materials:
- Dry gypsum putty.
- Primer with deep penetration function.
- Putty knife. Its blade should be flexible and elastic.
- Hammer.
- Attachments for the hammer drill in the form of a spatula and a mixer.
- PVA glue. Glue will be needed to coat the surface after the putty has dried.
- Masking tape.
- Fine grit sandpaper.
- Acrylic sealant and a gun for it.
All these materials are necessary for high-quality work. To prevent additional cracks and unevenness from appearing on the ceiling, it is recommended to carry out work in strict order.
Material selection
On the shelves of construction stores there is a very wide range of putty for sealing joints between tiles. Modern products are classified according to numerous criteria: water resistance, grinding fineness, chemical composition and binder composition.
Each of the available materials has its own properties and technical characteristics. Today you can find mixtures that are suitable for sealing joints in damp and wet rooms.
Gypsum putties
These mixtures are widely used today. This popularity is due to the fact that after applying gypsum-based putty, it sets quickly. And working with her is a pleasure.
In the photo - gypsum putty
You can use gypsum mixes when sealing joints between tiles in a room where there is a high level of humidity. At the same time, they will not collapse and peel off from the base.
Polymer putties
This version of the mixture serves as a finishing finish, but today it is actively used when sealing joints between tiles. Using polymer putties is beneficial in terms of savings. Using this mixture, you can not only seal the seams between the tiles, but also prepare the ceiling surface before installing the finishing material.
The finishing putty does an excellent job of filling cracks and small depressions. The thickness of the applied layer does not exceed 1 mm.
In the photo - polymer putty
To seal the seams, a finishing putty can be used, which is called superfinishing putty. It has a minimum layer thickness, and it must be applied in several layers with intermediate drying. At the same time, make sure that the total layer thickness does not exceed the maximum permissible value for this type of material. If you do not follow this rule, then there will be cracks on the surface. If you apply the finishing putty correctly, then after drying you can get a dense, non-chalking, silky white surface. After this, you no longer need to go over it with sandpaper.
Waterproof putties
This material option is suitable for sealing joints between tiles in rooms with high humidity levels. As a rule, this is the kitchen or bathroom. After applying the putty, you don’t have to worry that the seams will crack or crumble under the influence of moisture.
In the photo - waterproof putty
Special putties
These compounds were specially developed for sealing joints between tiles. They have excellent elasticity and a high degree of adhesion to the base. Used for finishing. It can be used not only for sealing seams, but also for preparing gypsum board sheets for final cladding. In addition, this mixture can be used even on curved surfaces.
The photo shows putty for sealing joints between tiles
Putty mixtures must be prepared immediately before work begins. Each manufacturer indicates on the packaging the time during which the mixture will not lose its properties. In addition, on the packaging you can find information regarding the shelf life and composition of the putty.
If you purchase modern material, it dries within 5-24 hours after application. Thanks to this, it is possible to avoid premature drying of the composition, and, consequently, increased consumption of materials. In addition, you don’t need to constantly be distracted to prepare a new batch of putty.
For those who want to learn more about how to glue polystyrene foam to concrete on the ceiling, you should follow the link and read the contents of the article.
How to install MDF panels on the ceiling and how to do it correctly with your own hands is described in this article.
What is the price of insulation for the ceiling in a private house and how to choose exactly what is needed, this article will help you figure it out: https://resforbuild.ru/paneli/utepliteli/na-potolok-v-chastnom-dome.html
What is the most popular ceiling insulation in a private home and how to use and apply it correctly is described in great detail in this article.
Recommendations for building a house
If housing is being built independently, then it is necessary to take into account some features even at the stage of building the house. This will help avoid unpleasant phenomena in the form of cracks in corners and between floor slabs after construction is completed.
Controlling several factors will help you cope with this task:
- Reliability of the foundation. If the foundation is poured correctly and with high quality after the building shrinks, cracks in the corners and on the floors between the slabs will not appear. It is recommended to first conduct a soil study, determine the level of soil freezing, and make the correct markings and compaction of the surface.
- Prevent heat leakage through the floor. For this purpose, it is necessary to lay the foundation correctly.
- Use of composite concrete. This material not only has excellent technical characteristics, but is also completely safe for human health.
- Adding special ingredients to concrete during construction in winter. The standard composition of raw materials is unsuitable for work at sub-zero temperatures.
- Reinforcement of the building. If aerated concrete is used as the main material for housing construction, reinforcement should be done every 2-3 rows. The reinforcement is laid inside block recesses previously created with a wall chaser for aerated concrete.
If the work technology is followed, it is permissible to seal holes of any size. To eliminate seams between slabs, you can choose any available method. If you carry out the work efficiently, you will end up with a completely smooth coating without flaws.
The only exception is apartments in new buildings. A new house shrinks within four years. As a result, the slabs will shift and small cracks may appear on the walls and ceiling. To give an aesthetic appearance to the ceiling in a new home, it is recommended to use tension or suspended structures.
Choice of putty
Since it is almost impossible to make the joining of the slabs ideal, before gluing the cut you need to think about how to seal the seams. It is important to remember one unspoken rule: if you make the seams a few shades darker, each product will stand out, and if you make the seams a few shades lighter, the coating will blend together. It can be seen that color plays one of the main roles in grout. In fact, the shade of the grout and tiles should be the same.
As for which grout to choose, imported or domestic, it all depends on the quality. Domestic material is cheaper, although it is believed that higher quality still comes from an imported manufacturer. There are moisture-resistant compounds, this is especially important if grouting is done on the kitchen ceiling.
In terms of what to use to seal the seams, you may have difficulty with the shade, since you may not be able to choose the right color, but you can make it yourself. For example, you can buy white grout and mix dye into it. It's difficult, but possible. If all of these do not work out, then it is better to use the so-called classics of the genre, that is, white.
But you can use other compositions instead of grouts specially designed for this, which significantly simplifies the essence of the issue:
- finishing putty;
- acrylic sealant.
Types of tile grouting
There are a number of materials used for sealing seams:
- acrylic sealant, polyurethane foam or construction plaster;
- leveling mixture, which can be used as a cement solution of the NTs grade;
- reinforcing mesh;
- latex putty;
- primer mixture or special impregnation.
Any of these materials, when used correctly, will provide invaluable assistance in sealing the seams on the ceiling, regardless of whether they were formed as a result of the displacement of the ceiling tiles or after laying the finishing material.
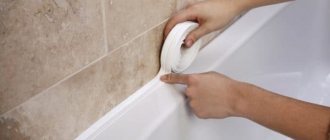
Seal the gap at the junction of the wall
In a panel house, you have to seal not only the seams on the ceiling, but also the junctions of the wall and ceiling panels. Without eliminating cracks, it will not be possible to achieve a high-quality result. To eliminate voids, you will have to use construction foam, gypsum mortar, synthetic putty and putty for exterior use.
Polyurethane foam remains the most affordable and effective means. It expands and fills voids well. To prevent cracking when applying putty, use a reinforcing mesh. It is placed on top of the applied raw material and lightly pressed into the applied composition.
To level the overall surface of the ceiling, it is recommended to use abrasive compounds. Non-woven fabric is ideal for creating a smooth and even surface. The material is glued to the ceiling before applying the final layer of putty. It allows you to hide small irregularities on the ceiling. To preserve the coating for a long time after finishing, it is necessary to apply a primer mixture before painting or whitewashing.
Construction of a foam frame for gluing tiles
This method is suitable for rooms with a flat ceiling plane, but small bulges. For example, if the floor is made of concrete slabs, the gaps between adjacent slabs are sealed with putty, but the dried mixture protrudes from the plane. Then it will not be possible to glue the panels to such a base.
To do this, construct a frame of foam strips:
- the sheets are cut into strips, which are glued to the ceiling in increments corresponding to the width of the tile. As a result, one panel should lie on two strips;
- if the strip lands on an uneven area of the base, a notch is cut in the foam with a knife corresponding to the width of the unevenness.
When choosing the width of the stripes, take into account the sizes of the tiles that are supposed to be used to decorate the ceilings. This frame is mounted only under light foam tiles.
Finishing putty
You can begin the process itself. It is necessary to prepare all the necessary tools and prepare the composition.
| Materials, tools | Preparation of the composition | Grout |
| · putty knife; · container for the composition; · dry putty; · foam sponge | You need to take water into a container and add putty to it, stir everything well. The solution should be thick | You need to put a little putty on your finger and fill the seam. However, this must be done evenly, which means that the thickness of the layer should be the same everywhere. After working on several seams, you need to remove excess material with a sponge, first moistening it with water. Do not press the sponge too hard, otherwise the putty will come out of the seam. |
Usually the putty dries out after 12 hours. After this, you need to wash the foam tiles. It is better to change the water frequently, because it is necessary to wash off all the dirt.
Carrying out work
After you have chosen the mixture for sealing the seams and prepared the tools (rubber spatula, drill, narrow and wide spatula), you can begin the sealing procedure. It consists of three stages, each of which is divided into subsections.
Preparatory work
In order for the new coating to last well and for a long time, you must first remove the old layer from the ceiling. This could be whitewash, paint or old putty. Next, unstitch the seam using a drill with a special attachment. In appearance it should look like a spatula.
Remove dry cement mortar from it using a narrow spatula. Remove dust and small material residues. Apply primer thoroughly and generously. Wait until it dries thoroughly. Thanks to the primer, you can achieve maximum adhesion of the putty to the surface.
The video shows how to seal the seams on the ceiling between the slabs:
Main stage
This stage involves sealing the seam. You need to fill it with construction foam. If it is not available, then ready-made sealant, tow, or gypsum plaster, the consistency of which resembles sour cream, will be suitable for these purposes. When the foam has dried, remove all parts protruding above the surface. Fill the sealed space with the pre-mix using a wide spatula.
Perform all work very carefully so that all voids are filled 100%. After this, apply a layer of primer again.
How and where you can use a white satin stretch ceiling and whether you can do it yourself is described in this article.
You can understand how to install a stretch fabric ceiling by watching the video in this article.
You may also be interested in learning about which ceiling is better, matte or glossy, and what reviews there are about this building material, as described in this article.
Photos and information from this article will help you understand what a suspended ceiling looks like and how it is installed in a bathroom.
But this information will help you understand which PVC or fabric ceiling is best to use and how to make the right choice.
Reasons for water penetration through cracks and how to deal with them
If, after inspecting the roofing material, no defects were identified, they proceed to repair work. Otherwise, the roofing material is first repaired and partially replaced. Most often, roofing felt, which is mainly used when covering high-rise buildings with a soft flat roof, becomes unusable.
This material is quite affordable, sold in rolls and provides excellent protection from water and other environmental influences. It is excellent for waterproofing floors.
Before finishing the roof with roofing felt, rolls are unrolled on the roof surface; if necessary, it is additionally heated with a special burner to ensure better adhesion to the surface.
If you reliably protect your roof from moisture, you will never see water stains on your ceilings, and the design of the room will not be spoiled.
Acrylic sealant
Another method is sealant. You will need:
- sealant;
- confectioner's syringe or gun.
The sealant is produced in tubes. However, it also requires a pistol to operate. It must be purchased separately. A substitute can be a pastry syringe, but more on that later. So, the grouting process includes the following:
- cut the end of the tube at a forty-five degree angle;
- put on a gun;
- press the balloon into the cracks, but firmly;
- press the pistol handle;
- gently move the tube along the seam.
Using acrylic sealant
But it is not always possible to buy a special pistol. It costs a lot, but may no longer be useful. Is it then possible to figure out how to seal the seam between the ceiling tiles? Of course, you can simply use a pastry syringe instead of a gun. You need to fill it with sealant. Usually the syringe kit comes with nozzles. You need to use the one with an acute angle. Everything else is done the same.
The options listed are very practical, the main thing is to do everything carefully.
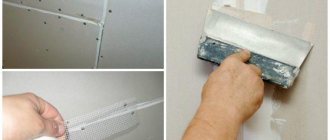
How to hide imperfections on plasterboard ceilings
On plasterboard ceilings, joints are created, to remove which you will need the following materials:
- paper tape;
- primer;
- putty mixture;
- emery cloth;
- wider spatula;
- fiberglass painting mesh.
Taking the putty mixture on a spatula, apply it in the thinnest layer to the seams, grabbing about 2-3 centimeters of drywall sheets on both sides. A paper tape is attached to the mixture applied to the seam, then the next layer of solution is applied, using a spatula to remove excess.
After drying, the seams are sanded and primed, and a painting mesh is attached to them using a stapler or pushpins. The stage of finishing putty begins, and after it dries, it is necessary to carry out final sanding and priming.
Seam filling scheme
The most reliable way to seal the seams between ceiling tiles.
Whatever the building of your house, modern or old, built with high quality and using technology or without it. Despite all this, changes occur in structures associated with winter-summer temperature differences, soil shrinkage, soil freezing, and the presence of new construction projects in the neighborhood. Sooner or later, if floor slabs were used in your house, cracks will appear between them.
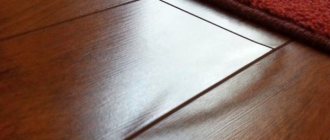
Before and after, you can do it even more carefully if you don’t rush. Before and after, you can do it even more carefully if you don’t rush.
Modern buildings are built without floor slabs and the ceilings are seamless; in the past it was different.
Below I will consider the most reliable, in my opinion, way to seal the seams between the slabs on the ceiling. They are also called rustics, if that makes sense to someone.
I would like to immediately note that if the distance between the plates is more than 4 centimeters, the right solution would be to make a suspended ceiling or a plasterboard ceiling. If environmentalists can somehow challenge the first option, then gypsum board is clearly a safe material. You just need to understand that the minimum ceiling level will drop by 5 centimeters.
Preparation
The first thing you need to do is either empty the room of furniture or cover everything thoroughly with foil, since there is a very dirty job ahead.
You need to tap the rustics with a hammer and understand where the plaster holds up well and where it doesn’t. Next, we decide whether we will repair only the seams, if the difference between the slabs is up to 1 centimeter, or re-plaster the entire ceiling. Experienced craftsmen advise that it is better not to touch plaster that adheres well to the plane of the slab.
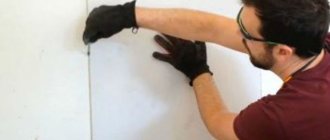
We clean the selected surface of whitewash, paint and plaster. You can use a spatula for whitewashing, but for paint you will probably need a sander. Don't forget to use protective equipment!
Seam repair
For the work you will need: a hammer, a chisel, a spatula, a 20 cm wide serpyanka, polyurethane foam, a primer, plaster and a water spray (or a damp rag)
- The first step is to deepen the crack so that it has a triangle cross-section with a width of 5 cm. Using a chisel and spatula, we clean and remove excess pieces of plaster.
- Using a sprayer or brush, we treat the rust with a polymer primer
- After drying, the crack should be moistened with the same sprayer with water or walked with a wet cloth.
- Before the water dries, we seal the joint between the plates with foam and wait for it to dry. We cut off the excess so that the foam does not extend beyond the plane of the ceiling.
- Prepare cement mortar, or you can buy ready-made one at a hardware store.
- We apply the plaster with a spatula so that it fills all the smallest cavities between the foam and the slab, so it will stick better.
- As the solution begins to set, cover the surface of the freshly plastered seam with sickle tape from wall to wall. It is important that the center of the tape coincides with the center of the seam; for this, you can put marks on the slabs in advance.
- After this, we proceed to complete plastering of the ceiling or we put the seam in order using putty.
Plastering the seam and covering it with serpyanka.
Plastering the seam and covering it with serpyanka. Although today there are many adherents of whitewashing the ceiling, I am more of a supporter of modern and quick methods of finishing the ceiling in the form of a stretch ceiling. There are many materials, including eco-friendly fabrics, that can be used even in kindergartens and are non-flammable.
Seamless ceiling tiles
Among the huge range of building finishing materials, there is a special tile made of polystyrene foam, called “ceiling without seams”. Using this type of material, you will ensure that the seams are almost invisible, and the surface of the ceiling will look as even and smooth as possible.
Seamless ceiling tiles
Ceilings made from such tiles are easy to install, and the process is not much different from installing ordinary ceiling tiles. But there are a number of nuances that should be taken into account when working.
After purchasing the material, it must be left unpacked for about a day, and the surface where the slabs will be mounted must first be puttied and primed. The tiles must be checked for defects and chips; damaged elements should not be used in the work.
Marking ceiling tiles without seams
In order for the tiles to lie flat, the surface of the ceiling must first be leveled and primed. Then comes the turn of marking and only then can you glue the tile fragments, after carefully treating each of them with glue. After securing two adjacent elements, the formed seam is covered with construction tape, which is removed after the adhesive composition has completely hardened. If you adhere to this technology, the seams between the slabs will be noticeable only upon careful examination.
To remove small cracks, use acrylic sealant or putty designed for this purpose. It is better to avoid silicone sealant or coloring compounds, they will only make the seams noticeable.
__________________________________________________