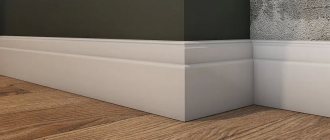
Advantages of polyurethane ceiling plinth
Skirting boards made from this material have a wide range of positive properties. It has a high ductility rate, which makes it possible to use it even when constructing a structure such as an indoor arch.
Characteristics of polyurethane skirting boards:
- the material is completely moisture-resistant, it is not prone to the appearance of various harmful microorganisms (insects, fungi, mold) and is stronger than polystyrene foam. In addition, it is not subject to mechanical stress, as a result of which it can also be mounted on the floor;
- polyurethane is an environmentally friendly material, which, moreover, does not cause any difficulties during operation. It can be washed using household chemicals and products containing abrasives;
- polyurethane plinth has a wide range of colors, patterns and textures. You can always purchase either ready-to-paint or already painted material;
- When installing such a plinth, it is recommended to use a special glue that is highly durable and can withstand even the heaviest weight. In this case, it is not necessary to install a polyurethane ceiling plinth on putty.
What material is best to work with when sealing joints?
Before deciding what is the best way to seal the joints of the installed ceiling plinth, you should understand what products are suitable for processing certain materials.
For foam and polyurethane curtain rods
For foam and polyurethane ceilings, acrylic putty is best suited. This material is stable and durable. In addition, it dries quickly and is practically not affected by moisture. Acrylic putties are very technologically advanced. In the process of sealing seams, especially in corners, the cornices will need to be sanded. To get a flat and smooth surface at the joint, use sandpaper of minimal grit for this purpose.
The white color of the material allows the putty to be safely used for working with baguettes that are being prepared for painting.
Today there is a huge selection of finishing building materials on sale, among which finishing putty is quite widely represented.
On a note:
expanded polystyrene and polyurethane have a natural white color. The structure of the materials goes very well with acrylic putties. Often this type of putty is used for installing ceiling moldings. When painting, the putty does not show through, especially when white paint is used.
It is necessary to remember this point too. Large cracks, up to 3 mm, are recommended to be sealed with gypsum-based putty. To prevent the plaster from hardening quickly, add a little PVA glue to the solution.
For wooden skirting boards
When working with wooden baseboards, the seams have to be sealed more thoroughly, since wood is much more difficult to install in the desired position. Finishing acrylic putty, gypsum-based solutions and PVA glue are also suitable for these purposes. Small joints and crevices are easily touched with mortars and then sanded to make the fillet surface uniform.
Before sealing the joints of the wooden ceiling plinth, it is necessary to carefully prepare the walls. The large curvature of the walls creates the preconditions that the gaps between the cornice and the wall can increase as the wood dries out. Otherwise, you will have to use a large amount of putty to seal the gap. This does not look very aesthetically pleasing, and over time, the dried putty may fall out of the crack.
Recommendations for choosing skirting boards for the ceiling
Even before deciding on what to putty on the ceiling plinth, you should carefully select the plinth itself.
When choosing, you must be guided by the following series of rules:
- Skirting boards with a width of no more than seven centimeters are well suited for narrow spaces in the kitchen, toilet and bathroom, as well as in rooms with low ceilings (read: “Ceiling plinth for the bathroom: types”).
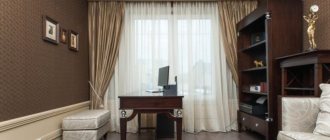
- Elements with a width of more than seven centimeters will look great in spacious, bright rooms like a living room or hall. They often have a non-standard texture, which allows you to give the entire room an original appearance.
- When choosing a plinth for arranging a ceiling with several levels, you should take into account the interval between levels. This type of work is quite difficult to perform, especially if you have no experience in such installation, so it would be better to entrust this procedure to a professional craftsman.
- The use of a colored element is more suitable for rooms decorated in a certain style. If there is no such design, then it would be better to purchase material in a standard white shade, which can be painted at any time.
- It is important to purchase a quantity of skirting boards with a margin of several meters, since during installation it will not be possible to avoid any scraps that are unsuitable for installation on the ceiling.
- The use of special glued corners, which significantly facilitate the installation process, will allow you to avoid joining.
- If there are any patterns on the plinth, then it is better to avoid using corners, as there may be difficulties in fitting the plinth parts.
We use glazes
In order to apply glaze to a ceiling plinth with stucco, you will need:
- a can of glaze or a spray bottle;
- brush;
- sponge or rag.
The order of its application is as follows:
- spray glaze over the surface;
- take a brush, sponge or rag and rub to obtain a tinted effect.
Patinating the ceiling plinth
To make a simple ceiling molding look like an antique, it needs to be patinated using glaze. It's not difficult to do this:
- we buy glazes in the colors Taire and UMBER;
- Apply Taire-colored glaze in an even layer to the top and bottom of the ceiling plinth, leaving the middle unpainted;
- Now you need to use a sponge to shade the area where the painted area meets the unpainted area. At the same time we remove the outer layer of paint. At the same time, the convex relief will become lighter and brighter, and the indentations will contrast with the color of the reliefs;
- To emphasize the relief, we use UMBER color glaze.
Here is a clear example of creating an antique effect on a ceiling plinth:
Create a stone effect
If our plinth has a large, eye-catching pattern, then it can be given the effect of a natural stone, slightly dirty surface:
- Apply TAIRE glaze in a thick and even layer to the surface of the baseboard;
- shade the surface with a brush to form light strokes;
- Using the Umber glazer, we cover the surface with dark spots;
- shade;
- apply small strokes of dark color, remove excess;
- let the surface dry;
- we apply strokes to the reliefs using bronze glaze;
- leave to dry.
In a room designed in the Baroque style, a gilded ceiling plinth would be appropriate.
Activities to prepare for installation of skirting boards on the ceiling
Before installing the plinth on the ceiling, you should prepare all the surfaces involved in the work process.
It is possible to glue the plinth either directly to the wall or to an already finished surface. But at the same time, it is important to remember that during a possible repair, the plinth glued on top of the wallpaper will have to be dismantled (for more details: “How to properly glue a ceiling plinth - instructions”).
It would be more correct to install the baseboard before the final finishing of the room is completed. The wall needs to be plastered and primed.
In the event that fungi or mold may appear on the wall, the surfaces must be treated with a special antiseptic or with regular whitening. But, although chlorine is capable of eliminating mold that has appeared, it cannot provide any protection against its further appearance.
The ceiling surface should be approximately 90 - 100% prepared. The last thing you can do is whitewash. If the ceiling structure is suspended, or if the ceiling is plastered, then the plinth can be safely attached directly to it. Otherwise, it will be necessary to perform such an activity as puttying the ceiling plinth.
To do this, using a spatula, you need to remove the old coating from the ceiling, if any, and also remove the old plaster.
After cleaning the ceiling surface, the ceiling should be washed from dirt and dust and left until completely dry.
After this, you need to start priming the ceiling. This is done so that the putty for the ceiling plinth improves its adhesive properties. Simply put, so that the ceiling covering does not absorb moisture from the mixture applied to it. This will not only help the surface dry faster, but will also prevent the formation of cracks and other minor defects.
It is best to apply the primer coat using a standard roller equipped with a long handle, since you will not have to regularly use a stepladder.
A good primer absorbs fairly quickly, so there is no need to treat the same area of the ceiling several times. The primer also needs to be given time to dry, and only then you can begin to putty the surface.
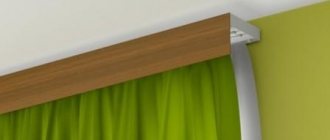
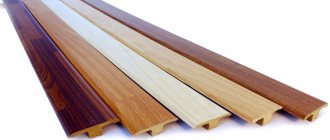
Types of in-line decor
Knowing the characteristics of the material from which the baguette is made, you can choose the required type of ceiling decor:
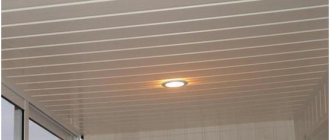
- Plastic baguettes. Economy option. Durable, strong and reliable. Do not be afraid of moisture or sunlight. Universal, suitable for any style and design of the room, due to the fact that they can be of different shapes and can be easily painted in any color.
- Aluminum baguettes. Strong, durable, but not cheap. Suitable for decorating apartments in a modern style, as well as for finishing office premises.
- Wooden baguettes. Used when decorating rooms with a classic design. Expensive and noble. In order for wooden baguettes to serve for a long time, they are treated with special compounds, since wood is afraid of fire, moisture, dust and dampness.
Since it is quite difficult to glue baguettes without experience and certain knowledge, you need to learn how to cut a baguette correctly, as well as to properly trim it in the corners. To trim corners and straight sections, use a miter box - a tool designed for cutting both ceiling and floor plinths made of different materials.
You can use a miter box only in rooms where the angle between the walls and the ceiling is straight. As a rule, the corners in apartments are not always 90 degrees, so the corners often have to be adjusted manually.
Installation of ceiling plinth
Once all surfaces are ready for installation, you can begin laying the ceiling plinth. All activities can be completed independently, without the help of specialists, and if any difficulties arise, you can always look at detailed photos or videos on installing ceiling plinths.
Technical features of installation of skirting boards are as follows:
- if the installation of the plinth is carried out on a suspended ceiling, as well as on a plastic or wooden structure, then it is better to use glue (read: “How to glue a ceiling plinth to a suspended ceiling”);
- Fixing the cornice to the plaster is done using putty. Its use provides a good opportunity to get rid of all the unevenness of the wall by filling cracks and voids;
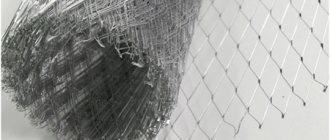
- On the inside along the edges, the plinth is equipped with a corrugated surface, which is the point of connection with the wall. Putty or glue should be applied directly to these places;
- It would be best to apply the putty in a thin layer using a small spatula, and the glue, called “liquid nails,” with a special mounting gun;
- The putty must be applied in a continuous and even layer. This does not apply to glue, since it can also be applied in a dotted manner, and it is only important to use the material economically;
- After fixing the plinth, it is necessary to eliminate the excess glue that has protruded outward using a rag or spatula. Do this quickly, otherwise the glue may dry out.
Features of fitting the plinth to the ceiling
- When using corners, you need to secure them first, and then fix the remaining elements of the plinth between them (read: “How to file a ceiling plinth - methods”).
- First of all, glue should be applied to those areas where a solid part is mounted, and in other areas the baseboard will need to be cut with a hacksaw or a stationery knife.
- To ensure an even cutting line, it is best to use a miter box. Thanks to this inexpensive tool, you can cut the cornice at an angle of either 45 or 90 degrees.
- It would be best to measure the plinth in the right place, but if this is not possible, then you need to use a tape measure. The plinth should rest at one end against a pre-installed corner, and then it should be pressed tightly to the place of fixation.
- Using a knife or pencil, you need to make a mark on the baseboard, and then the material is cut, and any irregularities that appear are removed. Using the same principle, it is necessary to arrange the entire perimeter of the room.
- The plinth without corners is also mounted in the same way. To do this kind of work correctly, you need to form a corner using a miter box. It is better to start the process from those corners where you can mount solid parts of the plinth.
- When adjusting the ceiling plinth where it abuts the corner, it is important to remember that the length of the plinth should be longer than the length of the intended installation area. First you need to cut the corner, and then set it in place and mark it.
- When marking, the thickness of the cut produced by the saw blade must be taken into account; therefore, it is worth leaving about 1 - 2 millimeters in reserve.
- If there are any three-dimensional images on the plinth, then it is better to start fixing the material from the least noticeable corner, since problems with joining usually arise at the starting corner.
- It is necessary to fasten the plinth exclusively in one direction, otherwise, in the areas of joints, the pattern of the plinths may differ.
Installation of ceiling plinth, detailed video instructions:
What you might need for work
For proper docking, prepare the necessary tools:
- miter box;
- hacksaw;
- construction knife;
- glue;
- rags or old clean rags.
Installation of the plinth should begin from the entrance. First, the surface of the wall is cleaned of dust; on a clean surface, the glue will stick to the wall better.
Adjusting the skirting boards for joining in the corners is one of the main elements of installation. The edge of the baguette is cut at an angle of 90 degrees, but you need to have an angle of 45 degrees, so you cannot do without trimming. Installation must begin from the entrance. Clean the surface of the wall from dust; on a clean surface the glue will stick to the wall better. We coat the baseboard and press it against the wall. If droplets of glue protrude from under the product, remove it with a rag or rag.
Don’t try to make the corners evenly with a knife, you will waste several elements, and you won’t get a beautiful joint. It is best to use a miter box. The part must be cut at an angle of 45 degrees. The long side should lie against the wall, the short side - towards.
Smooth corners cannot be made with a regular knife; it is best to use a miter box.
We remove the burrs with a construction knife, then you can glue. We cut the second plinth so that it copies the profile of the first, then the joints will be even.
You can use different joints, it all depends on the configuration of your room, but the joints must be connected with the utmost care. Defects in the corners are especially noticeable. In some cases, it is possible to replace a failed corner installation. Next, install the flat sections, you can check how the flat plinths are cut. In production, 90 degrees is not always observed.
Ready-made corners are now available in construction stores. They are glued into the corner, and you no longer need to adjust the corners. This makes the job very easy for inexperienced home craftsmen.
Glue the joints with glue, remove the excess with a clean rag prepared in advance by you. If gaps have formed between the ceiling and the joints, seal them with putty or sealant. You can paint the baseboard and your room will have a finished look.
Finishing ceilings with skirting boards is one of the final stages of repair work. The quality of the entire finish depends on how this work is done. Miscalculations made during the installation of ceiling moldings and cornices can negate all the advantages of apartment design, especially if this concerns the ceiling. Correct selection of consumables and adherence to fillet installation technology is only half the battle. During the installation of ceiling finishing materials, flaws and shortcomings involuntarily arise, not to mention technological gaps and cracks.
Our article is about how to seal the joints between individual pieces of cornices and how to remove the gap that has arisen between our ceiling and the glued baseboard. Tips and recommendations in this case will help you quickly solve the problem and complete the finishing of the upper part of the room at the proper level.
Final finishing of the baseboard
The installation of the plinth on the ceiling is completed by plastering it. The joints and corners must be treated. While working, it is advisable to use a small rubber spatula, but if you don’t have one, you can do without it.
Puttying is carried out according to the following principle:
- The cracks are filled with putty to the maximum depth. Excess mixture must be removed using a spatula, and then wipe the cornice with a sponge soaked in water. What is typical is that after the material dries, the joint will become almost invisible.
- The final part of the work is painting or whitewashing. It is important to remember that you need to whitewash the baseboard in two layers.
By completing all of the above procedures, you can achieve a ceiling that is beautiful in appearance and reliable, distinguished by its originality and harmony with the interior of the room, and if you want to somehow give it some freshness, you can re-whitewash it.
How to cut a piece of polyurethane?
You can try with a heated (hot) knife or nichrome wire through which current from the LATR is passed. Or freeze it well before using a hacksaw.
Interesting materials:
When do priority signs apply? When do you take a screenshot in Direct? When do they make a diagnostic card for a car? When to make a diagnostic card? When to do a car alignment? When is the best time to dry clean your car interior? When is the best time to do a wheel alignment? When is it better to do the vacuum exercise? When is the best time to do the vacuum exercise? When can you shop according to the lunar calendar?