Although the material has been on the construction market for several decades, it is still little known to some developers. In order to make a conscious choice, you need to familiarize yourself with porcelain stoneware in more detail.
Facade porcelain tiles
Installation of a ventilated facade
Porcelain tiles for facades – what is it?
Porcelain stoneware for facades is an artificial stone, so this material can be produced in a wide range of shades and with specified geometric parameters.
Porcelain tiles can be used for the facade of commercial and residential buildings
Practical aesthetics: clad the walls with porcelain stoneware
Porcelain stoneware or ceramic granite is an artificial finishing material characterized by increased wear resistance and strength. Unlike ceramic tiles, which are nothing more than a fired clay plate, porcelain tiles are a composition produced by a special method, which includes not only clay, but also quartz sand and other components. More often it is used as a floor covering, but modern technologies make it possible to create aesthetic colors for wall cladding.
Manufacturing technology of porcelain tiles for facade cladding
Facing tiles are produced by pressing, and after firing at temperatures up to +1300°C they acquire the necessary strength characteristics.
The raw materials for such material are kaolin, clay, quartz sand, feldspars, as well as dyes that provide the material with the required shade. Also, to provide the necessary aesthetic properties, other additives can be used, for example, metal chips.
Artificial granite was previously used for cladding floors and walls in bathrooms, but its properties make it possible to use this material for facade cladding. Facade tiles are large in size.
Gluing: process and optimal choice of glue
When laying porcelain tiles on walls, it is better to join them with visible seams about 2–3.5 mm thick. In the corners, the joining is done by bevelling, which requires an electric tile cutter with a wheel of the appropriate type. It is convenient to make straight cuts for the manufacture of ordinary trim on a manual tile cutter designed for working with porcelain stoneware. Other tools you will need are a mixer, spacer crosses, wedges and a scraper for clearing seams. The adhesive is applied using a comb spatula, and since the concept of caliber does not apply to porcelain stoneware, the tooth height does not depend on the size and thickness of the tiles and averages 8–10 mm. Leveling creamogranite on the walls is done only with the help of a laser axis builder, comparison of adjacent tiles is done using a straight edge.
The range of adhesives for porcelain tiles is quite wide. There are both overly expensive variants of mixtures with optional qualities (water resistance, frost resistance), and frankly cheap compositions with a clearly underestimated concentration of the polymer binder. The right solution would be to use glue from a trusted supplier, such as Ceresit CM 11, or the cheaper domestic “Moment” Elast. Special brands of adhesives for porcelain tiles, such as Litokol or UNIS, do not always justify the cost of them; mixtures with a high content of elasticizers are recommended when there is insufficient confidence in the quality of adhesion to the base, as well as when laying stones with a format larger than 45x45 cm.
In general, the technique of laying porcelain tiles has much in common with facing conventional tiles, although it differs in more stringent requirements for the quality of leveling. In addition, there are a number of points that must be observed:
Source
Specifications
A high-quality porcelain tile facade has the following set of properties:
- Resistance to low temperatures - high-quality material can easily withstand hundreds of freezing/cutting cycles. So these tiles can be used even in cold climates
- Hygroscopicity is minimal, which is due to the high density of the compressed material; there are no micropores in them, so the plates practically do not absorb moisture. Water absorption rate no more than 0.05%
- The hardness is high - this Moss indicator is 8-9, like glass
- Wear resistance - for finishing facades we choose artificial granite with the lowest first group of wear resistance - this will reduce costs, while the facade is not subject to abrasive loads
Dimensions
The dimensions of porcelain stoneware slabs for the facade are very important, since this determines the weight of the finish. So the thickness of the tiles should not exceed 10 mm. Even in this case, the weight of porcelain stoneware slabs is quite large, and therefore before cladding it is necessary to ensure that the building has sufficient load-bearing capacity.
The dimensions of the plates can vary from 40x40 to 80x80 cm.
Color solutions
Colored porcelain tiles
Artificial granite is available on the market in a wide selection of both colors and textures - an ideal option for implementing various design ideas. It is worth keeping in mind that the color of the tiles is often uneven, so in addition to the basic color tone, it is important to take into account the degree of uniformity of the color.
Porcelain tile colors for the facade:
- Monocolor - in this case, the color of the facade decoration is monochromatic and covers all known shades from white and black to green and red.
- Salt pepper. The variegated color is very popular, and the number of color components allows you to achieve different effects.
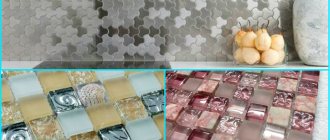
- Marble. Another popular option, technologies allow you to imitate expensive natural stone with different textures - with veins, tints, specks of shine, etc.
- Textured porcelain tiles reproduce a variety of materials from metal to leather, also very authentically and effectively.
Step-by-step instructions for installing façade porcelain stoneware slabs
Important. Installation of façade porcelain tiles is a very responsible job. If you don't have any experience, don't take it. Poor quality execution will result in the loss of significant financial resources. In addition, a slab falling from a height can cause serious injury. Unconditionally follow all manufacturers' recommendations, use only those fasteners that are designed for a specific weight.
Wall cladding with slabs (ventilated facade system) consists of several structural elements:
- carrier system. It includes mounting brackets, vertical and horizontal guides. They are made of thick galvanized steel; special holes are provided to adjust the spatial position. They must not only withstand the weight of porcelain stoneware slabs, but also the wind load;
- thermal insulation layer , if one is planned to be installed. All modern buildings must be thermally insulated; this is provided for by current regulations. In old buildings, the decision on additional wall insulation is made by each owner individually;
- facing finishing slabs . The dimensions and appearance of porcelain tiles are selected taking into account the planned design of the facade walls.
Section of the mounting element into 4 tiles
Scheme of porcelain stoneware facade
Facade system
To carry out the work, you will need an electric drill with a hammer drill, a device for installing rivets (if the supporting frame is assembled with their help), wrenches, a plumb line and a long, precise level. If you have a laser level, great, the markings will be done much faster and more accurately. If not, you will have to use a hydraulic level.
Fasteners for installing porcelain tiles
Before starting installation, remove near the wall, assemble scaffolding, and think about where to store materials. Be sure to work together, or better yet, three. The final number of people is determined taking into account the size and weight of the slabs. It is advisable to draw a wall on paper, indicate its dimensions and first think through a plan for placing the brackets, taking into account the linear dimensions of the slabs and the method of their fastening. Determine the locations for fixing the brackets, calculate their number and linear meters of horizontal and vertical slats. Taking into account the weight, choose dowels or anchors; the heavier the slabs, the stronger the hardware should be.
Assembly diagram of substructure elements and porcelain stoneware slabs. Option 1
Option 2
During preliminary planning, count the number of window openings and doors, determine the entry/exit points of utility lines. They must be accessible for prompt elimination of emergency situations.
Any installation of a ventilation facade must first be correctly calculated
Step 1. Marking the wall. You need to immediately mark the location of the brackets on the wall. Drawings for the placement of brackets are included in the documentation for ventilated facades. Using them, determine the extreme control points.
Important. The brackets must be at a distance of at least 10 cm from the corner of the building, window and door openings, otherwise there is a risk of compromising the strength of the frame.
Secure the two uppermost brackets, lower a long plumb line from them and mark the lowest points. Use a rope with blue to beat off the vertical lines.
Mounting bracket to the building wall
Step 2. Taking into account the dimensions of the porcelain tiles and the manufacturer's instructions, beat off the remaining vertical lines at the recommended distance. For most cases of finishing facades with porcelain stoneware slabs, the vertical distances between brackets are up to 1000 mm, horizontal distances are up to 800 mm. When calculating the quantities for the entire wall, round the resulting values taking into account the dimensions of the façade wall.
Step 3. Use a laser or hydraulic level to make horizontal marks at the corners of the wall, and use a rope and blue to mark parallel lines. After marking, a grid with identical cell sizes should appear on the wall of the house. Check them in all respects, everything is fine - start drilling holes. Keep in mind that load-bearing brackets must also be installed around the perimeter of window and door openings.
Step 4. Use a hammer drill with a Pobedit drill bit. The depth of the holes should be several centimeters greater than the length of the dowels or anchors. For porcelain stoneware slabs, it is recommended to use anchors; they can withstand significant forces. It is not safe to work with dowels.
Marking and drilling holes
Dowel installation
Prices for popular hammer drill models
Hammers
Step 5. Immediately install the brackets within reach and carefully check the strength of the fixation. To prevent the appearance of cold bridges, gaskets can be installed between the wall and the brackets. Use only paronite ones, they have greater strength and do not deform under prolonged exposure to loads. Plastic ones can bend, which has an extremely negative effect on the strength of the entire structure. The design of the brackets has special holes for adjusting their exact position.
L-shaped bracket for installation of guides
Bracket Attachment
Step 6. After all the brackets are secured, proceed to insulate the walls. Building codes and regulations allow the use of only non-combustible materials; only foam plastics that do not support open fire are allowed. But it is better not to use it either; during combustion it releases deadly toxic substances. To lose consciousness, you only need to inhale the smoke a few times. The optimal solution is pressed mineral wool.
Schematic diagram of insulation installation
Schematic diagram of installation of two-layer insulation
Practical advice. For insulation, take sheets at least 10 cm thick; thinner ones give little effect, and the labor costs are the same. But the final decision depends on the thermal conductivity of the wall.
Glass wool is secured with special dowels with large heads. Press the mats tightly against each other, install them in a checkerboard pattern, and do not allow any gaps to form. Any violations of technology lead to a significant decrease in heat saving efficiency. One standard size mat must have at least five fixation points. Remember that a gap of 2-3 cm between glass wool and the wall reduces the efficiency of heat saving by at least 60%. Air convection occurs in the gap due to the temperature difference, warm air goes outside, and the wall is cooled by incoming cold air.
Installation of insulation
Sequence of fixing plates
Fastening insulation with dowels
Installation of insulation
Important. Do not cut large holes in the locations of the supporting brackets or create additional areas of heat loss. Figure out where the bracket will come out and only here cut the mat lengthwise or crosswise. How exactly to cut depends on the characteristics of the bracket.
Prices for mineral wool
Mineral wool
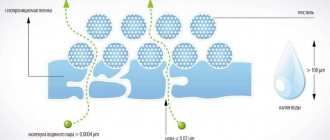
Mineral wool should be reliably protected from water. Cover it with a moisture-proof cloth; there is a huge selection of them on sale today. Do not use plastic film; moisture will accumulate under it and condensation will appear in winter. Mineral wool is moistened, and as the relative humidity increases, the heat saving values rapidly decrease.
Wind-hydroprotective membrane installation diagram
At this point, the first part of the installation of porcelain stoneware slabs is completed, you can proceed to the second stage.
Step 1. Begin installing vertical and horizontal profiles. This is a very important moment; if all the elements are not located strictly in one plane, then great difficulties will arise during the fixation of the slabs. How to install elements correctly?
Installation of guides
Adjustment
- Fix the two outer supporting profiles strictly level and adjust their position in relation to the wall. Check the spatial position again.
- Stretch ropes between them and mount the remaining vertical elements along them. We have already mentioned that fixation can be done with rivets or bolts. Never buy elements that are fastened with self-tapping screws; they are made of thin steel and are not designed for heavy loads.
- After the vertical slats are installed, fix the horizontal slats to them. The more often you check their position, the less disappointment you expect during the installation of porcelain stoneware slabs.
Step 2. Install the slabs. They are fixed using metal clamps.
Porcelain tile fastening diagram
This is what the clamps for installing porcelain tiles look like
Attaching starting clamps
Secure the two lower clamps, place the plate on them and fix the two upper ones. One clamp has two ears; they must hold two adjacent slabs. Thanks to this technology, their position is automatically adjusted; the edges will lie strictly on the same line.
Installation of porcelain tiles
Installation of porcelain tiles
It is important to maintain the gaps between the plates
The distance between the side edges of the slabs is controlled visually, but some types of clamps have special stops. Working with them is faster and easier, and the appearance of the façade wall improves.
Porcelain tile fastening unit in the guide
Porcelain tile fastening unit on the inner corner of the facade
Feudal attachment point on the outer corner of the building
Step 3. If there are outlets for pipes or electrical cables on the wall, then technological holes should be made in the porcelain tiles in these places.
With a correctly installed frame, work is completed quickly. Remember that time lost on marking and installing load-bearing elements is always returned during installation.
Review of manufacturers
For facing facades with porcelain stoneware, mainly large tiles of the 80x80 format are used - domestic manufacturers do not produce high-quality material of such sizes. So it’s fashionable to purchase small-sized tiles from these or “Estima”, and for large-sized tiles turn to manufacturers from Italy or Spain - Alfa Ceramiche, AO Ceramicas Aparici, etc. Chinese products, although they have an affordable price tag, do not have a good reputation in the market due to due to the uneven surface of the plates and the low accuracy of their dimensions, which causes problems during installation.
Surface preparation
The general technique for preparing walls for facing with porcelain tiles is the same as before laying ceramic tiles. There are only a few key points; in general, work is being done to correct the geometry and improve adhesion.
Depending on the material of the supporting layer, different leveling methods are used. For brick and block masonry, leveling with cement or gypsum plaster along the beacons is optimal. It is very important that the grooves left after removing the beacons are filled with a material that is as homogeneous as possible with the main covering of the wall. The alignment tolerance is no more than 2 mm/m and no more than 4 mm in the general plane of the wall.
For wooden walls, we can recommend leveling with sheet cladding made of gypsum plasterboard, gypsum fiber board or SML, depending on the climatic conditions of the building and the design features. The assembly of the false wall is necessary to compensate for the shrinkage of the wood; the work technology was described above. It is also possible to level with composite panels based on EPS or PPU, but only if it is technically necessary to provide additional heat and sound insulation.
Absolutely all surfaces must be dust-free and coated with a primer before installation. In general, it is recommended to use a water-dispersed acrylic primer, preferably from the same manufacturer as the adhesive mixture. For application to gypsum plasterboard, deeply penetrating compounds should be used that increase absorbency and adhesion; for plastered walls, strengthening primers that do not reduce porosity are well suited.
Advantages and disadvantages
Before choosing porcelain stoneware for facade cladding, it is worth considering all the pros and cons.
Advantages:
- Porcelain tiles do not support combustion, so they are fireproof
- Long service life - this finish can survive at least 50 years of operation; products from reputable manufacturers last much longer without problems
- Manufacturability - tiles can be cut, obtaining an even cut without cracks or chips, which minimizes the loss of facing materials during installation
- Quick installation, and you can use any of the suitable fastening options from glue to metal fasteners
- The compressed heat-treated mass is resistant to chemical attack
- Minimal hygroscopicity and high density create depressing conditions for plants and microorganisms
- Environmentally friendly - the material does not emit substances harmful to human health
As for the disadvantages, it is worth noting the high cost and significant weight. Despite the fact that the material completely imitates natural stone, it is significantly cheaper and lighter than natural materials. However, before installation, you should make sure that the building’s safety margin is sufficient for such a load as a porcelain stoneware façade.
The costs are justified in the long run, since porcelain stoneware on the facade lasts a long time, does not require expensive maintenance, is repairable and looks impressive throughout the entire period of operation.
Specific Features
Porcelain tiles used for finishing building facades are made from sand, clay and feldspar. Slabs made from this material are fired at temperatures above a thousand degrees, which increases its durability and strength, in many cases it is higher than natural stone. In the production of porcelain tiles, modern types of dyes are used, so you can find options in any color on sale. Porcelain tiles are becoming more and more popular in the building materials market every year.
Using porcelain stoneware slabs to decorate the facade of buildings is not an easy task, and it is not recommended to undertake it without the proper knowledge and skills. The material has many advantages, thanks to which any façade finished with it will look aesthetically pleasing and attractive.
Modern research shows that the service life of porcelain stoneware slabs can reach 50 years. The durability of the material is determined by its resistance to the influence of environmental parameters - temperature and humidity. Porcelain stoneware is additionally characterized by high strength, resistance to wear, abrasion and deformation, which is crucial when finishing building facades.
Despite the rather high price, the main advantage of the material is the ability to preserve the original appearance of the structure for a long time. The most common option for finishing the facades of modern buildings is polished porcelain stoneware with slab thicknesses varying by several millimeters. The second most popular variety is rectified porcelain tile, characterized by precisely adjusted thickness and ideal geometry. The cost of such material is higher in comparison with polished artificial stone. For both options, the price is determined mainly by the country of production and technical characteristics.
Types of porcelain tiles
Depending on the technologies used in production, the following effects can be obtained on porcelain tiles for the facade:
Mosaic tiles
The plates consist of multi-colored sections that provide the corresponding pattern, while the dimensions of the tile itself remain standard, and installation does not become more expensive.
Mosaic tile option
Shiny and matte
Achieving the desired surface effect is achieved through appropriate additives during production. At the same time, matte tiles are more expensive than glossy ones.
Matte or glossy tile option - everyone decides for themselves
Metallized
Spectacular metallic shine allows you to imitate cast plates with various decorative elements from rivets to the effect of patination, rust; a variety of shades makes it possible to depict any metal from cast iron to copper or stainless steel. Relevant for buildings in techno style.
The metallic shine of the plates gives the architectural object a strict appearance
Imitations
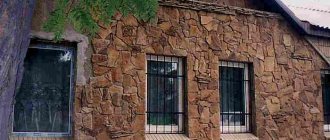
The variety of textures that can be obtained at the stamping stage makes it possible to produce plates “like wood” or “raw stone” - these are most often used for finishing private or low-rise buildings, reconstruction, etc.
Imitation wood tiles look so real that you can only guess that they are tiles upon closer inspection.
Features of installation of profiles
The next stage, carried out after the completion of thermal insulation work, is the installation of the frame. Corner, T-shaped or U-shaped posts are fixed on the wall surface in a vertical position. The choice of a specific type depends on the location - lining of window and door openings, corners, external and internal joints.
T-posts are the most common type used to form a uniform, smooth plane on the surface of a building. The main purpose of the vertical fixing elements is to form the basis for fixing the clamps intended for placing porcelain stoneware.
Types of installation of porcelain stoneware
For finishing with porcelain stoneware, you can use the following options:
Mechanical fastening
To do this, a metal frame made of longitudinal and transverse profiles is attached to the building - it becomes the basis for attaching porcelain stoneware to the facade. The plastics are fixed to anchor dowels, which are inserted into holes on the back side of the slab - they can be ready-made or have to be drilled. Four anchors are enough to fix one tile, while the fasteners are invisible from the outside. This technology allows you to quickly replace broken elements and is used for decorating high-rise buildings.
There is also the option of visible mechanical fastening - aluminum clips are used for fixation; if desired, it is fashionable to choose the clips in the color of the finish, and they will be invisible.
On glue
This version of the technology for cladding the facade with porcelain stoneware guarantees minimal time costs. But despite the minimal labor intensity, it is not the most reliable. You need high-quality glue, which over time will still lose its properties due to temperature fluctuations - the facade may begin to peel off.
Combined method
For reliability, porcelain tiles for the facade are glued to the profile and additionally fixed with anchors. This method is optimal for large slabs.
Ventilated façade
Installing a ventilated porcelain stoneware facade will solve several problems at once - the new finish will provide additional heat and sound insulation. At the same time, the requirements for the quality of the walls are minimal, which has a positive effect on the timing of the work. Due to constant ventilation, the service life of the building increases, the walls are kept in good condition, without cracks - in the long term, all costs are recouped, including by reducing heating costs.
The ventilated facade allows you to keep the walls of the building, as well as the porcelain stoneware itself, in good condition
https://youtube.com/watch?v=zVDhpaiUvjc
Final recommendations from professionals
Before choosing a specific installation method for porcelain tiles, consider the following factors:
- house dimensions;
- climatic features - temperature factor, prevailing wind direction, average annual precipitation;
- designer look and personal budget options.
The load-bearing elements of the frame must be made of the same metal, otherwise currents will appear at the contact points, accelerating corrosion. Never skimp on the strength of the brackets, always buy the most reliable ones. Porcelain tiles have a lot of weight, you need to constantly remember this.
Work only in good weather; if there is a chance of rain, protect structures from water ingress. Manufacturers claim that structures can be installed at air temperatures down to -15°C, but we do not recommend listening to them. Not because the structures won’t hold up, but because working in such conditions is very difficult. As a result, there may be a violation of technology, errors during marking or fixing frame elements. In addition, snow that falls on mineral wool will definitely melt someday. And increasing the humidity of the insulation by just 5% increases thermal conductivity by 50%. Mineral wool gets wet quickly, but takes a long time to dry. Moreover, if it is protected by façade membranes.
For porcelain stoneware slabs, be sure to install vertical and horizontal supporting profiles. The combined frame evenly redistributes bending and torsion, compression and tension loads. The design becomes very reliable and durable. If the strength of fixation of vertical profiles is impaired, the load is taken by horizontal ones and vice versa. The disadvantage of the combined system is the increased cost. But you shouldn’t skimp on safety.
Window frame installation diagram
Assembly of the façade to the window opening, lower
Junction of the facade to the window opening, side
Assembly of the façade to the window opening, upper
Carefully make connections and frames; cover the side ends only with solid slabs. Pay special attention to the base and areas where it joins the roof. Eliminate the possibility of moisture ingress, but do not close the ventilation. Based on the results of the inspection of defective facades, it was found that 55% of problems were due to improper installation of porcelain tiles, 40% due to incorrect markings and 5% due to unprofessional selection of load-bearing elements.
Facade finishing - photo
This is what a ventilated porcelain stoneware façade looks like
Facade cladding with porcelain tiles using glue
Having decided on this method of installing porcelain stoneware on the facade as glue, it is worth deciding on the presence or absence of seams between the tiles. The presence of seams allows you to painlessly neutralize the effects of thermal expansion. So even if you choose a seamless method, the distance between the tiles should still be -1 mm, and the dimensions of the facing material should be ideal.
Calculations
The technology for installing a porcelain stoneware façade involves calculating the amount of material required. To do this, the area of the building walls minus the existing openings must be divided by the area of one tile. In this case, it is worth purchasing the material with a reserve of 10%, which will allow, if necessary, to make up for losses due to defects/breakage/cutting of the material.
Required Tools
To quickly complete installation work, the following tools are required:
- Mixer or puncher with an attachment - thoroughly mix the tile adhesive.
- A grinder with a disc for concrete/tile cutter/professional machine for artificial stone will cut porcelain tiles without any problems.
- Drill with drill up to 12 mm or tile drill – for making holes
- Construction level – long and short for checking unevenness
- Notched spatulas and brush
- Tape measure/square/marker
- Crosses for seams
- Water + sponge - immediately wash the surface from traces of glue.
Surface preparation
Before laying porcelain stoneware on the surface, you need to prepare the wall:
- We inspect the wall - the coating must be durable, not delaminate or crumble. To check, it is necessary to draw intersecting lines with a trowel - the material should not spill out at the crosshairs. Otherwise, we remove weak points to a stable base
- We sand the walls and prime them with a brush or paint roller
- If necessary, level the wall with putty or plaster.
- We mark out the laying scheme, indicate places for borders and decorative inserts - this can be done using a rail, a level and plumb lines
Which mixture is better to choose?
The glue must be evenly applied to the wall surface.
Porcelain tiles are practically no different from tiles. The only feature is minimal hygroscopicity, so for the installation of artificial stone you can use popular polymer-cement mixtures like Ceresit CM-11 or analogues from other manufacturers.
If you have to glue tiles with a format larger than 40x40 cm, then you should choose an adhesive for large-format tiles. The layer of glue that will need to be applied to one plate directly depends on the thickness of the tile itself, which varies from 4 to 9 mm. Accordingly, the adhesive layer varies from 3 to 5 mm. Based on these data, it is necessary to calculate the required amount of glue, which is recommended to be purchased with a 10% reserve.
As for the wall material, it is also taken into account when choosing an adhesive composition. For surfaces made of wood, iron and plastic, it is better to choose an adhesive based on epoxy or polyurethane; the adhesive properties should be high.
When preparing the glue, you must thoroughly mix all the ingredients - the finished consistency should resemble sour cream. During installation, glue is applied either to the tile or to the wall - this rule works for small-format products. If the slabs are large in format and, therefore, heavy, then it is better to apply glue to both surfaces.
The grout will be epoxy material - it is best to choose it in accordance with the color of the finish. Elastic epoxy will prevent porcelain stoneware from cracking due to thermal expansion.
You cannot choose the most expensive grout - since the walls are not exposed to strong heat, a material with average characteristics will be sufficient.
Ventilated façade installation process
The most common technologies for installing ventilated porcelain stoneware facades in construction are hidden and using clamps.
Hidden installation of porcelain tiles
The first method involves the use of anchor elements when installing the facade on a frame subsystem. Its use helps to hide connecting seams and joints, creating the appearance of a solid wall. The hidden fastening method ensures effective ventilation of the internal space and an attractive appearance of the structure, while the final cost of construction and the time required to complete the work increase significantly.
The technology of hidden installation using special hinged fasteners - agrafs, provides for the following stages of construction:
- creating trapezoid-shaped recesses on the inner surface of the tile;
- fixation with special anchor bolts;
- subsequent fastening with agraphs;
- fixation of tiles with agrafs on a load-bearing surface consisting of transversely fixed guides.
Also widely used is the method of fastening by creating slots at the end of the tile, intended for subsequent fixation of porcelain stoneware to the surface. They can be located throughout the area or in certain places.
Installation using clamps
A clasp is a duralumin or steel plate with curved legs for placing finishing tiles. The clamp is fixed to the base using bolts or self-tapping screws.
Installation of a porcelain stoneware facade using clamps is very popular, as it is much easier compared to using hidden fasteners during installation. Further information in the article is provided specifically for this method of equipping a ventilated porcelain stoneware facade.
Tips for working with the material
- Laying porcelain stoneware on the facade does not require special professionalism or knowledge. We lay the tiles from bottom to top in rows in accordance with the design project. Each tile must be placed edgewise to the adjacent one, pressed against the wall and moved to the site in accordance with the markings. The width of the grooves is controlled by special crosses.
- In order for the porcelain tile to be pressed tightly against the adhesive layer and the wall, you can use a rubber hammer to tap each tile.
- If cut tiles are used during installation, the cut is located in the inner corner.
- When framing window and door openings, it is necessary to track the lines of the tile seams, which should be at the same level on both sides of the opening
- Seams can be jointed within 6-8 hours after installation. During this time, the glue will set and harden.
- Excess jointing can be removed from the cladding using a regular damp sponge.
- Wipe the finished wall with a dry cloth and leave it for a day.
Suitable types of load-bearing foundations
Not every wall and partition can be faced with porcelain stoneware. The main factor in suitability for this type of finishing is the presence of additional load-bearing capacity comparable to the weight of the tile and adhesive layer. Additionally, the stability of the base should be taken into account - both seismic stability and the tendency of the material itself to linear expansion under the influence of external factors play a role here. The third criterion for the suitability of a substrate is adhesion, but this can almost always be improved with additional preparation.
Almost all enclosing structures have sufficient load-bearing capacity. The exception is walls made of sandwich panels, as well as frame walls with sheet cladding without internal stone lining. An additional limitation for laying porcelain stoneware is the temperature regime of the building: the temperature range inside must be maintained as determined by the adhesive manufacturer, on average it is from +10 °C to +35 °C.
Separately, it is worth mentioning false walls covered with gypsum fiber board or aquapanel. Their flatness, stability and adhesion do not raise any questions, but there are problems with ensuring sufficient load-bearing capacity. Porcelain stoneware requires the construction of a frame subsystem from a profile with a metal thickness of at least 0.6 mm and an increased density of rack elements - no more than 40 cm. The use of ceiling profiles (CD) as frame racks is unacceptable. For cladding, only moisture-resistant types of gypsum plasterboard and gypsum board with a thickness of at least 16 mm with a fastening density of at least 30 screws per m2 should be used.
Cladding the plinth with porcelain stoneware
The technology for laying porcelain stoneware on the plinth can be any. Most often, each specialist has his own secrets. In any case, the cladding must provide additional thermal insulation, so heat-saving materials are used.
We lay tiles on the base only on a flat surface, so to level the lower part of the house we use cement mortar, to which you don’t even need to add sand for greater strength. In particular, for a new house it is better to choose a cement mixture, but for a building that has completed shrinkage, it is better to use a concrete solution.
Differences between porcelain stoneware and marble
Granite has been used for wall cladding for a long time. It is perfectly preserved over time, but it also has its drawbacks:
From this series you can also look at granite. Wall cladding with granite is also not done so often, but is sometimes used. Cladding walls with granite slabs, as well as marble, is a rather labor-intensive process. Which is not only expensive, but the material is also quite difficult to process. And in terms of strength, porcelain stoneware is perhaps not inferior to it. And the price is much lower. And if you do the finishing yourself, then it’s easier and simpler to do and, importantly, cheaper. And in this matter, wall cladding with granite loses. Cladding walls with granite is not a very simple and easy job, the material is not so easy to process. Now let's take a closer look at porcelain stoneware itself. With its advantages and disadvantages.
Advantages and disadvantages of porcelain stoneware finishing
This material has its pros and cons:
Attention: Before using this material, you should consult with specialists regarding the foundation. It is likely that it will have to be strengthened. After all, the load will increase significantly.
Facade care
- Porcelain tiles are easy to clean.
In accordance with the characteristics of porcelain tiles, this material is easy to clean and is not easily soiled. It is easiest to care for a material with a matte surface, which is why this particular finish is chosen for cladding a façade that will be exposed to pollutants. - If the tile has a structured surface, such as an imitation of natural stone or wood, then it is resistant to stains, but such a surface will have to be cleaned more often than for matte surfaces.\
- Polished and semi-polished surfaces need to be treated with a water-repellent solution, which allows the existing pores to be completely closed.
- It is not recommended to use cleaning products with a high concentration of acids - acids cannot harm artificial granite, but they have a destructive effect on the fugue. Therefore, damaged seams will begin to actively deteriorate in the coming cold season.
- Cleaners and tools with abrasives should also be avoided, as they will scratch the glossy surface. Instead of metal brushes, it is recommended to use soft bristles or a clean cloth.
- Fragile porcelain stoneware is not highly impact resistant, so it is recommended to clean it carefully.
Installation of insulation and waterproofing
Installation of insulation and vapor barrier is carried out after placing the fasteners. To create a layer that protects against steam, isospan is most often used. The material helps prevent moisture from entering from the outside, while simultaneously helping to remove excess moisture from the walls.
The next stage is the placement of insulation. Its thickness should be selected based on the minimum temperature values for a particular region and thermal conductivity characteristics. The most popular insulation materials are polyurethane foam, mineral wool and polystyrene foam. Each of these materials is characterized by specific features and thermal insulation properties.
Polyurethane foam is a rather expensive material compared to expanded polystyrene and mineral wool; it allows the formation of a seamless, uniform layer of thermal insulation. Working with it is carried out through the use of units in which a mixture of chemical components is created.
Mineral wool has different thermal conductivity characteristics and densities. The material is usually sold in the form of slabs or rolls; installation on the wall during construction work is carried out using special dowels with large diameter caps. When working with mineral wool, it is important to take into account that the thermal insulation properties of the material disappear under the influence of moisture; drying in this case will not have a positive effect. This circumstance determines the need for preliminary waterproofing when using mineral wool.
Sheets of expanded polystyrene or foam can be fixed using dowels and adhesive mixtures; this material also perfectly protects against heat penetration. The placement of foam blocks on the base base is carried out in two or three layers, and it is important to ensure that the seams of the lower and upper sheets do not coincide. To prevent cold air from entering the building, the joints are filled with sealant.
Price list
Design work
| Name of works | Price from, rub. |
| Testing | For free |
| Geodetic survey of the structure | from 20 rub/m2 |
| Creation of working documentation for the installation of a ventilation façade | from 70 rub/m2 |
| Registration of a color passport | RUB 155,000 |
| Issue an OATI order | 10000 rub |
| Project development | 30,000 rub. |
| Development of a work project | 30,000 rub. |
| Creation and approval of TDR for the duration of repair work | 30,000 rub. |
Works
| Name | Price |
| Assembly of the vertical subsystem: | from 500 rub/m2 |
| — galvanized with polymer coating | 400 rub/m2 |
| - aluminum | 600 rub/m2 |
| - made of stainless steel | 800 rub/m2 |
| Assembly of the interfloor subsystem: | 500 rub/m2 |
| — galvanized with polymer coating | 480 RUR/m2 |
| - aluminum | 720 RUR/m2 |
| - made of stainless steel | 960 RUR/m2 |
| Horizontal-vertical subsystem: | 650 rub/m2 |
| — galvanized with polymer coating | 560 RUR/m2 |
| - aluminum | 840 RUR/m2 |
| - made of stainless steel | 1120 rub/m2 |
| Wall insulation in 1 layer | 200 rub/m2 |
| Wall insulation in 2 layers | 300 rub/m2 |
| — basalt heat-insulating slabs, density = 45 kg/m3, m3 | 1850 rub/m3 |
| — basalt slabs, density = 80 kg/m3 | 2750 rub/m3 |
| — penoplex, ground floor | 5020 rub/m3 |
| Installation of the protective membrane: | 100 rub/m2 |
| - windproof membrane | 95 RUR/m2 |
| Fastening of facing material S, m2: | |
| S≥ 1 m2 | 600 rub/m2 |
| 1>S≥ 0.36 m2 | 720 RUR/m2 |
| 0.36>S>0.1 m2 | 900 rub/m2 |
| S≤0.1 m2 | 4200 rub/m2 |
| Cladding material: | |
| - porcelain stoneware | 590 RUR/m2 |
| Installation work: | |
| Construction of a subsystem for a parapet cover | 500 rub/m. |
| — galvanized with polymer coating | 320 rub/m. |
| - aluminum | 480 rub/m. |
| - made of stainless steel | 640 rub/m. |
| Assembly of additional elements: | 350 rub/m2 |
| - metal | 277 RUR/m2 |
| - aluminum-composite | 288 RUR/m2 |
| - aluminum | 550 rub/m2 |
Full price list for ventilated facades
Types of facade systems
- Vertical aluminum structure
- Interfloor fastening (reinforced)
- Vertical stainless steel subsystem
- Galvanized cross
- Fastening to floor slabs (steel, aluminum)
By type of system fastening:
- Hidden mount
- Imitation of hidden fastening
- Visible fastening
- Checkerboard fastening (laying in a chaotic order)
*The list can be continued, the main thing is to understand that this is the most common material in the Russian Federation for installation on any type of building, it has many sizes and textures of the slab for use in the reconstruction and repair of facades using the “NVF” technology
Internal laying of porcelain stoneware
Before you start tiling the room, you need to prepare the walls. Clean them from the old coating, cover all the cracks and level them with gypsum compound. The room temperature should be 40 degrees at maximum and 10 degrees at minimum.
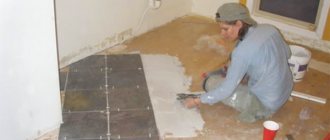
The walls are covered with porcelain tiles starting from the bottom of the wall, the solution is applied to the tiles and to the wall. Between the plates leave a distance for the seams, controlling it with the help of crosses for the seams. Each such laid stone tile is checked by a level.
Seal the seams with a special paste
After gluing the first row, you should take a break and wait until the adhesive mixture dries, then you can glue another row of tiles.
The slabs are cut to the required size using a machine with a diamond wheel. After all the boards have been glued and the glue has dried, it is necessary to seal the seams with a special compound.
The final stage is wet cleaning, you should wipe the tiles and get rid of any remaining adhesive. There are many schemes for laying such material.
Using a huge selection of porcelain stoneware slabs, you can create an extraordinary design in your kitchen, bathroom and hallway. The room in the house or the facade of the building will stand out with a special color, and the strength and durability of this material will help strengthen the walls.
How to glue porcelain tiles to plywood
The process of laying porcelain tiles on plywood is similar to gluing them to wood, but you should remember that the thickness of the plywood should not be less than 25 mm, otherwise it will deform or even break under the weight of the porcelain tiles.
At first glance, there is doubt that porcelain stoneware or ceramic tiles can be glued to metal. But if you delve deeper into this issue, it turns out that this is quite real.
The installation option depends on the size of the surface area and the conditions of its use, indoors or outdoors.
Large internal metal area
With this option, plasterboard is used, which it is advisable to install according to all the requirements, prime it and then glue the tiles, following the instructions in accordance with gluing to the wall or floor.
How to glue porcelain tiles to the floor
In order for the room to look harmonious and nothing hurts the eyes, the elements must be laid out without errors. To achieve this, before laying porcelain tiles on the floor, you need to mark it and find the center.
As a rule, markings are made starting from walls of greater length in length. For convenience, you can stretch a cord in the center of the room. The first tile should be laid so that the cord runs through its middle, this allows you to create the correct proportions of the area.
In addition, this method of laying gives smooth edges; sometimes it is possible to lay whole tiles, and sometimes cut ones, but with the same width.
As for the adhesive composition, it must meet the requirements stated by the manufacturer of the ceramic tile, as well as the properties of the surface on which it is applied.
The glue should be mixed until it becomes thick sour cream and in small portions, since its application period does not exceed 15 minutes.
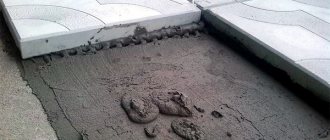
For good adhesion of porcelain stoneware to the floor surface and the absence of air gaps, you must first apply a small layer of glue to the floor, level it with a flat, then a notched trowel.
Next, the adhesive composition is applied to the back of the tile, passed along it with a notched trowel, and the tile is laid in the desired place as follows:
- first row - lies flat on the floor, while being controlled by the level;
- the remaining rows - each subsequent tile is first rested on its edge against the previous one, and then laid completely, then moved back to a distance of at least 3 mm, crosses are installed between them.
REMEMBER! There should be no glue in the gaps between the ceramic tiles; if necessary, the seams are opened with a paint knife and then grouted with a special grout mixture.
Which stone format is best to use?
Ceramic tiles are limited in size due to warping and shrinkage during the annealing process. For porcelain stoneware, the concept of caliber is absent as such; accordingly, it is manufactured in all possible variations of sizes and aspect ratios. It is not so easy to make a choice among all this variety; you need to look for the right approach.
One of the options is the same type of wall and floor cladding. In such cases, it is very convenient to focus on the format of porcelain stoneware laid in a horizontal plane. So, if the floor is covered with 60x60 cm slabs, then for the walls it is recommended to use the same overall size, but with an aspect ratio of 2:1 or 3:1, that is, 20 or 30 cm wide.
If you plan to install porcelain tiles yourself, it is better to give preference to tiles with the most “convenient” format. An amateur’s hands can confidently handle medium-sized stones - from 20 to 45 cm wide and up to 80 cm long. Tiles that are too small will cause difficulties in alignment, and large porcelain tiles will require special devices for gripping and temporary fixation.
For floors, a thickness of porcelain tiles of at least 8 mm is recommended; for walls there are no such restrictions. Even with a thickness of 3 mm, this finish demonstrates excellent resistance to shock and static loads, however, using tiles that are too thin can lead to damage during cutting and processing by inexperienced hands. The optimal thickness range for porcelain tiles for walls is 5-10 mm; thicker stones require temporary fixation and sequential laying of rows with large time intervals necessary for the underlying elements to bond to the base.
Subsystem for ventilation façade made of porcelain stoneware
The ventilated facade system for porcelain stoneware can be made of aluminum, stainless steel and galvanized steel. A common option is an aluminum and painted galvanized subsystem. Porcelain tiles are attached to the system using a 1.2mm thick stainless steel clamp.
There are no special requirements for the ventilation facade system for porcelain tiles; the main thing is that the manufacturer can provide all the necessary permits: Technical certificate, Conclusion on the fire hazard class in the K0 system.
How to properly glue porcelain tiles
Porcelain stoneware can be confidently called a universal facing material, since it can be used both indoors and outdoors. In addition, there is a very wide range of colors and sizes of tiles, which allows you not only to choose the appropriate option, but also to make the interior or exterior unique.
How to glue porcelain tiles to wood
It is possible to glue porcelain tiles to wood, but you should weigh the pros and cons, because wood behaves like a living organism: it breathes, absorbs and releases moisture. Therefore, if you decide to glue porcelain stoneware to it, the wooden base needs to be prepared for this.
First, the surface should be strengthened to avoid deformation and vibration.
Next, the wood is primed, preferably with a primer that protects the surface from moisture.
If glue is chosen for gluing the tiles, then for greater tenacity and reliability it is recommended to attach a metal mesh to the wood.
You can also use liquid nails or glue with an elastic texture to lay porcelain tiles on wood.
