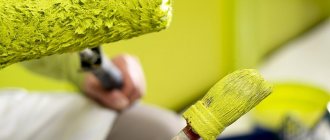
Painting walls is a job that requires care and concentration. To get a good result, you must adhere to a certain sequence and follow the rules. First you need to choose the right paint. It is divided into several types: water-based, PVA-based, acrylic, latex, alkyd, oil, silicone.
Water-based paint is practical because dust does not penetrate into its structure. All dirt from the surface painted with this type of paint can be easily cleaned with water. PVA-based material is more susceptible to contamination, so it is used mainly for ceilings. However, in conditions of high humidity it is better not to use PVA-based paint.
Paints based on acrylic resins are resistant to fading and will last a very long time. They prevent the penetration of moisture, so this type of color can be used in bathrooms and kitchens. Latex paints are resistant to mechanical stress, apply an even thin layer to the surface, and are used for painting plaster and wallpaper.
Alkyd and oil paints are designed for outdoor use. The advantages include quick drying and resistance to damage. Silicone paints have the following advantages: vapor permeability, water resistance, long service life, strength. They are used for both external and internal work.
Italian decorative paints can be placed in a separate category. While ordinary paints give a strictly defined effect, decorative paints leave room for imagination - the final result will depend on the method of application and the thickness of the final layer.
Calculate the amount of paint
In order not to run to the store for the missing can, it is important to immediately estimate the required amount of material. To do this, you need to divide the area of the walls by the paint consumption, multiply by the number of layers and add 10–15% in reserve. As an example, let's calculate how much paint will be needed for a room (4.5 × 3 m) with one window (1.4 × 1.6 m) and a door (2.1 × 0.7 m). Ceiling height - 3 m.
First we find the total surface area. To do this, calculate the perimeter of the room and multiply it by the height of the ceilings.
(4.5 + 4.5 + 3 + 3) × 3 = 45 m²
Now let's determine the net paint area. To do this, calculate the area of window and door openings, and then subtract it from the total area of the walls.
45 − (1.4 × 1.6 + 2.1 × 0.7) = 41.29 m²
And finally, we will find out how much paint will be needed. To do this, divide the net area to be painted by the paint consumption per square meter (indicated on the label), multiply by the number of layers (usually two) and add 15% in reserve.
(41.29 ÷ 10) × 2 + 15% = 9.5 l
Environmentally friendly material
When doing renovations, you want to be sure of the safety of the compounds used to cover walls and ceilings. Acrylic water-based and water-dispersion paints fully meet this requirement; they are even used when decorating children's rooms.
Materials of both groups are produced with the addition of different components, resulting in solutions adapted to any conditions, but all of them are suitable for painting interior surfaces, since they do not contain toxins and do not have a strong chemical odor.
Water emulsions contain white spirit as an organic solvent; aqueous dispersions are diluted exclusively with water.
The former are distinguished by higher hiding power (200 ml per 1 m2) and are used only for interior decoration; the latter, with less coverage (up to 400 ml per 1 m2), have increased wear resistance and excellent water-repellent properties, therefore they are also used for facade work.
Remove or protect anything that gets in the way
Before starting work, you need to remove everything unnecessary from the room and protect surfaces that will not be painted from splashes.
Take out the furniture and all other items, and place what cannot be removed in the middle of the room and cover it with film. Wrap the heating radiators with it or remove them. Cover the floors with thick film or several layers of newspapers.
Illustration: Artyom Kozoriz / Lifehacker
Turn off the power to sockets and switches, remove their covers and cover them with masking tape. Also cover the baseboards, platbands, edges of slopes and other adjacent surfaces so as not to splash them.
Variety and choice
Glossy
Gloss gives any surface shine and an appropriate shade, but in order to cover it you will need an almost perfect surface, because it shows all the defects.
Matte
The matte variety is more likely to be classified as universal; it is more durable and does not fade over time, maintaining its original appearance.
Acrylic paint is divided into several types according to color
Mother of pearl
This is a special type and contains an inorganic filler. When applied, it forms a visual relief.
Water-based
These are all paints that contain water, and those that do not contain water are perfect for outdoor use.
When choosing a paint material, first of all you should pay attention to the manufacturer, and then to the durability of the selected material.
When choosing a paint material, you should first pay attention to the manufacturer
Prepare the walls
Illustration: Artem Kozoriz / Lifehacker
When painting, the surface must be perfectly flat. Otherwise, the paint will lie unevenly and all the flaws will then appear even more pronounced.
Use a spatula to remove layers of old paint and wallpaper and clean the surface well. Putty all the smallest cracks, dents and irregularities, and after complete drying, sand thoroughly with fine-grained sandpaper.
Room painting options
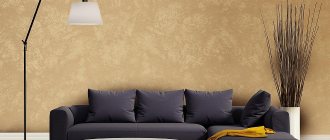
In the post-Soviet space, such a method of putting a room in order as wallpapering was used, but now an alternative has appeared in the form of painting surfaces. Acrylic paints occupy the main place among coloring substances - they can be used in any room and on any surface, which makes them very popular.
The building materials market is rich in the choice of various acrylic paints, they can be:
- glossy,
- matte,
- mother-of-pearl.
In addition to the specified spectrum, you can also distinguish different textures of paints. Using this type of paint and varnish material, the application surface can be made velvety, embossed, or painted (for which the material is used in tubes).
The choice of colors of acrylic paints is so wide that it allows you to bring any design solution to life. Thus, to paint the walls of the living room, it is customary to use matte monochromatic coatings, and with the help of pearlescent acrylic paints, you can apply additional decor to them in the form of painting.
Apply primer
Illustration: Artem Kozoriz / Lifehacker
Before painting the walls, you should definitely prime them: after this treatment, the paint will lie smoother and will adhere better. In addition, by reducing surface absorption, paint consumption will be significantly reduced.
Using a wide, medium-nap roller, apply primer to the walls. Make sure that there are no untreated areas. Don't rush and don't let it drip. Let the soil dry completely. This usually takes about 2 hours, the exact time is indicated on the label.
Detailed instructions for preparing to paint walls with acrylic paint
After puttying the wall, it must be sanded using sandpaper.
Related article: Milanese walnut door color: interior photo
Before painting the walls, their surface must be carefully prepared, since this stage is an integral part of the entire painting process. At the same time, it is impossible to allow even a small area to be missed during the cleaning process of the base. If the wall has excessively large irregularities, it can be sheathed using plasterboard. In cases where the base does not need leveling, it is putty using a spatula, the width of which can vary from 40 to 60 cm. The putty composition must be prepared of medium thickness; it should be applied with wide amplitude hand movements. This stage does not involve creating a perfectly even surface.
The starting layer must dry, only then can it be sanded using abrasive sandpaper, the surface grain of which should be medium. Next, you can begin treating the surface with a primer. Covering the base with fiberglass or cobwebs will be the next step. This procedure has the same principle as that used when gluing walls with regular wallpaper, but the execution speed is much higher. In order to strengthen the web, you will need special glue. After the work with fiberglass is completed, the room must be protected from the formation of drafts.
After priming, the base of the walls must be covered with fiberglass.
If you want to quickly paint your walls, then using fiberglass is not necessary. However, the use of this material will achieve reinforcing properties of the surface.
When the fiberglass has dried, which will take about 24 hours, you can begin the final puttying. In order to get better quality work, you should use ready-made putty, which is sold in buckets; this version of the material will be better than the dry version of the mixture, which must be prepared before use. Although the cost of the finished mixture is higher, the price will be compensated by its insignificant consumption. But the finished composition almost always has a slightly thicker consistency than required by the norm, which is why before applying it to the walls, it is advisable to add water and mix everything with a mixer. This will help make the work easier and reduce mixture consumption.
Related article: How to properly attach a sink to a cabinet?
After the wall surface has dried, it can be sanded with fine-grained sandpaper. This stage requires compliance with basic rules.
So, you need to grind the surface of the walls until they become mirror smooth. However, it is important not to overdo it so that the surface is not damaged.
Return to contents
Prepare the paint
Illustration: Artem Kozoriz / Lifehacker
Mix the paint thoroughly with a wooden spatula for a few minutes. You can use a mixer, but at the lowest speed to prevent the formation of bubbles.
Fill the tray with paint about a third: if you pour more, dipping the roller will be inconvenient. Immediately close the jar tightly to prevent the paint from drying out.
If you wrap the tray in a layer of foil, then after work it will be enough to remove it and throw it away. The bath itself will remain clean.
Do not submerge the roller completely. Roll it several times over the surface of the paint and then over the top of the tray to evenly distribute the material. Pre-moisten the roller in water and squeeze it out: this way the paint will better saturate the coat and will be applied well to the wall from the very beginning.
Advantages
- It contains toxic components.
- Dust does not settle on the surface painted with acrylic water-based paint.
- Acrylic paint also perfectly protects the surface from various bacterial fungi.
- Drying within one hour.
- Ceilings and walls painted with acrylic paint are more resistant to ultraviolet radiation.
- Not afraid of moisture, easily tolerates wet processing.
- If necessary, you can create your own shade by adding color.
Acrylic paint has many advantages
Lay down the corners
For better results and faster work, first carefully paint all the corners and contours of the junctions, and then the main surface. There are two main options for performing layering.
Illustration: Artyom Kozoriz / Lifehacker
First: using a small brush, slowly paint 5-7 cm wide stripes along the ceiling moldings, in corners, at baseboards, and around radiators, sockets and switches. To protect the ceiling, you can seal the spatula blade with masking tape and, placing it in a corner, calmly paint with a brush.
Second option: cover the junctions with the ceiling and other surfaces with masking tape, smoothing the joint well with a spatula so that paint does not flow there. There is no need to smooth the entire surface of the tape, otherwise the tape will be difficult to remove later.
The adhesive tape on the ceiling can additionally be painted along the edge with white paint: this way it will immediately fall into the gap and after painting the wall with a different color the border will be perfect.
Apply the first coat of paint
Illustration: Artem Kozoriz / Lifehacker
Before starting work, you should close the doors and windows to eliminate drafts and maintain humidity - this way the paint will dry more slowly and evenly. Additionally, you can spray water with a spray bottle, and also cover the windows with film to protect them from direct sunlight.
If the paint is thick, then for the first layer it can be diluted according to the instructions on the can - usually add 5-10% clean water to the total volume. To avoid streaks, do not skimp and put enough paint on the roller.
Cut the pile at the edges of the roller at an angle of 45°, and the joints of adjacent strips will not be so noticeable.
Start coloring from the corner. Using a roller extension, roll continuous strips from the ceiling to the floor without stopping. Each subsequent strip should overlap the previous one by 3–4 cm.
Spread the paint evenly, being careful not to make the layer too thick. Gradually move from one corner to another. Don't stop until you finish painting a wall before moving on to the next one or taking a break.
Apply a second coat
Illustration: Artem Kozoriz / Lifehacker
You can start painting the next layer only after the previous one has dried, otherwise the roller will tear off the paint and all the work will go down the drain. In the warm season, it usually takes about 2 hours; for the exact time, see the instructions for the paint.
The second layer should be painted in exactly the same way as the first, the only difference is that the paint no longer needs to be diluted.
Painting a wooden ceiling
Acrylic paint can be safely used on wooden surfaces. The material is non-toxic and flame resistant.
In order for the wooden surface to be painted well, it must be thoroughly cleaned of dirt.
When selecting a material, you need to look at durability. Degrease the desired surface and impregnate it with impregnation, this will prevent the impact of negative factors.
In order for the wooden surface to be painted well, it must be thoroughly cleaned of dirt.
Wood painting works
- Dilute the paint if it is concentrated.
- Paint one layer, correct any defects with a thin brush. In such cases, the roller should not be used.
- Apply a second coat.
- Allow the second layer to dry; if stains form, lightly sand them.
For painting on wood, follow the technology above
Remove the masking tape
Illustration: Artem Kozoriz / Lifehacker
After everything is painted, it is important to remove the tape that protects the contours and junctions of the walls. This should be done 15–20 minutes after applying the second layer. If you hesitate, the paint will dry out and the masking tape will tear it off. Be careful not to damage the paint edge.
It takes about a day to dry completely, depending on the temperature in the room and the type of paint used.
Why acrylic?
Many paints are suitable for facade and interior work. An advantageous medium is acrylic. Specific properties allow it to be used in an apartment.
The main features of the composition are:
- no pungent odor;
- absence of harmful, toxic components that cause allergies in humans.
The dye is water-based and is a clean, environmentally friendly product, without chemical solvents.
Acrylic paints are environmentally friendly and safe for humans.
Acrylic has the following properties:
- Moisture resistance.
- Frost resistance.
- Wear resistance.
- Elasticity.
- Durability.
- Fire safety.
The service life of acrylic materials is 15-20 years. The product can instantly set on wooden, metal, concrete surfaces and dry quickly. Thanks to the varnish component, as well as special additives, upon hardening, a durable, elastic paint layer is formed, protecting the base from external influences and temperature changes.
Despite its high cost, acrylic paint is used sparingly. For artistic painting of wall coverings, 1 large can of white and 3-4 small cans of different shades are enough to get a wide range of colors.