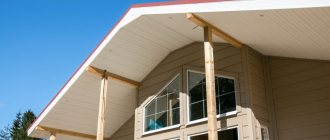
Roof overhangs are trimmed for several reasons. One of the main ones is the aesthetic appearance, since the lack of soffits gives the overall picture some incompleteness, and therefore the design is not neat enough.
Roof lining with soffit
Manufacturers of modern building materials have taken care to make the process of arranging this section of the roof as easy as possible. If previously various available materials were used to cover the lower space of the overhangs, such as moisture-resistant plywood, cutting boards, siding or lining, today you can find special profiled sheets of certain sizes on sale, as well as the necessary fittings for them. Due to the ease of installation of such parts, even a not very experienced craftsman who knows how to work with the simplest construction tools can install them. All you need is a screwdriver, an electric jigsaw or metal scissors, depending on the material the soffits are made of.
Naturally, when performing this type of work, it is necessary to take appropriate precautions, since the main process will take place at height.
Find out how to make scaffolding with your own hands for working at heights from a new article on our portal.
Types of cornice filing
In accordance with the architectural preferences of the developer, the installation of roof lining along the eaves can be done in two ways.
- Along the rafter system (without box)
- Perpendicular to the wall of the house.
In the first case, the rafter legs extending beyond the walls are lined from the inside with lathing for further decoration of the overhang with boards or soffits. Thus, it looks more aesthetically pleasing due to the natural continuation of the roof.
Option for hemming along rafters
But this method is not always convenient, because... Most specialized finishing materials and components are made for the horizontal finishing option, where the roof overhang and the wall are located perpendicular (at an angle of 90 degrees) to each other. To do this, a special box is mounted, onto which finishing material is subsequently stuffed.
Roof release with box
In the photo on the left, the cornice box ends flush with the wall, and on the right it continues to the gable projection.
Final recommendations
To extend the service life of structures, it is recommended to paint over all open locations of metal fasteners or corresponding holes on steel soffits with special paints that match the main color of the soffits. The filing does not require special care, but a couple of times a year its surfaces are inspected and cleaned with a long-handled brush.
Abrasive or aggressive detergents are not used for these purposes; particularly contaminated areas are washed with water with minor additions of soap or regular washing powder.
Particular attention is paid to lining made of wooden lining or corrugated sheets. In the first case, the protective coating of the overhangs is periodically (once every 2 years or more often under unfavorable conditions) renewed; in the second, the surfaces are inspected to identify pockets of corrosion.
Regardless of the type and material of the overhangs, the operation and condition of the drainage systems are checked simultaneously with their inspection. Now you know how to line roof overhangs.
Design and purpose of eaves overhang
The main function of the structure is protection from precipitation that flows from the roof. They play a special role. All liquid flowing from the roof moves along the slope and falls into the gutter or directly onto the ground. In this case, the better the liquid is removed from the walls, the less they will get wet even with significant winds.
Cornices are formed by protrusions of the bases of the rafters beyond the walls of the structure. According to generally accepted recommendations, it is believed that the optimal eaves distance is 50-70 cm. If the roof slopes are steep, then this length is reduced, but in this case the walls may get wet due to slanting rain.
There is practically no load applied to the eaves overhang. Because of this, most often it is not the rafters themselves that are produced, but an additional element - “fillies”. They are pieces of boards attached to the rafters. Moreover, it is permissible to select their cross-section smaller than that of the rafters. The fillies are connected using sheathing bars. A frontal board is tacked along their end side. The cornice strip will be attached to it in the future. Upon completion of the installation of the eaves strips, the construction of the frame part for lining the roof with corrugated sheeting is considered complete.
Eaves eaves strips are important elements when protecting roofing elements. They ensure the safety of wooden overhang parts from the influence of moisture and allow the removal of emerging moisture into the gutters. Membrane waterproofing must be installed on top of the plank. Otherwise, the condensate formed inside will not enter the drainage system.
In addition to their protective functions against high humidity, cornices are necessary for ventilating under-roof spaces. Ventilation is necessary both for rooms with attics and for spaces that are not heated.
The air rising from the ground must easily penetrate through the cornice and pick up the resulting moisture and exit at the ridge.
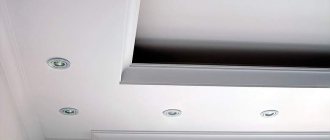
Types of spotlights for different tasks
By and large, soffits are the same siding, only for decorating the ceiling. Hence the name, because “soffit” means “ceiling” in Italian.
Soffits are produced in a variety of types. They are:
Perforated soffits provide excellent ventilation and air flow into the under-roof space.
At the same time, triple ones can be combined: solid at the edges and perforated in the center. Completely solid ones are often used for lining gable overhangs that do not need ventilation:
And, more as an exception, an additional ventilation hole is cut in solid soffits, often after installation:
By the way, GrandLine presents unusual soffits (GL Estetic), in which the perforation is hidden. It is applied to the stiffening ribs, so it is not visible. This geometry is called Ω-geometry, which also masks the joint of the soffit itself.
Optimal size
It is often difficult for non-professional craftsmen to determine what size cornice should be made
This is indeed a very important design decision, because if it is too small, then melt or rain water from the slope will fall on the lining of the external walls, on the foundation blind area, leading to destruction and also damage to the appearance of the structure. When choosing the length of the cornice, the following factors are taken into account:
- Climatic conditions. The optimal size of the roof eaves depends on the amount of precipitation falling in winter and summer. In snowier regions, roofs with wide eaves are traditionally used to protect the walls and foundation from snow. For example, alpine chalets located in the mountains usually have eaves overhangs at least 1 meter wide.
- Roof slope. The greater the angle of inclination of the roof slopes, the smaller the cornice can be made. This is explained by the fact that with a flat roof shape, the trajectory of falling snow and water goes far from the outer walls of the house. If the slopes are steep enough, then it is better to make the cornices wider to protect the structure from splashes of water that can reach the wall during intense snowmelt or rainfall.
- Proportions of the house. A wide cornice with a flat roof makes the building visually lower, squat, distorting the optimal proportions. A narrow overhang with a high, steep roof, on the contrary, elongates the silhouette of the house.
Optimal overhang size
Selecting the overhang width
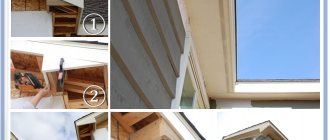
Stage IV. Inserting and fixing soffit panels
Let us note a few more important points. To install the soffit yourself, you will need to arm yourself with a screwdriver, roofing pliers, a tape measure, a level and a jigsaw with a metal file.
Don’t forget to also purchase a special corrector to remove scratches for metal panels (if you are installing just such panels), because anyway the surface will be damaged somewhere, and you will need to protect the coating in this place.
Insert the panels themselves into the J-profiles with a small gap:
Secure the soffits with self-tapping screws and a special rivet. It is advisable to use fasteners with a painted head. The panels are also allowed to be fixed using self-tapping screws with a press washer.
For open overhangs you need to use an F-profile:
Step 1. Using a level, make a mark parallel to the roof belt at the edge of the wall and nail the profile to the back wall of the house. Step 2: Step back 2 cm from these vertical marks and draw a chalk line. Step 3. Install the F-profile along this line so that the top edge is on the line
It is very important to do everything correctly here, because it is this profile that forms the rear support for the spotlights.
But for a closed overhang you also need a J-profile:
- Step 1: Measure the distance between the J-profile and the F-profile, from the front to the back edge.
- Step 2. Cut the panels to the measured length and subtract 3-5 cm to account for possible expansion. For this purpose, it is better to use solid panels, except for those places where ventilation will be installed - perforated soffit is also suitable there.
- Step 3. Cut the panels to length and insert them at one end into the wall support you installed - F-profile or J-profile. Align the profile and secure it.
- Step 4. Once the first panel is installed, secure the lock with the second one. Close the slotted edge.
- Step 5. Manually adjust the panels to each other. If the width is at least 45 cm, no additional intermediate supports are needed.
Corners are made using a J-profile or H-profile. Place both profiles with their back edges facing each other to create additional support for the soffits.
Next, carefully ensure that the soffit panels are not stretched too tightly, otherwise their shape may become distorted. Therefore, try not to pull the horizontal sheathing panels when installing, it is better to simply press on the bottom and pull them up until they are fully engaged.
In practice, you will immediately understand what and how, and this video will help you prepare for the process:
If everything works out, the nailed panels will hang without tension. If the panels are still stretched, friction will arise in the locks, and the profile risks changing shape, deforming, in a word.
How to properly trim a roof eaves with your own hands
The filing of the eaves of pitched roofs on which ondulin lies is based on the use of rafters. It would be rational to make the cornices ventilated. This will help the thermal insulation materials maintain their properties.
What materials are used for hemming cornices?
Traditionally, to perform these works, the following are used: – edged boards, – lining (wooden or plastic), – soffits (metal or plastic).
For fastening, as a rule, nails or screws are used.
How to properly hem a cornice with clapboard
Since this work can only be done using ladders, all necessary safety regulations must be followed.
Before starting work, you should make sure that the walls and roof of the house are insulated. If necessary, insulation is carried out before installing the lining. If it is necessary to repair the roof at the attachment point, it is worth doing this before installing the lining.
The order of work is as follows. The ends of the rafters are sawn off at the same distance from the wall of the house. In this case, the cutting line should be parallel to the wall and perpendicular to the ground. This is necessary in order to subsequently secure the wind board evenly.
The next stage is the actual filing of the lining. There are 2 main ways: 1. The lining can be hemmed to the bottom of the rafters, parallel to the roofing materials.2. The lining is hemmed parallel to the ground and perpendicular to the wall. To do this, support strips are fixed to the wall and to the inner surface of the rafters. They are located parallel to each other and at the same height from the foundation level. The lining is attached to them from below. Advice. To ensure normal ventilation of the under-roof space, install the lining with a gap, or cut ventilation grilles into it.
How to properly hem a cornice with a board
To perform this work, you should use an edged planed board with a thickness of no more than 20mm. Before starting work, it should be treated with antiseptic compounds. It is best to secure it with self-tapping screws. The width of the board and its quantity are selected depending on the width of the cornice.
The board, like the lining, can be hemmed parallel to the ground or on the lower part of the rafters.
How to properly sheathe a cornice with soffits
Soffits are important elements that create a finished, holistic look of the roof and the house. The word soffit comes from the Italian word soffitto, which translates as ceiling.
In construction, soffits are a group of siding designed to form roof overhangs. Soffits are ideal for lining eaves and roof wings
To attach the soffits, wooden strips are attached to the wall of the house and the back of the rafters. A special profile is mounted to them. It can be U, F or J-shaped in cross-section. One side of the soffits is inserted into it. The other side of the soffits is screwed to a strip located on the back side of the rafters. After installation, this part of the soffits is covered with a special L-shaped profile.
Upon completion of the work on covering the eaves, a wind board should be installed.
How to properly trim a roof eaves with your own hands
Any roof, even if there is ondulin on it, looks unfinished and untidy if a cornice is not installed on it. You can buy and install a ready-made one. Or you can do it yourself.
Types of overhangs
There are 2 types of roof overhangs. These are cornice light, which is also called horizontal light, and pediment light.
However, there are differences between them, and each type has its own filing characteristics.
Cornice overhangs
They are formed by the lower element of the roof slope. Air flows enter the attic through the overhang. If you plan to create a heated attic, then the air masses flow into the under-roof space, move upward and exit through the ridge or aerator. This allows for effective ventilation of the entire roofing pie.
In order for air draft to be effective, you need to make a ventilated liner with inlet holes. One of 4 methods will work here:
- The gap left between the wall and the panel. This is objectively the simplest, but not the most common option. Depending on the material used, the gap ranges from 10 to 15 mm for siding and wooden lining, or from 6 to 12 mm for profiled metal sheets.
- Grate for aeration. Another option. The grille is built into the structure. Installation is carried out in the cladding panel.
- Gaps between wooden boards. Relevant when finishing is done with a wooden board. Then a gap of about 5-10 mm is left between the boards.
- Perforated soffit. Quite a popular method. Using a perforated soffit, the eaves overhang is hemmed.
When finishing horizontal overhangs, it is important to follow the key rules.
The essence of the rules is as follows:
- All slots and gaps for ventilation must be closed using nets or gratings. This will prevent leaves, debris, birds and insects from penetrating under the roof.
- The volume of slots should not exceed 1/500 of the entire ventilated roofing area to be finished. Plus, a specific hole diameter is selected for each type of roofing material. For example, the breathable properties of ceramic tiles allow the use of gaps with a smaller diameter than when laying the same shingles.
Many are interested in the possible consequences if we ignore the need to ventilate the under-roof space and tightly block the horizontal (eaves) overhang.
In this case, excess moisture appears, which turns into condensation. This causes the heat insulator and rafter system to become wet and destroyed. Metal rusts and wood begins to rot. Metal tiles will suffer from corrosion, and natural ceramic tiles will crack due to excess moisture in the cold.
Additionally, the roof may become icy in winter, and the house may be too hot in summer. If you don’t do anything, you will eventually have to overhaul the roof.
Gable overhangs
They are formed due to the inclined side part of the roof slope.
Here the task is exactly the opposite. It consists of protecting the sheathing and insulation from possible blowing, as well as the negative effects of water and moisture. That is, wind and rain should not penetrate under the roof.
Taking these nuances into account, specialists perform hemming for gable overhangs by continuous sealing.
Why hem the cornice?
The aesthetic component of the cladding is, of course, important, but in addition to it, eaves overhangs also perform an important practical function:
- In the vast majority of roofs, it is now customary to insulate, and if the roofing cake is not covered along the edge with a frontal strip, then it will remain defenseless against the vagaries of nature and will begin to actively deteriorate, especially for insulation;
- The frontal board, which covers the frontal strip and is also considered part of the cornice structure, is the basis for the ebb system; in most cases, the ebbs are attached directly to it, it’s easier;
- Ventilation of the under-roof space proceeds from the bottom up; accordingly, in sloping roofs, the air enters through the eaves overhang and exits in the area of the ridge. A well-designed eaves overhang plays the role of a kind of filter, preventing debris and excess moisture from entering under the roof;
- And finally, birds, insects and other living creatures often build their homes under the roof, and by covering the overhangs, you extend the life of your roof.
House roof ventilation
Before choosing a material, you need to touch upon the topic of eaves overhang ventilation, since methods for ensuring it will be considered for each material used in roofing separately. So why do you need roof ventilation? It provides the air circulation necessary to prevent damage to the wooden elements of the supporting roof structure. Everyone knows that warm air always rises. If you do not ensure its unhindered circulation under the roof of the house, condensation will form, which, flowing onto the insulation, will render it unusable.
Attic roof ventilation diagram
How to hem roof overhangs: choice of material
Today you can find a wide range of materials that can be used to hem roof eaves (for more details: “Finding roof eaves - device and materials”). Each of them boasts good properties to ensure a reliable overhang structure
Insulation also provides protection from precipitation, as well as air circulation in the space under the roof.
An important property of any material is the preservation of its original qualities for a long time. For example, lining the roof overhangs with soffit will be an ideal solution (for more details: “Fitting with soffit - the work process”).
So, the following types of materials can be used to line the roof overhang:
Soffit is a plastic panel that is used for filing overhangs. Soffit is the most common lining material. It resembles siding (read: “Fitting a roof with siding - instructions”), but differs from it in thicker plastic. The soffit also has perforations designed for ventilation of the under-roof space. It should be noted that soffit plastic has UF stabilizers. Thanks to this, the material is very resistant and does not deform under the influence of the sun's rays. Cut the soffit panels to the length of the overhang and install them not along, but perpendicular to the wall.
Ordinary wooden lining. The material is most often used outdoors and is affected by weather disasters. Therefore, you need to carefully choose the lining, taking into account the quality. Pay attention to the thickness of the product - it should not be thin, otherwise the finishing of the roof eaves will be short-lived. Check the humidity of the lining - both dampness of the material and its excessive dryness are not allowed. The best option is lining that has been stored for at least a month in the fresh air. It is this that has a humidity similar to the humidity of the environment.
Planed and edged board, which has a thickness of 2 centimeters. The required gap is from 1 to 1.5 centimeters. The advantage of the board is uniform air circulation around the entire perimeter of the roof. This, in turn, ensures uniform and high-quality ventilation of the space under the roof.
PVC lining is the most economical option. Moisture-resistant material should be considered and selected. When buying this material, do not forget about the plastic corners that are used to secure the joints of the lining
It is also important to consider the U-shaped trim strips around the edges.
Choosing hemming material, what to pay attention to
A properly hemmed cornice not only has an attractive appearance, but also reliably protects the under-roof space from the penetration of winds, cold and moisture. That is why the choice of material for hemming should be approached with special care. So, today the most popular are
:
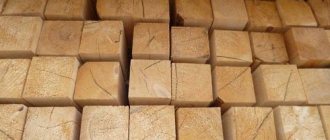
- Coniferous wood: larch, pine, spruce. The thickness of the boards should be between 17-22 mm. To avoid possible deformation, the boards must have optimal humidity, which is why they are stored outside before starting work. Before filing, the wood is subjected to antiseptic treatment to prevent fire and rotting. Short boards, laid perpendicular to the wall, are attached to the edges, while long boards are attached to the box parallel to the wall in meter increments. A gap of 1-2 cm should be made between the hemming boards to create ventilation.
- Siding is a more durable type of plastic lining. Vinyl siding is a budget option that is not practical enough to use. Metal siding is more durable and costs much more, but due to its susceptibility to corrosion, its service life is relatively short.
- PVC lining is an affordable material that has more disadvantages than advantages. Under the influence of rain, snow and sun, it quickly fades and loses its elegant appearance; the lack of ventilation holes has a negative impact on the ventilation of the under-roof space.
- Soffits are a fashionable option for lining the roof eaves, the design of which already includes perforated ventilation holes. Unlike siding, soffits are environmentally friendly and have increased resistance to mechanical stress. The advantages of this material are durability, aesthetic appearance and ease of installation, making its installation easy to do yourself.
Correct and reliable installation of the roof eaves will help to avoid deformation of the structure even under the negative influence of heavy snow covers. Recently, anti-icing systems for eaves and roof gutters have become very popular, the essence of which is to lay heating cables through the gutters and in front of the eaves. Thanks to these manipulations, ice does not accumulate on the eaves in winter, which puts a significant load on the roof.
Properly installed ventilation will help extend the “life” of the roof structure. The main elements of ventilation include grilles embedded in the sheathing of overhangs, gaps and cracks between the sheathing material and load-bearing walls.
Installation of soffits on the roof eaves
There are many options for roof designs and shapes, so there are no universal instructions for filing cornices. The installation of spotlights is always individual, although the general sequence of work can be identified:
- Install a sheathing made of wooden blocks or metal profiles, leveling all the elements. Errors are unacceptable, otherwise you will have to disassemble and reassemble the overhang trim.
- Measure the required length of the J-profile by applying it to the overhang and making a mark.
- Cut the profile to size using a grinder.
- Fasten the J-profile with self-tapping screws to the wooden frame.
- After fixing all the profiles, measure the distance between two adjacent profiles and determine the dimensions of the panels, after which they are cut.
- The soffits are installed, placing one edge into the wall overhang, and the other into the eaves, and fix it with self-tapping screws to the wooden sheathing.
- The frontal part of the overhang is also hemmed with soffits, if a J-chamfer was not used during cladding.
How to attach soffits to the roof
For high-quality cladding, the reliability of fastening of all elements is of great importance. Soffits are fastened only at right angles with anti-corrosion self-tapping screws equipped with press washers, screws or nails with a leg equal to 3 mm and a head of 8 mm. Nails begin to be driven in from the middle of the panels, moving towards the edges. There should be a distance of 30–40 cm between the fasteners, and 1 mm between the soffit and the fasteners.
Fastening soffits under a soft roof
Installation of soffits under a soft roof is done using horizontal filing technology. They construct a box (sheathing) from the beams, attach it to the wall 10 cm above the front board and to the rafters. If there is a long overhang, an additional support rail is installed in the middle of the box. Then the soffits are attached to this sheathing according to the general scheme.
Lining roof soffits along the slope
Hemming along the slope is the easiest. It is made on roofs with a slope of no more than 30° and a protrusion of up to 50 cm. The soffits are hemmed along the sheathing attached to the rafters. Hemming strips can be placed perpendicular to the rafters or placed along the end of the rafters parallel to the wall.
Installation of spotlights
To install metal and plastic soffits you will need two types of profiles:
- The L-profile is used to secure the ends of the soffit strips;
- H-profile is a part by which soffit strips are joined at an angle.
The frieze panel performs a purely decorative function. It is used to cover the front board - the most visible part of the cornice when looking at the building from some distance.
Installation of the filing is carried out using self-tapping screws. The profile is attached along the wall and at the ends of the rafter legs. Soffit strips are installed in the profile and joined together.
The soffit strips have a locking fastening, so the slats are pushed towards each other until they make a characteristic click. For greater stability, the planks are additionally secured to the profile with self-tapping screws.
Video:
https://youtube.com/watch?v=PyB8havghPU
Vinyl soffits are a very popular finishing material. They are easier to install than metal ones, because you can use a regular construction knife to trim the profile.
Metal soffits are made from galvanized iron. They can be with or without perforation.
In solid roofs, the overhangs are hemmed with soffits with perforations; in breathable roofs - slate and others - soffits without holes can be used for hemming.
Instead of metal soffits, sometimes they do the roof lining with their own hands using homemade soffits from corrugated sheets.
In this case, the metal strips are cut directly on the site using tin snips. To decorate the frontal board, a separate strip is cut out.
Flat roofing sheeting is used to make soffits. Ventilation grilles are installed every 2 meters of corrugated sheeting.
The metal is measured and cut with scissors, and then the strips are secured not perpendicularly, as is the case with industrial soffits, but parallel to the wall, screwing them to the wooden frame with metal screws.
The joint between the filing and the wall is covered with a metal corner. The external joints of the corrugated sheets are secured with an outer corner.
If you do not install ventilation grilles, then when installing the corrugated sheet, you will have to make a small indentation from the wall - the roof will be ventilated through this gap.
https://youtube.com/watch?v=R9HUBYvAEkQ
Important: when lining the roof overhangs with corrugated sheets, the service life of the surface will be shorter than when lining with wood, since the screws damage the anti-corrosion coating of the sheet, and the metal begins to rust. Lining the cornice with clapboard or soffit strips plays not only a decorative, but also a very practical role
Lining the cornice with clapboard or soffit strips plays not only a decorative, but also a very practical role.
This roofing detail protects the roofing pie and the attic space from the penetration of dust, noise and cold air currents from the outside.
Based on this, filing the cornice can be considered a mandatory construction operation.
Options for lining roof eaves
There are two popular methods for lining eaves among roofers:
- along the rafters;
- on a wooden frame (box).
Hemming the cornice along the rafters
This option is applicable only for roofs with a small slope angle. The biggest difficulty with this method is the uneven size of the rafter legs. To make the cornice smooth and neat, the edges of all rafters must form one plane.
If it is not possible to cut the rafters to the same size, you need to use an additional board, which is attached to the lower edge of the rafters, perpendicular to the wall of the house. The length of the board should correspond to the distance from the wall to the protruding edge of the rafter.
First, the boards are attached to the outer rafters of one slope, then a rope is pulled between them and the boards are mounted relative to it to the remaining rafters. Such a frame is sheathed using metal corners and screws.
Framing the roof eaves along the frame
This option is ideal for roofs with a large slope. To create an overhang, a board about four centimeters wide must be secured to the lower edge of the rafters. The other side of the board is fixed to the wall of the house, or rather to a vertical strip pre-installed there. Instead of this supporting strip, you can use a beam, which is horizontally fixed to the wall with dowels.
The result should be a frame of triangular cross-section, which after covering will resemble a box closed on all sides. You can look at the finished design options in the photo or video.
Finishing the cornice with soffits
Let's consider the most modern way of filing a roof eaves with your own hands - treating the overhang with vinyl soffits. The work must be done in the following sequence:
- Purchase the required number of plates, having previously calculated how many blind and perforated elements will be needed. At the same time, you need to think about guides, clamps and fasteners.
- Guides for spotlights are attached to a prepared box made of wooden boards. An element with a cross-section in the shape of the letter F (that is, a chamfer) is attached to a strip located along the edge of the rafter legs. The J-shaped plank is mounted on the wall of the house. To ensure that the guides are absolutely level, you need to make markings in advance.
- You need to measure the width of the cornice, that is, the distance from the wall of the house to the ends of the rafters. Subtract 6 mm from the resulting number and cut the soffits to this size. The gap is necessary for thermal expansion of the material; if it is not made, the soffits will “lead” over time, the cornice will warp and become deformed.
- The cut soffits are slightly bent and carefully inserted first into the chamfer, then into the groove.
- The plates are fastened through the factory holes using self-tapping screws, the length of which is at least 30 mm.
- In the corners of the cornice, the soffits are smoothly cut at an angle of 45 degrees, and the joints are connected using an H-profile.
How the edge of the overhang is formed
The two types of overhangs have standard open elements on the end side (edge). From the side of the house eaves, this is the end of the rafter system. And the gable overhangs have sheathing ends. They must be closed with special additional elements. They are usually purchased directly with roofing tiles.
Many people mistakenly believe that the design of the end (edge) of an overhang is done solely for aesthetic reasons. In fact, this is done for appearance, as well as to protect the roofing pie and all materials from the negative influence of weather.
Sometimes even professionals finish the edges using wood, pre-treating them with special antiseptics and painting them. But this solution cannot be considered the best.
It is recommended to make additional components from metal. They have a long service life and have a protective anti-corrosion coating.
When decorating the edge of the eaves overhang, you should trim the rafters to the same line in a vertical plane, achieving the same distance from the wall. The rafter ends are connected to each other using a frontal strapping board. A metal cornice strip is attached to it. Another name for the element is a dropper. A drainage system should also be installed along the eaves overhang.
Where the gable overhang passes, you need to cut the sheathing along one line, moving parallel to the wall. Along the gables themselves, the edges of the installed sheathing are closed, and then a metal end strip is mounted. It's also a wind bar. Needed for additional protection of the roof structure from strong winds. This prevents possible ingress of debris and insects.
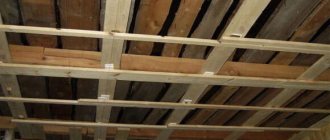
Stage I. Pre-installation of sheathing
Let's start from the very beginning. So, it is necessary to hem the roof overhang before laying the roofing material. You should also first insulate the walls so that there are no unprotected areas between the walls and the roof.
And first of all, they calculate and install the sheathing. The simplest and most common way of lining a roof with soffits is horizontal. For this task, bars are pre-attached to the rafters or their continuation in the form of fillies, forming the frame of the box.
At this stage, it is extremely important to control the future plane of the filing using a level and plumb line. Here are several options for exactly how to place the sheathing bars on the overhang of a standard roof:
It cannot be said that the horizontal or diagonal arrangement of the sheathing is better. Here, it most likely depends on which overhang seems more aesthetically pleasing to you and whether you plan to place communication cables in the soffits and build in lamps. Then the horizontal option is more appropriate, of course.
The sheathing needs to be laid along the perimeter of the overhang, parallel to the wall, and the suitable material is a galvanized profile or wooden slats. If you prefer wood, then make sure that the bars are sufficiently dry, with a moisture content of no more than 15-18%, without knots and bends, and if metal, then choose either aluminum or anti-corrosion steel.
There should be a distance of no more than 30-40 cm between the slats. If it turns out that the overhang still exceeds 40 cm, you will need to install an additional rail - between the inner and outer ones.
Nail two boards on the side of the front board and the wall, onto which you will then fix the soffit strips and additional elements. For overhang lengths greater than 80 cm, use three attachment points. In this case, the boards must be of sufficient width for the installation of soffits and additional elements more than 100 mm wide.
Installation technology
The roof on the gable side is sheathed around the perimeter with a J-profile or a special profile for the internal corner.
The installation rules here are the same as for vertical elements, where the top fastener is mounted to the upper edge of the nail hole, and all subsequent ones are mounted in their center.
Installation of perforated vinyl sheathing
Vinyl soffits are especially valuable because they are suitable for hard-to-reach areas. Their installation does not require special equipment, special knowledge or skills.
You just need to study the instructions from the manufacturer and our master classes:
So, first of all, two planks are mounted to the gable or eaves overhang along its entire length. Next follow the instructions:
Here is a wonderful master class on installing vinyl soffits with hidden perforations:
Installation of continuous metal overhang lining
To fix a metal soffit to the wall, you must first attach a J-shaped profile along the wall.
Using a building level, make marks on the wall that will run parallel to the bottom edge of the cornice. Attach the receiving profiles to them. Next, measure the distance between the gutters and profiles and subtract 6 mm to take into account possible expansion and contraction of the material. Our photo instructions will tell you what exactly you need to do:
To bring the upper edge of the J-chamfer under the finishing strip, it is necessary to cut special “burrs” into it. You can easily cope with this task on your own, especially if you use tools special for this purpose.
Thus, Freund 360020 and Malko NHP1R cutters easily punch slot-shaped holes of 3x15 mm and 4x19 mm. One edge of the soffit must be inserted into the groove, the other must be screwed to the second of the planks. Place everything in place and secure each panel in the center of the hole.
Next, cover the face board with a J-bevel. For a metal soffit, the width of the sheets must strictly correspond to the distance between the J-chamfer and the J-profile, you just need to subtract 6 mm for thermal expansion and, if the overhang width is more than 90 cm, then on both sides at once. Install soffit sheets between the J-bevel and the J-profile.
Here is an example of filing with metal soffits of complex shape:
Finishing the roof overhang
The junction of the soffit with the second strip is covered with a front strip. This is necessary to give the end edge a finished look:
Cut the strip to the desired width and bend the edge. Using a special bend and cutters, form the finishing strip.
In our case, the size of the frontal board is noticeably larger than the size of the J-chamfer, and therefore the installation should be carried out on the frontal board through two J-profiles or an external corner.
A light-colored soffit is used here, and this is correct - dark ones are not recommended in this case. Finally, secure the finishing strip.
Installation of wooden frame
The roof can be hemmed either parallel or perpendicular to the overhang. The only thing, keep in mind that with the parallel method all the irregularities will be noticeable, but hemming with short bars from the edge of the roof to the wall hides all the imperfections well.
If there is no frontal board as such, then the soffit must be secured between two J-profiles placed on the roof overhang and on the wall:
In practice, installing a wooden frame looks like this:
Have you chosen the right option for yourself? Glad we could help!
Source
The process of filing roof overhangs with your own hands
Scheme for sewing eaves overhangs
When planning to cover the roof with your own hands, you need to prepare drawings in advance that show the dimensions of the extensions and other elements, and also draw up an estimate. Work is carried out only upon completion of installation of the rafter system. In addition, you need to insulate the room and the roof itself, as well as install a waterproofing system. However, the overhang is sewn up before the start of measures to insulate the external sides. This is necessary to prevent damage to wall coverings.
Soffit panels are often used to cover the roof. The following requirements apply to their installation:
- Products must be mounted on top of the sheathing. If the base is made of metal, self-tapping screws are most often used as fasteners.
- Sheet elements are located between the slats.
- To calculate the length of a single panel, they are guided by the distance between the slats, from which the groove guard distance and some reserve for grinding are subtracted (0.6 cm on each side). For large overhangs (0.9 m), the subtracted value is doubled.
- The frontal board is covered with a specially designed strip.
- Before installing the first strip of soffits, mark the starting point for it. An indent of 77 cm is made from this mark and a horizontal line is struck across the entire length of the roof. The first strip is placed under it.
- The edging composition is created after the internal and external components of the spotlights have been installed. It is necessary that the lower element in any case be under the broken strip.
- The joints of all structural components must be made at right angles.
- The corner components of the structure are secured with self-tapping nails. Openings should be surrounded by edging elements.
- The end strip must be installed before the final strip can be installed. The wall panel must be cut to length. The side that has undergone this procedure is clamped into the end strip and installed into the wall.
- Then the cornices and overhangs are hemmed. Nails are used as fastening elements. They begin driving them from the middle part and then move to the sides. During the operation, care must be taken to ensure that there are no gaps.
Let's sum it up
Hemming of roof overhangs is an integral part of creating a roof structure. This is a great way to protect your home and give it a finished look. All that remains is to choose the mounting method and purchase the appropriate material. The good news is that there are quite a lot of them, so everyone can find the ideal option for themselves. And we looked at the features and prices of all materials to help you make your choice. All that remains is to bring everything to life. And thanks to the videos posted above, even a beginner who has no skills in the work can handle the job.
Recommended Posts
Do-it-yourself pitched roof
Forms of roofs of private houses + photos
Mansard roof project for a private house + photo
Weather vanes for the roof of the house + photo
DIY mansard roof step by step + video
How to lay corrugated sheets on the roof
Work algorithm
Preparing rafter legs
If the length of the parts of the rafter legs extending beyond the perimeter of the building is insufficient for high-quality arrangement of the “liner,” then they are artificially lengthened (increased). Such elements are called “fillies”.
Arranging the base for installation
Much depends on the configuration of the roof and its slopes. Therefore, to install the “lining” material, one of two methods is used.
First option
A board is sewn onto the ends of the rafter legs (vertically) along the entire length of the building. The legs are preliminarily trimmed accordingly. A support beam (rail) is fixed on the wall. This creates a base onto which the supporting frame for the “filing” is attached. It can be either made of boards or thick slats, depending on the type of “lining” material. In this case, the front board also needs to be finished.
Second option
The same board, but attached to the bottom of the rafter legs, so their ends are “trimmed” only in the horizontal plane. But this is more suitable for small overhangs, when the length (and weight) of the “hem” products is small. Accordingly, products for “filing” are attached at an angle, on the back side of the rafters.
If the legs do not lie in the same plane (unequal width), then this drawback is eliminated by “stitching” (on the reverse side) boards of different thicknesses, which form a load-bearing frame - the base (lathing) for attaching the “lining” material.
At the corners, if the overhang runs along the entire perimeter of the building, the outer boards of adjacent walls are additionally fastened together with corners and plates.
Sheathing methods
Roof overhangs can be designed in various ways, for example, in perpendicular and parallel directions from the overhang. Various solid materials or their elements can also be used. Let's consider methods of fastening the material:
Hemming along the rafters
If the roof has a slope of no more than 30 degrees and a small part of the offset, approximately 50 cm or less, then this cladding method can be used. To begin with, a sheathing is formed, which is attached to the rafters; the material is already mounted on it parallel, perpendicularly or along the end of the rafters.
Horizontal type binder
This design method is very good with a strong roof slope. To carry out cladding work, you need to build a kind of box that is attached to the rafters and the wall. To quickly drain water that gets onto the overhang, it is necessary to mount the beam on the rafters a little lower than the one that is attached to the wall.
All beams are reinforced with boards that are nailed perpendicular to the wall.
Materials for filing
When choosing a material for covering an overhang, you need to coordinate it with the style of the house. Agree - lining the roof with white plastic will not look particularly aesthetically pleasing if the house is wooden, and even dark.
Planed board is better, but edged board is also suitable
It is better to take softwood boards with a width of 5 to 25 centimeters and a thickness of 1.7 to 2.2 centimeters. Before installation, treatment with antiseptic, varnish or paint is required. Before work, you need to let the board lie outside under a canopy for a month - otherwise, if it is too dry or wet, it will warp later.
When sheathing the overhang, gaps of a centimeter or one and a half are made between the boards for ventilation. When installing boards perpendicular to the walls, they are fastened on both sides (if the overhang is wide, then in a third place - in the center of the board). If the boards are mounted parallel to the walls, they are secured every meter.
It is inexpensive, from $120 per cubic meter, or from $2.2 per square meter.
Wooden lining
This material is good because it has already been processed (unlike boards), which is why it is in great demand. To cover the overhang, it is necessary to take moisture-resistant lining designed to work in these conditions. Like the board, this material must also be left in the open air for a month before installation. The installation methods are the same as for the board, only there is no need to leave gaps. Instead, they use ready-made ventilation grilles, spaced 1.5 meters apart.
Cost – from $6 per square meter.
Photo: hibara.net
Polyvinyl chloride (PVC) siding
For filing, you need siding that is protected from moisture. Everything you need is included in the kit: these are strips in the shape of the letter “P” for finishing the edge, and corners for fastening the joints of the planks, and grilles for ventilation. Mount the planks perpendicular to the walls, fastening them in two, three or four places. The number of attachment points depends on the width of the overhang. It is not recommended to fasten PVC panels along the roof overhang since it is not as rigid as wooden planks and requires a large number of fastenings and can sag.
Cost – from $4 per square meter.
Corrugated sheet (profiled sheet)
This material is easy to install - after all, it can be laid in large planes and fastened with the same distance as a board. The height of its profile can be from 0.8 to 2 centimeters. When hemming roof overhangs with corrugated sheets, a gap of 0.6 to 1.2 centimeters is left (depending on thermal expansion). Ventilation is done using special grilles.
Cost – from $9 per square meter.
Photo: www.ruspolekb.ru
Sheet metal
This can be galvanized or polymer-coated steel, as well as aluminum or copper. The thickness of the sheets is from 0.6 to 0.8 millimeters, and the length is up to 6 meters. For ventilation, you can either insert ready-made grilles or perforated pieces of sheets. Where the cutting line runs, steel sheets are treated against corrosion (this is not necessary for aluminum and copper). The disadvantage of using such materials is that cutting requires a special tool.
Cost – from $5 per square meter.
Plywood and OSB
For filing overhangs, use brands of materials that are waterproof. These slabs are quite rigid and can be installed in large pieces. To do this, make a box of wooden blocks and screw the slabs to it. They are fastened every 1 - 1.2 meters. For ventilation, ready-made grilles are installed. An overhang made of this material definitely needs to be painted, otherwise it doesn’t look very nice.
Plywood costs about $6.5 per square meter, OSB is about 2 times cheaper.
Roof lining with soffit - fast, simple and reliable
Soffits are strips produced specifically for lining overhangs. They can be made from a variety of materials. In particular, from such materials as PVC, steel, copper, aluminum. Having a large palette of colors and different textures, soffits can be matched to the design of any home.
The kit contains the following main parts:
- Soffit panels;
- frontal strips (otherwise, chamfers);
- J-shaped profiles with grooves;
- finishing strips.
The appearance of the soffit and additional elements may vary depending on the manufacturer and material of manufacture.
Soffit panels can be triple, double and single, solid (for gables) and perforated (for cornices).
It should be noted that lining the roof overhangs with soffit greatly simplifies the work. You don’t need to involve experienced builders for this – you can do it yourself. Cut the planks according to the width of the overhang and secure them perpendicular to the walls on profiles with grooves - that’s the whole installation trick.
PVC strips cost from $4 to $8 per square meter, and fastening strips and chamfers are 5 times cheaper.
Prices for soffits for roofing:
Three options for finishing materials
In reality, there are many more such options; we took only the most popular ones, plus even in popular directions there are differences in models and types.
Option No. 1: wooden overhangs
Until recently, wood was the most common material. The beauty of natural wood is undeniable and the sheathing is quite easy to install. The only downside is the need for good wood impregnation. The line includes lining, as well as hemmed and edged boards.
The beauty of natural wood is admirable.
| Illustrations | Recommendations |
| Lining . The main advantage of such planks is the convenient tongue-and-groove connection. There is a tenon on one end and a groove on the other. Thus, the cornice, finished with wooden lining, will have no cracks or gaps. | |
| Hemming board. This board has a peculiar shape, its ends are beveled at an angle, which allows you to equip the surface without visible cracks.
| |
| Edged board. This is the simplest option. The edged board can be laid flat with small ventilation gaps between the planks, but this will not be very attractive. Or sew up the cornice with a herringbone pattern, as in the photo on the left, although in this option you will have to leave special gaps for ventilation. |
Option No. 2: soffits or siding for eaves
Covering eaves with siding is now breaking all records of popularity. To be precise, eaves siding is usually called soffits. Such planks differ from conventional siding by the presence of ventilation meshes or grilles. Otherwise, both the material and the installation of soffits are similar to the arrangement of siding.
| Illustrations | Recommendations |
| Copper soffit . If installed correctly, a copper soffit will last longer than the roof itself. Copper does not need to be painted or impregnated with anything, it is good as is. The only problem is that copper soffits are very expensive. | |
| Aluminum . Aluminum soffits are just as durable as copper ones. Plus, these planks are powder painted, which means the color can be matched to any façade. True, the price of aluminum soffits is not much lower than copper ones. | |
| Cink Steel . The price here is average, plus galvanized soffits are also painted and if they are not scratched, they will last a long time. | |
| Plastic . Vinyl soffits can be called the best option. They are light, not afraid of moisture and the most affordable. The main thing is not to buy cheap models, as they change color over time. |
Option No. 3: profiled sheet
Finishing with corrugated sheets is not much different from covering eaves with soffits; they are even visually similar. Moreover, the corrugated sheet is made from the same galvanized and painted metal as steel soffits. Only the dimensions of these sheets are much larger and there are no ventilation meshes on them. They will have to be arranged separately.
The corrugated sheet is quite attractive, but ventilation windows will have to be installed separately on the eaves.
How to hem the eaves (overhang) of the roof - step-by-step instructions from choosing the material to the finish
The eaves (overhangs) of roofs are different. The choice of their type is determined by the climate and the purpose of the building. In fact, this is nothing more than a continuation of the roofing “pie”, that part of it that protrudes beyond the perimeter of the external walls. The length depends on the type of material used in the construction of the building, number of storeys, architectural features and specific operation. As a rule, it ranges from half a meter (most often) to 1.2 m.
The work of filing the roof eaves is an intermediate stage in the construction of the roof. It can be started only after the rafter system is ready and the external walls are insulated. And this is understandable - the legs of the rafters are the elements to which the lining material is attached, and if the surface is not first treated with a “thermal insulator,” then the part of it that will be covered with the “lining” will remain cold.
Although there is another opinion - hemming should be done before external insulation. Probably, you still need to first of all be guided by common sense and local conditions. For example, what is under the roof – a cold attic or an attic space?
Dimensions according to standards
The dimensions of the overhangs are quite clearly specified in GOST. According to these standards, as well as SNiP, the optimal overhang size is 40-60 cm, but practice shows that sometimes these rules have to be neglected.
We are talking primarily about buildings belonging to certain architectural styles. For example, for an Alpine chalet it is appropriate to place the overhang at a distance of one and a half to three meters, and for a modern high-tech house it is appropriate to abandon any overhang at all.
As for materials, there are no mandatory requirements, however, there are recommended sizes, the ease of use of which has been confirmed in practice
When choosing planed boards, look for samples that are at least 20mm thick. These are the ones that are best suited for hemming, as they do not sag, do not suffer from the wind, and do not warp.
The length can be any, but it is best if it is equal to the length of the overhang itself (or its width when fastened transversely). This will avoid many joints, and the filing will be correspondingly stronger.
There are no standard sizes even for soffits, although they are specially produced for filing overhangs. However, each of the major manufacturers considers it their duty to offer different sizes than those offered by its competitor, so buyers have the opportunity to choose exactly what they need. Thus, the width of the panels ranges from 30 to 80 cm, length - from 3 to 4 m. The most popular are soffits with indicators of 3.6x0.3 m. As for aluminum soffits, their thickness can be from 0.3 to 0.6 mm. Vinyl thickness is from 1 to 1.2 mm.
Methods for filing roof edges
Roofers use two options for filing overhangs:
- Along the rafters - used only on roofs with a slight slope. For installation, all lower parts of the rafters must be in the same plane. If you can’t cut it straight, you need to stuff an additional flat board on top. First, align and screw the first and last trim strips. Next, you need to pull a rope between them for balance, after which you can attach the remaining planks. Metal corners and screws are used for cladding.
- Along the frame - suitable for roofs with a steep slope. The technology is simple - a board, the width of which is 40 mm, is attached on one side to the lower edge of the rafters, and the other must be fixed to the wall of the house, on a pre-installed beam. The result is a triangular frame, which can then be sheathed with any chosen material.
! Important. Use screws and angles as fastening materials, not nails, this will give the frame good rigidity
Lining the overhang with clapboard or board
It is more convenient to carry out this work from below, sitting on a stepladder or on scaffolding. Before making a roof lining, it is necessary to completely complete the external insulation of the walls, lay a vapor barrier and complete the creation of the roofing.
In the case of covering overhangs with clapboard, the rafters on the side eaves must not only have the same length, but also be parallel to the wall of the building. Wind strapping boards are attached to them.
One of them is attached to the wall vertically, and its edge should be located at the level of the edge of the rafters. The second board is fixed between the rafters and the first board along the lower edges - it needs to be parallel to the ground. The result is a base onto which the sheathing elements are fixed. Sheathing is mounted on the frame.
To ensure air movement under the roof when using lining along the entire perimeter, ventilation grilles should be installed at intervals of 150 centimeters.
When the roof frame is sheathed with boards, a slight gap must be maintained between them and the wall. Lumber must be smooth, of high quality and have a thickness of 1 - 2 centimeters.