Wood putty - features, varieties, useful tips
Wood is a very attractive decorative material.
However, it is possible to obtain a high-quality finish of wooden products only after careful preparation of its surfaces. This is an extremely difficult task, since processing must be carried out in several stages. At each of them, technological errors are possible, and defects and flaws in the material are often discovered. If every wooden part is rejected due to detected defects, the quantity of finished products can be reduced to zero. In addition, surface defects often appear on finished furniture. They appear due to operational errors or as a result of processes occurring in the mass of material. To solve most of these problems, putty is used. This is an effective and very common procedure that should be discussed in more detail.
What is putty
Putty is a concept that has a complex interpretation. This condition often causes controversy, but it is not fundamental. The term "putty" has a double meaning. It denotes both the material used to seal defects and the procedure for applying this material.
There is also the expression “putty.” Some sources claim that this is a designation for the application process, and only the material is called putty. However, more thorough research in this area has shown that both terms are equivalent and represent variant spellings and readings.
Most users are familiar with putty from construction work. In general, these are similar concepts, although the scope of work and tasks of construction putty are somewhat different from wood processing. There is no need to create a continuous thin layer; only defects are processed:
Slots and gaps resulting from insufficient fitting of parts during gluing;
Potholes and dents arising from mechanical impact on the material;
Scratches and holes from fasteners on visible furniture surfaces.
With the material the situation is more complicated. Wood putty is used in a variety of applications and works on different types of wood. It is necessary to know which types are used in a particular case in order to obtain the expected result.
Construction news
Viessmann: simplifying heating and hot water circuits
At the beginning of February 2022, as part of the business program of the international exhibition Aqua-Therm, a symposium “Efficient heating systems in combination with renewable energy sources” was held, organized by the German Association of Heating Equipment Manufacturers.
KNAUF is developing the direction of modular construction
The KNAUF Group, one of the world's largest manufacturers of construction and finishing materials, continues to implement a project to create systems for modular housing construction. The technology is based on the use of ready-made elements - modules, which can significantly speed up the process of building construction.
Redverg brings open type inverter generators to market
Redverg has recently expanded its range of open-type petrol inverter generators, which, unlike conventional petrol or diesel generators, allow the generation of consistently high quality electricity - with sine wave distortion of less than 2.5%.
Circular saw from Makita
Makita launches the CA5000XJ circular saw for cutting grooves in aluminum composite panels (also often called Alucobond).
"INTERSKOL": the birth of a new cluster
A year ago, the Russian company opened a new plant in the Special Economic Zone “Alabuga” (Republic of Tatarstan).
Shower System Rain
System Rain is not just a shower, but a real tropical shower in your home!
Requirements for wood putty
Wood putty is fundamentally different from building compounds. This takes into account the characteristics of the material, the finishing method and other specific properties of wood.
Basic requirements for wood putty:
In addition, the material must have maximum adhesion to wood surfaces, both unfinished and coated with various types of paints and varnishes. In addition, if the product is being prepared for a transparent finish, the putty sometimes has to be matched in color to the base.
This is a difficult task because the material changes color slightly as it dries. When mixing putty with color, you need to make the composition a little darker. This is a task that requires skill and some experience. Otherwise, the putty areas will stand out.
Another condition that must be met when finishing wood is the correspondence of the composition of the material and the properties of the base. Since there are so many varieties and species of wood, you need to have an idea of their characteristics.
As a rule, ordinary construction putty is not used for finishing wood. However, there are exceptions - if you plan to paint the surface in several layers, you can use construction oil putty.
Types of wood putty
Since there are so many options for finishing and types of wood, a considerable number of varieties of putty have been created. In addition, operating conditions, loads and other factors affecting wood vary. Therefore, you need to have an idea about the types of putty and choose the most suitable options. Let's consider the available types of material separately:
Gypsum putty
Gypsum putty is a common building finishing material. It is of little use for delicate work with wood, as it has noticeable shrinkage. As it dries, its volume decreases and cracks or surface subsidence occur. Therefore, it is necessary to carry out the procedure 2-3 times, gradually correcting the defects of the drying putty. This takes time and does not always give the expected result.
In addition, gypsum putty has low mechanical properties. It is not durable and easily breaks under load. Another disadvantage is its hygroscopicity - gypsum putty can only be used under impenetrable paintwork that can provide protection from external influences.
As a rule, it is used when finishing doors or wooden windows in service or auxiliary premises. For furniture or “clean” work, gypsum putty is practically not used.
insulation of a private house from the outside with penoplex
Oil-adhesive compositions
There are many varieties of oil-based putty. They differ little from each other, since the properties of this material are quite stable and do not need any improvements. The basis is drying oil with wood glue; chalk is used as a filler. In addition, driers and other additives (for example, tinting pastes) are added to the composition.
The greatest effectiveness of oil-adhesive putty can be achieved if it is used to level chipboard, OSB or similar materials for painting. It is not recommended to lay a thick layer, and you should not finish wet slabs. In this case, it will not be possible to obtain a high-quality and durable coating - the finishing layer may fall off.
Acrylic putty
Acrylic putty is significantly different from gypsum putty - it is durable, not afraid of moisture and temperature changes. However, its main advantage should be considered the almost complete absence of shrinkage, which is very important for wooden products. The treated surface retains its appearance, does not sag or crack. The material can be used in different conditions, it is suitable for indoor and outdoor use. At the same time, the adhesion of acrylic putty is higher than that of its oil-based adhesive counterparts.
The finished surface is considered completely ready for application of the topcoat after 24 hours. It can be sanded within 2-3 hours. The material sets quickly enough, therefore, you need to work with it without pauses or breaks.
The only drawback of acrylic putty is the lack of color variety. All materials are available in white color. To repair defects in wood, in any case, you will have to select a color and do several test applications to get an acceptable color. This is not required if the leveling is carried out for a solid color; in other cases, the selection of a suitable tinting paste is required.
Epoxy putty
Epoxy materials—both putties and adhesives or primers—are supplied in two-part kits. They are mixed immediately before use. The ratios are indicated on the packaging, and before starting work you must carefully study all the information. Otherwise, the quality of the putty will be too low - if there is an excess of hardener, the mixture will boil, and if there is too little, it will not be able to achieve structural hardness.
Working with epoxy putty requires some experience and skill. It is necessary to have a fairly complete understanding of the features of this material:
If it is necessary to seal a deep gap or crack, the epoxy putty must be thickened - mixed with sawdust, sanding dust or chalk. Otherwise, the material will endlessly go into the crack and will not allow the work to be completed with the required quality.
Source
Work order
Before you putty on wooden doors or floors, carefully examine the surface. If there are burrs, burrs, or loose pieces on it, all this must be removed. Then you should take the sandpaper and carefully sand all the defects. If there are large cracks, it is advisable to penetrate them by folding the sandpaper in half. To sand straight sections, you can use a float and attach sandpaper to it. Once you have finished this job and are sure that the wood is smooth, clean it of dust with a brush and a damp cloth, and then prime it.
Advice. Some putty manufacturers also produce primers of the same brand. Their combined use gives the highest quality results.
Let's move on to the main question: how to properly putty wooden surfaces. It's not difficult at all, you just need to follow these recommendations:
- Choose a spatula slightly wider than the defect to close it in one motion;
- Stir the putty before use;
- Proceed to work only after the primer has dried;
- If the depth of the gap or depression is too large, do not try to fill it at once - it is better to do this in several steps, each time waiting for the previous layer to dry.
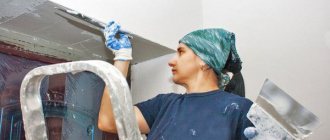
The puttying process itself is shown in the video in this article. As you can see, everything is simple: the required amount of mixture is put on a spatula, it is pressed against the surface just above the dent or crack and drawn down. The second movement can remove excess putty, if any remains. After filling all the defects, the putty should be allowed to dry for the time specified by the manufacturer, and then all treated areas should be sanded with fine sandpaper (see What to sand after putty and how to do it correctly). At the end of the work, the surface is again cleaned of dust and primed.
Methods for self-restoration of interior wooden doors
When restoring wooden doors, they are often repaired, allowing you to save on upgrading the door leaf and maintain the quality of the product without dismantling. Also, the restoration of wooden doors helps them adapt to different styles, which may change during the renovation of rooms.
In some cases, it is cheaper to restore a door than to replace it
For old houses and apartments, such measures are more profitable compared to replacing them with more modern models (especially when the opening parameters do not meet modern standards).
Examples of restoration work
To repair a door and carry out restoration work, you may need various tools and materials, including: a screwdriver or drill, a hacksaw, sandpaper, paint and varnish, a brush or a spray bottle. To remove the old layer you will need a sander, solvents or a hair dryer.
Traditional methods
In addition to professional methods, there are also folk ones - let’s figure out what home remedies will help disguise scratches on interior doors.
Walnut is not only a useful product, but also a reliable assistant in the fight against scratches on dark surfaces. You need to take a fresh nut, simply divide it into two parts and rub the defect on the door with it. The point is that the walnut releases oil and fills the damage with it. As the oil dries, the scratches will become less noticeable.
Vinegar and vegetable oil can be found in any home, so if a scratch is discovered unexpectedly, you can immediately begin to eliminate it. The ingredients are mixed in the following proportions:
- vinegar - 1/4 tea cup;
- vegetable oil - 3/4 teaspoon.
The mixture is kneaded until smooth and applied to the damaged surface, and then wiped with a clean cloth.
Doors in black or wenge can be retouched with regular shoe polish. The color of the cream must completely match the color of the door.
Smokers can derive at least some benefit from their bad habit. You need to smoke a cigarette, collecting the ash in a saucer, and mix it with wood ash in equal proportions. Then carefully add water to obtain a homogeneous, slurry-type mixture. The damaged area is covered with it. This method is suitable for dark coatings, and for light-colored doors you can use a mixture of cigarette ash and water without adding ash.
Another proven folk method for restoring doors is tea leaves. Strongly brewed tea is applied to the damaged area and left for half an hour.
Traditional methods are only suitable for dealing with shallow scratches - the more serious the damage, the more difficult it is to deal with.
How to remove a door from its hinges
To restore the old cloth, it is removed from its hinges and laid on the base (chairs, workbench, floor). Such work can be done with the door attached, but this will affect the quality of the product and it may fail.
Based on insertion and fixation, there are hidden, overhead, card, hidden, screw-in, and mortise hinges. If the hinge needs to be disassembled, then after removing the door from the lying panel, it is twisted with a screwdriver. Otherwise, you will need to place bars under the door, unscrewing the hardware from the slope and panel.
After removing the hinges from the canvas, you need to remove other fittings (lock and handles) and existing inserts. To remove decor made of plastic or glass, you need to remove the fixing beads and pull the elements out of the grooves. There should be nothing unnecessary left on the wooden surface.
Insulation of a metal door
Most often, insulation of a metal door is done from the inside; external insulation is also allowed. What material to choose for insulation? Each has its own advantages and disadvantages.
Stone or mineral wool
Advantages: does not burn, retains heat well, does not emit toxic substances, suitable for the entrance door to an apartment (if there is a heated entrance).
Disadvantages: not suitable for a street door; due to humidity, the material deteriorates, cakes and slides down over time.
Foam plastic, polystyrene
Advantages: suitable for street doors, as they are not afraid of changes in temperature and humidity.
Disadvantages: when burned, toxic substances are released.
The process of insulating a metal door can be divided into the following steps:
- Measure all the cells and cut out pieces of insulation of the required sizes. If the metal door does not have stiffening ribs, then the cells can be made using wooden blocks and self-tapping screws.
- Secure the insulation into the cells using glue or foam. You can also foam all the joints between the profile and the insulation.
- Cover the insulated door leaf with an internal decorative panel made of MDF, chipboard, plywood, plastic or other materials. Don't forget about the holes for the handle, lock, and peephole. The panel is most often attached to a metal frame using self-tapping screws.
How to remove old paint
Before starting restoration work, the old peeling coating should be removed from the balcony or interior door. To do this, you can use one of several methods, i.e. choose the appropriate option for a particular case.
Grinding
If you need to process a flat door with numerous layers of paint, it is better to take it outside and clean it with a sander . Such work is very dusty, the circles quickly become clogged, but the result is good.
Numerous layers of paint are removed from doors using a sander.
Chemistry
In hardware stores there are many chemical compounds for removing the old layer (for example, B52). They must be applied to the door surface with a brush, spatula, or scraper. After a certain time, foaming of the paint and its peeling are observed. Then the unnecessary layer is removed with a spatula.
tikkurila white color for walls
Due to the harmfulness of solvent vapors, work must be carried out in a respirator and gloves. A solvent must be applied to each layer of paint, since it will not cope with a thick paint coating. Therefore, this technology can be used when cleaning small areas of a door with a thin paint layer.
When working with chemical paint thinner, you must follow safety precautions
You can make your own paint remover by mixing caustic soda, oatmeal and water to a thick consistency. The resulting composition must be evenly distributed over the panel and removed after half an hour with a spatula.
Gas-burner
According to fire safety rules, you need to work with a gas burner outdoors. Heated paint peels off easily, but it can smoke and release toxic substances. This method is best used if you have certain skills in working with a burner and have a certain supply of cylinders.
Construction hair dryer
This device produces a stream of air with a temperature of no more than 600 degrees. This will be enough to heat up the old paint and remove it with a spatula. In this case, there is no burning smell, although the procedure is considered long and laborious.
You can use a hair dryer to remove old paint.
When using a hair dryer, it is forbidden to deviate towards the canvas, as there is a risk of getting burns from the hot air . Compared to using a burner, this method is safer. But you need to work carefully so as not to damage the wood and create a gap.
Drill with attachment
A rather dirty, but quick method of cleaning old canvas is mechanization. You can use a drill with a specialized abrasive brush. When cleaning the surface, you should work carefully to avoid damage or chipping of the wood from metal bristles. To process the entire canvas, you should buy several attachments.
Using abrasive drill attachments, remove the old paint layer
The large volume of dust and contaminants must be taken into account, so a respirator and safety glasses should be used. It is advisable to work outside so that paint particles do not fly around the room.
Soft blasting
This technique allows you to correct the outer coating, carefully and gently removing complex stains and old varnish from wood, glass and metal without damage. Together with compressed air, the door surface will be coated with Armex biodegradable cleaning agent.
But this method has a significant drawback - the inability to implement cleaning indoors. The door must be delivered to a workshop, which will incur additional costs.
Furniture polish
A high-quality furniture polish will help hide small scratches and disguise minor damage.
The polish gives the surface additional shine, while at the same time cleaning it from dirt. Most polishes contain silicone or wax. Before treatment, the door is washed or wiped with a dry cloth, after which the product is applied and thoroughly rubbed over the damaged area.
Removing scratches from interior doors with your own hands requires patience and accuracy. You can use both home and professional products, but you will have to act gradually and methodically: first clean the coating from dirt, apply a layer of the product, let it dry, spread it again, remove the residue, polish. Sometimes you have to use several methods at the same time, combining both folk remedies and professional compounds, but as a result the door will look like new.
Putty on a wooden door
After removing the old paint, you need to level the canvas with sandpaper. It is mounted on a holder and the door is processed, which allows you to remove remaining layers from hard-to-reach areas and smooth out cracks and scratches.
After the door has been sanded, it needs to be vacuumed and degreased with white spirit. Then you need to take the primer and, after mixing, apply a thin layer to the canvas. Priming will extend the life of the wood and will also serve as a basis for applying a new coat of paint. On average, 100 grams of primer are used per square meter of product . A primer for restoration with a chalk base is suitable, and to open the varnish when doing the work yourself, use PVA glue diluted in distilled water (in a ratio of 1/1).
After removing the paint, the wooden panel is sanded and coated with primer.
If the canvas has a deep gap, then it is removed by selecting a piece of wood of the appropriate shade and size. The sliver is lubricated with wood glue and firmly driven into the existing hole. After 24 hours, the glue will dry and the surface can be primed, puttyed and painted. After this, you need to putty the door, apply a special composition with a thin spatula, which can be used to repair small dents. Next, you need to prime the surface so that the paint layer is absorbed evenly.
The putty should be distributed evenly and left to dry. Then, to eliminate small defects, you will have to treat the surface a second time with fine-grained sandpaper.
Glass replacement
Old cloudy or broken glass is easy to replace yourself. Instead, you can put a new one of any type (plain, multi-colored, smooth, embossed, tinted, sandblasted, transparent or matte). It is irrational to change glass 1 cm thick, since it will be expensive and you need to have certain skills.
Glass with glazing beads
Replacing glass that is secured with glazing beads is the easiest to do. First, they are dismantled, removing the fragments by hand. After this, you need to take pliers and a metal spatula and use them to pry the glazing bead. Use pliers to carefully pull out the nails, clean the opening with a knife or chisel and measure. For a non-standard opening, a shaped pattern is cut out of cardboard, but you need to take into account the dimensions of the glass, which should be slightly smaller than the opening. After washing and drying the glass, the design is transferred from the pattern and cutting is performed. To avoid damaging your hands, you need to use gloves and work with a working glass cutter on a flat surface.
cabinet for heated floor assembly
Fastening glass to glazing beads
The glass opening is sealed around the perimeter, the cut section is mounted, new fasteners are sawed with a jigsaw and secured with thin nails.
Glass with hidden fixation
If the glass on the door is installed in a hidden way, then you will need to disassemble the structure and unscrew the fasteners. After this, the old glass is removed and new glass is installed in its place. In this case, the use of silicone is not allowed, which will make further replacement impossible.
A major disadvantage of replacing such glass is the risk of reducing the tightness of the canvas after assembly. It will be necessary to straighten the door with a plane. Glass can be replaced with an unbreakable acrylic mirror, which will be quite durable, aesthetic, lightweight, and quick to cut.
Finishing
Once you have covered up all the defects, you should choose a finishing method. The simplest thing is painting. There is a large selection of compositions on the market, among which you can choose the appropriate tone to suit the interior.
In the store you can buy overhead facades and decorate the canvas. They are fixed with PVA glue. If necessary, wooden decorative elements are used, fastened with staples or nails.
A solid wood door can be updated with special plaster, which allows you to obtain three-dimensional and relief patterns . In some cases, craftsmen use cracking compounds, which causes the surface to become covered with small cracks and become “outdated.” A similar effect can be obtained after treatment with fine sandpaper.
Painting
Not everyone knows how to repair an interior door with your own hands using painting. It is not necessary to use oil-based paint. Water-based or acrylic compositions that do not smell and dry quickly are more suitable. Painting should be done in the following sequence:
To paint the door it is better to use water-based or acrylic compositions
For painting, you can use different paints and varnishes (latex, semi-gloss or gloss), apply stains and varnish them. But such a finish is suitable for well-preserved products. It is better to apply two layers of paint (one white and the other tinted). Instead of a roller, you can use a brush or spray gun . Existing glass inserts are sealed with tape.
Finishing with MDF panels
Sometimes repairing doors using simple methods does not lead to the expected results, so drastic measures have to be taken. When a complete renewal of the canvas is required, overlay facades are suitable. They are made from different materials. It is rational to buy an MDF insert, which does not absorb moisture, retains its shape, has optimal strength and rigidity, is quickly fixed and is inexpensive. As a result, the restored door changes its appearance radically.
MDF panels can be used as door finishing
You need to purchase a canvas of the required size, apply the facade to the finished base, securing it with PVA or self-tapping screws.
Finishing with natural or artificial leather
Previously, doors were covered with dermantine, which was distinguished by its elasticity and high strength. This material is easy to clean, resistant to temperature changes and humidity, retains its color under the influence of UV and is environmentally friendly.
Vinyl leather, in addition to its decorative function, has thermal insulation properties
Such restoration increases the thermal insulation performance of the structure, the level of sound insulation, and makes it more attractive. But the finishing process is labor-intensive, and the material can be damaged.
Finishing with wooden slats
The door can be finished with fiberboard or clapboard. Wooden slats are strong, durable, and are not subject to physical or mechanical stress. The wood must first be prepared, dried and coated with antiseptic compounds. This will ensure optimal strength of the panels, and the treatments will protect against fire. The panels are attached to a leveled surface to a pre-mounted sheathing or sheet.
The door can be finished using lining
Before cladding, wooden panels must be polished, stained, impregnated or varnished . You can choose any direction of the slats (diagonal, horizontal, vertical or geometric pattern).
Film lamination
To properly laminate the door surface, it is better not to use budget PVC film, but to choose the self-adhesive DC-FIX option. This coating will last more than 10 years, will not fade or wear out. You can take a film coating that imitates wood, stone, abstraction or another pattern that is suitable for a specific design. You need to glue the film carefully, cutting it according to the patterns in advance.
It is important to remove all air bubbles using a flat board.
Types of door leaves
In one apartment or house there can be several of them, made of different materials, the purpose is also different.
Input
They are everywhere, they can be either wooden or metal. This monumental, durable structure has a thermal layer that prevents cold from penetrating into the interior. They are equipped with strong locks and bolts. Suspended with at least 3 loops, but usually 4 are used for greater strength. They can have a decorative texture or a smooth surface. They usually putty before painting.
Interior
Interior doors are lightweight decorative structures . Sometimes glass or plastic is inserted into the panels. Interior paintings are not metal - this is impractical and inconvenient. But like other types, they need puttying and painting.
Important
It is especially important to thoroughly putty the interior door if it is to be painted with varnish. This material will make even the slightest irregularities on the panel visible.
Auto
Continuing the conversation about doors, we cannot fail to mention car doors.
This is logical, since these elements are made of metal and are designed to protect the interior from the cold, that is, they are thermally insulated. They are covered with expensive paint, highlighting any irregularities. A car door needs exactly the same preparation and puttying as a metal entrance door , with the exception of some nuances.
- Firstly, special putty is used - automotive putty.
- Secondly, the surface of the putty canvas is sanded until it is mirror smooth, which can only be done by a competent craftsman. However, with due patience and effort, even a beginner can cope with such work.
- Thirdly, the material and tools for working with a car door cannot be found in a hardware store. That's what car dealerships exist for. There you can get two-component automotive putty, consisting of fiberglass and chalk. It covers deep dents and irregularities well.
ReferenceThe final mixture contains several more components and is also diluted with a solvent. It may contain chalk, metal powder, talc, glass in microscopic granules, quartz and fiberglass. The ratio of components depends on the brand and quality of the semi-finished product.
Restoration of a veneer door
To restore the surface of the door, veneer with an adhesive base is used
There is an option for restoring a wooden door with veneer with an adhesive base.
The laminate is glued to the panel using liquid nails or glue. To hide the edges, varnished or painted slats are placed around the perimeter, after which the resulting frame is filled with material. The end panels can be painted the same shade.
The second side of the veneer has an adhesive backing. To attach it, cut strips are laid on the canvas and ironed.
Decor options in various colors
To remove scratches on doors with a dark finish (for example, wenge), machine oil is suitable.
Using a cotton swab, apply used machine oil to the scratch and allow the oil to absorb. After a few minutes, wipe the damaged area with a rag. This method is not suitable for light-colored coatings. If the doors have a beige, woody or brown tint, you can use olive oil. The principle of use is similar to machine oil.
It is better not to experiment with light and white doors, and use professional putties and furniture markers and strokes.

