An easy-to-install gypsum or cement-polymer self-leveling floor will allow you to independently level the surface of the concrete screed with optimal expenditure of working time and money. The technology is based on the use of environmentally impeccable self-leveling dry construction mixtures, characterized by ease of preparation, strength, hardening time and service life. But which self-leveling floor is better for a country house: gypsum or cement?
Gypsum and cement self-leveling floors
These mixtures received their names - gypsum and cement self-leveling floors - from the type of binder used in the mixture. As you already understood, in one case it is gypsum, in another case it is cement.
Because of this, these building mixtures have different characteristics and, most importantly, different areas of application.
gypsum and cement self-leveling floors
Advantages and disadvantages
Let’s say right away that we cannot say that cement floors are better than gypsum floors and vice versa, it all depends on the specific situation. In one case, gypsum “works” better, in another, cement, so there can be no pure “pros” or “cons”. Let's put the general properties in the table:
| Indicators | Cement floors | Gypsum floors |
| Strength | Strength is higher than gypsum | Strength is lower than that of cement |
| Drying | Dries and hardens longer than plaster | Dries and hardens faster than cement |
| Moisture resistance | High moisture resistance | Medium and low moisture resistance |
| Frost resistance | High frost resistance | Virtually absent |
| Spreadability | Spreadability is worse than gypsum | Flowability is better than cement |
| Surface quality | The surface quality is worse than that of gypsum | Surface quality is better than cement |
| Layer thickness | Narrow application thickness range | Wide range of application thicknesses, can be used as a thick layer screed |
| Environmental friendliness | Environmental friendliness is lower than that of gypsum | More environmentally friendly than cement |
| Warm floor | Used for heated floors | Used for heated floors |
| Price | The price, as a rule, is significantly higher than gypsum | The price, as a rule, is significantly lower than cement |
Now that we are familiar with the general properties, let us describe the selection algorithm:
- Warm or cold room? (cold - cement; warm - cement or gypsum)
- High humidity or moderate to low? (high - cement; low - cement or gypsum)
- Are high loads expected or not? (high - cement; low - cement or gypsum)
In principle, having answered these questions, you can already make a choice. For example, if it is a balcony, basement or unheated garage, then only a cement floor is definitely suitable, because... It's cold and damp here. If this is an office or a sales area, despite the fact that it is not cold or damp there (we hope), then you still need to use cement, because... it has higher strength, just suitable for high loads.
If this is a room in an apartment or a kitchen, then it is better to use gypsum, because: it is more environmentally friendly, there is practically no load, it levels and dries better and faster, and the price is lower. It is possible to use a cement floor in an apartment, but it does not make any sense, except, perhaps, for the bathroom and toilets. There is no need to worry that the gypsum floor will fall apart under your weight or furniture, it will not fall apart. The average strength of such floors is 15 – 20 MPa, which, excuse me, is 1500 – 2000 kgf/m2 – that’s a lot :)
We really hope that at least as little as we could, we helped to understand this issue and eased the “pangs of choice.” If you have (or have) any questions, additions or comments, please write to us by email or call, we will be happy to help.
Might be interesting:
- Self-leveling floor or screed – which is better to choose?
In our online store you can always get advice from an experienced specialist on the product you are interested in, its application and find out its properties and technical characteristics. After you have chosen a product and you are satisfied with the price and conditions, you can place an order in just a few minutes, delivery with unloading and lifting to the floor in Moscow, the Moscow region (in some cases throughout Russia) or buy the selected material for pickup from warehouse or factory. We work with both legal entities and individuals. We organize fast delivery to cities such as Moscow, Balashikha, Podolsk, Khimki, Korolev, Mytishchi, Lyubertsy, Krasnogorsk, Elektrostal, Kolomna, Odintsovo, Domodedovo, Serpukhov, Shchelkovo, Orekhovo-Zuevo, Ramenskoye, Dolgoprudny, Pushkino, Reutov, Sergiev Posad , Voskresensk, Lobnya, Ivanteevka, Dubna, Yegoryevsk, Chekhov, Dmitrov, Vidnoye, Stupino, Pavlovsky Posad, Naro-Fominsk, Fryazino, Lytkarino, Dzerzhinsky, Solnechnogorsk, Istra and Zhukovsky. Contact us, we will be glad to see you!
Gypsum self-leveling floors
Gypsum self-leveling floor is a dry construction mixture based on high-strength gypsum binder. In addition to gypsum, the mixture includes: quartz sand and special additives that improve the plasticity of the resulting solution.
Distinctive features of gypsum self-leveling floors are a relatively high hardening speed and a low threshold for the minimum pouring thickness of 1-2 mm.
A large assortment of gypsum floors from a large number of manufacturers makes it difficult to derive the average characteristics of this type of floor. However, to demonstrate their advantages and disadvantages, I will show the popular brand of gypsum self-leveling floor Knauf Boden 30. And I will start with the fundamental disadvantages of gypsum-based self-leveling floors.
Preparing the base
Preparatory work includes removing debris and dirt, removing all kinds of stains using solvents, and sealing cracks with a quick-drying agent. As the latter, you can use epoxy putty.
Preparing the base
Important! It is advisable to cover a base that is fragile or cannot be cleaned from oil or bitumen stains with an insulating material - for example, a thin polyethylene film (100 microns). Waterproofing will also be useful when laying a self-leveling floor on a surface with increased absorbent properties.
Before pouring the composition, you need to make sure that the floor is completely dry.
Table No. 3. Tools for installing self-leveling floors.
| Name, photo | What is it for? |
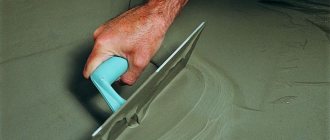
| Raklya | This is a special spatula with teeth, the size of which ensures the rapid formation of a screed of the required thickness. To apply the gypsum mixture you will need a tool with a steel blade. |
| Benchmarks | Steel devices serve as beacons on the surface of the base, helping to ensure that the coating is distributed evenly. |
| Needle roller | Designed to eliminate air bubbles formed when mixing the composition with water. If you do not remove the air using this roller, then after the solution hardens, pores will remain inside the screed. This will make the floor less durable. |
| Paintshoes | To level the uncured solution with a needle roller, you have to walk on it in such overhead soles with spikes. If you step on a wet mixture without these pads, then unevenness may remain on the surface. |
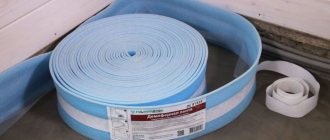
| Damper tape | A strip of porous polyethylene, fixed around the perimeter of the wall, saves the screed from cracking due to expansion when drying. |
| Level | Required to check the evenness of the coating. |
| Plastic bucket | Will be used to transfer the finished gypsum mixture. |
| Construction mixer | Necessary for preparing this mixture. |
| Primer and roller for its application | Pre-treatment of the subfloor. |
Disadvantages of gypsum self-leveling floor
The presence of gypsum binder in the mixture imposes restrictions on the use of this mixture. Gypsum self-leveling flooring cannot be used in damp rooms, much less outdoors. Only indoor spaces with normal and dry humidity are suitable for its use.
As a result, you cannot use gypsum self-leveling flooring in the apartment in the bathroom, toilet and kitchen. If the kitchen in the apartment can still be considered for the use of gypsum floors, then the bathroom and unheated balcony are not exactly suitable.
There are no other restrictions for the use of gypsum self-leveling floors. They can be used:
- For installation of connected self-leveling floors with a thickness of 25 mm or more. The bonded floor is poured directly onto the supporting base after priming.
- Floor installations on a separating layer with a thickness of 30 mm or more.
- When installing floating insulated floors with a thickness of 35 mm or more.
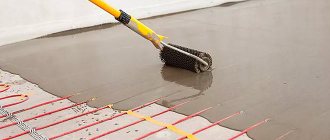
- Underfloor heating covers, 35 mm thick.
As you can see, even with restrictions on humidity, the range of applications for gypsum self-leveling floors is enormous.
I would add to the advantages of gypsum floors:
- Possibility of application by machine;
- No restrictions on finishing coatings;
- Possibility of walking in 3-4 hours;
- Complete drying for laying tiles takes 3 days. For other coatings 5-7 days.
Of course, we do not forget about the properties of self-flowing and self-leveling, after knocking out the air from the spilled solution with an aeration roller.
Criterias of choice
The purpose of laying the screed is important. For example, self-leveling compounds are not used for inclined surfaces, since they still form a horizontal plane under the influence of gravity. Cement-sand screed without plasticizers, the fibers are not made in a layer less than 4 cm, as they will crack under the influence of load, vibration, and temperature changes.
Pay attention to the selection factors:
- drying time;
- surface complexity;
- the need to lay pipes and wires;
- layer thickness;
- requirements for compressive, tensile and bending strength.
For home
Distribution of different types by room in the house:
- living rooms, offices, bedrooms - gypsum screed, expanded clay solution for insulating the floor surface;
- bathrooms, showers, bathtubs - only cement mortar or ready-made mixtures with increased resistance to humidity;
- utility rooms - any mixtures, if ceramics are placed on top;
- garages, warehouses - floor on sand-cement screed, expanded clay crushed stone without finishing is possible.
Old floors are repaired and prepared for laying mortar using a special technology that ensures long-term operation of the screed.
For apartment
The proximity of neighbors and the multi-story structure of the building impose special requirements on the screed device:
- The floors are laid with a sound-absorbing device, so the screed in the slab, prepared in a floating version, is suitable for strengthening the acoustic barrier.
- High-quality waterproofing is done in the bathroom and kitchen so that in case of leaks, the neighbors below do not flood.
How to work with gypsum self-leveling flooring
50 kg of dry mixture yields 26 liters of solution. Mixture consumption per 1 sq. meter of floor is 19 kg per 10 mm of fill.
For work you will need:
- Tools for measuring floor and mortar levels;
- Construction bucket 30 liters;
- Mixer at low speed (can be replaced with a drill with a mixer attachment);
- Squeegee for dispersing the solution on the floor;
- Aeration roller for knocking air out of the solution;
- Shoe attachments for walking on mortar.
Preparing the base
The supporting base must be cleared of debris and dust.
For a bonded screed, the base needs to be primed twice. A deep penetration primer is used for concrete slabs, a strengthening primer for weak and old foundations, and a “concrete contact” primer for monolithic concrete or ceramic floors.
If the screed is made on a separating layer, for example cellophane, on a solid wooden base. The separating layer is laid with an overlap of at least 80-100 mm, overlapping the walls of the room. An edge strip is attached around the perimeter of the room.
Under a floating screed, for example on expanded polystyrene boards, a separating layer of cellophane or lining paper is laid overlapping. Extruded polystyrene foam does not react with mixtures and does not require covering with cellophane.
If mineral wool slabs are used as insulation, then GVL slabs are laid on top of the wool. As an option, KNAUF sheets of the dry floor system.
Warm floors are installed using our own technologies.
Preparation of the solution
The gypsum self-leveling floor solution is prepared according to the instructions on the specific packaging, but the general principles are the same.
- Pure cold water (4-4.5 liters) is poured into a dry, clean bucket. Water from standing sources, reservoirs, industrial water is not suitable;
- Dry mixture (20 kg) is poured into water;
- Using a mixer at low speed, mix the mixture until a homogeneous mass is obtained. High mixing speeds add a lot of air to the solution, so they are not advisable.
Checking the consistency of the self-leveling floor solution
The consistency of the solution is checked using the graduated cylinder method. Take a piece of plywood or chipboard and wrap it in cellophane, without creases. Make a cylinder 180 mm high and 100 mm in diameter (a sewer pipe will do). Place the cylinder on the plywood, press firmly and fill completely with the prepared mixture.
With the correct consistency of the self-leveling floor solution, the mixture should spread into a “puddle” of 40-42 cm in 120 seconds.
Pouring the solution
The solution is poured continuously, from the far corner of the room. The pouring area must be chosen so as to have time to process the solution within 10 minutes.
By processing the mixture we mean spreading the mixture along the base to the required level with squeegees. Also, knocking out the air mixture with a roller or stiff brush. The brush is used when covering a warm floor with a solution so as not to damage it.
How to use
The technology of pouring the finishing screed involves preparing the surface of the rough coating and a mixture of the required consistency, followed by its uniform distribution in the horizontal plane. The primary coating is cleaned of construction debris, dust and primed with special solutions. If necessary, waterproofing is carried out with film entirely or in strips from the shelves of at least 150.0 mm. The walls around the perimeter of the room are limited by damping tape.
Next, using beacon tripods, the horizon of the filling level is established. The plane is checked with a laser level or a rule with a simple building level. Instead of factory beacons, it is allowed to form platforms at the required height.
For further actions, it is recommended to adhere to the following rules:
- Regardless of the technology used (manual or automatic), pouring begins from the farthest corner and continues towards the exit of the room.
- The thickness of the distributed composition must strictly correspond to the level of the exposed beacons.
- Level the surface with a specially prepared brush.
- Spotlights are removed immediately after passing the laying point with the simultaneous distribution of the screed material.
- Make sure the alignment is done using the correct size rule.
- The final leveling time before the working mixture sets should not exceed thirty minutes.
- The first stage of drying lasts no more than a day (you can walk on the surface), and the final drying takes place within seven days.
Drying time for self-leveling gypsum screed
The drying time of the self-leveling floor depends on its thickness and air temperature. On the packaging you will read that drying time is 3-7 days. This is true, but the question arises: drying for what.
You can walk on the self-leveling floor after 6-8 hours. The floor can be loaded after 3 days. But coatings can be laid only after full strength has been gained and humidity has been reduced to the standard level .
Pure gypsum self-leveling floors dry completely in 3 days for laying tiles, and 7 days for laying parquet and laminate. Humidity control test below.
Weber Vetonit Fast Level
This product from a Russian manufacturer, intended for installing a poured floor, can quickly harden. It goes on sale in three-layer bags of 20 kg.
The composition can be used to level the base from 3 mm to 60 mm. Such coatings are installed in those rooms (wet, dry) where moderate mechanical load is recorded. The flooring can be linoleum, laminate, tile, parquet.
The composition covers the bases:
- gypsum;
- cement-concrete;
- concrete;
- the so-called weak.
It is also suitable for arranging surfaces with a “warm floor” system (electric heating).
To use the solution, the temperature must be between +10 °C and +25 °C.
Main advantages
You can lay both a very thin and a fairly thick layer. The composition hardens quickly. You can walk on such a floor within 3-4 hours after pouring it. It is convenient to work with the material. The price is set reasonable.
Brands of gypsum self-leveling floors
- Knauf Boden 30, 25-80 mm.
- Dauer Ecoline (2-100 mm);
- Prospectors "Practical" 5-70 mm;
- RUSEAN NIVELIR II, 3-80 mm;
- Forman No. 31, 20-100 mm;
- Perfekta Normal layer, 2-100 mm;
- Paladium PalaflooR 303, 2-100 mm;
- Founds T-48 "Scorline" (FK48 R), 3-80 mm;
- Stroybrig "Bystril FK48 MR", 3-80 mm;
- IVSIL TIE-ROD-III, 2-100 mm;
- VOLMA Level Express, 5-100 mm;
- BERGAUF BODEN TURBO, 5-80 mm;
- UNIS Horizon, 5-100 mm;
- BOLARS SV-210, 2-100 mm.
Automation Features
The use of modern equipment will minimize the time of pouring the finishing screed. You can easily find a suitable copy on the construction tools market. But if the work is carried out on a small-sized plot, then the costs of acquiring it are unlikely to be justified. The optimal solution seems to be renting equipment.
The equipment is a combination in one device of the functions of preparing the solution to be poured and moving it to the floor surface while simultaneously leveling the created surface. The dimensions of the equipment allow it to be used even when pouring the finishing coating in small areas and in small rooms.
Work automation
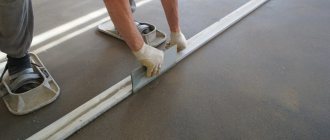
Note that automation of the process does not guarantee the final result in the form of a perfectly leveled surface. To level out minor imperfections in the newly formed screed, a grinding machine is used, which is represented by a special large-sized disk with an axial motor mount and is complemented by special handles for comfortable operator control and supporting support wheels.
Grinder
Important! When carrying out work on pouring screed using an automated method, it is imperative to follow technical safety rules and use protective construction clothing and accessories. Failure to follow these instructions may result in injury or injury.
Gypsum screed with exceptional properties of quick drying of the surface is the best option for organizing the base for flooring in small rooms and rooms where the rough concrete covering has been technologically correctly formed. Low humidity coefficient, minimal equipment allows you to carry out work quickly without the involvement of professionals.
How to fill the final floor screed using a mechanized method is presented in the video below.
Video 1. Filling the screed.
https://www.youtube.com/watch?v=KACRHxyRndc
Average score of ratings is more than 0
Share link
Comments There are no comments yet, but you could be the first...
Cement self-leveling floors
Quick-hardening cement self-leveling floors are assembled on the basis of cement binders, mineral fillers and various chemical additives that improve the plasticity of the solution.
A distinctive feature of self-leveling cement flooring is the ability to level small unevenness (from 2 mm) to significant unevenness (100 mm) of load-bearing foundations. In addition, and this is important, cement self-leveling floors have NO restrictions on room humidity. As a result, it can be used in damp areas. For an apartment this is a bathroom, kitchen, balcony, toilet.
This parameter is the main difference between gypsum and cement self-leveling floors.
By the way, I note that very often manufacturers call self-leveling cement floors of high pour thickness – levelers.
For objectivity, it is important to note that cement self-leveling flooring is recommended for “warm floor” systems and “floating floor” systems. Also excellent for bonded fast-curing screeds.
Disadvantages of cement self-leveling floor
The advantages of the mixture are not as important as its disadvantages. These disadvantages are relative, but they need to be taken into account when choosing.
Firstly, a cement self-leveling floor gains full strength and standard humidity no earlier than 2-3 weeks. The “walking” time of 6-8 hours and the “load” time of 3-5 days cannot be sufficient for laying finishing coatings that are “afraid” of moisture.
You cannot lay parquet, laminate, or other wooden coverings on a self-leveling screed before 21-28 days. You can walk in a few hours, but lay parquet only after 28 days.
What does self-leveling mean?
Why is it needed?
The floor, as you know, must be smooth and durable. A few decades ago, this was ensured by the use of cement-sand screed.
But progress does not stand still, and science has given us such a miracle as a self-leveling self-leveling floor. With its help, you can quickly and efficiently level the surface, and put it into operation in a short time.
The question of which is better: self-leveling floor or screed is somewhat incorrect. Because if you look at it in detail, self-leveling flooring is one of the types of screed. Only it is produced on a different basis and filled using slightly different technologies.
Why such a coating is necessary can be answered in a nutshell, for ideal, quick leveling of the floor. Moreover, this technology allows even an untrained person to do this work with his own hands, if he has detailed instructions.
Types of coating
For different types of premises, different self-leveling floors are used, in particular, it is customary to distinguish.
- Self-leveling coating based on cement.
- Self-leveling coating based on gypsum.
- Self-leveling coating made from synthetic polymers.
The first 2 types are more used for residential premises, as an ideal intermediate layer for laying the finishing coating. The third type is more often used for filling large industrial premises. It has also found its application in the arrangement of decorative, designer floors.
Self-leveling floor scheme
Mixtures used for flooring
Self-leveling mixtures are usually used exclusively at the final stages to create a perfectly flat floor. They are used when the height difference is no more than 40 mm. Theoretically, it is possible, by pouring layers, to even out large differences, but the price of such mixtures is quite high and such a screed will be very expensive.
Therefore, we advise you that if your floor has too large differences in plane and horizon, first fill the beacons using a reinforcing mesh with a regular cement-sand mixture, and then, when it dries, this is up to 1 month, level special solutions.
A self-leveling cement floor is a mixture of the main component, which is cement with the addition of polymer-based modifiers.
A distinctive feature of this mixture is that it is not afraid of high humidity and can be used in damp rooms.
- The coating also has a high compressive or bending strength.
- The coating, due to the presence of cement, adheres perfectly to concrete.
- Has a high degree of wear resistance.
Gypsum self-leveling flooring is a similar mixture, but uses gypsum as a base.
This coating is no longer as durable as cement.
- It cannot be used in damp areas.
- Its flexural and compressive strength is much lower.
- The coating, although quite strong, is fragile.
- It is not recommended to lay ceramic tiles on it.
- Among the advantages are the short drying time and the price is more affordable.
Scheme of decorative self-leveling coating.
Which coating is better?
This question cannot be answered unequivocally; each coating was created for specific purposes.
But it is possible to generalize and make comparisons.
- So, if you are building a bathhouse, renovating a bathroom, hallway or kitchen, then the best self-leveling floor, in this case, will be cement-based. Since, unlike the gypsum version, ceramic tiles can be laid on the cement mixture, and they are not afraid of water.
- But if you just need to level the surface in the living room, bedroom or children's room, then the best self-leveling floors will be gypsum-based. After all, the square footage of these premises is much larger, and the price of the gypsum mixture is somewhat lower. As a result, by intelligently combining the use of these mixtures, you will significantly save money.
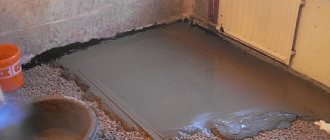
Self-filling the floor.
Test to check the moisture content of the screed
It is during this period that the cement self-leveling floor gains full strength and reduces humidity to standard levels. However, drying time may be reduced at certain temperatures. Therefore, there are tests that can be carried out to check the moisture content of the screed. Works on gypsum and cement self-leveling floors.
Test 1. Scientific
There are devices that will determine surface humidity.
Test 2. Practical
For a day, secure a piece of polyethylene measuring one meter by one meter to a screed. If moisture appears on the film after a day, the solution has not yet dried.
Test 3. Quick
Take a metal bowl and fill it with hot water. Place the basin on the screed. If, after a few minutes, a dark spot appears on the surface of the screed, it means that the screed has not yet dried.
Advantages
The gypsum-based self-leveling floor is characterized by impeccable smoothness and uniformity. Therefore, rough foundations of this type are popular when laying so-called “capricious” floor coverings (parquet, laminate, parquet boards, etc.).
With good spreadability and careful rolling of the mass with a needle roller, you can obtain an almost mirror-like surface.
The plasticity of the solution combined with adhesion reduces the likelihood of cracking or peeling. It is noteworthy that even the thickest layers are characterized by no less plasticity and adhesion.
It is worth noting that, when hardening, the self-leveling gypsum floor expands, while the gypsum-cement or cement floor shrinks.
The possibility of passing the leveling solution over the surface occurs after 5-9 hours. For example, you can walk on a cement self-leveling floor after at least a day.
In addition, the entire pouring process is quite simple even for an unskilled craftsman. The device can be made either manually or using special construction tools.
It is important that even the most uneven floor does not require preliminary preparation. That is, there is no need to use putty solutions to eliminate unevenness
It is enough just to thoroughly clean the surface to improve adhesion, and the self-leveling gypsum will “find” problem areas and level them. The thickness of the layer can reach 10 cm. For comparison, cement mixtures are poured to a thickness of no more than 5 cm.
A unique feature is the ability to absorb moisture from the base when there is excess and return it, optimizing the level of humidity in the room.
The advantages of the composition also include environmental friendliness and low cost.
Filling the screed
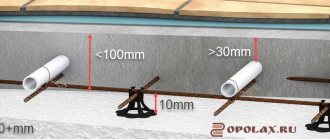
The solution is placed in the installation position using beacons made of pipes, galvanized profiles or special elements intended for this purpose. On the second day after the screeds have hardened, they are removed and the furrows are sealed with mortar.
Filling includes the following steps:
- marking and placing beacons, strengthening them with mortar;
- preparing a solution or mixing ready-made dry powder;
- pouring the mixture onto the floor, leveling;
- care of the screed until it gains strength.
A screed made of cement, sand and crushed stone is covered with plastic film or shavings. In the second option, the surface is sprayed with water daily. Before installing the layer, the surface of the slabs is treated with a primer.
How to calculate material consumption
It is more convenient to use ready-made dry mixtures, in which the number of components is specified at the factory.
The components of conventional solutions are calculated by first determining the volume of the entire layer:
- measure the width and length of the room, obtain the square footage (in m²);
- the area is multiplied by the average thickness of the screed (in meters);
- multiply and determine the volume (in m³).
Next, the ratio of materials in the solution is taken into account. For example, screed 1:3. There will be four parts in the volume, with sand accounting for 3 and cement for one. Divide the volume by four, for example, 1.5 m³: 4, to obtain the volume of one part (0.375 m³)
Then 0.375 is multiplied by 1 and by the volumetric weight of cement: 0.375 x 1.7 t, a weight of -0.637 t is obtained. The weight of sand is found by multiplying 0.375 x 3 x 1.5 (volumetric weight of sand), a weight of 1.69 t is obtained.
How to prepare the mixture
A small volume can be mixed using a construction mixer.
The solution is mixed using a mortar mixer or manually . The second method is suitable for a small bathtub or hallway; in other cases it is better to use electromechanical preparation.
The ingredients are placed in a bunker, water is taken at 0.5 of the volume of cement (ideal), but in reality the amount is increased to 0.7 to improve plasticity. The solution is poured from a concrete mixer into a bucket, then poured onto the floor.
Valera
The voice of the construction guru
Ask a Question
The thicker the mixture, the less shrinkage it will have when it hardens. Plasticizers and fiber are added to the composition. These components must be introduced when screeding heated floors.
How to fill a floor
The first beacon is placed against the wall, then the remaining planks are mounted from it so that it is convenient to tighten the mortar using a rule, leaning on the two adjacent ones. The distance should not exceed the length of the rule, and horizontality (or slope) is checked with a water or bubble level.
Laying rules:
- the thick solution is applied tightly between the beacons, the mass is “driven in”;
- work is carried out in the area of one working plot between the lighthouses;
- after laying 1 - 1.5 meters along the length, excess mortar is pulled together with aluminum or galvanized rule, sometimes round pipes are used.
After setting on the second day, you can iron the surface. To do this, dry cement is rubbed into the surface of the screed with a plaster float.
Drying time
You can walk carefully on the set mass the next day. But the layer will gain strength only after a month. You need to move along the screed to remove beacons, seal furrows, and smooth the surface. The finishing coating is not laid for about two weeks , because the mass can release moisture, which will accumulate under the finishing layer.
Valera
The voice of the construction guru
Ask a Question
You can speed up drying (not strength gain) by turning on heaters to increase the air temperature. Cracks are prevented by regularly wetting the surface with a spray bottle.
