How to properly prepare the floor surface for pouring screed? The work is carried out after the walls are erected and the house is covered with a roof. Preparation for concrete floor screed:
- Marking.
- Clearing. Surface preparation.
- Backfilling or pouring of the underlying layer.
- Creation of waterproofing.
- Creation of heat and sound insulation.
Additionally, to increase the strength of the screed, reinforcement is laid and the solution is poured on top of it.
Important! Preliminarily calculate the total thickness of the floor with the floor covering (when calculating, it is important to remember that some materials require a substrate). Otherwise, after repairs, the doorway may be blocked, or the ceiling may become too low.
Marking
The level of the covering (parquet, solid board, floor tiles, etc.) is called the finished floor. This is what needs to be found. To do this you will need a building level. Make a mark at a height of 1 m from the bottom border of the doorway. Apply it all over the walls. Set aside 1 m from the resulting line. Apply a second line to the walls at this height (finished floor).
Marking
We install beacons
Many craftsmen have problems at this stage. Setting up beacons correctly is not such an easy task. We will show you a method that will significantly save time. To do this you will need metal profiles and screws.
- Take one self-tapping screw and screw it near the corner you like. The height of the screw should be slightly below the level of the screed.
- Next, install a strip (wooden or metal) on it and determine on it the point of intersection with the “horizon line” that was previously marked on the wall.
- The next self-tapping screw must be screwed into another corresponding corner and the previous easy-to-follow process must be repeated.
- The point marked on the second staff must also coincide with the “horizon line”. If you find deviations down or up, simply adjust the screw. By marking the entire floor in this way, an ideal basis will be provided for subsequent planned work.
Beacons need to be fixed to the floor. To do this, pour a pile of mortar onto each screw, and then place the beacon on the pile and press it tightly against the screws. Remove excess solution and give the beacons time to dry. We recommend reading the article on how to independently form a dry screed in an apartment.
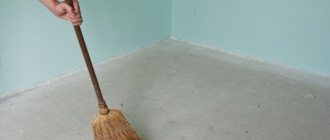
Clearing. Surface preparation
Remove the old screed. A hammer drill is used for this. Fill cracks and recesses with cement mortar. If the floor is being installed over a new floor, it is enough to clean the surface of the slab, inspect it for defects, and if necessary, remove them. If the floor is poured on the ground, it is necessary to remove the soil to the calculated depth, then compact the surface of the base.
Tamping
Prime the base
Spinal factory solutions for surfaces that highly absorb moisture can be used as a primer. It is advisable not to use materials whose instructions indicate that the cement screed can be poured directly onto a wet primer. It is best to prime the base twice. Please note that the second layer is applied when the first is completely dry. PolaRemont.ru does not recommend using a roller, since it is not capable of “penetrating” small irregularities. You can read the material about floor screed with expanded clay.
But a wide brush will do the job perfectly.
Spinal factory solutions for surfaces that are highly absorbent can be used as a primer
Creating an underlying layer
The base of the floor under a concrete screed has two types of underlying layer:
- hard (up to 13 cm) - made of concrete;
- non-rigid (up to 35 cm) - made of bulk materials (gravel, crushed stone, sand), the layers are moistened, compacted and leveled along placed pegs with marks.
Underlying layer
For the floor, a rigid layer is created along the floors; on the ground floor, a non-rigid layer is created. If high humidity is expected in the room (bathroom, kitchen), then the hard one is arranged over the non-hard one.
What are the types of floor screeds?
Many novice craftsmen ask: what is a floor screed? We answer: this is a reliable substrate between the finishing floor covering and the base itself. The reasons for using screeds are varied.
- Firstly, the floor often needs sufficient strength qualities to withstand significant loads.
- Secondly, for decoration (horizontal or vertical) in those rooms where it is necessary.
- Thirdly, situations may arise when, without reliable thermal insulation, certain rooms will feel uncomfortable. This is especially true for a “warm floor” system, where a professional screed embodies a generator that distributes the heat supply.
- Fourthly, to add aesthetics to the unpresentable appearance of wires and pipes, as well as to preserve the thermal insulation layer unchanged. It will depend only on your preferences whether the finished product will be single-layer or two-layer.
- The first layer levels the surface horizontally, or gives the desired slopes. It is usually made of a cement-sand mixture or concrete. It is commonly said that the first layer is a rough screed. You can then lay tiles or porcelain stoneware on it.
- The second layer is called finishing screed. It already makes the surface perfectly flat for the final floor covering, for example, laminate, parquet, carpet. Very often, the finishing screed is made with self-leveling floor mixtures, which provide an ideal surface when used correctly. The screed can be laid on different substrates: compacted soil, concrete or even wood.
Depending on the connection between the bases of the screed, the following types can be divided:
- A bonded screed, which is characterized by the fact that it is firmly held together by the previous layer. More often it is a concrete screed on the same concrete floor slab. The required adhesion and homogeneity of this design provide excellent mechanical strength. Such screeds can only be made in rooms where the humidity of the base is not high. They are used on the second and subsequent floors of various buildings.
- Screed separating layer. This design should exist when two different materials come into contact. For example, when a concrete screed is made on the ground. Or in the case when gypsum or dry screed is laid on concrete. So, the use of a separating layer is mandatory if the humidity of the underlying layer is higher than normal. Various rolled materials based on bitumen (roofing felt), polymer films or coating compositions can be used as a separator. Obviously, the screed will already be a separate structure, so it is advisable to reinforce it and make it at least 3-5 cm thick.
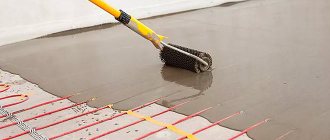
- The floating floor screed is a further continuation of the previous one. It must be arranged if any insulation is required. The floating screed is separated from the base by a layer of insulation together with waterproofing. The wall is also necessarily separated. This can be insulation, but of less thickness, or a special damper tape. Warm water floors are necessarily accompanied by a floating screed, since in addition to mechanical loads, such a screed will also change in size due to temperature effects. Working under such conditions forces the use of reinforcement and a thickness of at least 5 cm.
- Prefabricated or dry floor screed. In our country this is a relatively new phenomenon, but in Europe it has been used for a long time. On the prepared and insulated base of such a screed, filler is poured in the form of dry bulk material. Most often, granulated expanded clay is used, which is a good heat and sound insulator. Sheets of gypsum fiber boards are laid on top of it and fastened together. Such a screed is equipped very quickly and this is its main advantage. However, dry screed can only be done in rooms with guaranteed low humidity and low or medium floor load.
Screeds can also differ in the way they are installed. Let's list them:
- Continuous floor screed performed using the wet method. This is the most common, one might even say classic, method. The solution, mixed with water, is applied to the prepared base and leveled using the beacon rule. Since the main binder for the wet method is 95% cement, such screeds gain full strength only after 28 days, which is a big drawback.
- Continuous floor screed performed using the semi-dry method. This direction began to develop relatively recently. The meaning of this approach is that the working solution is added exactly the amount of water that is necessary to hydrate the cement. Such screeds dry faster—the next day you can already walk, and lay the tiles within a week. A plasticizer is introduced into the solution, which improves mobility and plasticity during installation. In addition, micro-reinforcement with fiber (polypropylene or basalt) is often used in semi-dry screeds. Fiber screed has better strength, wear resistance, tensile and bending properties than classic wire mesh reinforcement. The technology for laying semi-dry screeds is more complicated; preparing the solution requires strict adherence to the recipes.
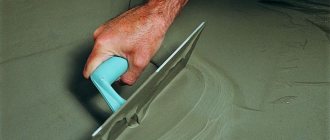
- Continuous floor screed using self-leveling mixtures. This method also applies to the wet.” As we noted, it is very convenient to make a finishing screed in this way. Such screeds are made in a thin layer of 0.5-20 mm, primarily for economic reasons, since dry mixtures for preparing solutions are very expensive. But the installation technology and the result observed later are above all praise. The working solution is simply poured onto the surface in strips, rolled with a needle roller to remove bubbles, and, in fact, that’s all.
- Dry or prefabricated floor screeds. All floor screeds, with the exception of prefabricated (dry) screeds, are made on the basis of two main binder components - cement or gypsum. There are also others - magnesium, bitumen, anhydride - but they are not used for housing construction, therefore they will not be considered. Let us note the strengths and weaknesses of these two basic materials.
- Cement-based screeds have high strength, durability and, most importantly, resistance to water. The weaknesses of such screeds are the tendency to shrink when drying and the long maturation time.
- Gypsum-based screeds are quite strong and durable. The solutions are very plastic and do not shrink when dried. They have good thermal insulation properties. Can be applied to any substrate, including wood. The maturation period is much shorter than that of cement screeds. But there is one main disadvantage—the fear of water. Naturally, in addition to the astringent component, which is the main one, the composition of any modern solution or dry mixture also includes other components: fillers and modifiers, both of natural origin and those obtained in chemical production. Therefore, modern mixtures cannot be called only cement or gypsum. It would be more correct to say cement-polymer or gypsum-polymer. In cement screeds, polystyrene foam chips are often used as one of the fillers, which gives the coating thermal insulation properties. The load-bearing capacity and rigidity of such screeds is less, this must be taken into account. In this case, a second leveling and strengthening layer with more durable fillers is also required.
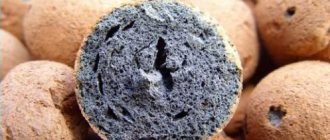
If you need to create a screed with heat-insulating properties of great thickness, another material comes to the rescue - expanded clay, obtained by firing clay. This is an excellent filler that has good thermal insulation properties, is inert, does not decompose with water and is quite durable. Another advantage of using expanded clay as a filler is a significant saving of cement and a reduction in the labor intensity of laying the screed. With the help of fillers and modifiers, modern cement screeds dry faster and shrink less, and gypsum screeds partially overcome the fear of water.” But, it must be said that hereditary diseases still remain in one form or another. Therefore, cement-based screeds are still the most versatile. Gypsum-polymer also has a place, but only in dry rooms, where exposure to water in any form is excluded.
Waterproofing options
The waterproofing layer of the floor is created in the following ways:
- Film. The strips are fastened with adhesive tape, each should overlap the adjacent one, the latter and the walls.
Film
- Roofing felt and similar materials (rolls, sheets, panels) based on bitumen or polymers. This is the best choice for the kitchen and bathroom.
Ruberoid
- Bitumen-based mastics. They are applied in several layers. The next one can be applied after the previous one has dried. At the junction of the walls and the floor, a special tape is glued and also covered with mastic.
- Polymer membrane. Heated with hot air, it is glued to concrete and a seamless coating is obtained. If the width of the membrane is not enough for this, then the individual strips are joined with glue, adhesive tape with waterproofing properties, or welded.
- The membrane is profiled. It is nailed to the concrete with dowels or glued with bitumen mastic. The spiked membrane maintains good ventilation over the underlying layer. This material is the optimal solution for flooring on the ground.
Profiled membrane
Freshly poured concrete
Freshly poured concrete
It is highly not recommended to apply self-leveling floors to a wet surface. If there is no choice and you still have to do it, then as a last resort you can coat the newly applied concrete layer with AquaStone primer.
It is recommended to carry out a test pour before carrying out the full amount of work.
Insulation and sound insulation
Thermal insulation for the floor:
- Expanded clay. It is poured over lighthouses in a layer up to 30 cm thick.
- Mineral wool. It is laid in one or two layers. The total thickness should be 10 cm. The mineral wool can be treated with a water-repellent agent.
- Expanded polystyrene. Polystyrene foam boards up to 15 cm thick are laid on the floor, using cutouts at the ends for connection. A waterproofing layer is placed over polystyrene foam if the floor is poured over the ceilings.
- Styrofoam. To insulate the floor, choose sheets with a thickness of 5 cm and glue them together.
- Polyurethane foam. It is applied by spraying, without seams. There is no need to lay waterproofing under polyurethane foam.
Insulation
When choosing a material for floor insulation on floors, for which sound insulation is required, keep in mind that expanded clay and polystyrene foam do not have sound-absorbing properties.
Important! Thermal insulation on the ground is mandatory. The floor on top of the ceilings only needs insulation if the room is located above a basement or other unheated room.
Expanded clay
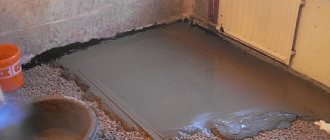
If we talk about insulation under the screed specifically for a concrete base, then expanded clay was originally created for this purpose. These are granules of foamed clay, which are simply scattered on the floor, leveled in thickness (usually within 7-20 cm) and covered with a semi-liquid concrete composition.
The thermal conductivity of expanded clay is 0.16 W/m K.
Fittings and guides
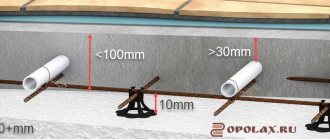
To increase the strength of the screed, a reinforcing mesh (most often made of metal) is laid. Its thickness is from 4 to 6 mm, the cell size is 10 × 10 cm or 15 × 15 cm. The mesh is attached at a height of 2 - 3 cm from the insulation or waterproofing layer, connecting the individual parts with wire.
Armature
The preparation of the new floor for screeding is completed by installing beacons made of metal profiles at a level, starting from the walls. They are fixed with cement-sand mortar. The pitch between the guide beacons depends on the size of the rule with which the screed is aligned. It should be 20-25 cm smaller than the tool.
Lighthouses
How to make a floor screed
Let's move on to the practical part of implementing the floor screed. To do this, we will divide this process into stages, each of which we will consider separately. What are these stages?
• Preparation of the base.
• Display of beacons.
• Preparation of the solution.
• Floor screed device.
At each stage we will try to explain the entire process in detail, accompanied by photos and video materials. So let's begin.
