This type of work, such as plastering slopes, is one of the important stages of finishing a doorway. Not only the appearance of the door, but also its important operational characteristics depend on the quality of work performed. Let's take a closer look at the technology and features of doorway putty.
How to apply putty to door or window slopes: description of the process
Surely each of us has encountered some kind of construction work in our lives.
After all, over time, even the most modern apartments, due to objective reasons, will require repairs. The list of all possible repairs is long. But in this article we will try to talk in more detail about how to putty any slopes.
If you want to replace a window or doors with new ones, you will certainly be faced with the need to finish the slopes. Residents of old Soviet houses often face this problem, where the quality often leaves much to be desired.
As for the work itself, it is not that labor-intensive. However, if you want to get quality and a guarantee, you should contact experienced craftsmen. If you are interested in doing the work yourself, then you need to familiarize yourself with a number of rules and recommendations.
Don't be afraid that you won't be able to do such a responsible job. With the proper desire and diligence, you will certainly be satisfied with the result.
However, before you begin, you will need to make sure you have all the necessary materials and tools.
Possible mistakes
- Applying too many layers . To prevent the putty from crumbling, a thin reinforcing mesh is fixed between the layers.
- Applying the next layer without drying the previous one will cause the putty to crack.
- Working with dirty containers and tools . Small particles falling on the spatula form grooves in the finishing layer, deteriorating the quality of the coating.
- Wrong choice of spatula . Beginners are recommended to work not with a rigid, but with a flexible canvas.
- Errors in preparing the mixture . The diluted putty should have the consistency of thick sour cream, in which the spatula can stand vertically.
Proper puttying of slopes is a guarantee of aesthetics and heat resistance of the window unit. Therefore, before carrying out construction work, you should think through all the stages so that the finishing is successful.
List of tools
To achieve your goals, you will need to arm yourself with tools such as a set of spatulas, a small bucket, a small tray and roller, primer brushes and tin snips.
However, this is not all that may be useful to you. If you don’t want to prepare the putty by mixing it by hand, you can use one construction trick. For this you will need a drill and a special mixing attachment. In this case, the mixing process will be significantly accelerated. In addition, the quality of putty prepared in this way will be much better.
In order to monitor the integrity of your work, you will need to arm yourself with a level.
Putty work
The entire planned volume of work should be divided into a number of stages, performing them gradually and efficiently.
Surface preparation
Before you begin preparing the solution, you must first clean the area on the wall where the putty will subsequently be applied.
Remove from the wall old wallpaper, pieces of peeling plaster and anything that will interfere with the proper application of the solution.
At the next stage, after the wall is prepared, it must be primed. This is the only way to ensure that the putty will firmly adhere to the wall surface.
Preparing window slopes
But at this stage, surface preparation does not end. If you are concerned in advance with the problem of removing excess putty or primer from surfaces near the place where the solution is applied, then you will probably take care of purchasing molar tape.
By pasting in advance the surface of the door, window or wall where the putty work will be carried out, you will greatly facilitate cleaning at the final stage of the planned work.
Preparation of the solution
You've probably come across ready-made putty mixtures sold in most hardware stores. Despite their variety and advertising guaranteeing that this is exactly what you need, you should not pay attention to them.
Any experienced specialist will tell you that only homemade putty will work best. And the point is not that this is the only way you can guarantee the preparation of the optimal consistency of the solution, but that the ready-made mixture sold may not be suitable in your case. Selecting them is quite problematic, especially if you do not have sufficient experience and knowledge.
Mixing putty
Therefore, if you decide to prepare the composition yourself, first of all prepare a small bucket or container in which the solution will be mixed.
Why is it recommended to use a small container for mixing? The thing is that the resulting solution will harden quite quickly. Therefore, to avoid the situation that you have not yet had time to apply the solution, but it has already hardened, it is recommended to prepare it in small portions.
In addition, when preparing the solution, it is recommended to use water at room temperature.
The mixing itself is best done using the above-mentioned drill with a mixing attachment.
Sealing slopes after installing the front door - how to seal and sheathe it on metal
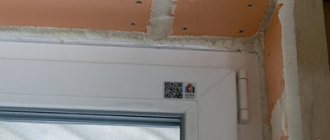
When the installation of a new door is completed, it still does not look attractive. And the reason is that there are still cracks that lead to the development of drafts. Unprotected polyurethane foam quickly absorbs moisture. Thus, heat loss occurs in the room. All these problems can be avoided if you take care of installing slopes. The installation process is not particularly complicated, so you can do everything yourself.
Installing door slopes on the front door
In order for all work to be carried out efficiently, the following sequence of actions must be followed:
- Prepare the slopes, remove all loose and protruding elements, stains and dirt.
- Treat the surface with a primer.
- Install beacons.
- Apply and level the first layer of plaster.
- When the solution has set, plaster the slope a second time. In this case, it will already be finished. If a finishing material such as tile or stone is planned during the cladding process, then their installation is carried out directly at this stage. For these purposes you will have to use suitable glue.
Video showing the finishing of door slopes after installing the front door:
Plaster finishing
If you decide to use plaster to finish the slopes, you must first prepare the following tools:
- putty knife;
- trowel;
- rule;
- level;
- mixer;
- painting mesh;
- masking tape;
- lighthouses;
- metal painting corners;
- plaster; but how plastering on polystyrene foam occurs is indicated here.
- final putty;
- liquid primer;
- sandpaper.
Sequence of work
Beginning of work
The first priority will be to select a suitable spatula. And here the question is not what material it should be made of, since almost all of them are made of stainless steel, but what dimensions it should be.
During construction work, spatulas of various sizes are used. In your case, the optimal one will be the one with which it will be more convenient to work. If the scope of work is small, then your own small spatula will do. If the volume of work is large, as is the surface area to which the solution will be applied, then a large spatula will be useful. However, it is best to keep several types of spatulas on hand and use them as needed.
Selecting a spatula for the job
After you choose the right spatula for you, you will need to prepare a starting putty. To prepare it, certain proportions must be observed. It is customary to dilute one kilogram in two or even two and a half liters of water. The mixing process itself must be carried out until a homogeneous mass of the mixture is obtained. Lumps are not allowed.
Another important point is the thickness of the layer of applied solution. A thickness of five to seven millimeters is considered optimal. It is recommended to apply the starting putty itself using a spatula, with strokes from bottom to top.
foil for electric floor heating
If you are faced with a problematic area, then you will probably need additional materials such as a special plastic mesh and a perforated corner. With their help, you will not only simplify the work process, but also protect the applied solution from accidental external influences.
Perforated corner
You should not ignore some of the nuances of putty work. It happens that there are depressions on the surface requiring repair. In this case, you will need to divide the process of applying the starting putty into two stages.
First of all, you need to carefully putty the recesses, aligning them with the main surface. After this work, you need to let the solution dry. This takes about a day. Only after it has hardened can you begin the second stage of applying the starting putty.
Completion of work
The final step will be applying the finishing putty. The rules for applying it are somewhat different from the process described above. The thing is that it is finely dispersed and is designed to obtain a smooth surface.
First, make sure that enough time has passed for the previously applied solution to harden.
Next, you need to carefully rub over with a mesh all the bumps and irregularities remaining after applying the starting putty. Only after this the finishing one is performed.
Grouting the layer with a mesh
The solution must be applied in small portions. The thickness of the resulting layer itself should not exceed 2 millimeters.
At this stage it is very important that the resulting surface is sufficiently smooth and without any defects. However, if you subsequently plan to put wallpaper on this surface, then you don’t have to bring it to perfect condition. Wallpaper is guaranteed to hide the presence of small defects.
If you want to complete the job perfectly, then after the solution has hardened, go over it with abrasive sandpaper. This way you can bring the surface smoothness to perfection.
Later, after the priming process, a layer of special water-based paint can be applied to the resulting surface.
Source
Sequence of repair actions
When you have the necessary tools and materials, you can begin to work. Next, we’ll look at how to repair the door leaf if you’ve punched a hole in a fiberboard door.
We offer you a sequential algorithm of action:
- Before filling a hole in a fiberboard door, remove it from its hinges and place it on a horizontal, flat and stable surface.
- Armed with a construction knife, we make a hole. To do this, you need to retreat some distance from the edge and make a cut with a confident and strong movement.
- Now you need to place paper, newspapers, sections of fiberboard, chipboard, wood, and shavings inside the door leaf. This manipulation will allow the structure to gain strength. In addition, filling the space can reduce the consumption of polyurethane foam.
- Construction foam should be laid on top of the filling materials.
- When the mounting compound has completely dried and hardened, its excess should be removed by cutting off with a knife. If there are many traces of foam on the surface of the door that are impossible or impractical to remove with a sharp object, use a solvent.
- The next step in repairing a hole in a fiberboard door is to coat the area where the hole was with epoxy resin. When performing this manipulation, be sure to wear gloves. This substance coats the foam, forming a dense protective crust on its surface. If resin gets on your skin, remove it with a solvent as quickly as possible.
- After hardening, the surface of the door is covered with putty. The required amount of material is collected onto the tool, after which it is evenly distributed into the cracks.
- When the putty has dried, you need to walk over the area to be treated with fine sandpaper to clean and level the surface.
- We complete the repair of the fiberboard door by applying three layers of primer to the surface. When it dries, you can finally coat the door with varnish or paint.
How to plaster slopes: do it right
The design of door slopes is an obligatory part of major repairs or finishing of a newly built house. Plastering them can be considered a classic design today. This method, although it takes a lot of time, is the most reliable: with this finishing there are no voids left. Although this is not an easy task, if you follow the technology, plastering slopes with your own hands can also be done at a good level. In any case, you can prepare the surface for wallpapering yourself.
We plaster the slopes with our own hands: if you follow the technology, everything will work out
Technology
Plastering the slopes begins after the surface of the main walls is leveled. The work ahead is dirty, so it is advisable to cover the door leaf, floor and door frame with film, oilcloth or other similar materials. You can cover the jamb with masking tape - it will be easier to clean.
Preparation
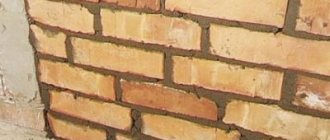
The first stage of work is surface preparation. First, poorly adhering plaster, pieces of brick, and other building material are removed. If the doors have been replaced, the old plaster may stick out a lot. In this case, even if it holds up well, it gets beaten up.
If the old plaster sticks out a lot, it is refinished
Then, grease or oil stains, if any, are treated with neutralizers. Old paint is also removed: plaster does not adhere well to it. Afterwards, remove dust and dirt.
If the cracks were not foamed when installing the door, you will need to do this now. Polyurethane foam is applied to the wetted surface in a volume of no more than 1/3 of the required amount. First, clean out all the dust, then moisten it with a spray bottle. In a few minutes it will greatly increase in size, filling all the empty spaces. After waiting for the foam to polymerize (harden), the excess is cut off with a knife. It’s more convenient to do this with regular stationery paper.
If plastering is to be done with cement-sand mortar, the surface is moistened. This can be done from the same spray bottle or using a brush or roller.
Setting up the guides
It is more convenient to plaster slopes with your own hands, as well as walls, using guides. On the outside of the doorway, to obtain a smooth and rigid edge, a perforated paint corner is usually placed. Once secured well, it can be used as a guide.
It is cut to the height of the doorway. The upper edge of the corner, which will be adjacent to the main wall, is cut down at an angle of 45°. It is better to do this, since during work this edge for some reason always lifts up and causes a lot of inconvenience.
You can fix the corner in several ways:
There shouldn’t be too much solution, but there shouldn’t be too many voids either.
Having pressed the corner well, it is leveled so that its edge is flush with the main wall. The solution that protrudes through the holes is removed with a spatula. Then they take a level bar (you can use a building level or a rule), apply it to the corner, checking how level the corner is. They check both from the side of the main wall and from the side of the slope.
The procedure is repeated on the other side, and then on top. At the junction of the corners, the absence of differences can be checked by running your finger along the joint.
There is another way to attach the corners - with nails or self-tapping screws. This method is good when working with drywall, but it is not used when plastering: the caps get in the way.
When plastering door slopes it is convenient to use a template
The second guide is the door jamb. When installing the doors, they were aligned straight, so this is a good guide. But since the solution should not cover the entire surface of the jamb, a template is cut out of some dense material, which is then used to level the solution. It is better to cut it out of a piece of plastic: the edge is smooth, glides well, and is quite dense. You can use a piece of flat wooden plank. Only the edge that will cut off the excess mortar should be perfectly smooth. The part of the template that will slide along the jamb is made in the form of a step. This protrusion will remove excess solution.
Chevy Niva front right door
You can work with a spatula or a rule, but then a beacon is installed and secured along the jamb at the required distance. The tool rests on it when cutting off excess mortar.
In this video tutorial on plastering slopes, the technology for attaching perforated corners is explained in detail, and explanations are given regarding the technique of applying putty during finishing.
Formation of a slope using finishing material for mortar
- All finishing materials are attached to cement mortar or special glue.
- To level, screw in the screws so that their heads are all at the same level. Since the sheathing will rest on these caps, take into account the thickness of the finishing fabric.
- The voids of the slope are filled with a solution, and a reliable adhesive composition is selected. For better fastening, glue is applied to both surfaces: the finish and the surface of the slope.
- Then the finishing material is applied and pressed down a little. We check all work with a level.
- The final stage is attaching the platbands.
Do-it-yourself rough plaster of slopes
The process of applying plaster to a slope is no different: a solution is poured onto a dust-free and wet surface. They do this with a wide spatula or a paint bucket - depending on how you are used to it. It’s more convenient to start from the bottom and work your way up.
By running a rule or template along the guides, rocking from side to side, the solution is leveled, and the excess is removed back into the container. For the first penetration, you don’t need to achieve a particularly flat surface, but be sure to monitor the condition of the corners - remove excess mortar regularly.
Plaster slopes are made in two stages: the first is rough, the second is finishing
Some problems may arise when plastering the upper slope: it is more difficult to apply the solution here. It is taken with a wide trowel (spatula) and, pressing lightly, applied with a slight pull. If the surface is rough, there are usually no problems. They can occur if a concrete beam is installed on top. The solution, especially cement-sand, does not “stick” well to such a surface. In this case, you need to pre-impregnate it with a primer, which serves to improve adhesion (adhesion) to finishing materials.
Treatment may also be necessary if the surface on which the DSP plaster is applied strongly absorbs water (silicate and clinker bricks, for example). Only in this case should the primer further reduce moisture absorption. The second way out is to use special Knauf compounds - they do not react so sharply to a lack of fluid. And the third way is to apply a layer of tile adhesive to the surface treated with primers, forming a wave with a notched trowel. Tile adhesive admirably “clings” to the most difficult surfaces, and itself serves as an excellent base.
If all this seems very complicated to you, read the article on how to make slopes from MDF. Everything is extremely simple there. No solutions or spatulas, and the result is excellent. Or you can make slopes from plasterboard. The look is almost the same, but it’s faster to do. After installing plastic windows, you can make plastic slopes.
Finishing layer
After some time, or the next day, the dried plaster is leveled by applying a second finishing layer. You can’t start leveling too early - the solution “floats” and loses its shape. Touch the plastered surface: the solution should crumble, but not “float”.
For final leveling, the solution is made a little more liquid. It is also applied and stretched. Only this time you need to make sure that the surface is even. If necessary, the solution is re-added into the voids, filling even minor holes.
Secrets of smooth plaster: the rule is not to pull straight, but in zigzags
Grout
This stage creates a perfectly flat surface. The plaster can only be rubbed after the mortar has set. To do this, at least 16-24 hours must pass (depending on humidity and temperature). To determine if you can start grouting, take some mortar from the wall between your fingers and rub it. If it crumbles, you can work; if it smears, we wait again.
The solution is made even more liquid. It is no longer applied, but rather poured onto the surface. And it is distributed not with a spatula or template, but with a grater - a foam surface with a handle. With this grater, use a circular motion to distribute the solution over the surface. The plaster becomes smooth and monochromatic. This procedure is optional, especially if everything will then be puttied. But this is how your DIY plastering of slopes takes on a finished look. But we repeat once again - this is not necessary.
This video shows how to plaster door slopes with cement-sand plaster. The case is complicated, the explanations are detailed, but in some places the sound is not the best.
Selection of plaster mixture
For plastering work, two main types of mixtures are used:
Cement-sand .
In rooms with high humidity, unheated rooms, on slopes of entrance doors, external slopes and surfaces intended for finishing with ceramic tiles, cement-based solutions are used. Such materials do not suffer from significant changes in humidity and temperature and are highly durable. You can prepare a simple mixture yourself from sand and cement grade M400 in a ratio of 4:1. They are used for economic reasons when it is necessary to process large, rough surface defects.
It is more practical to use ready-made mixtures with a balanced composition, plasticizers and improved adhesion.
In areas where additional thermal insulation is needed, warm plaster filled with perlite or vermiculite is used. Plaster .
To form internal interior slopes, which are prepared for the application of paint, wallpaper or decorative plaster, gypsum starting mixtures are used. Gypsum-based solutions are more flexible and easier to process. Gypsum is much lighter and has lower thermal conductivity.
Finishing of plastered slopes
If the slope is then painted, the putty will be leveled perfectly. To do this, apply two layers: starting and finishing. The starting putty has a coarser grain; it can be laid in a layer of up to 1 cm. With its help, all defects that are difficult to remove with cement mortar are eliminated. After the finishing putty has dried, all irregularities and protrusions are sanded with a special mesh. Afterwards a layer of finishing plaster is applied. It is even more plastic than the starting one, and can be applied in a very thin layer. With its help you can achieve perfect smoothness.
For a beginner plasterer, getting a perfectly flat surface for painting is very difficult. It is much easier to level the slope for wallpapering. In this case, you can stop at the starting putty.
If, when installing the door, the old slopes were not damaged much and can simply be restored, there will be less work. You just need to pour the solution into the depression and level it with a long trowel (trowel).
Step-by-step instructions for puttying
Let's move on to consider the question of how to putty the slopes of windows with your own hands practically.
First of all, using a level, we install perforated corners that protect the corner sections of the slopes from possible damage and ensure a more uniform distribution of the solution over the surface. We measure the length of the corner, carefully cut off the excess part with metal scissors, coat the inner surface of the element with putty solution and press it against the sloped corner, checking its vertical position with a level.
We begin to putty the window slopes, applying the starting material, without which no repair work can be done today. We apply a mortar layer five to seven millimeters thick, which is enough to hide defects in the plaster coating and form a smooth slope surface.
Many people are interested in how, and most importantly, how to properly putty the slopes on windows. The mixture is applied with a spatula with a wide blade, onto which the putty is first applied with a small tool.
Broad strokes are made on a flat surface, moving from the bottom edge to the top, pressing the spatula blade tightly against the slope.
If the slope is old, it is recommended to install a reinforcing layer by attaching a plastic mesh to its surface. The existing recesses are filled with putty first, after which the entire surface is leveled to a general level. The internal corner is formed with a special spatula, the working parts of which are located to each other at an angle equal to ninety degrees.
If the situation requires applying a second layer of putty mixture, you should wait until the first layer is completely dry.
We continue to putty the slopes for painting. Once the starting material is completely dry, it will show minor unevenness, which should be removed with a special sanding mesh. We bring the surface to a smooth state, since finishing putty is not used to fill defects.
Apply the putty solution for finishing in a thin layer, no more than one to two millimeters. If we putty several times, we change the direction of movement with the tool with the next applied layer.
We process the dried slope surface with fine sandpaper or an abrasive mesh mounted on a grinder or grater.
The process is not difficult, but you should not make much effort so as not to scratch the surface.
Having finished sanding, all that remains is to paint the slopes with a water-based composition. To improve adhesion, it is recommended to coat the putty layer with a primer.
Plastering a doorway
Sometimes doors are not placed in the opening, but even in this case the doorway requires finishing. And the easiest way to do this is with plaster. The technology of the plaster itself is similar, but the guides and methods of their installation are different.
Plastering the doorway begins only after both adjacent walls have already been plastered. The opening itself is covered with a primer (the selection principle is the same).
The guides are installed from the sides. These can be boards, metal profiles, two rules, pieces of plastic, fiberboard, etc. One is installed on the right, the second on the left, they are fixed. The most convenient way to secure them is with clamps. If there are no clamps, you can use nails or screws - the remaining holes will then need to be carefully repaired.
To plaster a doorway, you need two guides, which are installed on both sides
The leading edges of the guides will serve as the basis along which the rule or wide spatula will move. The sequence of actions is the same: the first layer is rough, the second is finishing, if it is necessary to bring it to perfect condition, grout is done. For more information on how to putty a doorway, watch the video.
Source
Features of finishing for different walls
The easiest way is to seal openings in panel houses. The walls made of panels are stronger than brickwork and do not crumble at all, so the box is tightly installed in such an opening. You will need a little foam to seal the opening.
The brickwork is thicker than a concrete wall, so there will be room to turn around.
The material for the slopes can be anything: drywall, plastic and other sheet materials are suitable.
If you want the finish to look neat, use PVC panels as the finishing material; they are the most durable. Yes, and you can match the color of the door frame without any problems.
Puttying slopes with your own hands - video
Puttying slopes is a labor-intensive process, but if you know the sequence of steps and have the necessary tools at hand, then such work can be easily done at home without special skills. The main thing is to purchase the necessary materials and tools, prepare the surface, create the necessary conditions in the room and take your time. This article provides detailed instructions on the work process, as well as a video describing the nuances of the work.
corrugated sheeting for the dacha on the fence
Threshold device
When deciding how to finish a door threshold, you need to take into account the material and dimensions of the doorway frame. It can perform its functions only if several factors are taken into account:
- Floor level. This point must be taken into account first of all; it directly affects the height of the threshold. If it is located high, it will impede movement around the room; if it is low, it will also bring inconvenience. A standard step rises to a height of no more than 3 cm; if the door is installed in a private house, then this parameter is determined taking into account certain conditions;
- Material. It is selected taking into account the intensity of use of the structure and the expected load. If the threshold is installed, then you need the most durable material. For doors inside the house, you can use plastic, wooden and metal thresholds;
- No gaps. It is necessary that the threshold exactly matches the shape and dimensions of the opening. It will be good if our craftsmen install the slopes right along with the threshold.
Slope putty
Puttying slopes depends not only on the efforts of the worker, but also on the quality of installation of doors, windows, openings and walls. If there is damage, then they require dismantling. To make the walls more even, it is worth using plasterboard blocks, and only then deal with the slopes. The main condition for the success of repair work is the sequence of actions. First you need to prepare the necessary material, carry out installation, apply a base layer and then proceed to the finishing putty.
IMPORTANT! Particular attention should be paid to installing a perforated metal corner or replacing it with a plasterboard template.
Plastering work for window and door slopes Plastering slopes requires preparation. First, let's look at the problematic issues that may arise. It is necessary to install the structure and take into account the area where the electrical wire passes, if any. The room must have a comfortable temperature for repair work, otherwise cracks may appear later or the plaster may come off completely. Let's consider a step-by-step algorithm of actions.
When to install interior doors?
Content:
- Interior doors: at what stage of renovation is it better to install them?
- Selection of interior doors
- Non-standard doorways: to fit standard dimensions or not?
- Premises requirements
- What happens if you install door blocks at the beginning of the renovation?
- Finishing the floor or installing doors: what to do first?
- Finishing walls or installing door blocks: what to do first?
- Laying tiles on walls or installing doors: the correct order of work
- Sliding door systems: when to install them
- Installation of rotary doors
Interior doors: at what stage of renovation is it better to install them?
Installing interior doors is one of the mandatory stages of almost any renovation. Door structures perform the function of zoning space, provide good heat and sound insulation, creating a cozy atmosphere in the apartment.
When to install interior doors during renovation? It is generally accepted that door blocks must be installed at the final stage, when almost all the finishing touches of the room have been completed, which is why the purchase of door panels is often postponed until the very end of the renovation.
Still, Porta Prima factory experts recommend starting to prepare for installing door blocks when you are at the very beginning of the repair process, and there are several reasons why you should definitely follow these expert tips.
Selection of interior doors
If you are making renovations in a new building with a flexible layout or major renovations in an “old” apartment with a thorough redevelopment, then already at the stage of drawing up a design project, you and the designer will determine which doors will be installed. These can be either regular swing door units or sliding or rotary structures. Each of these types of doors has its own requirements for the preparation of openings, which should be taken into account when carrying out repair work.
An apartment in a new building is usually rented with an open plan, often without any internal walls. And it is very important to correctly create openings of optimal width in accordance with the functionality of the room.
If you are making renovations in a secondary home, it is worth considering whether you are satisfied with the size and location of the existing passages into the premises, because it is extremely difficult to bring furniture or large equipment into an opening 60-70 cm wide. It may make sense to widen the passage to the kitchen, bathroom or living room, or completely move poorly located doorways.
Non-standard doorways: to fit standard dimensions or not?
Apartments in old buildings and houses in the private sector often have doorways of non-standard height or width. When carrying out renovations in such housing, their owners are faced with a choice: adapt the openings to standard designs or order non-standard canvases.
When deciding this issue, the following factors must be taken into account:
- products of non-standard sizes are made to order, their delivery may take several weeks or even months;
- canvases of non-standard dimensions are more expensive by at least 30%, and in some cases by 50% or even more;
- When manufacturing and installing door structures of unique sizes, the requirements of ergonomics and operational safety must be taken into account.
During repairs, it is much easier and cheaper to adjust non-standard openings to the dimensions of standard door blocks. In this case, you will be able to order and install door leaves of any design and color from those on the market, without wasting effort, time and money on ordering non-standard door products.
Premises requirements
Installation of interior doors can be carried out at any time of the year. The main condition is that at the moment when the door blocks are installed, the room must be warm and dry. This means that all so-called “wet” repair work must be completed, which includes plastering and puttying walls and ceilings, installing cement screed, and pouring self-leveling floors. Otherwise, the installed door blocks may swell and become deformed.
The walls of the openings must be aligned vertically; according to building codes, the maximum permissible deviation of the structure is no more than 3 mm. Otherwise, the door block will not be able to be installed correctly, which will disrupt the aesthetics of the interior.
Before purchasing door structures, it is necessary to correctly measure the openings. Mistakes at this stage can lead to additional financial expenses, so it is best to use the services of professionals.
Do not forget that door structures must adapt to the humidity and temperature conditions of the apartment or house. Before installation, it is advisable to leave them indoors for 1-2 days.
What happens if you install door blocks at the beginning of the renovation?
If doors are installed at the very beginning of renovation work, there is a high risk that they will suffer from negative external influences. When you renovate a room by applying plaster or putty, the room will be damp and quite dirty. Therefore, door structures will almost certainly suffer from high humidity, and the decorative coating will be contaminated by splashes of the solution if a special protective coating for the product is not used.
During repair work, craftsmen constantly carry stepladders and large tools from room to room. In this case, there is a high probability of accidental damage to the new sashes; scratches or dents may remain on them. And by hanging the canvas before pouring the floor screed and laying the floor covering, you may not guess with the gap at the bottom, which will lead to the need to change the height of the opening and reinstall the door block so that it opens and closes well.
Finishing the floor or installing doors: what to do first?
Many people are concerned about the question of when to install interior doors - before or after laying laminate, parquet boards or ceramic tiles? It is better to install the door blocks after laying the finishing floor covering - it will turn out beautifully and neatly. You will also completely eliminate the risk of errors. After all, when laying, for example, tiles, porcelain stoneware or parquet, the difference in the height of the rough screed and the finished floor can be several centimeters.
Selection of putty and other materials
Puttying windows begins with preparatory work. The room should be cleaned as much as possible; dust and debris may get into the mixture or paint. First you need to select all the necessary materials and start with the basics. Putty for slopes should be selected based on the following indicators:
Putty is divided into three types: starting, finishing and specialized. The first thing to do is level the surface. The second removes imperfections before the decorative coating is applied. A third may be required to seal the joints. The fourth one can replace all the previous ones. Builders and repairmen call it a budget option.
On a note! Prepare the surface thoroughly before starting work. All debris and dust must be removed.
Tools and materials
Puttying slopes will require the necessary tools and available materials. For a quality installation you will need the following list of tools:
IMPORTANT! To ensure clear edges, you can use a perforated corner. Last but not least on the list is primer.
Slope leveling technology
The stages of work include leveling the walls. To do this, you should cover the entire area around with newspaper and begin leveling. To avoid touching the jambs, you can stick masking tape on them. Preliminary priming of the surface is required before puttying work. After the walls are ready, you need to dilute the mixture, if you purchased powder, and begin the main work.
Preparation of putty mixture
Puttying window slopes most often begins with making a solution. This process needs to be given special attention, because the result will depend on the quality of the mixture. The starting and finishing compositions have a similar mixing method. Let's consider a step-by-step algorithm:
On a note! Before starting repairs, stir the composition again.
Leveling slopes Do-it-yourself puttying of window slopes is done after the primer has been applied. Remember that the soil must dry well. Therefore, you first need to apply a primer, and then mix the solution. Beacons are always installed at windows and alignment should begin with them, and then move on to the perforated corners. The profile material is placed on the plaster in several layers. No more than 5 mm.
You can use a wooden template or a piece of drywall. It is cut strictly along the window opening and screwed with self-tapping screws. Its thickness should be equal to the thickness of the wall. Then you need to draw out the corner using a level and apply putty. The drywall is removed only after the mixture has completely dried.
Finishing putty
After the initial processing of window slopes, we move on to the final stage. It will only be required if the finishing is not done with wallpaper or tiles. Finishing putty is carried out only to prepare the surface for painting. It is not critical to apply it even to a fresh starting layer. You will need both spatulas to work. One will pull the mixture along the slope, and the other will apply it.
The blade of a large spatula should be longer than the slope, in this case the result will be without scars the first time. After the finish is applied, you need to give it time to dry completely. Only after this you need to treat the surface with sandpaper. Work the spatulas close to the frame. It can be pre-covered with masking tape.
Sanding and painting
The windows will look perfect, but there will still be some minor flaws. They can be easily hidden by sanding and painting. The most important thing: the slope had to be completely dried. You will need sandpaper for sanding, and a brush or roller for painting. The paint should not be very thick. In this case, it will lie flat, too liquid will leave smudges. If the paint is chosen in a delicate color, then additional layers may not be required.
On a note! Give preference to water-based or water-based paints. If you want the shade to be more saturated, paint in 2-3 layers.
Installation of gypsum board sheets
Let's figure out how to cover a doorway with plasterboard quickly and easily. In principle, there is nothing complicated at this stage. Here it is important to accurately mark the dimensions of the opening on the sheet and cut out the required area along the contour. To do this, you only need a sharp construction knife.
Along the marked lines, cut the cardboard layer one by one, then simply bend the sheet at the place of the cut. Thus, go along the entire contour.
There should be two such blanks. First install one of them. Fastening is carried out along the entire perimeter and along the installed crossbars. Then go to another room and lay soundproofing material between the frames. For example, it could be ordinary mineral wool or foam panels. The gap between the sound insulator and the frame can be filled with polyurethane foam.
Now you can install the second workpiece and secure it with self-tapping screws. Pay attention to how the fastening is done correctly.
- The self-tapping screw should be recessed 0.5 cm deep into the sheet.
- The distance between adjacent fasteners is 10-15 cm.
- The distance from the edge of the panel to the attachment point is 1.5-2.0 cm.
If there are still small gaps on this side between the gypsum board sheet and the end of the opening, they can be foamed.
In fact, you have already sealed the opening in the wall; all that remains is to align the walls of the room with the installed plasterboard sheet. Putty is used for this. But before this, it is necessary to treat the gypsum board sheet itself with a primer and seal the places where the screws are installed with a thin layer of putty.
After drying, a layer of putty solution is applied to the entire area of the sheet, extending onto the walls of the room. If necessary, the leveling material is applied in two layers. Before the second, the surface to be treated must be primed again.
Installation of a perforated corner
This process is considered the most important and time-consuming. You need to choose a metal profile; it will shape and reinforce the slope better than others. Not only will it provide direction, but it will also make basic plastering of the walls easier. Let's consider a step-by-step algorithm of actions:
The amount of solution spent will depend on the thickness of the protrusion. Place the corner and use a spatula to fill the gap in several places at once. The voids should be filled as tightly as possible. At the same time, lightly press the corners into the mixture and monitor the surface equally using a level. The adjustment must be strictly vertical.
On a note! Only when the solution has hardened a little, remove the remaining mixture from the boundaries of the profile. Don't worry if there are small uneven spots, they will go away during sanding.
Preparing the work surface
Let us remind you that puttying window slopes is considered a labor-intensive and slow process that requires preliminary preparation of the surface.
The frames are sealed with masking tape to keep them clean. This requirement is especially relevant for wooden structures. An exception is made for plastic windows, because such frames can be washed.
It is recommended to cover the glass with plastic film, because the solution that gets in and is not washed off in time dries quickly and is difficult to clean.
Developers often wonder whether it is necessary to prime slopes before puttying window openings?
Yes, this needs to be done, for which it is better to use deep penetration compounds that ensure better adhesion of the putty mixture and the slope surface. The primer guarantees resistance to moisture, strengthens the surface, and does not emit toxic substances harmful to the human body. It should contain antiseptic additives that prevent the appearance of mold and mildew.
Before priming the slopes, they are cleaned of dirt and dust, the old covering layer, if any, is removed, and poorly adhering plaster is knocked down. After this, the surface is primed, carefully working with a brush.