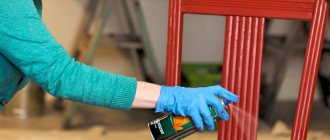
Is it possible to dilute the ready-made putty mixture for walls with water?
In construction stores, putty is sold in dry form: it will have to be mixed with water.
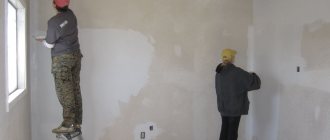
Ready-made formulations are quite expensive and are not suitable for use in large volumes. Inexperienced builders may encounter a number of difficulties when breeding. There are 2 types of putty: starting and finishing. The first is needed to level the surface, the second serves as the basis for any decorative finishes. The method of preparing each solution is different. It doesn't require much effort or skill to get started. The process of diluting the finish looks technically more complicated, since you need a drill with a mixer attachment.
The dry mixture can be diluted with plain water or, even better, with a liquid primer. Some sellers sometimes try to impose a professional solution for these purposes. However, this is all a waste of money. Water will do the job perfectly. It can be added at the beginning of work or during the process if the thickness of the material is not satisfactory.
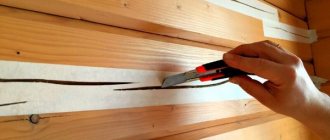
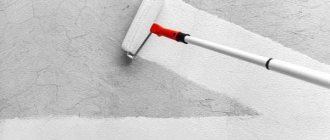
The walls are puttied at an angle: the larger it is, the thinner the layer of putty material will be needed for the job. You need to work quickly, without leaving even for a minute. This will prevent the mortar from turning to stone.
Preparation of finishing putty
The technology for preparing the finishing material is practically no different from the starting material. Only with the finishing mixture should you pay due attention to re-mixing. Since the presence of lumps in the solution will significantly complicate the work process.
The positive qualities of the finishing solution include:
- creating a smooth surface;
- possibility of applying a thin layer;
- high drying speed.
To prepare the finishing putty you need:
- Wash all working tools thoroughly. There should be no dried residue on it.
- Pour the required amount of water into the bucket and add dry material in the correct proportion.
- Mix it all manually or mechanically until a homogeneous mass is obtained.
How to do this correctly and how to dilute semi-finished products?
To understand the intricacies of diluting a semi-finished product, sometimes it is enough to read the instructions. But each type of putty mass has its own characteristics.
- You need to select a container - its volume will depend on the amount of putty needed for repairs. It is most convenient to do the kneading in a plastic container, but you can take an aluminum one.
- The water should be at room temperature: the dry mixture will not dissolve in cold water, but hot liquid will “cook” it and turn it into an incomprehensible mass.
- Make sure that the mixture from the bag is dry.
- For maximum quality, it is better to use a drill with an attachment. The tool should have a soft start mode, so as not to splash the room, rotate the nozzle in both directions. The ideal mixing speed is 600 rpm.
There are two universal ways to dilute putty.
- Pour the dry mass into the container and gradually pour in the liquid. You need to look at the proportions on the packaging. Stir gradually. The process is somewhat reminiscent of preparing yeast dough: housewives carry out similar manipulations with flour.
- In the second option, we do all the steps in reverse: first fill in the water, and then slowly add the powder. It is best to bring the mixture to a homogeneous state with a construction mixer. The device will give the solution the required viscosity.
Before deciding how to dilute the putty, you need to know that this material is used for interior decoration and exterior work. Based on the scope of its use, the solution can be given a detailed classification - according to composition and proportions.
Acrylic
Diluted with ordinary water. The volume of liquid should not exceed the weight of the construction mixture by 3–5%. After adding water, the composition is thoroughly mixed. The surface to be puttied is cleaned, slightly moistened, then you can begin to work. It is possible to apply several layers: their number depends on the relief.
The surface must dry well. Only after this do they begin grinding and polishing.
To work, you will need several wide spatulas. First, mix a small amount of solution. It is important to practice transferring it from one spatula to another so that the mixture does not end up on the floor. This method helps you understand how to apply putty to the surface.
Gypsum based
Gypsum putty can be paste or powder.
It is used in rooms where there is no high level of humidity. It dries in two to three days. Often it is used to decorate walls intended for painting. The cooking algorithm looks like this:
- The composition is poured into a bucket filled one third with water.
- After thirty seconds the powder should settle.
- The solution is mixed with a power tool for several minutes.
- If the mass has not acquired sufficient viscosity, add more water or powder. The main thing here is not to hesitate: after a while it will no longer be possible to do this.
- The solution is stirred twice in a row, maintaining an interval of one minute.
- Check the viscosity level: if everything is done correctly, the putty will easily stick to the wall, but will not remain on the spatula.
With cement
This type eliminates any unevenness, cracks, and can be used in any room - both with high humidity and with dry air. Additionally, cement putty is used to finish the facades of buildings made of concrete or brick.
Stores sell ready-made solutions or dry mixtures. The required consistency is achieved by kneading. The density will depend on the type of work. For example, to level walls, a thick mass is needed: for defects to become invisible, the layer can reach several centimeters.
Having applied the first layer of the mixture to the surface, do not rush with the second: it can curl up and tear off the initial layer, increasing the drying time. Wait until the first layer is completely dry.
Polymer
Polymer putty is made on the basis of polymers and plasticizers. Its main advantage is the combination of plasticity and elasticity. These mixtures are suitable for different types of premises. The solution is applied in a light layer; it can be used even on rough surfaces.
- To mix such material, dry powder is poured into a container with liquid.
- Mix thoroughly by hand or with a tool.
- After ten minutes, knead again.
- Polymer putty is applied to the surface of the walls in a layer no thicker than 3 mm.
- The dried surface is smoothed with sandpaper. This must be done with smooth movements in a circle, but without pressure.
Withered
Many have encountered a situation where, over time, a dried lump was discovered in a jar of putty. There are three factors that can lead to this mixture being in an unusable dried state:
- Temperature conditions : storage at sub-zero temperatures is not allowed.
- Sealing of packaging. When the can is opened, the mixture dries quickly as the diluent evaporates.
- Over time, most substances in nature undergo caking and separation. During long-term storage without movement, the particles are arranged into levels.
Such a product will not lie on the surface in an even layer and can seriously spoil the result of the repair. But there is one small trick: the mixture can be applied a second time by adding a small amount of liquid. A “rescue operation” can only be carried out once.
How to mix wall putty at home: proportions
Almost all types of repair work at the cladding stage use putty. Its use allows you to properly level the walls, give them a more aesthetic appearance and remove minor irregularities such as holes, bumps, etc. In order to use the mixture without fail, you need to know how to properly dilute the putty, then it will turn out one-dimensional and easy to use. To prepare the mixture, it is often enough to simply read the instructions on the packaging, but complete information about the resulting consistency is not always provided. It is quite difficult to take into account all the possible nuances of preparation, but we will highlight the main pitfalls in the question of how to dilute dry putty.
Types of putty
Today, many types of materials are used for puttying walls, the range is really large, usually the type depends on the purpose and the effects on the mixture.
Absolutely all putties are finely dispersed mixtures that differ greatly in quality characteristics, color and grain fraction.
There is a classification taking into account the material used in their basis: gypsum, cement and polymer putties.
Cement
Putty made from cement is characterized by a gray color, but is highly resistant to high indoor moisture. Well suited for use in rooms with high moisture content, as well as for outdoor facades.
There are putty options prepared on the basis of white cement; they combine the quality characteristics of the material and at the same time have a pure, white color, only this mixture is much more expensive.
Plaster
Gypsum putty is primarily used for interior work.
It also implies additional external treatment of the putty using paint, wallpaper or some other options.
The advantage of the solution is its attractive snow-white color, but in terms of resistance to moisture it is much inferior to the cement base. So it is used in rooms with moderate moisture content.
Acrylic
Polymer putty is a modern type of material; it is also divided into acrylic and latex bases.
Acrylic is actively used for arranging the facade of a building, but it is also well used for interior work.
Acrylic putty has a medium grain, which allows it to be used as a rough, leveling and finishing layer.
Latex
The latex version has found its use exclusively in interior decoration. Its main advantage is its high ductility, elasticity and resistance to shrinkage, as well as cracking of the applied layer.
This way it is applied mainly in a thin layer and allows you to maintain the appearance of the structure intact for a long time, which neither plaster nor cement can boast of.
Finish
The finishing putty is fine-grained, it allows you to perfectly level the surface, which becomes uniform and smooth to the touch. Starters are used to give a smooth surface to the walls; it is important for use when it is necessary to apply small layers of up to 3 cm.
If a larger layer is required, the surface should be pre-plastered.
At the same time, the leveling putty is quite strong and can replace the starting putty.
Universal
Universal putty options are somewhat more expensive and have average properties, the grain fraction is medium in size, and the binder varies greatly depending on the amount of water added.
Universal
It is convenient for use in leveling small parts of the wall, especially if the hole is deep.
Breeding
How to properly dilute dry putty without a mixer at home
In general, when it comes to the question of how to properly mix starting putty for walls, there are two main methods, both of which are actively used. Now let's look at the first method. The principle of how to mix putty for floors and walls in this perspective is very reminiscent of kneading dough.
It is enough to take a container, but it must be dry, and pour in the required amount of the mixture, usually determined by eye. Next, water is added in small portions.
In this case, it is necessary to observe exactly this order; when pouring the putty into the water, it is taken in pieces that will have to be pressed manually. To learn how to dilute gypsum putty, you need to consider the issue step by step.
Putty can almost perfectly level any surface, as well as give the layer additional strength. Here you will find out how long it takes to dry.
Sand is a loose mixture that is formed as a result of the destruction of rocks under the influence of water. Here is the calculation of the volume of sand in a ton.
Cement is a mineral material that, when combined with water, becomes durable and plastic. By clicking on the link, you will become familiar with the density of M400 cement.
How to dilute and stir wall putty without a mixer:
- take a small container, plastic containers work well, but must be clean. Pour about 7 trowels of starting putty and add a little water. Everything is thoroughly mixed. A necessary condition for preparing a high-quality mixture is ideally clean dishes;
Pour putty
- if dust, dirt, or pieces of organic matter get in, the mixture will quickly harden, and you will not have time to work it out before that moment;
- After thorough mixing, add the rest of the dry putty and pour in water. Now mix everything again, a homogeneous mixture should come out. Pay attention to the bottom and sides of the vessel, as there is often unmixed putty there;
- When preparing gypsum putty, you should be aware that it dries quickly, but you should not apply it immediately after mixing. You should wait 3 minutes for it to acquire quality properties. Then it is mixed again;
- It’s now clear how to mix wall putty, but the proportions can vary greatly depending on the type of work being done. Most likely, after mixing, you will have to adjust the consistency by adding the necessary ingredients;
- the mixture hardens quickly, so you need to prepare such a quantity of putty that it can be worked out in 20-30 minutes, after which the putty begins to harden. You will have to knead the mixture little by little, which is better than struggling with the dried mixture and ultimately throwing it away;
- There is another nuance in the question of how to properly dilute putty, which lies in the specifics of the gypsum mixture. It absorbs moisture well, which is why it swells somewhat;
- thus, during the hardening process, it dries out a little, which can cause cracks in the corners, which are eliminated using finishing putty;
- it can be used for rooms with humidity, since gypsum absorbs water, but it is better to prevent constant changes in moisture, as well as the transfer of liquid into the walls;
Also, too thick a layer can be a problem, as uneven hardening occurs. Cracking is possible due to the type of material on which it is applied; putty does not stick to wood, or rather, it falls off over time, and cracks will appear in the near future.
In this case, destruction can occur due to poor preparation of the wall, especially if it consists of bulk materials.
In this case, particles of the wall are drawn behind the spatula, and they fall into the mixture, which leads to unevenness of the material, and therefore its fragility.
How to mix and dilute wall putty with a mixer by hand
This option is used much more often if the household has a drill or screwdriver with a mixer attachment. How to properly dilute and mix putty at home:
- pour a little water and add the mixture, add putty until the desired thickness is obtained;
- depending on the type of putty base, it may form lumps, but the mixer easily removes them;
- if you have experience, you can prepare putty in large quantities, but of higher quality;
- prevent the penetration of air in large quantities, otherwise cracks or bubbles in the putty may occur. Use a rotation speed of about 800 rpm. At first, when there is still a dry mixture, it is necessary to knead extremely carefully, otherwise part of the putty will be blown up with air.
Repeat the stirring procedure every 15 minutes if preparing a large portion. This will preserve the diluted putty before it begins to harden.
Dilution with a mixer
Before diluting the putty and specifying the proportions of water and the mixture, it is necessary to determine the purpose and size of the application layer.
Usually the proportion is determined by eye, take a trowel, tilt it at an angle and watch how it stretches.
Determining the proportion
If the entire mixture immediately falls off in one clot, this indicates poor stirring, since there is a layer of water on the trowel, which will greatly interfere with application to the surface.
The prepared mixture should be left for a few minutes and only then applied. Also re-mix to increase the elasticity and plasticity of the putty.
How to dilute and mix the finishing
For finishing putty, the procedure is similar, but there are some nuances that are worth paying attention to. It should be understood that the finishing putty is applied in a thin layer, so its consistency should be liquid. If it turns out like sour cream, you should add more water.
To find out how to dilute dry putty and clarify the proportions, you should read the instructions. By and large, even without skills in this area, you can prepare a suitable consistency by eye.
When preparing the finishing putty, it is worth paying due attention to mixing, this includes not only the first mixing, but also further hardening. You will have to periodically stir the resulting mixture or prepare it in small quantities.
If it is necessary to re-dilute the putty, use a different container so that the remnants of the previous batch and water do not affect the quality of the solution. If there is no suitable container, you should rinse the bucket from the previous use with boiling water.
Wipe containers and tools dry, otherwise the dry mixture will stick to the edges and complicate the mixing process.
To learn more clearly how to dilute finishing putty, you can watch the video:
Some tips on what proportions to stir the material in, how to preserve it so that it does not dry out
Beginning builders often ask, is it possible to dilute dried putty? No. It is taken in one lump and can no longer be diluted (this is its main essence). Therefore, to clean vessels and instruments, you will have to use a mechanical method.
Please note that lumps may form when loose mixtures are picked up from the wall, especially from the back of the spatula, or if there is residue on the nozzle or in the container. Everything needs to be cleaned in a timely manner.
It is convenient to wash the mixer by immersing it in a bucket of water and setting high speeds, so the mixture will dissolve itself in the water, but you will have to wipe the surface a little.
It is necessary to exclude even small lumps, since the layer thickness is often about 1 mm.
Any lumps will be clearly visible. If it was not possible to prevent the appearance of lumps and they have hardened a little, so that the mixer no longer picks them up, you can use a little trick.
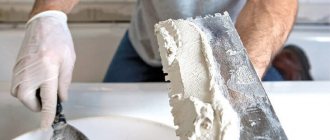
Place a medium amount of mixture on a spatula and apply it to the wall in thick layers. Then turn the spatula at an angle of 60° and, using pressure, remove excess and also crush the pieces.
Don't be afraid to use large spatulas, they are more convenient when working on a large area without external elements that get in the way, like a gas pipe.
They are not only convenient, but also practical; it is easy to see areas with unevenness on the wall using a spatula as a level. It is advisable to have an arsenal of spatulas of different sizes.
Conclusion
Construction stores sell putties in dry form, which must be mixed with water, and in prepared form. Cooked types are more expensive and not suitable for use in large quantities, but are versatile.
Dry mixtures are also divided into finishing and starting options. Each has its own task, which leads to significantly different properties and composition. Sometimes it can be difficult for an inexperienced builder to dilute the putty, as the plaster can crack.
The cause is usually due to improper use or mixing technology. Common reasons: there was not enough water, most often this is clearly visible when mixing, the layer of plaster is small, which prevents it from acquiring an independent shape. It is recommended to lay at least 5 mm.
Useful advice from experts
Even experienced craftsmen are not always able to create a uniform mixture. It will be useful to get acquainted with some of the “tricks” of builders:
- Before preparing putty, be sure to thoroughly rinse the container.
- If water is taken from a pond, it is advisable to filter it through at least a layer of paper.
- To prevent the mixture from drying out in vain, it is better to prepare it in small portions. A suitable amount is one that you can spend in twenty minutes of work. After this time, the solution begins to thicken.
- If the mass turns to stone, it can be softened with cold water. But you won’t be able to do this several times with the same material: the effect will no longer be there.
- You cannot dry the layers of mortar using an accelerated program (for example, with a hair dryer) - they will crack.
- When working, it is better to use large spatulas: with them it is several times easier to process large areas without external elements such as heating pipes.
AQUAPRINT CLUB
The point of my question was how to dilute the putty, that is, to make it thinner or thinner. And you tell me that I don’t need this. Explain why I don’t need a more liquid putty than I currently have
Added after 3 minutes 4 seconds: By the way, fiber micro putty, I continue to take advice.
Lyokha, dilute it with polyester resin. He uses the same hardener.
Added after 44 minutes 47 seconds: now I was diluting liquid putty (I use NOVOL) so the thought came to me, what if I dilute it?
Types of acrylic putty
Acrylic putties, since they are produced only in finished form, can be divided according to the types of work that can be performed with them:
1) Putty for interior work. This material is only suitable for rooms with a normal microclimate, without high humidity and steam.
2) Facade . It is used for exterior decoration of buildings and structures, and can also be used inside, provided there is a “wet” room.
3) Universal. Can be used for external and internal work.
It should also be noted that the scope of application of acrylic putties is very wide compared to other finishes. Acrylic can be applied not only to brick or concrete, but also to drywall, and even wooden or metal surfaces. This is also an absolute advantage of acrylic putties.
How do mixtures differ from each other?
Entering any specialized store, the average person may be stupefied by the huge number of types of wood putty. There are so many options that choosing one specific material is very, very difficult.
So how are they different from each other? First of all, it is the main connecting component. It is this that influences the cost of the putty and its durability and quality.
And before we move on to a detailed description of the various types of wood putty, let's define the main qualities that this material should have, regardless of the binding component:
- High adhesion to wooden surfaces. Today you can find on store shelves the so-called universal putty, which, according to the manufacturer, has high adhesion to any materials. It’s hard to believe, and you can only check it experimentally, so if you plan to work only with wooden surfaces, then it’s better not to choose a universal putty.
Peculiarities
The material is a one-component composition, with a paste-like consistency, for a better bonding effect between planes. It should be noted that the material does not need to be diluted or added. It is completely ready for use and application to the surface of your choice.
For concrete walls, water-dispersion putty is best suited. This is due to the fact that concrete is actively destroyed under the influence of steam and water intervention. Dampness and moisture cannot have a positive effect on this coating, so this type is used.
From the features, it can be revealed that due to its practicality and versatility, the acrylic mixture has gained great popularity and is in demand.
Recommendations for selection
To begin with, it is worth noting that there are water-dispersed acrylic putties designed for finishing concrete or wooden surfaces.
The advantage of such compositions is their excellent water-repellent parameters. In addition, VDAK is more ideal for application to walls than to ceilings. This is due, first of all, to its less dense and dense structure, which somewhat complicates the ceiling decoration.
In order to level the ceiling space, it is advisable to choose a universal putty that has the necessary consistency, optimal density, and transparency.
To select the required density of the composition, it is necessary to carefully study the technical characteristics of the mixture. High density indicates a “tight” consistency, which is not always appropriate for certain bases, for example, walls. And low density is not suitable for ceiling finishing work.
To choose the right volume, you should accurately determine the purpose of the repair. That is, if you only plan to update the old putty layer, then it’s a matter of finishing compounds, the consumption of which will be on average 500 g/m2 with a layer thickness of 1 mm, which is quite enough for cosmetic work.
In the case of serious plane defects, it is best to give preference to starting or universal mixtures with a flow rate of 1000-1500 g/m2.
Application of the composition
Working with acrylic putty is a fairly simple task even for a non-professional. As before starting any finishing work, it is necessary to prepare the surface for further application.
That is, dismantle the outdated finish, clean the base and treat it with a primer. After the primer liquid has been completely absorbed, it’s time to proceed directly to puttying.
Since most often the acrylic mixture can be found in finished form, after opening the container you should thoroughly mix the mass to use the precipitated components.
Preparation of the dry mixture involves mixing it with water in certain proportions specified in the instructions.
Acrylic putty is applied using a spatula and rules. After hardening, the putty needs light sanding.
Today, puttying work during indoor renovations has become an integral step towards creating smooth and attractive surfaces. Acrylic putty for interior work is a real treasure for both a qualified specialist and a home craftsman.
Combining a lot of advantages, the composition is winning more and more consumer preferences every day and is increasingly displacing analogues in the rank of popularity.
Acrylic putty, due to its many advantages, enjoys authority among builders. The features of this finishing material, as well as its application, will be discussed in this article.
Pros and cons of acrylic putties
Although acrylic putties are practically universal and often used, of course, they, like any material, have their advantages and disadvantages. To make the right purchasing decision, it is worth considering all the details.
Pros:
- No smell. Acrylic putties are made on a water basis, they do not contain a solvent, even an organic one, and therefore there is no aroma.
- Excellent adhesion. Thanks to this property, the material can be used on any surface.
- Thin layer. Finishing acrylic putties can be applied in literally one millimeter layer! This allows them to produce a very thin and smooth surface.
- Plastic consistency. Acrylic putties have the most ideal elasticity, compared, for example, with gypsum or cement. Even an amateur in finishing work can work with this material.
- There is no shrinkage. After drying, the finishing layer remains practically unchanged, the shrinkage of the acrylic putty is minimal and not noticeable to the naked eye.
- Resistant to ultraviolet radiation , not afraid of direct sunlight.
- Highly durable. Surfaces finished with acrylic putty can withstand moderate mechanical stress without problems. Compared to others, such as gypsum putties, acrylic putties create a much more durable layer.
- Long service life. Acrylic putties can last in their original form for many years. They do not turn yellow, do not crack, do not collapse for ten or even more years.
- Tinting. Acrylic putties belong to the type of finishing materials that can be easily tinted. Before starting work, you can add colorants to them, mix well and get a colored finish. This is convenient because you don’t need double work: putty + painting, and also, if subsequently, for example, with a strong impact, a chip is formed, then it will not be noticeable in the painted putty.
- Safe for health. The composition of acrylic putties is completely safe for health, it meets all necessary environmental control standards.
- Fireproof. Acrylic putty is absolutely fireproof. It does not burn, does not ignite, does not smolder.
- Thermal insulation properties. This finishing material helps retain heat in the room and has proven to be an excellent additional heat insulator.
As you can see, the advantages of acrylic-based putties are many and all of them are significant, which effectively works for the overall image of this finishing material. Due to its rich advantages, acrylic putty is widely in demand.
Minuses:
Grinding. No matter how carefully and thinly the layer of putty is applied, it still needs to be sanded after complete drying - this is the only way to get a perfectly flat surface. Acrylic putties are quite difficult to sand, as they generate a lot of dust. Because of this, it is imperative to work in a respirator, and also change the sandpaper as often as possible, since dust clogs the abrasive and it stops sanding properly.
Thin layer. On the one hand, the fact that acrylic putties are applied only in a thin layer is an advantage, on the other hand, it can also be a disadvantage. This happens when there is a need to level out significant differences. For acrylic putties, a layer of more than 7 mm is unacceptable! This means, if necessary, it must be applied in two or more layers.
Low air temperatures. Acrylic putty loses the consistency required for work at ambient temperatures below ten degrees Celsius. It becomes inelastic and is not so easy to apply, and it shouldn’t be. Acrylic finishes should only be worked in a warm environment.
Price. Acrylic composition is not a cheap pleasure; all materials based on it have a high cost. Of course, it is fully justified by the high quality and properties of the product.
Of course, if we talk about the advisability of buying acrylic putty, then despite its shortcomings, the advantage will still be significant.
The only significant disadvantage affecting the purchase of this material may be its price. In this case, specialists often do a combination of things: for the initial work they use more budget-friendly brands of putty, and then the final finishing is done with acrylic-based material.
How to dilute putty: advice from professionals
Putty (putty) is a mixture similar in structure to paste, which is used to level walls and ceilings under the finishing coat. Don’t know how to choose the right putty and how to dilute it correctly? All secrets from professionals in this article!
What types of putty are there?
Putty is divided according to consistency; it can be dry (used for mixing) and paste-like (ready for use).
A common type of putty is dry; you can find it in a bag in stores or markets. The strength of such a mixture lies in its low price, the putty is convenient for transportation, the shelf life is quite long, and such putty can be diluted to the extent that you need. There are also instructions on the package with which you can dilute the putty, but there are still some general principles of preparation that are not written on the packages, but are important to know. Because of this, the mixing process is a big disadvantage of this type of putty. Another disadvantage is that the resulting putty, already diluted, must be quickly and completely used before it begins to harden.
Ready-made putties are most often sold in buckets; their shelf life is also long.
Also, putty can be divided according to the type of binder raw material: cement, gypsum and polymer.
Putty with a cement base is waterproof and is best used in rooms with high humidity. But, this putty often shrinks, after which another layer is needed. This putty gains strength very slowly, and because of this, microcracks are possible in some places.
Putty with a gypsum base does not shrink, and therefore it can be applied in a very small layer, for example, 1 mm, but at the same time, this type of putty is afraid of temperature changes and high humidity levels.
Polymer putty provides a high-quality coating, but its price is high; there are many different low-quality fakes.
The choice and preparation of putty depends on the classification of purpose.
For the initial finishing of walls, window and door slopes, and elimination of planning defects, leveling or starting putty is used. This putty can easily replace conventional plaster. If you already know how to properly mix putty for walls, then with the help of such knowledge you will most often get an elastic, manageable consistency of the material that will adhere perfectly to the surface, unlike plaster mortar. It should also be noted that the putty dries quickly, unlike plaster. For example, plaster takes about 28 days, while putty will be ready for finishing in 3 to 5 days. But, such saved time and effort will be reimbursed in its price.
Preparing putty for walls
Well, you purchased a bag of dry mixture, it needs to be diluted with water, but not everything is as simple as it seems. In order to know how to properly prepare putty, you first need to think about what stage of finishing it is needed for.
For starting putty, the mixture must be thick, since this type of putty is applied in a large layer, and with its help large surface defects are hidden. The size of the layer can reach 5 cm, because of this the mixture is applied in several stages. To ensure that the resulting solution does not harden too quickly and does not “float”, it should be diluted with purified river sand, but it is important that the sand is free of any impurities and clay, proportions 1:1. But this method is used only for gypsum mixtures for indoor work. A flawless coating will not cause any cracks or shrinkage.
For finishing putty, more stringent requirements apply. Consequently, gypsum-based mixtures are used to decorate the interior of the room.
It is important to know that the smaller the fraction of the dry mixture, the smoother the coating will be.
To work you need to prepare:
Any large bucket or other suitable item. Enameled or galvanized utensils are also suitable, but plastic is still better suited for working with putty. But just don’t use any basins or other containers with a rounded bottom; only a right angle at the base is needed.
Further, running water at room temperature is required for work; you cannot use hot water containing rust and debris.
It would be good if you used a drill with a mixer attachment, with a soft start function, so as not to contaminate everything around and the reversible rotation, in other words, should spin in different directions. The drill speed should be about 600 rpm, this will allow the mixture to be thoroughly mixed without whipping it into foam, and will also saturate the putty with air bubbles. But if you don’t have such a drill, don’t despair, because many stores provide building materials on deposit. But if you can’t get it as bail, then you’ll have to mix it manually, and this, alas, is hard work.
You will also need a regular paint brush, a container of water or a spatula about 12 cm in size.
And the last thing you need is a regular bucket of water to wash the nozzle.
So, let’s spread the putty step by step:
- Fill a clean bucket with the amount of water indicated on the package.
- The walls should also be wetted, this can be done in a circular motion.
- Apply the required amount of putty.
- Leave the resulting mixture for five minutes, but do not stir immediately, let the putty limp a little.
- Stir, watch the consistency, add water if necessary or add dry putty.
- Wash down the remaining putty around the edges using a small spatula or brush. Continue stirring, moving the nozzle in a circular motion in both directions, from side to side and from bottom to top. Pause periodically to scrape the edges of the bucket, then knead again.
- Take out the drill and lower it into a bucket of water, where we dip the attachment for a short time in both directions. If you do not do this procedure, then after the mixture dries on the nozzle, it will be impossible to wash it.
- Leave the mixture for 15 minutes, then pour in one tablespoon of PVA glue. By adding it, you will give the putty elasticity and softness, and after the mixture dries it will be quite strong.
- And mix everything thoroughly again.
Is it possible to dilute the ready-made putty mixture for walls with water?
In construction stores, putty is sold in dry form: it will have to be mixed with water. Ready-made formulations are quite expensive and are not suitable for use in large volumes. Inexperienced builders may encounter a number of difficulties when breeding. There are 2 types of putty: starting and finishing. The first is needed to level the surface, the second serves as the basis for any decorative finishes.
The method of preparing each solution is different. It doesn't require much effort or skill to get started. The process of diluting the finish looks technically more complicated, since you need a drill with a mixer attachment. The dry mixture can be diluted with plain water or, even better, with a liquid primer. Some sellers sometimes try to impose a professional solution for these purposes. However, this is all a waste of money. Water will do the job perfectly. It can be added at the beginning of work or during the process if the thickness of the material is not satisfactory.
VGT Extra white 1 kg, Acrylic putty for wood, finely dispersed
VGT Extra is a finely dispersed putty for sealing knots, cracks, and other wooden surfaces.
Can be used as a finishing putty, incl. in places with high humidity or in periodic contact with water.
Recommended for sealing knots, cracks and other defects in carpentry.
- For sealing knots, cracks and other defects in wooden surfaces
- For carrying out other important finishing works on fiberboard, MDF, chipboard, concrete, brick, plaster
Working with acrylic putty
In order for the coating to serve for many years and remain intact and visually attractive, it must be applied correctly. Working with acrylic has its own nuances that are worth paying attention to.
1. Surface preparation. In no case should you be irresponsible about this stage and skip it or perform it in bad faith. It is very important that the surfaces are clean, free of dust and traces of dirt, grease stains and the like. Otherwise, the acrylic putty may lie unevenly or not adhere firmly and fall off over time.
If you plan to work on sealing cracks or crevices, they must first be cleared of remnants of building material and dirt, and must also be provided with free access for dense placement of putty. Laying acrylic putty with gaps is unacceptable - in this case, sealing the cracks may be ineffective.
2. Primer. When working with acrylic putties, priming is a mandatory step and cannot be ignored to achieve a quality finish. Primers in this case are also used on an acrylic base, but the specific type is selected depending on the source material of the surface. For example, if you have clean concrete walls, then they need to be primed with a special adhesive primer, and if the surface is pre-plastered, then a deep penetration primer would be the best choice. There are also universal acrylic primers for atypical cases.
The primer is easy to apply even on your own - it is best to do this with a soft velor roller or a special natural brush. When distributing the composition, you need to make sure that there are no dry areas left, and if there are cracks or chips, then pay special attention to these places and thoroughly moisten them with primer. After the first layer has dried, re-application is necessary. And only after the second layer of primer has completely dried - and this takes about a day - can you begin subsequent work.
3. Puttying the surface. Acrylic putties have a good elastic consistency, making them easy to work with. The easiest way to apply them is with a simple metal spatula of medium or large size, transferring the mass from the bucket onto it with a small spatula. If the putty is too thick and difficult to spread over the surface, you can dilute it with ordinary clean water at room temperature. You shouldn’t add a lot of water at once; it’s better to do it in doses, in small portions, stirring the mass thoroughly, otherwise it’s easy to turn a thick mass into a very liquid one, which will be much more difficult to correct.
4. Surface cleaning. When the putty hardens well - the hardening time is always indicated on the packaging, it must be sanded to a smooth, even state. The easiest way to do this is with sandpaper or mesh. They are fixed on hand graters or on a special hammer drill attachment, depending on the size of the area being treated. When performing grinding work, it is imperative to follow safety precautions: wear a respirator, safety glasses - a lot of dust is generated in the process.
If there is a need to apply subsequent layers of putty, then after sanding the first layer, it must be cleaned of dust and primed, and then puttyed again with acrylic putty. No matter how many layers are needed, the algorithm of actions must be followed the same: sanding - cleaning - priming - putty. After applying the last layer of putty and before further finishing, it is also necessary to apply a primer.
How to dissolve VGT universal acrylic putty?
Last year we bought VGT universal putty, now we want to use the leftovers. How to dissolve VGT universal acrylic putty?
comment to favorites Kim Jong-un [412K] 3 years ago
Acrylic universal putty "VGT" is available in finished form,
This is not a dry mixture that needs to be diluted before use, this putty just needs to be mixed and you can work.
If you need to change the consistency (for example, the putty is too thick), then it dissolves (more precisely, it is diluted) with ordinary water.
But water is added to the finished putty without fanaticism, no more than three percent of the total mass of the “VGT” putty; after adding water, mix thoroughly.
It is also important to note that after drying (completely), this putty is no longer soluble in water, it does not absorb water at all, because it is a waterproof putty.
This putty is applied in a thin layer and is usually used for painting, that is, the putty itself is not the finishing layer, but the last of the preparatory ones.
Last year we bought VGT universal putty, now we want to use the leftovers. How to dissolve VGT universal acrylic putty?
If you stored it in the wrong conditions in an open container, the putty will set and will not dissolve with anything, just throw it away.
About invoices
Acrylic putty for wood, concrete or any other type of surface can not only improve the performance of facades, but also enhance the aesthetic potential of the entire building. Finishing putties are presented in the following textures:
- Bark beetle This is one of the most popular textures. It is used not only for finishing facades, but also inside many rooms. Usually this is the kitchen, corridor or hallway. The bark beetle looks like a canvas that has been fairly sharpened by bark beetles, leaving characteristic passages. A special plastic grater will create the desired effect due to the fact that the granules in the composition can “deform” the surface in a special way;
- “Pebble” acrylic facade putty. The application of this mixture differs significantly from the option described above. By using specific granules, a pattern is formed on the dried surface of the decorated canvas. It seems that there are a lot of pebbles concentrated on the surface of the wall, tightly packed next to each other;
- Mosaic putty. Crumbs of different colors are mixed and transparent resins are added. It is possible to obtain coatings that are universal in terms of use. Most often, such putty is used for ceilings, finishing slopes, plinths and balustrades. Surfaces can be washed. Wood covered with mosaic putty is not afraid of dust and dirt.
The choice of texture also largely depends on stylistic features. For example, bark beetle is positioned as a universal finish that will fit into any composition, but it will be more difficult to find an application for mosaic putty.
Which putty is best for wood?
Companies that manufacture finishing materials produce a variety of surface treatment compounds to improve their appearance. Wood putties have special properties. They are subject to special requirements and there are separate recommendations for use.
Description and properties of the material
Wood putty mixture can be used indoors and outdoors. However, different compositions are selected for these purposes. The following requirements apply to the properties of the putty:
- effective masking of irregularities, scratches and small cracks;
- protection of wood from drying out;
- water resistance;
- excellent adhesion to the surface;
- improvement of the natural texture of wood.
High-quality formulations from reputable manufacturers 100% meet each of these requirements.
Areas of application
Wood needs protective coatings, as it dries quickly and becomes unusable without treatment. The natural shade of wood may fade within 1-3 years after use.
Putty is used to protect and improve any products:
- furniture;
- floors;
- sculptures and other designer items;
- walls;
- wooden buildings: cabins, gazebos, toilets, fences;
- plywood and MDF sheathing;
- doors and window frames.
Even if there are knots or small cracks on the surface, wood putty can mask them.
Types of wood putties
Wood can be treated with some universal products and special compounds.
Acrylic
Universal composition for wood and chipboard. Has good ductility. Working with acrylic putty on wood is simple and convenient. However, it is not capable of repairing large defects.
Latex
Contains polymer additives and is resistant to moisture and fungi. Can be used in wet areas on floors, windows, walls and other objects. However, it is not suitable for use in frosty conditions.
Polymer
The best option for interior work, however, putty with polymers is relatively expensive.
When working with it you do not need to have any special skills.
Adhesive and epoxy
Glue-based putty contains chalk, glue and drying oil . It is well distributed over wood and increases its strength. The epoxy composition contains 2 components that need to be mixed. After preparation, the solution hardens quickly. Epoxy mixtures provide a durable coating, ideal for floors and doors.
Oily
Often used for external work. It has high strength and does not form cracks due to temperature changes. Lasts a very long time.
Plaster
One of the most common types of wood putty. It successfully combines strength and ease of application. However, in other characteristics, gypsum compositions are inferior to more modern mixtures. Can only be used in dry rooms.
Nitro putty
The mixture contains cellulose. One of the most ancient types of putty. May contain resins and plasticizers for easier application. It seals small defects well, but is highly flammable.
Polyester putty
The composition contains 2 ingredients: resin and hardener. They are mixed right before application. Be sure to use a primer and final sanding. It has good water resistance and is suitable for wet rooms and outdoor work.
Criterias of choice
The choice of composition depends on the following factors:
- starting or finishing wood finishing - in the latter case, the mixture should be with very small particles to create a smooth layer;
- the putty must have quality certificates confirming the absence of harmful substances in the composition;
- preference should be given to quick-drying products;
- elasticity is a big plus for application; such putties do not crack.
If the level of adhesion is indicated on the packaging, the choice should be given to compounds that adhere as strongly as possible.
Making putty at home
You can prepare wood-look putty yourself. However, experts do not recommend doing this, since some types of wood are sensitive to chemicals. Homemade formulations can ruin them.
- With PVA glue . Mix equal parts PVA and crushed chalk. You can use some fine sawdust to fill cracks.
- With chalk . In the recipe, chalk is used as the main component. Acrylic varnish to match the wood is carefully added to it until a thick paste is obtained. Add a little sawdust to improve application.
- Complicated recipe . The main one is 300 g of flaxseed oil. To it add 70 g of oleoresin oil, 30 g of gelatin, 40 g of perlite powder, 30 g of casein, 22 g of borax, 28 g of ammonia 18% and 350 g of water. First, mix the oils and perlite powder, then add water. When the mixture becomes homogeneous, pour in the remaining ingredients and heat to 90 degrees.
How to putty wood correctly
Compliance with technology when using wood putty is a prerequisite for obtaining a durable and even coating. To implement it, you will need some tools: a container, a spray gun for spraying, a narrow and wide spatula, and sandpaper for finishing.
Surface preparation
To prevent the putty from falling off several months after application, the surface must be properly cleaned before work:
- using solvents, remove traces of old paint and plaster;
- large pieces are cleaned off with an abrasive material;
- Remove nails and other remaining metal parts to prevent corrosion.
After removing dirt and dust, clean the surface with a brush and a damp cloth.
Primer
Priming improves the adhesion of wood and putty material. The primer also contains antiseptic substances necessary to protect the wood from mold and mildew. Select a primer on the same basis as the finishing material. Apply an even thin layer before the main work.
Mixing the mixture
Modern types of putty are sold ready-made. They do not need to be combined with other ingredients - simply poured into a suitable container and stirred thoroughly.
Puttying
After preparing the surface, you can begin applying putty:
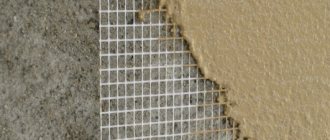
- Fills seams and large cracks. If they are too large, a sickle tape is placed on top before applying the composition.
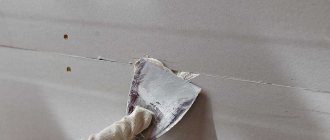
- Using a smaller spatula, take the solution and place it on the larger one.
- Distribute the mixture from top to bottom from the corners, maintaining a layer of 2-3 mm.
- The remaining strips are leveled with a sharp spatula or sandpaper after drying.
You can use a spray gun to apply liquid compounds. Sanding is carried out only after complete drying.
Brief overview of acrylic putty manufacturers
There are a lot of varieties of acrylic putties, since they are not only for walls and ceilings, but also for various materials - wood, metal, and the like. The most common brands:
PARADE S40
Moisture-resistant acrylic putty, which is used for wooden and mineral surfaces. Designed for indoor work. It can be applied in a thickness of up to five millimeters, and the drying time will be from five to ten hours.
Acryl-Putz finish and subtleties of its application
Acryl-Putz Finish is used primarily during finishing work when leveling the surface. This acrylic mixture is great for touching up walls and ceilings and works well with drywall.
The main qualities of Acrylic Putz finish are as follows:
- drying occurs within a short time;
- ultimately the surface acquires a snow-white color;
- excellent for painting;
- hides all irregularities;
- easy to sand.
The surface of the wall is perfectly polished
The mixture dries very quickly
This putty is perfect for painting.
To treat one square meter of surface, you will need to use at least 1.5 kilograms of the mixture with a putty layer thickness of 1 mm. This product is used when it is necessary to hide stains that have appeared after applying several layers of starting putty. The final version is used exclusively for interior work. In some cases, it is permissible to use one layer of material when minor defects need to be hidden.
After the putty has dried, you can safely begin painting the wall or wallpapering. Even if you plan to glue a white canvas, you don’t have to worry about red spots appearing on the surface. The presented putty will reliably hide all existing imperfections of the surface on which work is being carried out.
Range
It is worth considering another important classification, which usually plays an important role for a potential buyer. The acrylic composition is characterized by the following forms:
- Ready-made mixtures. The mass is packaged in small plastic containers, tightly packed, ready for use. The product is best purchased if minor cosmetic repairs to façade surfaces are planned;
- Dry mixes. The choice in favor of such a moisture-resistant putty is given when you need to work with a large area. The dry mixture can be diluted or diluted as desired to achieve your preferred consistency.
In addition to acrylic putties, mineral and polymer analogues are offered to potential buyers on the modern construction market. No less popular putties are mixtures based on silicates and silicone.
All the pros and cons of water-dispersed putty
The advantages of the composition include the following properties:
- Excellent ductility of the material. It applies well, withstands temperature changes, is moisture resistant, and is suitable as a base for any finish.
- There are no toxic substances in the composition, therefore it does not cause intoxication of the body even when working with putty indoors.
- Easy to apply, allowing both professionals and beginners to cope with the task.
- The material is environmentally friendly and absolutely safe for the human body, which makes it available for use even in children's rooms.
- Fast drying. After just 1 hour, you can begin applying the next finishing layer. Although experts still recommend waiting up to 6 hours in a normal microclimate, and up to 20 hours in low temperatures.
- The low thermal conductivity of acrylic putty on a water-dispersion basis allows the material to be used to insulate the building foundation, which makes the indoor climate even more favorable.
- Long period of operation.
- Not picky about processing. Thus, during grinding you will not have to make special efforts to level the surface.
- The property of air permeability, which allows the surface to “breathe”, thereby preventing the development of a bacterial environment, mold and fungi.
- Easy to use. Since the putty is sold in a ready-made state, all that remains is to take a spatula in your hands and apply the material to the wall.
- Hypoallergenicity of water-dispersed putty - and that says it all.
Against the background of all the advantages, the disadvantages seem insignificant, but they are still present. An open can of putty should be used immediately for surface treatment.
Please note that it does not store once the container is opened and hardens too quickly. In addition, experts do not note the negative aspects of putty
Arguments in favor of puttying
A wide variety of wood products are puttied, including old window frames, new joinery made of soft and hard wood, parquet, etc.
Puttying wood allows you to get the following advantages:
- The putty layer prevents the absorption of moisture into the material, which results in an increase in the service life of the wooden product.
- Thanks to the putty mixture, it is possible to mask all sorts of surface defects, such as knots, cracks, chips.
- When the coating dries, it remains completely transparent, which allows you to maintain the appearance of natural wood structure.
- Parquet putties come into close contact with the floor material, filling all its unevenness, and also prevent contamination.
Composition and technical characteristics (consumption per 1 m2)
The putty is based on liquid acrylic. This synthetic substance is produced by processing acrylic acid. Varieties of putties are sold in ready-to-use form. The plastic, viscous consistency of the white mass is packaged in plastic containers of different sizes. The container is equipped with plastic handles for comfortable transportation.
In addition to the main component, various fillers are added to acrylic putties that change the characteristics of the finishing product. The mass also includes water.
When marble chips are added to the composition, the strength of the building mixture increases; the product is suitable for coating various surfaces, including wood and metal. When purchasing, it is taken into account why the product is selected based on the components of the mixture.
The material has the following technical characteristics:
- The putty dries in 12 hours at a temperature of about +20°C;
- when covering the surface, the thickness of the putty layer is less than 5 mm;
- The material is applied at a temperature of at least +12°C;
- mass density - 1.8 kg/m³;
- The shelf life of the composition is 1 year.
The consumption of building material per 1 m² of surface is 1.1-1.2 kg, depending on the quality of the product and the thickness of the layer.
Storage tips
The putty sets quickly. For this reason, experts recommend setting the volume that is easy to implement. The stirred mixture cannot be stored. It sets and freezes into a single lump. To remove it, use a mechanical method.
Another distinctive feature of the solution is that it begins to set even faster if even small loose lumps get into the container.
Experts also note that if the dry mixture is stored incorrectly, its quality is lost. Therefore, it is necessary to adhere to the rules for storing material:
- Closed packages are stored in a dry room where the air temperature is more than 5 degrees.
- Open packaging is tightly closed and stored in a warm, dry place.
- If there is high humidity in the room where the mixture is stored, the packages are additionally covered with plastic wrap.
- It is not recommended to store an open package for more than 1-2 months. During this time, it absorbs moisture from the air and loses its performance characteristics (it becomes damp).
It is recommended to store and use the induced solution within 30-40 minutes. During this time he does not have time to grab.
Do not prepare too much putty mixture at once, otherwise the material will be difficult to distribute over the surface.
Price
Below are the prices for various dry mixtures that have proven themselves:
| Brand | Price in rubles |
| VETONIT LR 25kg (polymer finishing) | 650 |
| OSNOVIT BAZSILK T-30 20 kg (cement) | 328 |
| GIFAS 25 kg (gypsum) | 340 |
| Knauf Polymer Finish 20 kg (gypsum finishing) | 500 |
| Ceresit CT 225 25 kg (cement-limestone) | 660 |
The prices in the table are valid for the summer of 2022.
Scope of application
Wood putty is used for processing or restoration of various surfaces. It can be used for finishing cladding made of MDF panels or plywood, and used when preparing parquet for further painting. The mixture is actively used to restore door panels, window frames or old flooring. These are the most common uses, but this list can be expanded, because the product is quite universal.
It is important to note what properties the putty conveys to the surface in order to understand why it should be used in general:
- The moisture resistance of wood increases significantly, which has a beneficial effect on its service life.
- Regardless of what type of putty material you choose, it can be used to mask existing defects, and some compositions can cope with very large damage.
- Using putty, you can emphasize the texture of the wood.
- The surface that has been treated with the material in question can be safely painted or covered with a decorative layer of varnish.
- The putty used to finish the flooring is characterized by excellent adhesion to the surface. It perfectly fills existing unevenness and even the smallest cracks that are sure to appear in the parquet after several years of use.
Advantages of latex putty
This composition has a number of advantages. These include: low consumption; good adhesion to any materials such as wood, concrete, plasterboard, chipboard; resistance to external influences, such as humidity, frost, temperature changes; possibility of applying the solution in a thin layer; minimal shrinkage during hardening.
When applied, the solution penetrates perfectly into cracks and acquires high strength after hardening, which reliably protects the surface from further shedding.
About application technology
Acrylic paint, plaster and any other material for finishing work can be applied in different ways. The finishing putty is applied in two ways: mechanically or manually. You can putty using special units. They release the composition under high pressure. The mechanical option is good if you need to decorate large areas. For interior decoration and when working with miniature façade elements, the manual finishing method is used.
Reinforced mesh is applied to the corners of the facade of any building. Only then can you dilute the putty to the desired consistency and start working. The use of a mesh allows you to form really clear, regular angles, and the coating itself will be strong and complete.
The algorithm for applying putty material to the work surface is as follows:
- We clean the surface from any contaminants, level it, and clean out relief defects;
- We prime the walls with the prepared composition;
- The required amount of putty must be diluted as required by the construction task. If the composition was initially ready, the mass is still thoroughly stirred;
- When the diluted mixture is ready for use, the master applies the required amount of acrylic composition to the surface manually or using a machine. We putty carefully, but quickly. The choice of method for working with compositions depends on the texture that is preferred.
When the acrylic finishing putty has already dried, but still retains its elasticity, a pre-thought-out pattern or imitation (for example, a bark beetle) is formed on the surface. At this stage, you cannot do without a special roller or plastic “grater”.
How can I dilute polyester putty?
We bought polyester putty in the store; it was not expired, but very thick. How can you dilute polyester putty without compromising its properties?
comment to favorites Kim Jong-un [412K] 5 years ago
There is no need to dilute it with anything.
In this case, it is extremely important to know the following points:
Polyester putty is usually two-component.
The putty itself (not the hardener) consists of two components: the polyester resin itself and the filler.
There are different fillers, for example talc, chalk, fiberglass and so on.
To make the putty workable (that is, so that it can be applied with a spatula), styrene is added to the mixture.
Styrene is a solvent.
Of course, there are special thinners for sale for polyester putties, for example, Thinner S thinner,
but I would not recommend diluting the finished polyester putty, because its composition (including the solvent) is completely balanced, there are problems with the putty itself and with its storage.
There are many reasons for this putty behavior:
The expiration date has expired.
The container in which the putty was stored was damaged.
The putty was stored in the cold and so on.
Warm the putty to room temperature.
Reduce the amount of hardener.
Add putty of normal consistency to the thick putty and mix thoroughly.
The amount of solvent in polyester putty is strictly regulated; increasing the amount of solvent leads to the putty losing its properties (this is exactly what you are asking about).
This is a separate topic, about shrinkage (after all, the solvent will evaporate when the putty dries) and all that.
But if you still decide to dilute, then the diluent should be no more than 10% (this is the limit, less is better) of the total mass of the putty.
Little tricks
If the gap or crack is very large, it must be sealed with a mixture of sawdust. We use homemade wood putty. Prepare a mixture of chalk, PVA glue and small sawdust. We apply, let it dry and apply serpyanka (self-adhesive nylon mesh, sold in small coils 6-8 cm wide), apply the mixture in a layer of 2 mm. After drying, apply another thin layer.
If the gap is too large, you should seal it with sawdust
In order for the color putty on wood to differ as little as possible from the color of the surface, add tint (a liquid coloring element, the amount of which will determine the color saturation of your mixture).
If the color of the mixture does not suit you, you can add color to it
In old doors and window frames made of wood, the ends of the knots often rot. It is better to drill them out and fill them with wood glue or PVA. Insert the cut wooden chop and putty with a thin layer. Sand it.
Wooden surfaces on the street are first treated with an antiseptic and impregnated with drying oil. Apply putty to the prepared surface. After drying, sand it. For coating we take varnish or paint.
How to restore dried waterproof putty
Almost all of us use putty to one degree or another in our activities related to wood. I also use it in some cases. There are different types of putties and the most common ones are acrylic.
I would immediately like to forestall the tediousness of such a category of Internet users as grammar Nazis, who stand guard over the Russian language in terms of its grammar, vocabulary and other punctuations. So, the words “putty” and “putty” are equivalent. But their “mother” is the German word Spatel - spatula :)
Has dried up
Naturally, with use, putties can dry out. Especially if the lid is not tightly closed or the jar is left open altogether. Of course, this happened to me too. I usually threw it away - fortunately it is inexpensive and you can buy a new one. So this time I found an almost full jar of dried putty.
This time I didn't throw it away. I noticed the inscription on the lid “Wood resistant putty.” So I immediately filled the jar with water (I need to check) and put it away - I’ll always have time to throw it away.