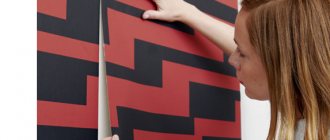
Drywall is a universal finishing material, the advantages of which are ease of installation, reliability and durability. Gypsum sheets are used to construct niches, partitions, ceilings or as a way to level the plane of walls. When preparing gypsum boards for painting or wallpapering, you will need to putty their surfaces.
Do I need to putty drywall before painting or wallpaper myself?
GKL look smooth, but during transportation and installation work, cracks and dents form on the drywall, and cracks form at the joints, into which dirt and dust accumulate over time. Coating with putty will be required even if you plan to paint or paste with embossed wallpaper and there is no damage to the wall.
GCR treatment is required for any subsequent coating option. It is necessary to putty the drywall before painting or plastering. Errors and damage appear on the surface of the drywall, which is painted but not pre-leveled. Putty for drywall for painting is designed for processing connecting seams, corner areas and screws, but, in addition to correcting aesthetic defects, it increases the service life of gypsum boards.
To carry out finishing work with plasterboard sheets, no special skills are required. All you need is a set of tools, knowledge of how to properly putty drywall and strict adherence to the instructions. Irregularities, crevices, cracks and holes from fasteners will be hidden by a layer of gypsum board putty under the wallpaper.
Seven steps for finishing gypsum plasterboard under wallpaper
We’ve sorted out the reasons, tools and materials, now it’s time to talk about how to properly putty drywall for wallpapering.
Step No. 1: correcting the builders’ shortcomings
It doesn’t matter whether you installed the gypsum plasterboard frame yourself or hired people; in any case, you need to carefully check the build quality again and correct minor defects.
Fastening the gypsum board sheet.
One of the sore points of any frame is the quality of screwing in the screws, or more precisely, the depth to which they were driven. The ideal option is when the screw head is slightly recessed into the cardboard.
- First, take a wide metal putty knife and run the blade along all the walls. If the head of the screw is visible somewhere, the spatula will “stumble” on it and you will need to slightly tighten the screw;
If you rarely “communicate” with a screwdriver, then it is better to take a simple screwdriver and tighten the protruding screw heads manually. A good, powerful screwdriver can drive a self-tapping screw too deep in the wrong hands.
Screwing screws into gypsum boards.
- It’s worse when the self-tapping screw is driven more than halfway; in this case, only additional fixation of the sheet with another self-tapping screw can save the situation. Keep in mind that it cannot be screwed next to or into the same hole, the minimum distance is 50 mm;
- If you miss a deeply recessed screw, then over time it may break out and cracks will appear along the sheet, and this will lead to creases or even breaks in the wallpaper;
- Another common defect is fringe along the cut edge of the plasterboard, but this defect can be called an innocent prank. Here you take a knife and cut off all excess, after which you lightly sand the edge.
The result of skewed drywall.
If you find traces of fungus on the sheets, try to remove them with sandpaper. But the main thing is to choose a soil with complex action and good protection against biological pests.
Step #2:. Trimming the joints
The factory edge of the gypsum board sheet has a rounded shape, and if there are 2 such edges at the junction, then there is no need to touch them, but this situation does not always happen.
When two evenly cut edges of a sheet meet, the putty in this place will not adhere well, even if it is reinforced. Therefore, such drywall joints must first be trimmed.
Cut joint.
The procedure here is quite simple: take a construction knife and cut both edges inward at an angle of approximately 45º. This groove is made approximately half or even 2/3 deep of the sheet.
Step No. 3: priming the walls
We have already talked about choosing a primer, but applying the composition itself usually does not cause any difficulties for anyone. Pour the composition into a container, take a wide brush or roller and cover the structure with primer, carefully treating all problem areas.
Primer of gypsum board walls.
Often one coat of primer is sufficient. If the sheet has been affected by a fungus, then it will need to be covered with soil twice. Double coating with soil is provided even with continuous reinforcement of gypsum boards, but in what case it is necessary, I will tell you a little later.
Step No. 4: reinforcement and puttying of corners
Puttying corners can be called the most important work in the entire process. As you know, there are external and internal corners and they are finished differently.
The outer or outer corner of the gypsum board frame must be reinforced. For these purposes, special perforated corners are now produced; the corners can be aluminum, galvanized steel or plastic.
Types of corners.
Galvanized steel corners will cost you the cheapest, but I don’t recommend using them. The fact is that if the protective layer of zinc coating is damaged somewhere, the steel will begin to rust and a yellow spot will sooner or later appear on the wallpaper.
The home handyman should reinforce even corners with aluminum corners. If the dimensions of a gypsum plasterboard structure allow, then it is better to buy corners with additional reinforcement; wide strips of reinforcing mesh are attached to them on both sides; such surfaces are easier to level.
Corner with additional reinforcement.
- First, a small amount of putty is evenly applied to both planes of the angle. After this, until the mixture begins to set, you need to sink the aluminum corner into it;
- You should press tightly, but without fanaticism, so that the corner does not bend. I press such corners using a plaster rule, applying the tool along the entire length of the corner, but in principle, any strong and even plank is suitable for these purposes. By the way, if a corner is bent, it is almost impossible to straighten it unnoticeably;
- Naturally, the composition you applied to the walls will be squeezed out through the holes; all this excess is immediately leveled with a small spatula. Now let the composition dry, you need the corner to firmly grip the base;
Arrangement of the doorway.
- The next step is step-by-step finishing. First, scrape off any dried excess mortar and go over it again with primer. When the primer is completely dry, you can begin finishing the corner;
- To do this, I use a medium spatula with a blade of about 20 cm. The mixture is evenly applied in small portions to the blade along the entire length. We cover the corner slowly, moving from top to bottom. The reinforcing structure must be completely covered with putty;
- There is no need to “grab” both planes at once; first, draw out the corner on one side, and when this side is dry, start the same work only on the adjacent plane of the corner. It is unlikely that everything will turn out perfect the first time, but mastery comes with experience.
Aluminum corner fastening.
Plastic corners are intended primarily for reinforcing rounded complex structures. There are no special differences in the arrangement technology here, but to be honest, the rounded corners and curves of the frame are more difficult to finish.
To reinforce the internal corners, fiberglass mesh tape is used; in professional jargon it is called serpyanka. Some serpyanka models are equipped with an adhesive surface, making them much easier to attach.
Although, if there is no serpyanka with an adhesive side on the market, just take PVA glue and glue it into the corner in the traditional way.
Putty on glued serpyanka.
Remember, the inner corner is reinforced with two separate strips, which are joined together in the corner without overlapping. I have met innovators who bent a wide serpyanka lengthwise and glued it into a corner with a single tape, and after six months the wallpaper in this corner began to look like an accordion.
The inner corner is puttied in approximately the same way as the outer one, that is, first you finish one side completely, and after it dries, you begin the same procedure on the other side.
Working with an angle spatula.
Now special corner spatulas are sold for finishing internal corners on two planes at once. I don’t recommend those who like to take up such spatulas; it’s better to learn using classical technology, finishing the planes one by one. The classic technology is also good because after mastering it, it will not matter to you what degree of rotation you use to finish the corner, but the corner spatula is curved strictly at a right angle.
Flexible plastic corner.
Step No. 5: sealing joints along the plane
You remember that in step No. 2, even before treating the sheets with primer, we trimmed and deepened all the joints. Now, before we putty the drywall under the wallpaper, we need to reinforce and seal these grooves.
Sealing the joint with the factory edges.
For this procedure we will use the same aforementioned fiberglass sickle. Many craftsmen glue the tape directly to the joint, after which they apply a putty mixture. But I was taught by the old masters, and I do things a little differently:
- First, with a small spatula, I apply a layer of finishing putty to the empty primed groove, while the groove is completely filled, plus the composition extends on both sides of the joint no less than the width of the tape;
- Immediately, before the composition has set in, we need to drown our serpyanka. Simply apply the tape to the fresh putty and run the putty knife over it. After which you leave our joint alone and let the solution harden completely;
Roll of serpyanka.
In order not to waste time while your joints between the sheets are drying, you can putty the heads of the screws. No special professionalism is required here; take a narrow spatula and cover all the holes with cross-shaped movements.
Glue the serpyanka onto the fresh compound.
- The finishing putty has one unpleasant feature: it shrinks slightly. Therefore, when the composition at the junction hardens, where our groove runs, it will sit down a little and the groove will be visible, but this should not be allowed;
- There is no particular point in priming the same putty a second time; just lightly sprinkle the surface with water and you can apply the finishing layer, which will hide both the sickle itself and the recess at the junction of the sheets;
- At the last stage of sealing the joints, when they are completely dry, you will need to lightly level and sand the surface with coarse sandpaper or sanding mesh.
Sealing joints over serpyanka.
In the store, serpyanka refers to both fiberglass mesh, construction bandage and perforated paper tape. So, what you need is fiberglass mesh, the construction bandage will bubble and curl, and only a “savvy” professional can install the perforated paper tape.
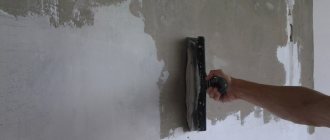
Step No. 6: finishing along the plane
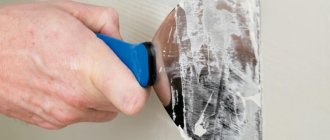
It is more convenient to finish the surface with a wide spatula with a blade of 30 cm or more. The quality of the blade on this spatula directly determines how smooth and beautiful your wall will be. Therefore, my advice to you is to keep one spatula for intermediate work and another for finishing.
Applying the first layer to the walls.
To put it mildly, working from a stepladder under the ceiling is not very convenient; there are too many unnecessary movements. If there is no “goat”, then I try to adapt some reliable table for these purposes, most often it is a kitchen table.
The technology itself is not complicated, but you need to work quickly, since the hardening time of the solution is not that long. Here it is advisable to have an assistant who will mix the next portions of putty while you are working on the wall.
- The steps are something like this. Apply the composition in small portions onto the blade of a wide spatula, and then rub it into the wall with wave-like sweeping movements;
- While you don’t have enough experience yet, it’s better to start from the farthest and least noticeable corner possible. So, when it comes to the central part of the wall, you will already have gained some experience and skill;
Work with a wide professional spatula.
You don’t need to put a lot of solution on a wide spatula, just take small portions. The thing is that if you try to apply a lot of putty at once, you will end up with bumps, and then you will have to smooth them out.
- The composition should be applied in 2 layers, but there is no need to wait until the first layer dries. I usually finish a few square meters or a whole small wall. And when I reach the end of the sector, I simply return and start the same work over again;
- Well, that's not all, the next day, when the walls are guaranteed to be dry, take a block in your hands, attach a coarse sandpaper or sanding mesh to it and start sanding the surfaces.
Grinding the plane with a block with a stretched mesh.
Ideal quality wallpaper is not required, in fact, that’s why you use coarse sandpaper; it’s enough to smooth out all visible defects and wipe off the dust with a damp rag.
Step No. 7: subtleties of putty under wallpaper in a new house
If the house is old, then what I told you above is enough. But when it comes to a new building, the technology continues, because any new house will shrink for several years and the plasterboard frame will inevitably begin to weaken, which means that the wallpaper may also develop creases and distortions.
To avoid this, it will be necessary to completely reinforce the entire surface of the sheets. In other words, you do everything that I have already told you, and after that you create additional reinforcement.
Fiberglass canvas.
For continuous reinforcement of gypsum boards under the wallpaper, a cobweb is used, which is popularly called a thin fiberglass canvas. The surface you have prepared will need to be primed again and, after drying, covered with cobwebs; the cheapest option is to use PVA glue, although now there are special compounds.
The canvases are glued with an overlap of a couple of centimeters, and while the glue is not hardened, this overlap is cut in the center with a sharp knife. Ultimately, when you remove the excess trimmings, your covering will be butt-joined.
After such trimming, you will need to once again cover the entire wall with PVA glue and leave it to dry for a day. At the last stage, the wall reinforced in this way is covered with a finishing layer of putty and, after drying, sanded again.
Reinforcement of gypsum boards with cobwebs.
Primer for drywall: why, what and when to use
When using a primer solution, you do not need to putty the plasterboard sheet completely. Water-dispersed acrylic paint used for processing gypsum board creates a film on the surface being processed that interacts well with the glue and prevents damage to the cardboard when removing old wallpaper. Using a primer reduces the likelihood of bubbles and material peeling when covering drywall with putty. This stage of finishing gypsum boards should not be skipped. As a result, the amount of mixture used is reduced, and the treated surface is leveled.
The soil solution performs the following tasks:
- enhances adhesion between coating layers;
- increases absorbency.
It is necessary to apply a primer solution before each stage of finishing, for example, before puttingtying gypsum board to create an improved connection of materials. Before painting a wall or covering it with sheets of wallpaper - in order to save coloring and adhesive substances.
Primer treatment is also required before applying the finishing putty for drywall to the surface - the sheet becomes dusty when leveling the starting coating. The final layer of finishing without the use of a liquid composition can roll off and fall off.
Options for the solution used for priming the cardboard area, depending on the finishing layer:
- The plane prepared for decorative pasting is treated with diluted glue for the material.
- The solution for working with porous surfaces is used before putting drywall, painting or decorating with wallpaper.
- When preparing the surface for applying the coloring composition, the recommendations of the manufacturers are taken into account. Sometimes you can use diluted paint or deep penetration primer.
Which putty to buy
It is very important to buy quality material. To ensure your purchase meets your expectations, follow these tips:
- Do not under any circumstances buy putty marked “for outdoor use.” This material is used for finishing the walls of facades and the substances from which it is made can be harmful to humans;
- Before purchasing, be sure to check the expiration date. Unsuitable material can cause irreparable damage to the wallpaper;
- We advise you to buy only ready-made putty mixture, and not the dry version. By purchasing a ready-made solution, you will be confident that it was made correctly, and you will not need to look for tools and containers for mixing.
Types of putties for drywall - which one to choose and apply
For plastering, different types of mixtures are used, among which several groups are distinguished. Before starting work, you will need to decide which putty is best to putty on plasterboard sheets.
When choosing, the following are taken into account:
- type of space;
- conditions for using the room;
- temperature and degree of air humidity.
It is especially important to correctly determine what to putty on drywall under wallpaper, otherwise the material may lose its characteristics and will not last long. In rooms with a dry climate and high temperatures, it is recommended to use polymer-based solutions that can retain their properties during prolonged heating and withstand thermal effects.
Starting material is used for filling errors with a difference of 0.5-2 cm in height. Sometimes a fine-grain finish can be applied.
Any type of drywall putty produced is distinguished by its positive properties and negative characteristics.
Cement
Compositions containing cement are used in rooms with a humid climate, are in demand and are sold in every hardware store. Mixtures containing cement are durable and have a long period of use, and protect the surface of drywall from getting wet.
The advantages of the material include:
- increased strength;
- moisture resistance;
- affordable price;
- ease of application.
The disadvantage of cement putty is its ability to shrink, so in apartments and residential buildings the mixture is only suitable for plastering kitchen areas, bathrooms and toilet rooms.
Plaster
Such compositions have increased adhesion to the base material, which is why they are popular. The mixture sets easily, hardens and is easy to process. The ability to change properties and color when included in various additives is considered an advantage and expands the scope of application of the material. The disadvantages include reduced resistance to dampness and humid environments.
A gypsum-based mixture is suitable for rooms with dry air because it quickly absorbs liquid and loses its properties. The addition of hydrophobic impurities does not affect performance characteristics, so the material is not used in rooms with a humid climate, kitchen areas and bathrooms.
Acrylic
Universal acrylic mixtures are considered the most suitable for puttying plasterboard walls for wallpaper and painting. The compositions are sold in bulk packaging, and the ability to withstand mechanical stress makes it beneficial for long-term use. Polymer materials are often used for finishing ceilings.
The plastic mixture adheres well to gypsum plasterboard, is durable and moisture-resistant, but more expensive. The composition retains its structure and can be used for decades.
Before deciding which putty to choose for drywall, it is recommended to verify the behavior of the material under conditions of use.
Choosing the right putty
There are a lot of different products on the market that can suit the intended purpose. Construction supermarkets offer a wide selection, and it’s easy to get lost in all this variety.
Since no one will glue wallpaper in rooms with high humidity, you can use the most common gypsum putty. As for the kitchen, cement-based putty is sometimes used in this room, but this is not important.
You should give preference to a dry mixture, which can always be diluted with water in the desired amount.
The consumption of material and the procedure for its use are always indicated on the packaging. Therefore, there should be no questions about the quantity required for the job.
There is a starting and finishing putty, which are used at different stages of work. Do I need to putty the drywall under the wallpaper with both putties? It's not obligatory. The starting solution is applied in a large layer and is used to seal cracks and level the surface. In the case of using drywall, this is not necessary, except for sealing joints. Therefore, you can use finishing putty, which is applied in a thin layer and has less consumption.
In the classic version, a starting putty is used first, and then a finishing putty. But such a scheme will be more expensive.
Separately, I would like to dwell on polymer putties. They are sold ready to use and are easy to work with. They take longer to set, which means a beginner will have enough time to correct his mistakes. However, the unused solution can be safely thrown into the trash, since its shelf life after opening does not exceed half a month.
Everyone must decide for themselves about the brand. The most commonly used products are Knauf, Fugenfüller and Uniflot. However, you can take a lesser-known product if we are talking about simple dry gypsum putty.
Putty tools
Puttying drywall with your own hands is not a very difficult job that even a novice finisher can do.
To putty drywall you will need the following set of tools:
- container for mixing dry mixture;
- an industrial mixer or drill with an attachment for kneading the plaster to the desired consistency;
- a roller with medium pile for treating surfaces with a primer solution;
- spatulas of two types: narrow - for sealing unevenness and cleaning wide, and larger - for applying a layer of finishing mixture;
- a sizing rule to check the evenness of walls and ceilings;
- reinforcing tape installed at the corners to help ensure stability and create the correct shape.
Additionally you may need:
- paint brush;
- a screwdriver with a Phillips head for self-tapping screws;
- sanding block or power tool to smooth hardened plaster.
When carrying out finishing work in low light conditions, you will need a lamp mounted on a tripod.
Preparation for work
So that in the process of work, directly, when mixing the solution, it does not turn out that you do not have any tools, or you bought the missing number of materials, you need to calculate everything you need in advance.
Tools for work
The degree of fatigue and how quickly we complete the work depend on what tools we use in our work. So, in order to putty a wall, you need the following tools:
- putty knife;
- roller (used in the priming process);
- knife (if you need to chamfer drywall);
- drill (if you don’t have one, you can knead with a spatula, but this process is labor-intensive and takes much longer than with a mixing attachment);
- bucket or trough (to mix the solution in it).
IMPORTANT. Sometimes rust appears on the walls some time after the repair has been carried out. This is due to the fact that a non-metallic spatula was used. Experienced builders recommend buying stainless steel spatulas.
There must be two spatulas in the work: one narrow and the other wide. The solution is collected first and placed on the wide one. And with a larger solution, apply it to the wall and spread it evenly. Also, if a situation arises when you need to take a little solution, take it and apply it to the wall with a narrow device.
Puttying technology, sequence of work for plasterboard walls for painting and wallpaper
Preparation for finishing with finishing putty begins after the installation of the gypsum board on the frame is completed. The sequence of actions establishing how to putty drywall for painting is considered the most suitable. If the technology is strictly followed, the treatment is carried out in 2 layers. For other decorative coatings, unnecessary steps are eliminated.
Finishers with insufficient work experience are often concerned with the question: is it possible to putty drywall immediately with finishing putty or will pre-treatment be required? Both operations are important; if you skip one of the stages, there is a risk of rapid destruction of even the highest quality coating.
Sequence of work:
- Treatment with deep penetration soil solution.
- Puttying marks from fasteners and screws.
- Gluing the joints of sheets with mesh or reinforcing tape.
- Treatment of corner areas inside and outside.
- Applying drywall primer solution.
- Coating with the starting composition of the putty and sanding the irregularities.
- Priming plasterboard sheet;
- Treatment with finishing mixture and filling of imperfections.
- Coating with a primer solution before decorative finishing
Before starting work, the joints of the gypsum boards must be checked for defects. Loose fasteners are additionally checked and tightened if necessary.
Lowering the screws is not allowed more than 5 mm below the surface, so the old screws will need to be removed and new ones installed in their place.
Organizational issues and a little theory
It is no secret that good organization of work is an indispensable condition for a successful ending; preparation is especially important for novice masters. First of all, you should prepare the tool and decide on the putty itself.
But first, let's talk about whether it is necessary to putty drywall before wallpapering and what awaits the owners if this is neglected.
Why putty gypsum board under wallpaper?
The question of whether it is necessary to putty plasterboard under wallpaper can be asked either by a person completely far from finishing work, or by someone who has not yet encountered the re-gluing of plasterboard walls that have not been puttied.
Removing old wallpaper with a spatula.
I’ll tell you honestly, when home-grown specialists reproachfully declare: “I pasted the wallpaper on the gypsum board without preparation and it hasn’t fallen off yet,” I don’t even try to convince them, I just ask them to wait a little.
Almost every one of us knows that if paper is glued to paper with good glue, then they will stick not just firmly, but dead. For some reason, people lose sight of the fact that they are dealing with a gypsum sheet covered with thick paper, which is simply cardboard.
You will be able to stick it, and everything will stick perfectly, but in my memory, no one has ever been able to tear off the old wallpaper without damaging the base. Accordingly, the damaged sheets will have to be replaced and now, consider what is cheaper - buy a couple of buckets of putty and spend 2 - 3 days on finishing or reinstall the entire room in a few years?
The process of gluing wallpaper on plasterboard.
Another reason for the need for putty could be color mismatch. A standard gypsum plasterboard sheet is dark gray in color, waterproof plasterboard is painted green, plus there are markings on the sheets. Thin wallpaper, no matter how you look at it, will show through, and this intrusive shade can ruin your entire interior.
To save money, many owners take up the task of covering a room with plasterboard with their own hands; I welcome such people, because if you do not touch multi-level ornate structures, the task is quite realistic. But without experience, you will have a lot of small defects, and you can only hide these defects with putty.
In addition, no one has canceled the shrinkage and slight movement of building structures, this is especially evident in new buildings. Here, if you do not putty and reinforce all problem areas and drywall joints, then within a year creases and accordions will appear on your wallpaper.
Wallpaper on gypsum board.
We seem to have sorted out the question of whether it is necessary to putty gypsum boards, now let’s talk about what such structures are puttied with, and here both the selection of tools and the purchase of working material, putty, primers, corners, etc. are important.
A few words about the instrument
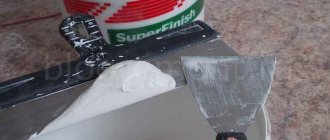
- I think each of you understands that since we are about to putty any surface, it means we need spatulas . Of the essentials, you will have to buy one wide metal spatula with a blade of about 30 - 40 cm and one medium one with a blade width of 100 mm;
Metal spatulas.
- But spatulas will always come in handy for a home craftsman, so I recommend taking a whole set of such tools . One set of metal spatulas with blades from 3 to 50 cm, and the second set of soft rubber spatulas. Their price is small, but believe me, this tool will not be superfluous in your arsenal;
- It’s good if you have a screwdriver , although for this type of work one decent screwdriver is quite enough;
- You will definitely need a construction knife with a set of spare blades;
Construction knife.
- Prepare one plastic bucket with a capacity of about 5–7 liters for mixing a large amount of material and a soft container that fits in your hand. Previously, a children's rubber ball, cut in half, was used for batch mixing; now special small silicone containers are sold;
- To apply the primer you will need a large soft brush or roller with good absorbency;
- To mix dry putty, professionals use a construction mixer ; an amateur just needs to purchase a mixing attachment for an electric drill.
Tool for the job.
Choosing putty
The question of which putty is better is rather rhetorical; each master has his own opinion on this, so I will talk about the general principles and express my opinion.
Stirring the putty.
It's no secret that there are starting and finishing putties. The starter ones have a larger fraction and are intended for arranging the substrate. Finishing agents are designed to bring the surface to perfection.
Any classic instruction instructs to first apply the “start”, and when it dries, apply the “finish” to it. This is of course correct, but personally, I only use finishing putty for finishing wallpaper.
If you look at it, we just need to arrange a thin buffer layer between the wallpaper and the cardboard; accordingly, 1 - 2 mm will be quite enough. If you apply one starting composition and stick, for example, silk-screen printing on it, then small defects, no matter how you sand them, may be visible.
Putty "Uniflot".
But if you take the finishing composition, everything will turn out smoothly. Although I do not encourage you to do as I do. People who are used to doing everything strictly according to instructions can follow the classic sequence (ground-start-finish), although this will take more time and money.
Based on the composition of the putty base, there are gypsum, cement and polymer. To finish gypsum boards under wallpaper, a gypsum or polymer-based material is usually taken. Cement-based compositions are intended for wet rooms, and wallpaper is rarely glued in wet rooms.
If you are limited in funds and do not have enough experience, then you are better off paying attention to dry gypsum mixtures. You can dilute this material as needed, and anything that remains can be stored in a dry place for at least another year.
Sheetrock putty.
Ready-to-use polymer compounds are much easier to work with, their setting time is quite long, and the end result is much better.
But polymer putties are significantly more expensive than gypsum putties. Plus, if your polymer putty remains unused, then you will have to throw it away, as the composition is not sealed, and it will not last more than 2 weeks.
When working with ready-made polymer putty, after opening the can, place a piece of polyethylene pre-cut to the size of the can on top of the composition. By doing this, you will block the access of air, and the material will remain in working condition longer. When you need to pick up the next portion, lift the edge of the polyethylene, pick it up and return the film to its place.
Polymer putty "Vetonit LR".
As for specific manufacturers, for finishing corners and other difficult places it is better to use the German dry putty “Fugenfüller” from Knauf; in the same line, the Germans produce “Uniflot”, it is of approximately the same quality.
German materials themselves are quite durable, which is why they are used for finishing problem areas. It is possible to work with them on large surfaces, but due to their high strength, grinding them will be problematic.
To cover plasterboard walls, you can use inexpensive dry putty from the domestic brand “Starateli”. The same company produces a ready-made composition based on PVA glue, it is of course more expensive than the dry mixture, but the price/quality ratio of this product is quite acceptable and the walls are sanded perfectly.
Dry mix from "Starateli".
For those who are not used to saving on materials, there are ready-to-use polymer putties “Sheetrock” and “Vetonit LR”. Now these materials are produced under license here, but I have not heard any complaints about the quality.
The choice of the base composition is, of course, important, but before you putty the drywall under the wallpaper, it still needs to be covered with high-quality primer. I warn you right away that you should not use alkyd-based primer under drywall; the coating will bubble and be hopelessly damaged.
Domestic putty based on PVA.
Otherwise, for those who respect European quality, there is Tiefengrund and Ceresit CT17. Although our manufacturers have now reached a decent level of quality, the main thing is that the primer is intended for treating surfaces with a high level of absorption.
In general, in any finishing work there is a golden rule: putty and primer should be taken from the same manufacturer, so you will never have a problem with rejection.
During work, after you have worked out the next portion of the composition, the tool must be thoroughly washed. Otherwise, a new portion of putty will begin to set about a third faster. This rule is especially true for gypsum-based compositions.
Domestic soil.
Preparing drywall for putty: do-it-yourself primer coating
The cut edges of the drywall are cut at an angle of 45° to a width of up to 3-5 mm, unless the manufacturer did this. The operation allows you to increase the plane of adhesion of the base to the finishing coating. A primer solution must be applied to the cut areas, otherwise the plaster on them will begin to crumble. Before plastering plasterboard walls, they are coated with a primer, which is always used only on a clean, dry surface.
Sequence of preparatory work:
- Cleaning gypsum sheets from dirt, dust and foreign elements with a vacuum cleaner or a rag soaked in water.
- Confirmation of installation stability. A correctly installed sheet of cardboard should not “walk”, and if you try to move the partition from its place, it may crumble.
- Preparation of the primer: the solution is poured into a container and diluted with water in a given ratio; sometimes simply stirring the mixture is sufficient.
- Treating the drywall surface with a liquid compound using a brush or roller. The primer easily penetrates the base and increases adhesion to the plaster.
- The drying process, the time of which is indicated in the instructions for the solution, takes about a day. The dried primer acquires maximum performance characteristics.
On gypsum plasterboard installed in rooms, it is allowed to apply primer in one layer, but in bathrooms and kitchens it is better to apply the treatment twice to create a stable coating. After the surface has dried, you can proceed to the next stage.
Preparing the wall for puttying
After the primer has dried, care must be taken to ensure a smooth surface of the wall. The screws on which the sheets of drywall are attached should not stick out and at the same time should not be strongly recessed into the wall.
Tip: if the self-tapping screw is too deep, you need to remove it and in its place screw a longer screw so that the head is flush with the surface.
Next, you need to make sure that at the joints of the gypsum board there is no detachment of the paper from the gypsum layer. If such defects are detected, the exfoliated material should be cut off with a knife. Any wrinkle that remains on the surface must be rubbed off with sandpaper. If there are large chips on the seams, they will have to be primed and sealed with a special adhesive. The following work can be carried out only after it has dried.
USEFUL INFORMATION: Using moisture-resistant drywall in the bathroom
If there is no factory edge along the edges of the sheets, you will have to make it yourself. To do this, use a sharp knife to cut the edges at an angle of 45 degrees. This is necessary to ensure the reliability of the reinforcement of the seams.
The final stage of preparation will be gluing reinforcing tape to the corners and seams so that the seams run strictly along its center. Avoid unevenness when gluing it.
Sealing screws and seams - step-by-step instructions for putty
Do-it-yourself puttying of drywall under wallpaper is accompanied by simultaneous processing of joints and places where screws are installed. The mixture is applied to the suture areas using transverse movements of the spatula. Then a serpyanka is placed on the zone, pressing it into the mixture with wave movements. To secure the part, cover it with a thin layer of putty.
The screws are treated with the mixture, at the same time you can seal the seams along the edges of the cardboard, the serpyanka should then cover them. Using a spatula, apply putty to the places where the screws are installed, and later remove the excess. All self-tapping screws that can be sealed before the seams or simultaneously with them are processed in this way.
After drying, sand and prime the surface again. For processing seams, there are materials from popular manufacturers: Knauf-Fugen, Fugenfüller and similar. After the primer has dried, the putty is diluted to a concentration of thick sour cream. Mixtures dry out quickly, so do not mix large quantities at once.
GKL joints are divided into 2 types. The edges on the long side are made uneven to facilitate embedding, but there are no ledges on the narrow side of the sheet. Drywall has to be cut, and the resulting joints require special processing technology.
Why putty vertical joints of walls and partitions?
The vertical joints of the drywall sheets are first tightly filled with putty, and while the mixture is still wet, a mesh or reinforcing tape is laid along the seams. The operation is carried out to prevent cracks from appearing. First, the tape is divided into parts of the required length, which are placed in water for 10 minutes. After filling the seam, the reinforcing material is removed, the excess liquid is squeezed out with your fingers, and glued to the connecting joint.
The reinforcing material is pressed with a spatula 8 cm wide below the gypsum board plane, the tape should “sit” on the factory protrusion. The process is carried out from the middle of the sheet towards the edges. When laying the material, excess mixture is squeezed out, which needs to be removed. If, when applying a spatula with a width of at least 20 cm to the plane of the drywall, it is clear that the reinforcing material is located below the plane of the wall, the joining seam is leveled again to the level of the surface of the cardboard sheet.
Trimmed seams
Horizontal joints - places where two sheets of cardboard are joined or vertical seams that have no edges - are best puttied after pre-treatment. The joints are first coated well with a brush moistened with water. You will need to go over the material several times to thoroughly wet the drywall. Then use a knife to make grooves at an oblique angle of 45°.
The prepared seams are primed, for which it is more convenient to use a brush. After the drying process is completed, the area is filled with a mixture for processing the compounds. It is more convenient to use 2 spatulas when working - one 10 cm wide to apply the composition, and a hard 20 cm spatula to remove the excess. The seams need to be filled well by pressing the putty. If the work is done correctly, you get a roller that protrudes slightly above the plane.
The joint is covered with a new layer of the mixture 0.5 mm thick, after which the reinforcing material soaked in water is taken and glued on top. The tape is pressed tightly against the plane of the cardboard with an 8cm wide spatula, and the excess putty is squeezed out. The paper wave that forms during operation must be monitored so that it does not become wrinkled.
Excess composition is removed from the tape and the plane nearby. A thin layer of the mixture is once again applied to the surface at the final stage. The remains of the drywall putty are stretched along the plane with a roller.
The second filling technology is first tape and then finished putty
When using the second puttying method, reinforcing material or serpyanka is first glued onto a sheet of cardboard, on which a layer of putty is applied. This way the process moves faster, but has a significant drawback - voids remain under the material. In such places, wallpaper may wrinkle, and putty and decorative plaster are not immune to cracking.
Serpyanka mesh is characterized by increased rigidity, which makes work difficult. Often the edges of the material are visible under the mortar. To facilitate the process, a mesh is first glued to the treated area, which is puttied after the solution has dried. You can use self-adhesive sickle tape to speed up the process, but it is difficult to putty drywall using this method - the spatula “jumps” over an uneven plane and forms a wave that is difficult to smooth out.
Finishing internal corners
Many people rely on a special spatula shaped like a corner. It is convenient for them to putty corners, spreading the putty with vertical movements. However, such a tool also has disadvantages. It will be difficult for a beginner to handle it. Also, if the sheets of drywall do not form a right angle, then such a tool is useless, because it is designed for ideal walls.
Classic version of working with an internal corner
Puttying drywall under wallpaper on the inner corners is done using a serpyanka. The tape is glued to both walls along the joint. Moreover, you need exactly two tapes on two walls, not overlapping. You can’t bend the serpyanka in half to stick it on two walls at once. If you do this, then over time the wallpaper in the corners will begin to peel off. It is advisable to take a tape with an adhesive base so that you can stick it evenly.
A layer of putty is applied on top of the serpyanka, which is spread vertically, and then horizontal movements from the corner are made only with pressing movements of the spatula. The correct thing to do would be to complete one wall first, and then move on to the second wall.
After wallpapering, the slight curvature of the inner corner will not be noticeable.
How to putty corners of drywall: external and internal
When finishing gypsum boards, you will need to work on the corner areas inside and out. Before you putty the plasterboard corners, they are given a clear shape, for which you will need perforated metal parts. The elements are not durable and are lightweight, but the inclusion of products in the coating gives it the ability to withstand mechanical impact of moderate force.
The corners are attached during the application of putty. You will need to pre-cut the products to the size of the part of the wall being finished. The parts are fastened as evenly as possible, and a plumb line or hydraulic level is used to check the position of the elements. You can fix the corner at several points with a construction stapler for greater reliability.
A master who knows how to putty drywall can easily cope with finishing corner areas, for which the usual coating method is used.
The mixture is applied to the wall on both sides and leveled. To do the job, it is more convenient to use a medium-width spatula.
To finish the corners inside, use the material used for connecting joints - reinforcing tape or sickle tape. It is better to work with a narrow spatula or a special trowel. The processing technology is no different - drywall putty is sequentially applied to different sides of the wall.
Finishing of corners begins after the coating layer has dried. First, the outer sections are reinforced.
Sequencing:
- the corner is covered with the mixture on both sides;
- the corner is pressed evenly with the rule;
- level the released part of the putty over the surface;
- wait until the mixture sets.
The corner must be completely covered with the solution when applying the finishing coat. It is more convenient to work with an angled spatula. Place your own tape on the mixture applied to each side of the wall; this should not be done overlapping.
Should drywall be primed before puttying?
Priming is the impregnation of the surface with special quick-drying solutions. As a result, the cardboard becomes denser and its absorbency decreases.
Primer advantages:
- putty consumption is reduced;
- glue and paints do not dehydrate;
- the cardboard is protected from waterlogging and deformation;
- the aggressive effect of adhesive components is reduced.
The putty does not apply evenly on an unprimed surface, and the adhesion to the cardboard is weak. Such a coating will be loose and fragile, and will quickly peel off along with the wallpaper or paint.
Sanding seams and corners with putty
Sanding time is kept to a minimum if the coating layer is well leveled when sealing the joints. The work takes a long time, so it is better to reduce it. The fine dust that is formed during grinding floats in the air for a long time and rises again. Before starting work, cover the floor with wet rags or sawdust. The doors are covered with a large cloth moistened with water to prevent dust from getting into other rooms.
Irregularities protruding above the surface before starting work are cut off with a sharp spatula. Corners and seams do not need to be sanded smooth during the sanding stage. For work, use a wooden block with an attached mesh with a cell size of 180-200, which can be attached using a construction stapler. The device levels the plane. It is advisable to use oblique lighting during work - unevenness becomes better visible on the surface. But you can’t sand drywall under wallpaper very carefully.
It is better to work in a respirator, safety glasses and gloves. After sanding, cover the surface with the solution again. You will need to apply primer to the entire surface, because settled dust prevents the adhesion of materials. Inner corners are difficult to putty and sand.
Why do you need putty?
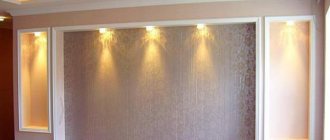
The appearance of the wall after covering the drywall with wallpaper.
It is clear that the joints of the sheets will be protected with a special reinforcing tape and puttied. It is clear that the screw heads are also hidden under a layer of putty. However, not everyone knows whether it is necessary to putty drywall before wallpapering. We are talking about completely covering the sheet with a special solution. Is this really necessary?
- The covering under the wallpaper should be white. If the wallpaper is made in light colors, it will begin to show through and the color of the cardboard will begin to show through. In this case, already processed joints and screw heads will not be visible.
- When removing wallpaper in the future, it will be much easier to do this if you apply it to the putty wall. Otherwise, by peeling off the wallpaper, you can remove it along with part of the plasterboard sheets. If this happens, then in the future such sheets will not be suitable for new finishing and will have to be replaced.
Consequences of the absence of a layer of putty on drywall sheets
There are only two arguments, but they are very significant. It is also worth noting that shrinkage is possible in a new building. So the wallpaper can start to turn into an accordion. Only properly used drywall (installed with gaps) can save you from this. Experts say that putting drywall under the wallpaper also helps, but this is only a theory that has not been tested in practice.
Corner joints
External and internal corners when covered with plasterboard are designed differently:
- To make the external joint strong, special profiles are used. They are made of plastic or steel and have perforations along their entire length. A small portion of putty is applied to the corner, the profile part is placed on it and, with light pressure, it is immersed in the uncured mass. The surface must be carefully smoothed with a spatula. Then the area is covered with new putty on top to completely hide the profile. If the angle is uneven, the profile can be installed with self-tapping screws.
- For internal corners, use paper tape. It is placed on a thin layer of putty and pressed into the joint with your hands. Now you need to level it with a narrow or angled spatula, apply a little solution on top and distribute it evenly over the surface.
Putty can only correct small defects. Loose corners, waves and bumps cannot be leveled this way. Ideally, crooked drywall should be dismantled and installed over a new frame. But if radical repairs are not part of your plans, flaws can be made less noticeable if the walls are covered with structural wallpaper or decorative textured plaster.
Preparing plasterboard surfaces for puttying
Before puttying the entire surface, putty the seams with sheets of plasterboard, and also, if the room has external corners, they need to be closed with a perforated metal corner.
After the putty has dried on the seams and corners, the surface is primed with a surface primer. The primer forms a surface layer that improves the adhesion of the putty to the surface. Looking ahead, I note that each layer of sanded putty is primed.
How to prepare gypsum boards for puttying?
Before you start puttingtying the surface of plasterboard sheets, it must be primed with a thin layer (no thinner than 0.03 mm) using a roller - this will ensure a moisture-resistant effect that will not allow glue or paint to soften the top layers of plasterboard. It is worth noting that in this case the use of an alkyd composition is not allowed, because it can affect the deformation of the coating and its bubbling with subsequent peeling. Painting drywall without putty is not possible, because a good repair should not have open protruding screw heads with an uneven surface covered with a layer of paint, so before that you will need to level it to perfect condition. There should be no protruding or overly driven bolt heads (otherwise dents will appear). Here you need to make sure that the sheet is intact; its core should not move away from the picture component; if a detachment appears, it must be removed. To do this, you need to tear off the paper layer and clean the exposed surface with sandpaper (this will prevent the putty from peeling off or becoming cracked).
Puttying plasterboard walls - application technique
The most difficult layer to putty is the first layer. The layer thickness is 2-3-4 mm, the solution consumption is the largest. To apply the putty you will need two spatulas 40 cm wide. The putty is loaded with a 10 cm wide spatula. With certain skills, the width of the working spatulas can be increased to 50-60 cm (although this is unnecessary).
Putty is applied from the corner to the middle and from bottom to top. One spatula is held in the right (working) hand. The second auxiliary spatula is held in the second hand. Apply putty from a bucket with a 10 cm spatula onto a working spatula. At an angle of 30°, the spatula with putty moves along the wall, leaving behind an even layer of putty. Remove the remaining putty using an auxiliary spatula. Apply the putty again to a working spatula and repeat the application operation. The applied putty should lie in an even layer without ridges or bald spots.
The second layer of putty is applied after the first layer has dried, sanded and primed.