Ceramic tiles are a fragile and expensive material. Treating the installation process without due attention is an unaffordable luxury. In this business, wrong decisions are very costly. Ultimately, it all comes down to the questions: what glue to choose, how to properly prepare the surface, do you need to putty the walls before laying the tiles?
Especially often, novice craftsmen and people who decide to do repairs on their own are interested in whether the tiles will stick to the putty layer. The answer is yes, but there are certain nuances.
Important Features
The criteria for choosing material for putty are:
- moisture resistance;
- adhesion level;
- required layer thickness;
- tile weight.
It “sticks to the wall without compromising its performance. They also take into account where it is used - inside or outside the building. The outer material is required to be frost resistant.
The type of putty is taken depending on the condition of the wall. Small irregularities are removed using a finishing coating; for deeper irregularities, starting mixtures are used. You can understand what layer of putty will be needed for leveling by using a long building level. To do this, find the most protruding point on the surface of the wall and take measurements relative to it.
A perfectly flat surface for laying tiles is not required. Small flaws can then be easily removed after applying tile adhesive. After puttying, the base is not sanded. On the contrary, in order to strengthen the adhesion of the base to the finishing material, special notches are applied to it.
Surface preparation
A wall with good adhesion is the key to the durability of the coating
Do I need to putty the walls? The surface on which the ceramic coating will be installed must be prepared in accordance with all standards and technologies. After the completed manipulations, the wall should have the following characteristics:
- excellent adhesion, since this indicator is very important for firmly holding the tiles on the wall; if this is neglected, then over time pieces of tiles will come off one after another;
- be perfectly smooth without cracks, depressions or flaws; tile panels can be easily and quickly laid on a smooth surface, even if the installation is done by hand; It will not be possible to quickly lay tiles on an uneven or crooked base; there is a possibility that the slab will move away from such a surface before its stated service life;
- high strength; since the walls are not able to bear a high load for a long time if the indicator of this parameter is low; Over time, the wall covering may collapse completely.
Simply put, if you do not follow certain technologies for preparing the surface for installing tiles, the end result will be very disappointing. Most likely, in the near future, additional expenses will be required for leveling the surface and purchasing a new ceramic coating, since it will no longer be possible to glue the old tiles to the wall perfectly evenly, even for an experienced craftsman.
It is easier to putty walls using beacons
You can prepare the wall surface in various known ways. The most popular is leveling with gypsum plaster. If there are large depressions or bulges on the surface, then leveling beacons should be installed on the walls. As a rule, they are aluminum, wood or plastic.
The first step is to install beacons along the edges of the wall. To do this, you need to retreat 20-30 cm from the corner. They are leveled, strictly vertically. Next, the remaining beacons are installed using thread.
The most optimal distance between the axes is considered to be 1.5 m. As practice shows, the smaller the step between them, the smoother the wall surface will be.
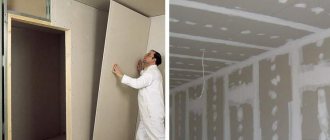
There is another proven method. You can glue ready-made sheets of drywall to the wall. They have a perfectly flat surface, suitable for cladding with any finishing material.
If the wall surface is initially almost ideal for laying tiles, but with small cracks or minor flaws, then all unevenness must be primed and filled with putty. After this, you can safely lay the tiles on the putty.
Laying tiles on a putty wall: stages of work
Laying of ceramic material takes place in stages according to the instructions:
Stage 1. Taking measurements. At this stage, the area is calculated. Based on its size, it becomes clear how much tile you need to buy with a mandatory margin for defects (10-15%). The amount of consumables is also affected by the types of patterns. Diagonal laying requires more material consumption.
Stage 2. Preparatory. Clean the wall from dirt, lay out the tiles and tools. Determine the place to start work and, depending on this, divide the wall into zones.
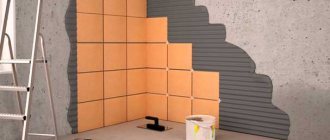
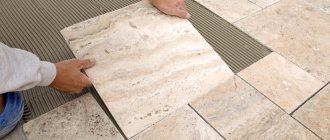
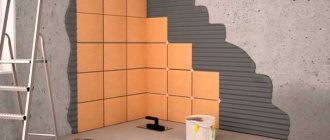
Stage 3. Laying. They start from the center, having previously laid a row of tiles without glue to eliminate mistakes and secure the support stops. Apply adhesive to small areas using a notched trowel. The size of the adhesive layer is equal to the depth of the spatula tooth. After installation, be sure to check it for correctness using a level and plumb line. To maintain the minimum distance between the tiles, beacon crosses are installed in the corners.
Stage 4. To fill the remaining surface, the material is cut to size and glued. This is done using a special tile cutter. If necessary, it is replaced by a glass cutter or grinder.
Stage 5. Grouting joints. It is carried out after the adhesive layer has completely hardened. The grouting compound is applied with a rubber spatula in the following sequence:
- a small amount of grout on the seam between the tiles;
- deepen it into the seam;
- Place a spatula across the seam and remove excess grout.
How long does it take to dry?
The final hardening time of the adhesive layer varies depending on the following factors:
Which is better: heated floors or radiators?
Warm floorBatteries
- Temperature conditions (at low temperatures, drying may take 3-4 days).
- Humidity.
- Layer sizes.
- Glue composition (high-strength ones harden faster).
- Additives.
- Water absorption of the base.
The surest way to find out exactly how long the glue will dry is to read the information on the packaging. Manufacturers base their calculations on the hardening time at room temperature with an air humidity of 60%; this time is indicated with a margin.
If you want to create a solid base for laying ceramic sheets, putty the walls to level them. However, tiles will adhere well to a putty surface only if the materials are selected correctly and the requirements of the technological process for wall putty are met.
Features of working with different partitions
The choice of material and leveling technology depends on the raw materials from which the walls are made. Professionals call brick the most capricious to process. After 10 years of operation, the blocks are destroyed, and curvature appears in the partitions, reaching 5-7 cm. For such surfaces, it is not advisable to use putty. Preference is given to drywall mounted on a frame.
Features of working with different materials Source cozzyroom.com
It is difficult to remove old finishes from wood. Removing plaster from wood is much more painstaking than building a new wall. After dismantling, the surface is puttied with cement, additionally reinforced with metal mesh. After drying, use plasterboard or DSP.
Problems rarely arise when working with concrete floors. The material made of iron and cement, after removing the old finish, retains its original evenness. All the contractor needs to do is “patch” visible defects and level the base with moisture-resistant putty.
How walls are leveled Source krovati-i-divany.ru
Tips for laying tiles on plasterboard walls
Leveling gypsum plasterboard walls has long been a favorite for everyone who makes repairs on their own. It is used in almost all rooms and always gives good results. Only sometimes people have doubts: is it possible to lay tiles on drywall? And if so, how is this done? In order not to get lost in doubt, let us take a closer look at this issue.
So: do they lay tiles on gypsum boards? Builders assure that your favorite ceramic coating will adhere perfectly to this material if you do not violate certain technologies and understand some of the nuances of performing the work.
Application technology
After placing the beacons, apply the first “rough” layer of plaster to generally level the surface. Often it is not needed if the wall was previously plastered and the surface does not have obvious defects that weaken it.
The second, main layer is also not always appropriate if the base is level and the plaster is of high quality. The final layer is made using a high-quality cement-based putty mixture. If all the requirements described above are met, the question of whether it is possible to lay tiles on finishing putty will no longer be relevant.
The technology for applying the putty mixture is simple: a small amount of the compound is applied in a thin, as even ball as possible, paying special attention to the cracks and irregularities that remain after the base layer has dried. After the putty has dried, the surface can be sanded with medium-grain sandpaper.
Now the wall is ready for laying ceramic tiles. Some craftsmen additionally prime the putty surface to further increase adhesion.
Installation subtleties
In order for laying tiles on drywall to be successful, you need to follow several rules:
- The walls in the bathroom or kitchen are covered with moisture-resistant sheets. They usually have a green pasting and are marked with the letters GKLV. Others will warp from dampness, and your cladding will simply crumble.
- Before laying tiles on the gypsum board, you need to take care of the strength of the frame: it will bear a very noticeable load. Therefore, the elements of the rack profile should be spaced no further than 40 cm from each other, and the sheathing with sheets should be made of two layers. This way you are insured that the frame will not bend under the load, and the seams between the plates will not separate or become distorted.
- All mixtures and liquids are purchased for dual purposes: they must be oriented towards both tiles and gypsum finishing coating.
- The tile should be chosen in a standard size. Many materials even indicate that its longest side should not exceed 33 cm. Then the load on the gypsum board will be evenly distributed, and the elements will stick to them more reliably and firmly.
In cases where it is impossible to make double cladding (for example, in small bathrooms, where it hides too large a piece of usable space), in the intervals between the profile elements the wall is covered with a plaster mesh with duplicative fixation with staples. If all these conditions are met, you can safely lay tiles on drywall. It will hold up no worse than on a concrete wall.
Which mixture should you choose?
Selecting a putty mixture is a critical step for the successful implementation of a renovation project.
Material should be purchased based on indicators:
- moisture resistance;
- adhesion properties;
- working layer width.
More often, the question of choosing a composition is of interest to those who want to glue tiles onto putty in the kitchen or bathroom. Is it possible to use putty to level and strengthen the work surface in rooms with high humidity? Yes, but gypsum mixtures are not suitable for this purpose. Gypsum tends to absorb moisture, which leads to an increase in the mass of the putty layer. And this is already a violation of technology, since the glue on which the tiles are set will lose adhesion to the wall, which will inevitably lead to the ceramics falling off. The choice in favor of gypsum putty is justified only for dry, heated rooms where there are no significant temperature changes.
The best option is a cement-based putty mixture. These materials are characterized by high moisture resistance, good penetrating properties and excellent adhesion. Cement mixtures can be used in any conditions, since they have a polymer base with strengthening additives in their composition. If the installation technology is followed, ceramic tiles installed on cement putty will last 10-15 years.
Preparing the wall for laying tiles
Most structures are prepared in the same way for finishing. However, if tile is chosen as this, the order changes somewhat. For example, doubts about whether it is necessary to putty drywall under tiles have good reasons. After all, putty is applied to level out minor imperfections that will be visible under the wallpaper, and even more so under a layer of paint. The tile will cover the defects, and small differences in height, if any, will be leveled with a layer of glue. So puttying the entire surface is cancelled. But other work remains.
What needs to be done when finishing?
- In any case, the screw caps, seams between sheets, minor scratches and damage received during the installation process are puttied.
- The corners are taped with sickle tape and also sealed with putty - without this step, laying tiles on drywall in the bathroom is, of course, possible, but the corners that are not reinforced with tape will be very vulnerable, and it is from them that all the tiles will begin to float.
- If the room has poor ventilation and is constantly damp, it is advisable to impregnate the gypsum board cladding with hydrophobic reagents. “Flechendicht from the Knauf company” showed itself very well in this regard. If the furnishings in the bathroom are standard, you can lay the tiles on drywall without such treatment.
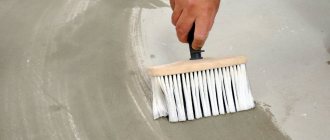
- When the putty has completely dried, the entire surface intended for cladding is primed. You need to buy primer that is compatible with glue. The primer is applied twice, with an interval for the first layer to absorb and dry. For most formulations, this takes from 45 minutes to an hour.
Before laying tiles on sheets of drywall in the bathroom, you need to consider one more nuance. A bar must be installed under the bottom row, set to a level, strictly horizontally. On walls that are laid out completely, all the way to the top, a whole number of rows are counted from the ceiling so that the cut tiles are located near the floor. Above the bathtub, the rail is placed according to the same principle, but, naturally, higher.
Choice of putty
Is it possible to glue tiles to putty? The answer is obvious; laying tiles on putty is not only possible, but also necessary, which is recommended by experienced specialists.
The material itself has high adhesion and perfectly bonds any finishing material to the wall. Another positive quality of the putty is that it absorbs a small amount of adhesive solution during the installation of the tiles.
Putty for tiles is selected according to the following indicators:
- It should not be destroyed under the influence of large changes in temperature and humidity, especially in sanitary areas, corridors, bathrooms and other rooms. It is worth understanding that it is under no circumstances acceptable to use gypsum plaster in the bathroom; it quickly absorbs moisture, as a result of which the layer cracks. Another disadvantage of gypsum is that it quickly absorbs water from the adhesive during the process of laying tiles. This will lead to a deterioration in its physical properties, and possibly its movement away from the wall.
- Adhesion. This indicator plays a huge role. The putty must not only hold the tile securely, but it must also adhere firmly to the surface.
- The type of putty purchased must be combined with the wall material. Silicone, silicate or cement putties are selected for foam or aerated concrete. Usually their use is indicated on the packaging.
- Climatic. If installation is carried out on the outside of a load-bearing wall, then the putty mixtures must be frost-resistant.
- Only one layer of ready-made mortar is rarely placed on the walls. As a rule, they are applied in threes: the starting one (levels the surface), the second one (fills all large irregularities) and the finishing one (the surface is brought to an ideal state).
If the wall has large defects, then the number of layers is increased.
Deep cracks or depressions cannot be smoothed out using putty. It fills only shallow defects. When there are defects on the wall surface, plaster is suitable to eliminate them.
If plasterboard is used to level the walls under the tiles, then a layer of putty will also need to be applied to its surface. The joints between the sheets must be treated with putty, this will make the coating uniform and durable.
Plasterboard wall cladding
In the future, laying tiles on gypsum boards is carried out according to the same basic principles as on other surfaces. They start it from the most visible corner, if you have to cut the last vertical row by less than half. If the area to be trimmed is larger, installation begins from the middle of the wall so that the trimmed elements are placed symmetrically.
- When it comes to the question of how to properly lay tiles on drywall, the installation solution is important. It is better to limit yourself to a small volume so that you can use it before it starts to dry out right in the container.
- The adhesive composition (it is better to take trusted manufacturers) is applied to a wall with an area of about a square meter.
- Observing right angles, the first tile is applied and pressed.
- Next, 3-4 elements are laid out vertically. They must be checked with a level, as they will serve as a guide for subsequent rows. The evenness of the masonry must be checked regularly, since it is impossible to remove the tile from the drywall when it is stuck without damage; you will have to change the whole sheet or at least a fragment of it.
- Next, the first horizontal row is displayed. When fixing the tiles, you also need to fill the gaps between the tiles. To ensure that the seams are the same width, paint crosses are placed at the points of contact of the four elements.
- To evenly distribute the adhesive under the tiles and prevent the formation of voids, lightly tap the material laid in place with a rubber hammer.
- After 3-4 rows of tiles have been laid, a break of half an hour or an hour is taken. During this time, the glue will have time to set strongly enough so that the tile does not sag or move under the weight of the next rows. Afterwards, you can continue laying it on the drywall in the same mode.
- If glue gets on the tile, it must be wiped off immediately with a sponge. Some compounds are very difficult to remove after drying.
When all the tiles are laid on the drywall and the glue has set sufficiently, the crosses are removed. The next day you can start grouting the seams and filling them with silicone to increase the degree of waterproofing. Here is a step-by-step master class. How about you: did you manage to stick the tiles onto this material?
How and with what to putty plasterboard under tiles
- Starting compounds (leveling, base), which are designed to hide the largest surface defects.
- Finishing putties used to finalize the coating to perfect condition.
- Universal compositions that can be used to create both base and top coats.
There is an alternative way to seal the joint with serpyanka, but its implementation will take more time. However, the result is worth it, since the seam will be very durable. In this case, first put not tape, but putty, which is then sanded with sandpaper.
After this, the tape is laid and coated with the finishing compound. The next stage is priming the drywall. Thanks to the primer, the surface will adhere better to the putty.
You can do without a primer, but in this case the putty may peel off along with the tile. The primer composition is applied with a wide brush or roller. To achieve a more reliable connection of plasterboard sheets, even before puttying, the joints are laid with a special reinforcing tape. The best option for reinforcement is serpyanka tape made of synthetic material. This tape also has another name - construction bandage.
In recent years, fiberglass mesh has become widespread. The use of this material allows you to make the plasterboard structure more rigid. In addition, the fiberglass mesh absorbs the loads that occur due to temperature changes.
Do I need to putty drywall before laying tiles?
The primer for drywall has deep penetrating properties: after application, the composition penetrates deeply into the plaster and strengthens its surface. Before you putty the surface, it is necessary to prepare it. First you need to make sure that the heads of the screws do not protrude above the surface. If protruding screws are found, carefully tighten them deeper, but not too deep.
The self-tapping screws should be positioned flush with the surface of the drywall. If there are self-tapping screws that are too deeply recessed, we replace them with longer ones. Before starting to plaster the drywall, you need to prepare its surface for applying a wet putty composition using a primer. It is necessary to prepare gypsum board sheets for tiles.
Even if it takes a few days longer, however, by using plaster and a primer under the tiles, you can be sure that the drywall will withstand its load and you will be able to forget about repairs in the room for many years. And even when this time comes, it will be much easier to do than without preparation.
- Recommendations for choosing materials
- Preparing your workspace
- Padding
- Features of strengthening the structure
- Puttying seams
- Reinforcement of joints
- Fiberglass mesh
Dismantling
This kind of work is very easy to do on your own, even without special skills. To remove old tiles, use a hammer drill to remove the old layer of mortar.
- When working with a hammer drill, it is important to use safety glasses, as flying pieces of old materials can cause injury.
- It is also important not to forget about the presence of electrical wiring that cannot be touched with a tool.
- If necessary, the old wiring is replaced with new one.
After completing the dismantling process, there should be no unevenness or bulging areas on the surface. If the walls are covered with old paint, a grinder with a special attachment is used to remove it, which cuts off the paint from the old layer of plaster.
How to prepare gypsum plasterboard for tiles
_ If the glue for ceramics is good, then you don’t have to prime anything. The tile is still holding on as if it were dead. You just need to dust off the surface.
Waterproofing in the toilet, and with moisture-resistant plaster, is also not needed. A box of two layers is optional. I don't see the need either. _ And the most important thing is no sickles and no putties for ceramics! Glue sticks very poorly to putty. Any gaps and depressions are smoothed out with the same ceramic glue.
There is a gypsum plasterboard box covering the pipes in the toilet. What is the minimum that needs to be done with it to prepare it for laying tiles? Do I need serpyanka for the seams or is a special putty enough?
Do I need to putty the entire surface or is it enough to just the seams, and the rest can simply be primed (for example Knauf Tiefengrund)? Thank you. Valena wrote: _ If the glue for ceramics is good, then you don’t have to prime anything. The tile is still holding on as if it were dead. You just need to dust off the surface.
Waterproofing in the toilet, and with moisture-resistant plaster, is also not needed. A box of two layers is optional. I don't see the need either. _ And the most important thing is no sickles and no putties for ceramics! Glue sticks very poorly to putty. Any gaps and depressions are smoothed out with the same ceramic glue. Oh how! It’s a good thing I didn’t have time to putty it yesterday.
So, cover the gypsum board-gypsum board and gypsum board-wall joints with tile adhesive and everything is OK? “Forward Etalon” is suitable for these purposes? I made the box in the bathroom from moisture-resistant plasterboard, did not treat it with anything, did not prime it and did not bother at all, glued 20*30 tiles, used Hercules superpolymer, grouted the seams with regular tile grout, it has been standing for a year and is not going to fall apart
The procedure for puttingty under ceramics
Sometimes plastering the walls under the tiles is a sufficient measure of preparation for further manipulations. And the logical conclusion is if you ask the question: is it necessary to putty the walls before laying the finishing slabs? It is necessary if a similar degree of preparation is chosen, and the wall allows you to get by with it. To comply with the technology, the putty must have a number of characteristics, and the set of works must be carried out in strict accordance with construction GOSTs.
Is it possible to glue tiles to putty walls? This can be resolved if, before laying the tiles, you study all the factors and come to the conclusion that putty can be used in a particular situation. But then you will have to strictly adhere to the sequence of the technological process:
1. Before laying the stone on the glue, it is necessary to remove dust particles and dirt from the working surface, you will need to cover up large cracks and eliminate defects. For this purpose, they resort to the use of plaster and construction foam.
2. The next step is to prime the wall, which will prevent the formation of mold and mildew under the stone and improve strength and adhesion. For this purpose, it is advisable to work with soil with antiseptic properties.
3. After the soil has hardened, you can begin to putty. It is worth noting that the maximum layer thickness is 5 mm. Greater thickness is achieved by layering in several approaches, and you should wait until the previous layer hardens and prime it (pay special attention to work in the bathroom; finishing work requires a special composition).
Do I need to putty drywall in the bathroom before laying tiles?
Novice builders often ask the question of whether it is necessary to putty drywall before laying tiles. Of course, applying a putty layer strengthens the structure, improves adhesion (and therefore the tiles will adhere securely to the drywall), and reduces glue consumption. The specifics of choosing materials, surface preparation and puttying will be discussed in this article. When all the tiles are laid on drywall and the glue has set sufficiently, the crosses are removed. The next day you can start grouting the seams and filling them with silicone to increase the degree of waterproofing.
Here is a step-by-step master class. How about you: did you manage to stick the tiles onto this material? Before you putty the surface, you need to prepare it. First you need to make sure that the heads of the screws do not protrude above the surface. If protruding screws are found, carefully tighten them deeper, but not too deep.
The self-tapping screws should be positioned flush with the surface of the drywall. If there are screws that are too deeply recessed, replace them with longer ones. The joints must be puttied separately.
This imparts integrity and strength to the structure. When installing plasterboard panels, many joints arise - they are the weakest areas of the structure. It is along the joints that cracks most often form after laying the tiles.
To prevent this, the seams must be carefully puttied. In recent years, fiberglass mesh has become widespread. The use of this material allows you to make the plasterboard structure more rigid.
In addition, the fiberglass mesh absorbs the loads that occur due to temperature changes. The choice of ceramic tiles for renovation is due to their properties, which are ideal for being in conditions of increased vapor formation and moisture. Why is moisture-resistant HA usually selected?
Ceramics can be wall or floor. Therefore, it varies in thickness and weight. For the floor, it is designed to be stronger and heavier, which has a high coefficient of resistance to regular pressure. Collections whose elements have a minimum thickness are suitable for walls. The varied external decor of such tiles, as well as the ability to combine them with stone, wood and even brick, makes them quite popular on the market.
Advice! For drywall, use a primer for interior work. When choosing a mixture, pay attention to the expiration date, price and manufacturer. It is recommended to begin gluing the trim after all rows of solid tiles have completely dried.
The drying time for the glue is indicated by the manufacturer on the packaging. When the entire surface is covered and the glue has dried, you can move on to the final stage - grouting the joints.
Preparatory operations
A logical question arises: is it possible to lay tiles on a wall that has been puttied or treated with another material again? It will not be possible to reinstall a fallen element a second time efficiently. Buying a new puzzle each time instead, you may go bankrupt. In this regard, it is strongly recommended that you initially approach the preparatory operations responsibly.
Leveling the wall is done using different methods, for example, by plastering or fixing plasterboards. The methods are relevant in the presence of noticeable hollows and protrusions.
In the case where the wall is relatively smooth (with only small deviations), it is rational to stop at puttying.
Selection of material
The putty mixture should be selected due to its good moisture resistance, penetrating abilities, the width of the required layer, and the weight of the mixture:
- Gypsum putty, which cannot boast of this ability, is permissible for use only in rooms without heating failures, and air humidity is not subject to constant fluctuations. It is not advisable to use the material in the bathroom and kitchen, since the putty layers will swell from constant moisture. A cement mixture is more appropriate in such rooms.
It is undesirable to use gypsum putty under ceramic tiles. This type of material draws out moisture, thus reducing the working properties of the adhesive used under the tile elements.
- The putty material must adhere perfectly to the surface without reducing the performance characteristics of the wall. For special walls, specific solutions are selected (for example, for gas silicate block surfaces, cement and a well-known solution are suitable).
- The target area of application is important: different compositions are sold for external and internal work. For finishing the outside of the house, only frost-resistant solutions are suitable.
- The group of putty material is selected based on the level of defects on the wall. Thresholds of two centimeters will be corrected only by starting solutions with large grains in the structure; for minor defects, a universal material will do.
When it is necessary to use a mixture more than 2 cm thick to level the surface, only plaster will do the job, since even a thick layer of putty will not hold a significant mass of ceramic tiles.
On video: checking the quality of glued tiles.
Calculation of the thickness of the putty layer
In order to find the right decision on whether putty is needed for ceramic tiles, you should study the level of smoothness of the wall:
- When the surface is strong and no prominent defects are found, then it is permissible not to putty the surface, using only primer.
- For subtle defects, by correlating their area and calculating the required thickness of the putty layer, you can calculate the material costs.
- When ripples on the wall are noticeable to the naked eye, when to create a flat working plane you will need to spend putty on a layer of more than 2 cm. Putty loses its meaning. The best way to replace the process is by plastering or installing gypsum boards.
In the extreme case described, the putty mixture can be useful for covering the joints between sheets of drywall. You can calculate the required thickness of the putty layer using plumb lines and a level.
To make the calculation, you need to find the point on the plane that protrudes beyond the general boundaries and determine the thickness, starting from the distance of this point to the general surface. The required thickness of the leveling layer is determined by a segment from the wall to the vertical thread (base of the level). A sheer thread is hung in the corners of the room and along the trajectory of the most protruding point. You can ensure accuracy by pulling the thread diagonally from the top corner to the bottom.
An automated way to find out if a wall is level is with a laser level.
Preparing drywall for laying tiles
The hardened primer for drywall under tiles creates a protective polymer layer that prevents the penetration of moisture contained in the tile adhesive. Is it necessary to putty drywall before laying tiles? No, but it is desirable.
Putty applied to a plasterboard surface allows you to create a smooth and durable base for the tile. In addition, in case of repair work to change the coating, it will be easier to remove the old cladding. But it is imperative to use a primer to prepare the wall. It is necessary to prepare the base carefully; the final result will depend on this.
Do I need to prime drywall before laying tiles? Here the opinions of professionals converge. The primer applied to the wall contributes to: One of the frequently asked questions to professionals is “What is the thickness of drywall for walls under tiles?
The most optimal sheet thickness is 12.5 mm. What primer is best for drywall under tiles? It is recommended to treat the surface with an acrylic primer.
It is non-toxic, dries quickly, lays evenly on the plane and has high performance characteristics.
Surface preparation
A wall with good adhesion is the key to the durability of the coating
Do I need to putty the walls? The surface on which the ceramic coating will be installed must be prepared in accordance with all standards and technologies. After the completed manipulations, the wall should have the following characteristics:
- excellent adhesion, since this indicator is very important for firmly holding the tiles on the wall; if this is neglected, then over time pieces of tiles will come off one after another;
- be perfectly smooth without cracks, depressions or flaws; tile panels can be easily and quickly laid on a smooth surface, even if the installation is done by hand; It will not be possible to quickly lay tiles on an uneven or crooked base; there is a possibility that the slab will move away from such a surface before its stated service life;
- high strength; since the walls are not able to bear a high load for a long time if the indicator of this parameter is low; Over time, the wall covering may collapse completely.
Simply put, if you do not follow certain technologies for preparing the surface for installing tiles, the end result will be very disappointing. Most likely, in the near future, additional expenses will be required for leveling the surface and purchasing a new ceramic coating, since it will no longer be possible to glue the old tiles to the wall perfectly evenly, even for an experienced craftsman.
It is easier to putty walls using beacons
You can prepare the wall surface in various known ways. The most popular is leveling with gypsum plaster. If there are large depressions or bulges on the surface, then leveling beacons should be installed on the walls. As a rule, they are aluminum, wood or plastic.
The first step is to install beacons along the edges of the wall. To do this, you need to retreat 20-30 cm from the corner. They are leveled, strictly vertically. Next, the remaining beacons are installed using thread.
The most optimal distance between the axes is considered to be 1.5 m. As practice shows, the smaller the step between them, the smoother the wall surface will be.
There is another proven method. You can glue ready-made sheets of drywall to the wall. They have a perfectly flat surface, suitable for cladding with any finishing material.
If the wall surface is initially almost ideal for laying tiles, but with small cracks or minor flaws, then all unevenness must be primed and filled with putty. After this, you can safely lay the tiles on the putty.
Puttying walls under tiles: 10 tips for repair and finishing
- Treat the wall with primer. It is applied twice, without a pause for drying, to ensure maximum penetration into the putty;
- Apply tile adhesive according to the manufacturer's instructions;
The seams between the gypsum board sheets are filled with tile adhesive directly when laying the tiles. Cavities cannot be left. If the seam between the tiles gets caught in the seam between sheets of drywall, the cavity under the joint will interfere with the grout and reduce the strength of the finish.
In addition, the tiles can be hidden under drywall, which is attached to the sheathing made of a bar or profile. With the same success, you can stick the gypsum board leveling layer onto polyurethane glue or regular mounting foam. This is not advisable, but it is possible. The most obvious way is to apply concrete contact (adhesive polymer primer with the addition of quartz sand) over the tiles.
It forms a rough surface on which any cement or gypsum building mixture adheres perfectly. To mix it, use a construction mixer or, in its absence, a drill or hammer drill with a whisk. When mixing the solution with your own hands using a spatula, you are likely to leave lumps in it.
How to treat the surface → Room decoration → How to choose the right paint → Surface treatment technologies → Leveling and finishing the walls → Selecting and applying a primer → Removal from the surface → Stretch ceilings and technologies → Reviews and testimonials
