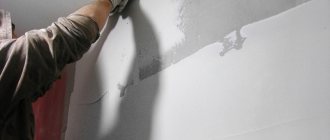
Having leveled the walls in an apartment with drywall, many people wonder: is it necessary to putty the drywall before hanging wallpaper? After all, plasterboard sheets have a fairly flat surface on which wallpaper will stick without any problems. But if you try to understand this topic in more detail, you will understand that putting drywall under the wallpaper will help you avoid many unpleasant moments.
Preparing the surface
We already understand whether it is necessary to putty the drywall under the wallpaper before gluing it. If the wallpaper changes in the future, then putty is definitely needed. But even drywall needs preliminary preparation. It’s clear that nothing needs to be aligned, but there are certain nuances that you should pay attention to.
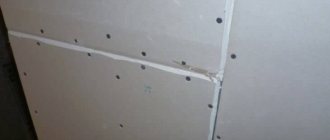
Self-tapping screws must be screwed in to this depth
Most often, problems arise due to self-tapping screws. If the screw head sticks out above the surface, the spatula will constantly cling to it. Therefore, it is necessary to immediately go over the entire wall with a spatula to detect such defects. The screws need to be tightened with a curved screwdriver in order to sufficiently recess the cap into the gypsum board.
Application process
Before plastering a wall or any other surface with the mixture, you need to pay attention to problem areas. Let's analyze this process using joints as an example:
Let's analyze this process using joints as an example:
- First you need to choose the material. Putty is also suitable for seams. Deeper damage must be treated with plaster.
- The mixture is diluted with a mixer or manually.
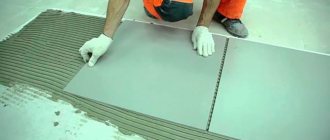
- The edges of the sheets are cut at an angle to create a chamfer. The resulting recess is primed.
- Next, apply the solution with a narrow spatula into the recess and smooth it out. Place a reinforcing mesh on top and cover it with another layer.
- Level everything with a wide spatula.
- After drying, the unevenness should be smoothed out with a brush or sandpaper.
Before wallpapering, such a coating is quite enough.
Before painting or laying tiles, applying plaster is mandatory:
- You will need two spatulas. A narrow solution is applied to a wide one.
- Apply the mixture directly to the wall with a wide spatula and level it.
- The layers should be as thin as possible. If in the end you need to level out a large deviation from the level, then it is better to apply several thin layers than one thick one.
- The finishing layer is leveled and checked using the rule.
- After drying, the surface must be sanded.
Arches and other structures with semicircular outlines are finished as follows:
- A primer is applied to the surface and a reinforcing profile or mesh is installed in the corners of the arch and secured temporarily with nails or screws.
- Using a small spatula, apply the mixture between the nails, pressing tightly.
- After hardening, remove the nails and sand them.
- Then you should proceed to the inner arch of the arch. To do this, you need to take a wide spatula, apply putty on it and level it in a thin layer over the designated surface. You can apply the topcoat right away, since there are no uneven areas.
Decorative plaster can be applied in different ways, but initially the wall must be coated with a primer in two layers and a basic regular mixture must be applied thinly.
Then you need to do the following:
- To obtain any color, the plaster can be tinted in the mass or coated with paint after completion of all work. To color the solution, you need to add color to it. And then apply the resulting decorative mass to the wall and distribute.
- Start to form a relief. To do this, use rollers, spatulas, brushes, sponges and other available means. It all depends on what effect you want to get in the end. Sometimes the texture begins to form directly during the application of the solution. And sometimes sprayers are required for application.
- After hardening, the surface is painted, covered with wax, or, conversely, part of the coating is removed using various devices. Again, it all depends on your imagination.
Tips and tricks:
- Before starting manipulations, you need to think about and prepare equipment and available tools (stepladder, additional light sources, extension cords). Don't forget about protective equipment (working clothes, hats, shoes, gloves).
- Only whole sheets are plastered, without holes. Because in places where integrity is damaged, the coating can penetrate into the inner layer of drywall. If such deformation occurs, it is better to immediately replace the sheet with a new one.
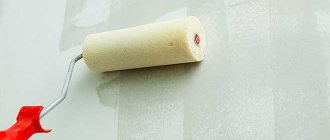
- Don't neglect the primer. Any coating fits better on it. And when applied to sheets, it also protects against swelling.
- The primer is applied with a roller. Alkyd, acrylic or phenolic bases are best suited in our case. They not only improve the properties of gypsum plasterboards, but also save money.
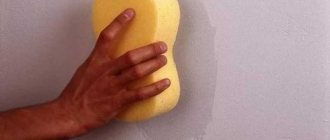
Before applying any type of coating, the surface must be thoroughly cleaned. This is especially true for gypsum dust, which remains in large quantities after the installation of plasterboard sheets. To remove it you need a good, preferably industrial vacuum cleaner. And also wetting the surface from a spray bottle. In addition to the dry mixture, which needs to be diluted, there are ready-made solutions on sale. All solutions are prepared in portions. And the remains are hermetically sealed in containers. The hardening time of the solution differs for each manufacturer. It must be taken into account when it is necessary to apply the next layer only after the previous one has completely dried
It is important to follow the instructions on the packaging in everything. The indoor climate contributes to the speedy completion of work and improved quality of cladding. It should not be cold or hot
Constant air exchange is required.
For information on plastering drywall, watch the video below.
Expert decision: is it necessary to putty drywall before wallpapering?
Experts strongly recommend that putting putty on the surface before wallpapering is not only possible, but also necessary! Of course, if the house is planned to be used for many years. If repairs are done in a “makeshift” building, technology can be completely neglected. However, the materials used here will be of a completely different quality than in a full-fledged residential building.
Experts say that for finishing drywall, a gypsum-based composition is the most optimal option.
A properly carried out puttying process allows you to:
Conclusion
Now you will find out whether it is necessary to putty drywall before gluing wallpaper, as well as how to work with putty and how to glue wallpaper. All that remains is to purchase the necessary materials, prepare the required tools and get to work.
You will certainly find a lot of useful related information on our portal. In addition, the video in this article will help simplify the planned work.
1 Purpose 2 Technology 2.1 Preparation 2.2 Puttying 3 Conclusion Using wallpaper as a decorative finish for walls during renovation is a solution.
1 Preparation of plasterboard 1.1 First stage 1.2 Second stage 2 Conclusion Finishing walls with plasterboard allows you to create an original design in a room easily.
1 Selection and gluing 1.1 Types of wallpaper 1.2 Preparatory work 1.3 Installation of wallpaper 2 Conclusion When renovating a house or apartment, many are interested in which ones.
Putty corners
How to putty the corners of drywall? This is one of the most difficult stages that involves preparing plasterboard structures for wallpapering. Walls can form internal and external corners, and they are treated differently.
Special elements are used to draw external corners. These are perforated corners made of plastic or aluminum. The former are used when processing curved corners, such as arches. Using rigid aluminum corners, right angles are created.
Read also: How to straighten a headphone cable
- The corner is applied to the wall at the attachment point and outlined with a pencil.
- The drywall is cut with a knife slightly wider than the resulting contour, at a distance of 3 mm from the marking lines.
- Using a chisel, select a groove for the corner, which should also be slightly larger than the thickness of the latter.
- The resulting recess in the wall is coated with glue or putty, and then a corner is pressed into it. At the same time, it should sink a little compared to the general level of the wall.
- The mortar protruding through the perforation of the corner is leveled, and after drying the corner is puttied flush with the wall.
The process is quite long, but while one corner is drying, you can work on the rest.
Preparing drywall for wallpapering also includes processing the internal corners.
- Like seams, at the initial stage they are glued with reinforcing tape.
- The sides of the corner are puttied alternately, using a special corner spatula.
What if it’s like this: first tape, then putty?
Some are chasing to save time and money by simply applying glue to the gypsum board or a self-adhesive mesh, or sickle tape, or paper tape. In this case, the junction remains unfilled. Such a connection will come out with warped wallpaper and cracks. In this case, saving is inappropriate. If you apply the right technology, then plasterboard walls will not let you down when wallpapering.
By the way, serpyanka and self-adhesive have significant drawbacks. Serpyanka cannot maintain the necessary rigidity, it is deformed and stretched. Fabric fibers interfere with finishing, sticking out with small wrinkles. The self-adhesive mesh comes apart immediately, without strengthening anything.
What to do if drywall shows through the wallpaper?
The situation when walls are visible through the wallpaper occurs quite often among inexperienced finishers. There is only one way out - to redo all the work done: remove the wallpaper, prepare the drywall for a new pasting (putty the wall), re-glue the trellises.
Inexperience also leads to a more difficult situation. The trellises were glued directly to the gypsum board. In this case, it will not be possible to tear them off the wall. You will have to glue heavy non-woven or vinyl wallpaper on top of the already pasted wallpaper. The sheets of new trellises should be dense and not translucent.
Processing seams and corners
Separately, it is necessary to describe the technology for processing corners that are formed when the slopes of doors and windows are sheathed with plasterboard. Plastic or aluminum corners are mounted in these places.
The installation process is simple:
- attach the corner to the joint of the drywall sheets;
- make a mark with a pencil where they go except for the drywall;
- cuts in the sheets are made near the mark, retreating a few millimeters from the edge;
- along the line of cuts, use a chisel to clean cardboard and plaster to a depth greater than the thickness of the corner material;
- the recesses are filled with putty;
- press the corner;
- Excess putty is removed with a damp cloth or spatula.
Important. Until the fixing composition completely hardens, the corner can additionally be secured with tape. When the structure has hardened, the corner is puttied on top of both plasterboard shelves flush with the entire wall.
Finishing corners takes time, so experts recommend finishing all corners in a similar manner before puttingtying the entire wall. In this case, technological downtime can be avoided.
When applying putty, it is important to maintain uniform pressure and the same angle between the spatula and the wall. In this case, the layer is uniform and thin, without external scratches or damage.
Protrusions are preferable to scratches as they are easier to remove with sandpaper.
Upon completion of the finishing process, dust should be collected from the wall. Minor defects may be hidden under a layer of dust. For an ideal result, it is recommended to re-prime the surface. Provided that all finishing stages are carried out in compliance with the technology, wallpapering is carried out quickly and easily.
Primer for drywall: why, what and when
The primer performs two different functions. The first is that it improves the adhesion (adhesion) of two materials. As a result, when puttying, the chances of bubbles forming and material peeling are reduced. The second function is that it evens out absorbency. The result is less material consumption, and when puttying, a more even surface. So it is not advisable to skip the primer.
In theory, priming during finishing work should be done before each new operation. For example, before puttying, plasterboard sheets need to be primed to improve adhesion to the putty. Before painting or wallpapering - to reduce the consumption of paint and glue. You also need a primer before applying the finishing layer - the starting layer has to be leveled, which is why the surface turns out dusty. Without primer treatment, the finishing layer does not apply well, rolls off and may even fall off.
Primer for drywall from Ceresit is also suitable for interior work.
What primers are needed? Depends on the stage and the type of finishing material:
- Before puttying gypsum board (starting and finishing layers), use a deep penetration primer or for porous, highly absorbent surfaces.
- The same composition can be used before painting and wallpapering.
- The putty surface of the plasterboard under the wallpaper can be primed with wallpaper glue diluted with water. The proportions are indicated on the glue packaging.
- When painting, you need to look at the manufacturers' recommendations. Sometimes the primer is paint diluted with water. If there are no other instructions, use a deep penetration composition.
To summarize, it is worth saying that priming is a necessary operation. It allows you to get good results and reduce material consumption.
How to properly prepare
Before covering plasterboard walls with wallpaper, you need to go through several preparatory steps:
- Drywall primer.
- Rubbing imperfections (chips, scratches, holes, joints between sheets).
- Puttying the entire surface.
- Primer before gluing.
Many amateurs often neglect this sequence of actions, believing that drywall is initially smooth and does not need additional layers of finishing.
However, it is worth considering that sheets of drywall are usually colored and can be seen through the wallpaper.
This stage should not be skipped, because if you want to save on putty during the first pasting, you may encounter additional costs when you subsequently update the interior. The fact is that wallpaper glue applied to drywall will soak the cardboard covering and make it impossible to remove the wallpaper without damaging the drywall sheets themselves.
Trimmed seams
Before sealing horizontal GVL connections, you need to perform the following steps:
- unstitch the seams - cut the edge at an angle of 45 degrees on each side of the joint;
- apply a brush to the primer and walk along the seam to remove dust and increase adhesion;
- as soon as the soil dries, fill the joints with putty; it is more convenient to work with a small spatula;
- level the surface of the seam and glue the serpyanka;
- Using a large spatula, apply a small layer of putty to the mesh.
At this point, the work of sealing the seams and masking the screw heads can be considered completed.
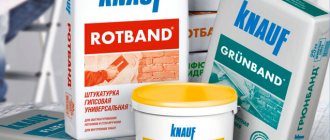
Sealing screws and seams
For seams there are special compounds Knauf-Fugen, Knauf Uniflot, Fugenfuller and their analogues. After the soil has dried, dilute the putty to the consistency of thick sour cream. Please note that these putties dry quickly, so dilute a small amount at a time.
We take a small spatula, apply the composition to the places where the screws are installed, and remove the excess. There should be just enough putty in this place so that the surface is even. This way we go through all the screws. They can be sealed parallel to the seams, or they can be sealed first. It doesn't matter.
The principle of working with putty is that a roller of the compound is placed on the edge of the spatula, then it is stretched in the right place
There are two types of drywall joints. Along the long side of the gypsum board, the edges are uneven - for easier sealing of this joint. But the sheets are also connected in height, where there are no ledges. You also have to cut the sheets and the joint is also end-to-end. Such connections require special technology, which will be discussed below.
Vertical joints
When puttingtying vertical joints of drywall with normal factory edges, they are first carefully filled and then glued.
After filling, while the composition is still wet, it is glued with a sickle mesh or paper reinforcing tape. This is necessary so that cracks do not form at the joints. If tape is used, it is torn into the required pieces and soaked in clean water for 10 minutes (while the seam is being filled).
The tape is recessed to the required distance
Having filled the seam, take out the tape, hold it between your fingers, remove excess water, and glue it to the seam. Then take a spatula 8 cm wide (this is a must) and press the tape below the surface of the gypsum board. She “sits” on one of the factory ledges. They begin to press from the middle to the edges. When pressed, the putty is squeezed out from under the tape; we collect it. As a result, if you apply a wide, hard spatula (at least 20 cm wide) to the surface, you can see that the tape is below the surface of the cardboard. Then they go through putty again, leveling the joint level with the surface.
Trimmed seams
It is better to putty plasterboard in places of horizontal joints - where two slabs are connected or on vertical ones, but without edges, after pre-treatment. First, the surface is moistened with water - dip the brush in water and coat the joint well. Walk several times until the plaster gets wet. Then use a sharp knife to cut grooves at an angle of 45°. These joints can be treated before priming. It's even more convenient.
Preparing seams for putty
We coat the prepared joints with primer. In this case, it is more convenient to use a brush. After drying, fill the seam with a composition for puttying drywall joints. It is more convenient to work with spatulas 10 cm wide and hard 20 cm. Apply the composition with a small one, and remove the excess with a large one. Fill well, pressing the composition into the seam. If you did everything correctly, a small roller will form, slightly protruding above the surface.
Once again we go through the seam, applying fresh putty about 0.5 mm thick, take the soaked reinforcing tape and glue it to this compound. Use a spatula 8 cm wide and press the tape well onto the surface, squeezing out the excess putty from underneath it.
Puttying of cut seams on gypsum boards
In this case, a wave of paper is formed (you can see it in the photo), we make sure that it does not wrinkle, we catch it to the end, where it straightens out. Remove excess solution into the tape and adjacent area of the sheet. And the last stage - again take the putty and coat the pasted tape on top with a thin layer. We make this layer as thin as possible, as they say - “to tear off”. Actually, we stretch the remaining putty in a very thin layer.
Second technology: first tape then putty
There is a second technology - first, serpyanka or paper reinforcing tape is glued onto the plaster, then it is puttied. This works faster, but the disadvantage is the voids that remain under the tape. In these places, the wallpaper may wrinkle or the putty or decorative plaster may crack.
This is how you stick serpyanka onto drywall
They also use sickle mesh instead of paper tape. Serpyanka is more difficult to work with - it is rigid and its edges often stick out from the mortar. To make it a little easier, the mesh is pre-glued, and after the glue has completely dried, it is puttied. In order not to think about glue and speed up the work, use a self-adhesive serpyanka (there is such a thing).
An example of puttying a seam with serpyanka
But, anyway, it’s more difficult to putty drywall - its surface is uneven, the spatula “jumps” on the fibers and you get a small wave that is not at all easy to smooth out.
Type of materials used
In the photo - moisture-resistant gypsum boards
Despite the fact that plasterboard appeared in the post-Soviet space relatively recently, it has managed to become one of the most sought-after and popular finishing materials. Currently, there are two main varieties of this material on sale, namely, the regular and moisture-resistant modification .
As the name suggests, the usual modification is used when finishing rooms with a normal level of humidity, while the moisture-resistant type of drywall can be used where the level of moisture in the air is excessive (bathroom, kitchen, balcony, etc.).
In addition to different operational features, ordinary and moisture-resistant gypsum boards behave differently when wallpapering. For example, the surface of ordinary drywall provides good adhesion due to the fact that it absorbs wallpaper glue. The moisture-resistant modification of gypsum board is less prone to absorbing glue, and therefore the adhesion of wallpaper and surface is insufficient.
The lack of adhesion can be compensated for by a layer of putty. The putty fits equally well on the surface of any drywall, and wallpaper on an even layer of this finish also demonstrates optimal adhesion.
Another important point is the type of wallpaper used. For example, it is dangerous to glue thin wallpaper onto drywall because it will show through. As a result, on the walls, in addition to the pattern on the wallpaper itself, the markings applied to the plasterboard from the factory will be noticeable.
There is a high probability that transitions from untreated drywall to joints covered with putty will be noticeable through thin wallpaper.
Without puttying the surface of the walls, you complicate the following repairs
However, there is a more important reason why it would be better to putty the surface before installation. The fact is that even high-quality wallpaper, regardless of its modification, can become boring over time. And if you plan a cosmetic renovation, you will probably face the problem of dismantling the old coating.
If wallpaper can be removed from a previously puttied surface without much difficulty, then the same material glued directly to drywall is much more difficult to remove. As a result, fragments of old wallpaper will remain on the surface of the gypsum board or the plasterboard structure will be damaged altogether and will require repairs with mandatory putty.
So, what conclusion can be drawn from all of the above? There is no universal answer to the question of whether it is necessary to putty drywall before wallpapering. But, if you need maximum confidence in the optimal result of finishing work, it would be better to putty, sand and prime the surface.
We putty walls quickly and efficiently
Universal putty, the price of which is justified by the quality
Which is better: heated floors or radiators?
Warm floorBatteries
Once we have decided that there is no need to putty walls, let’s look at the instructions for finishing work. Since we are plastering the walls under wallpaper, we should use gypsum mixtures intended for finishing.
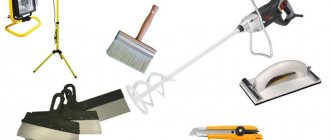
To carry out the planned work you will need the following tool:
- clean plastic bucket with a volume of 10 liters;
- low-speed drill and special nozzle for mixing;
- wide spatula and narrow spatula;
- rule at least 1.5 m long;
- a float with clamps and zero-grit sandpaper.
Materials you will need:
- dry mixture for finishing drywall;
- mesh tape for sealing joints;
- acrylic primer;
- water.
The photo shows the distribution of the putty layer
Finishing work is carried out as follows:
- The surface of the gypsum board is thoroughly dusted and primed.
- After the primer has dried, prepare the putty solution in accordance with the manufacturer's instructions.
- Using a small spatula, scoop up the solution and attach the mesh tape over the gaps.
- Then fill the recesses for the screws with the solution.
It is important to begin subsequent work only after the applied putty has dried. In this way, it will be possible to avoid the occurrence of bumps and cracking.
- Next, using a small spatula, apply the solution along the entire length of the large spatula and spread it evenly over the entire wall. As a result, the thickness of the putty coating should be no more than 1-2 mm.
- After applying an even layer, wait 2 to 4 days for everything to dry, after which you can begin sanding.
Important: When sanding, a lot of fine dust is generated, so using a respirator will be very helpful.
To summarize the above, we note that putty will delay wallpapering for no more than one week, but in this case the waste of time is completely justified.
We glue the wallpaper correctly
Applying glue to the strip
Wallpapering on drywall begins with preparing the surface. To do this, the pre-plastered wall is carefully primed in two layers with a time interval necessary for each layer of primer to dry.
If the installation of plasterboard structures was carried out with high quality and in accordance with technological requirements, then wallpapering will not become something difficult.
We will need the following tools:
- a special rectangular container for dipping the roller into glue;
- a clean plastic bucket for preparing glue;
- roller with medium length pile;
- brushes (narrow for gluing corners and wide for working at the junction of walls and ceilings);
- sharp mounting knife;
- wallpaper brush.
Let's get started:
- We prepare glue in the proportions specified by the manufacturer.
- We try on the wallpaper according to the height of the wall.
- We spread a strip of wallpaper over a previously prepared surface.
- We cover the wallpaper with a thick layer of glue and leave it for a while so that the base has time to soak in.
- We cover with glue a part of the wall 10 cm wider than the width of the roll.
Important: Gluing can be done end-to-end or overlapping, but, one way or another, we start from the window towards the door.
- We unfold the first strip and glue it so that the margin at the ceiling is 20 mm. At the same stage, we check the perpendicularity of the strip to the horizon line.
Important: Regardless of how smooth the walls are and the method of gluing, approximately a third of one roll will be spent on adjustment and the forced overuse of wallpaper per average room.
In the photo - gluing the strip and smoothing it with a wallpaper brush
- After the strip is applied, smooth it with a wallpaper brush, first from top to bottom, and then from the sides to disperse the air.
- Next, we cut the strip along the floor line and make cutouts for sockets and switches. Such work is carried out when the power supply is turned off.
The procedure for puttingtying a wall
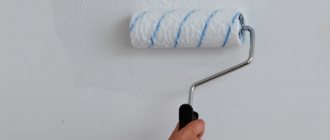
In order for the putty to be more securely attached to the drywall sheets, they must be treated with a water-based primer. It is enough to use a roller to go over the entire wall twice, waiting until the first layer of primer dries. When the second layer has dried, you can mix the putty for work.
It is most convenient to apply the primer using a roller with an extended handle.
Using a small spatula, apply the solution in an even layer onto the large one. After this, the solution is spread over the wall with wave-like horizontal movements. You need to rub it into drywall in a thin layer.
You need to work with a small amount of material so that it does not bulge when spread on the drywall. The solution is applied over the entire wall in an even layer, after which it is allowed to dry.
It is recommended to start work from the least visible corner of the room. The further the work progresses, the more thorough it will become, and all the flaws will remain where they are least visible.
Plasterboard putty under wallpaper should be applied in two layers. Moreover, there is no need to prime, because a kind of fur coat has formed on the first layer, which will improve the adhesion of the second layer. A new layer is applied in the same way as the first one was applied. After this, the surface should dry (usually wait until the next day).
The dried surface has many roughnesses, sagging and bumps (the less experience, the more such defects). But all this can be easily eliminated with grinding. You can use a regular grater with sandpaper placed on it. The entire wall is sanded and becomes smooth, just right for wallpapering.
A special grater for attaching sandpaper to it
Now you know how to putty drywall under wallpaper correctly. However, there are certain difficulties with working in corners, so we will dwell on these points in more detail.
Instructions for wallpapering drywall
Before starting work, you need to purchase the wallpaper and glue you like, preferably specialized glue. In addition, you will need a set of tools. You can tape plasterboard with trellises with a minimum amount of tools. But for the work to progress you need:
- ladder;
- plastic buckets - 2 pcs.;
- bath;
- roller and paint brush;
- metal spatula;
- plastic spatula;
- plumb line;
- ruler;
- pencil;
- knife with replaceable blade (scissors);
- roulette;
- wallpaper roller;
- a narrow, cone-shaped rubber roller;
- foam sponge;
- napkins.
The instructions for wallpapering walls are simple. The sequence of work is as follows:
- the place to start work is determined;
- using a plumb line on the wall, a vertical line is drawn for the first tapestry;
- the glue is prepared in accordance with the recommendations on the packaging - it must be prepared carefully, since otherwise the wallpaper sheets will very soon begin to fall off;
- wallpaper is cut to size;
- The first sheet of wallpaper is smeared with the adhesive mass and left for several minutes to soak in the glue;
- the first tapestry is glued onto the drywall strictly along the drawn vertical line;
- Using a sponge and a plastic spatula, the wallpaper is pressed against the wall - all air bubbles and excess glue are removed;
- All subsequent trellis panels are glued using the same technology.
The technology of wallpapering has a lot of nuances that cannot be considered in one work. Therefore, we once again suggest that you familiarize yourself with the material “How to hang wallpaper yourself, quickly and efficiently,” in which you can find answers to almost all the questions that arise when wallpapering drywall.
Scheme for wallpapering walls.
Puttying plasterboard walls under wallpaper - step by step
To achieve the desired results and obtain a reliable, smooth surface on which the wallpaper will ideally stick, you should follow all stages of work provided for by the technology used by professional builders.
There should be no excessive haste or fussiness in the work - each stage must be completed
So, work on finishing drywall for wallpaper is carried out in several stages, presented in this instruction table.
| Illustration | Brief description of the operations performed |
| Before moving on to the main work, it is necessary to make preparatory work. The first step is to once again carefully examine the quality of the fastening of the plasterboard sheets to the frame and, if necessary, correct minor defects. The most common mistakes when fastening sheets is incorrectly screwing in the screws. Their caps should not protrude above the surface and be slightly recessed into the drywall. To find the protruding screw heads, you need to take a metal spatula and run along the lines where they are screwed in. | |
| If the cap is located above the level of the main surface, then the spatula will definitely bump into it. In this case, all you have to do is take a screwdriver and tighten the self-tapping screw, sinking the head into the thickness of the cardboard. If the head of the fastening screw has pierced the cardboard layer and is recessed into the plaster, then the self-tapping screw will not securely hold the sheet on the sheathing. Over time, it may fall off the frame, and the sheathing in this place will bulge forward. You can correct the situation by screwing in an additional self-tapping screw, stepping back from the first one along the same line 50÷60 mm. If the head of the screw is not deepened into the cardboard, then it can ruin the wallpaper being pasted. Firstly, they may tear during installation. Secondly, the cap will protrude and remain noticeable after the glued sheets dry. And thirdly, the self-tapping screw will rust over time, and yellow spots will appear through the wallpaper. | |
| A common mistake made by novice home craftsmen is that they often do not cut a chamfer on sheets of drywall that are joined at the edges without a factory edge (this applies to the end side of entire sheets or cut-out fragments). Fixing such a defect is not at all difficult. To do this, use a sharp construction knife - it cuts off the chamfer and be sure to remove any burrs formed along the edge of the cardboard. This edge can then be lightly sanded. | |
| When cutting chamfers, a gap should form between the sheets, tapering inward. Therefore, while performing this process, the knife must be held at an angle of approximately 45 degrees. In the future, this gap will be reinforced and filled with putty, which will firmly connect the sheets to each other. | |
| The next step is thorough priming of the surfaces. To make this process easier, it is recommended to use a special plastic container - a painting tray with an inclined corrugated surface, which will help save solution. Many people doubt the need to prime drywall - they say its surface is already impregnated with the necessary compounds during production. But experienced craftsmen do not recommend saving on this - there is always a thin layer of dust on the surface, accumulated during storage, transportation, and installation work. And it must be bound with a primer, otherwise high-quality adhesion of the putty may not be achieved. In addition, impregnation with a primer requires cut edges of sheets, areas of possible damage, and places where screws are screwed in. | |
| You can prime drywall with a roller or a brush, but it's best to have both tools on hand. It is more convenient to handle sheet joints and corners with a brush, and it is faster and easier to cover the main surface with a roller, since it immediately covers a larger area. | |
| It is recommended to first prime the drywall cuts and let them dry. The soil will hold the structure of the gypsum together, which will prevent it from crumbling during further work. When the primed joints are dry, the solution is applied to the entire surface in two layers, and each of them must dry well. The primer should be distributed evenly over the entire surface. | |
| After the soil has dried, the external corner joints of the plasterboard sheets must be reinforced - this can be done using special corners equipped with “wings” made of sickle mesh. Corners will greatly simplify the design of corner joints, since it will be quite difficult to create a perfectly even corner using putty. In addition, the edges of drywall at external corner joints, if not reinforced, may crumble under mechanical stress. | |
| Manufacturers sell various types of reinforcing perforated corners made from different materials - these can be plastic, galvanized steel and aluminum products. The most affordable are steel angles, so they are most often chosen by inexperienced builders. However, experts do not recommend taking them, since in places where the protective layer of galvanization is damaged, the steel begins to rust, and yellow spots can appear not only through the layers of putty, but also through the wallpaper. Plastic or aluminum corners equipped with mesh “wings” are best suited for strengthening corner areas. | |
| It is not difficult to secure the corners to the surface, since they have very little mass. The elements are fixed using a putty solution - it is evenly applied to the plane on both sides of the corner, and then the corner is pressed tightly against it. It is convenient to press the corners using the plaster rule, since with point pressure the metal can be easily bent. The rule is to press the corner against the wall along its entire length at once. Instead of a rule, you can use a flat beam or board. The putty solution that comes out through the holes is immediately collected with a spatula. | |
| Some craftsmen secure the reinforcing corners with staples, driving them in with a stapler, or even with nails. It is not recommended to do this because of the same rust, which can ruin the wallpaper. If it still seems that fastening with nails is easier, then for this purpose it is worth purchasing only galvanized ones. It is also best to use plastic corners to reinforce arched openings, as they have a certain flexibility. Thanks to this quality, the product will fit well into the curved shape of the arch. | |
| After the corners are fixed, they must immediately be covered with putty and an even corner must be drawn out. The work is carried out slowly, starting from the top and gradually moving down. The entire reinforcing element must be completely covered with putty. First, one side of the corner is covered with putty, and after the solution has set, they proceed to work on the second. This technique will help you create an even angle without smearing it. It should be noted that leveling the corners is a rather complex process, so you need to be patient to complete it. Don’t be afraid of initial failures - if you try, everything will soon start to work out. | |
| The internal corners of walls covered with plasterboard are reinforced with a sickle mesh or a special tape made of perforated paper. On sale you can find a mesh that has an adhesive base; it is easily fixed on cardboard, and the work goes quite quickly. Another version of the mesh without glue is fixed to the wall using a thin layer of putty or PVA glue. The adhesive composition is applied to the drywall in a thin layer, and a mesh or paper tape is applied to it and pressed with a spatula. | |
| Today you can easily find corner spatulas on sale. They are more convenient and faster to draw both internal and external corners. The corner spatula has an even 90-degree bend, so it will create a neat right angle. | |
| The seams between sheets on a flat wall surface are reinforced in the same way. Serpyanka on a self-adhesive base is glued to the joint, or a layer of putty is first applied, which immediately fills the gap between the sheets. A reinforcing material is fixed on top of the solution - a mesh or tape made of special paper. After this, the applied putty is carefully leveled with the general surface of the walls. If necessary, the solution is added so that there is no “ditch” left along the line of the sheet joint. | |
| If an adhesive-based mesh was attached to the seams, then the putty is applied on top of it so that the seam between the sheets is completely filled and then aligned with the general plane of the wall. | |
| If, during installation or trimming of drywall joints, creases and then potholes are formed, then before reinforcing, they should be primed, filled with starting gypsum putty and leveled. After the repair layer has dried, you can begin to reinforce the joint. | |
| Next, using a spatula, you need to tightly fill the holes from the recessed screw heads with the solution. The solution should be applied flush with the main surface of the drywall. Before moving on to the next stage, you must wait until the applied putty solution has dried. | |
| After the putty has dried, it is necessary to inspect the surface for evenness, since in some places the solution may be applied with slight unevenness. Therefore, the surface will have to be cleaned using a construction float, securing a strip of abrasive mesh or coarse sandpaper to it. Cleaning is carried out in a circular motion, so that a large area of the wall will be covered at once. Naturally, you should use respiratory and eye protection, since there will be a lot of fine dust. | |
| The next step is to prime the puttyed and leveled walls again in order to create the necessary conditions for good adhesion of materials during continuous puttying of surfaces. At this stage, it is enough to apply one layer of soil generously and wait for it to dry. | |
| When the primer layer has dried, you can proceed to the main process of final leveling the wall with putty. If it was purchased in the form of a dry mixture, then the solution must be prepared independently by studying the manufacturer’s recommendations located on the packaging. Clean water in the required volume is poured into the prepared container, and the appropriate amount of dry putty mixture is poured into it. Mixing is done using a construction mixer, otherwise the solution will have a non-uniform consistency. As already mentioned, you should not mix a large volume of mortar at once, since the gypsum-based finishing material sets quickly. This warning especially applies to novice plasterers, whose work productivity is still low. | |
| It is best to apply putty to the surface with a spatula having a width of at least 300 mm. To ensure that the putty surface is even and smooth, you need to choose a high-quality tool for the job. Experienced craftsmen advise having your own spatula for each stage of work, since the starting putty has a coarser structure, and this adversely affects the smoothness of the spatula blade due to the inevitable slight abrasive wear along the edge. Therefore, when applying the finishing composition, the surface may also not be too smooth. | |
| Applying and spreading the putty on the top of the wall, as well as on the ceiling (if this is included in the plans), is best done while standing on construction trestles. If they are not there, then you can use a reliable, stable table as a stand. Another trick that professional craftsmen resort to when achieving a perfectly smooth surface is illuminating it from different angles. The fact is that with side lighting, even the smallest irregularities in the wall cast a shadow, and they can be easily detected, and before the putty has set, they can be successfully smoothed out. | |
| The technology for applying putty to walls is, in principle, simple, but you need to get used to the process. Therefore, if you have no experience in such operations, it is worth preparing a small amount of solution and first experimenting on a small section of the wall that will not be visible, or even on a remaining unclaimed piece of drywall. When performing work, it is necessary to take into account that it will not be possible to remove the solution from the container with a wide spatula, so you must have a spatula 120÷150 mm wide on hand. With its help, putty is collected from a bucket (bath) and distributed in a strip along the edge of a wide spatula. | |
| When performing putty, it is very important to hold the spatula correctly in relation to the surface. It should be at approximately a 30 degree angle. Applying the solution starts from the corner. A spatula with putty collected is placed in a corner, and moving towards the middle of the wall, the mixture is distributed over the surface. The layer of mortar should not be too thick, but sufficient to hide the visible reinforcement elements (mesh or paper tape). | |
| Thus, the putty is applied in one layer. Due to the fact that the solution sets quickly, having plastered the wall from one corner to the other, you can return to its beginning and immediately apply a second layer, if, of course, this is necessary. Usually, when putting drywall under wallpaper, a layer within 1 mm is sufficient, since the wall is initially quite flat. When you press the spatula against the plastered surface while leveling the mortar, relief grooves from the corners of the blade may remain on it. To prevent the spatula from leaving such marks, some plasterers slightly bend sharp corners outward, as if rounding them. When applying plaster, you must try to level the surface as much as possible - ideally, there should be no deep grooves left at all. “Thread-like” marks will then be easy to clean up by grinding. | |
| After a day, the plaster will be completely dry, and you can proceed to sanding it. For this purpose, a manual construction float or a special vibrating or eccentric grinding machine can be used. Manually, the process is carried out in a counterclockwise circular motion. Medium-grain sandpaper (about P120 - P180) or an abrasive mesh of the same parameters is attached to the grinding tool. It is not necessary to achieve a perfectly smooth wall for wallpaper, the main thing is that it is smooth and does not have marks from the corners of the spatula. When performing this stage of work, it is imperative to protect the respiratory tract with a respirator, and the eyes with goggles or a mask. | |
| To ensure good adhesion of the wallpaper to the plastered surface, it should be covered with another layer of primer. You can choose a deep penetration solution with an antiseptic effect, which will bind the plaster layer to the drywall and create a kind of film. Any wallpaper will stick perfectly to such a surface. And later, if it becomes necessary to remove the old wallpaper, the drywall will remain intact. Perhaps somewhere the putty layer will be damaged, which will not be difficult to restore very quickly. After the primer has dried, you can proceed to the stage of wallpapering. |
* * * * * * *
Now, having familiarized yourself with all the nuances of puttingty work on plasterboard walls under wallpaper, you can try your hand at it in practice. You shouldn’t despair if you don’t get a perfect surface the first time - everyone has been through this. The process seems simple only at first glance. Therefore, before you start decorating the walls, it’s still worth doing some training, so to speak, to get your teeth into it.
To make the self-learning process faster and better, we suggest watching a useful video dedicated to these very issues.
Preparing structures for finishing
During installation, gypsum sheets may acquire certain defects that must be corrected:
- When screwing in the screws, the caps are “recessed” into the surface of the gypsum board too deeply, and pits are formed. There may also be dents on the paper surface. If the screw “goes” too deep, it is better to unscrew it and replace it with another, longer one;
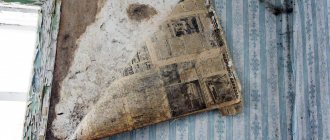
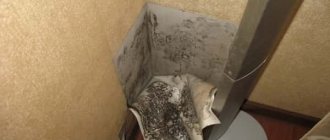
- the paper “lining” of the panel has peeled off or a crack has appeared on it. The exfoliated material must be carefully cut off, and the damaged area must be puttied using reinforcing material (mesh, special tape). The cracks are “filled out”, puttied with reinforcement (in the photo below, number 1 indicates small damage cut out and puttied - punctures, pits, cuts);
- the edges of the panel were crumbled or broken off, were initially not entirely even, and were carelessly cut when cutting the sheets. It is necessary to make a chamfer - cut the edge at an angle of approximately 45 degrees with a sharp knife. Next, the “embroidered” seam is puttied with reinforcement (in the photo above, number 2 indicates an “embroidered” seam, number 3 indicates a high-quality factory edge of the sheet, which does not need to be embroidered);
- The gypsum board joints at the corners turned out to be uneven. A common problem that can be corrected by using special reinforcing corners or paper tape with metallized strips for putty. In the photo below (in order from left to right) - metallized paper tape, plastic corner, metal corner. Plastic and metal corners are available for right angles - solid - and for arched openings, with the possibility of smooth bending (the side surfaces consist of separate elements or can be notched). Corners with reinforcing mesh (top photo on the far right) are used in cases where increased mechanical load on the corner is expected - for example, frequent accidental impacts, shocks (in door and window openings), heavy cladding.
Leveling the gypsum plasterboard plane with putty
In order for the work of puttying drywall to be completed quickly, you need to prepare a large spatula (400 mm) and a “helper” spatula (100 mm).
The first layer will be the application of a starting layer of putty - a layer thickness of 5 mm, usually more is not needed for drywall. This layer will be enough to mask all irregularities in the material and possible defects.
The mixture is prepared as written on the packaging from the manufacturer.
The solution should have the consistency of thick sour cream without lumps. This can be achieved using a drill and a mixer attachment.
The technique for puttingtying the surface of drywall is simple: take a large spatula, at its end using a small spatula, lay out a roller of putty. We press the blade to the surface and stretch the composition. We repeat several times, filling some part of the wall or ceiling. Then we clean the blade and run it over the newly puttied surface, leveling it. You need to level it as carefully as possible - less time will be required for grinding.
When you have finished puttingtying the drywall, wait until it dries. Then you take a familiar tool - a block with a mesh - and smooth out all the flaws. Sanding is completed, remove the dust, and cover the surface again with a deep penetration primer. After drying, begin applying the second layer.
Next, you need to putty the drywall with a finishing compound. As they wrote, it can also be gypsum-based, like the starter one, or it can be polymer-based. Both are suitable, but some are more difficult to work with - they quickly begin to roll and harden.
The finishing putty is made more liquid and applied in a thinner layer. The application technique is the same, nothing changes. Besides the fact that it is more difficult to work with, it spreads worse, but you need to stretch it in a thin layer and quickly level it. Everything is much better with a primer, but without it, the bottom layer quickly draws moisture out of the fresh plaster, and it begins to slide. After applying the finishing putty, they again wait until everything is dry, then they begin to level it, but this time they do not use a mesh - it leaves noticeable grooves, but fine-grained sandpaper. It is not so convenient to work with - it clogs quickly, but the surface is smooth. If you are preparing the surface for painting, we light it from below or from the side and you can use an LED lamp rather than an incandescent lamp - all flaws are visible. Even very small ones.
To create a beautiful, impeccable interior in an apartment, the walls in the room must be perfectly smooth. Finishing putty on the walls can help with this, which is easy to do with your own hands. To do this, it is enough to adhere to the selected algorithm for performing the work.
Preparatory work
Before starting finishing work, it is recommended to prepare everything that is required to complete it. Every man will probably have some of the tools; some will have to be purchased along with the materials. The set looks like this:
- electric drill;
- special mixing attachment;
- rollers made of foam rubber and fur;
- wide brush with soft bristles;
- tray for liquid materials;
- knife with a sharp blade;
- container for diluting putty;
- different spatulas;
- grater for grinding the surface with a set of attachments;
- eye protection glasses and respirator;
- putty material;
- acrylic-based primer mixture characterized by deep penetration;
- serpyanka for reinforcing suture areas;
- perforated corners for finishing corners.