Design, types of columns
Elongated architectural elements have purlins and floor beams, which are made in different shapes: round, multifaceted, tetrahedral, elliptical.
In addition to pillars (columns), which are usually used to distribute weight, there are similar structures that look almost the same in appearance. These include semi-columns and pilaster pillars. Columns always have a main trunk, a top and a base.
Almost the entire length of the pillars has one section, sometimes for aesthetics it increases or decreases closer to the ceiling. The classically shaped concrete column is cylindrical and gradually tapers towards the top.
Interesting! Almost all columns have flutes; they are needed to visually reduce the structure and lengthen the trunk. The Egyptians were the first to make them.
Channeled columns have slots resembling a semicircle in shape. They run along the entire length and end with a smooth outlet of the groove. There are flat areas between them.
Another way to decorate columns is rustication; it imitates stones that are located along the entire trunk. Pillars are made from brick, concrete, metal, wood.
Columns with a curved contour
Plastering entasis elements is carried out using several rules for beacons. To finish the cylindrical part, a straight-line rule is used, which is followed by ring beacons. For the tapering part of the trunk, a pattern rule is used. The solution is applied immediately to the entire body of the column, then leveled, moving the rule around the trunk. After several passes, having obtained a flat surface, the solution is allowed to set, the beacons are removed, and the groove is covered with the solution. Covering and grouting is done with a concave trowel.
Pre-hanging
To plaster geometric columns, sagging is used. To process such shapes, high precision is required, since any deviation will be immediately noticeable. Hanging on the street begins from any extreme column. It is performed in several stages:
- A self-tapping screw is placed at the top and a hole the size of a layer of plaster is made in its head.
- A plumb line is lowered through it.
- At the bottom, the second screw is fixed so that the head touches the thread.
- It is tied tightly and several more elements are placed along the length to align the column.
- The same tension is performed on the other extreme column, and self-tapping screws are installed on all intermediate structures, focusing on the auxiliary area.
Important! Hanging is done correctly only if the auxiliary plane is parallel to the wall.
Device of stamps
To make them, a gypsum solution is applied along the thread. The top is cut off, looking at the plumb line. It is also removed from the sides so that the piles are neat. On round columns, stamps are also used to fill the lighthouse after fixing the template.
Plastering a round pillar involves installing lines that encircle the structure. Between them leave from 1 to 1.5 meters.
To create a brand, a solution about the size of your palm is applied to the column, and the top is cut off along a vertical thread. Square columns require a more precise setting of the rule, so there the mixture is applied closer to the ribs.
Columns with a curved contour
To plaster round columns of non-standard shape, first place a self-tapping screw at the bottom, where the largest radius is. The cap is set according to the thickness of the plaster layer. After this, fix the weight on top at a small distance so that the thread reaches the bottom screw. The resulting difference is measured from the upper suspension and the second element is placed there.
Lighthouses
They are suitable only for round and semicircular columns and pilasters. To fix them, a ring template is required; it is installed across the pole. The template is made from a shield on which the circumference of the column is drawn. Then it is sawn and 2 semicircles are cut out. Then the structure is connected and a ring is used for mortar beacons.
Important! In some cases, several ring templates are used for plastering, because the diameter of the column changes in different areas.
Information and construction portal OLDMIX
Columns come in different shapes: cylindrical, conical, rectangular, multifaceted, barrel-shaped. They can be smooth, with flutes, with a helical rod, and can be equipped with simple or complex bases and capitals. All require highly qualified performers, patience, attentiveness and knowledge of the inherent technology of each type.
Smooth cylindrical columns are plastered along ring beacons.
First, they do the weighing and set the marks. They should be small in height and up to 2 cm in width. The corners of the stamps are tapered. The stamps are placed in a ring shape in several rows along the height of the column. Distance between rows 1. 1.5 m.
Along the rows of marks, ring beacons should then be formed. For this, a ring template is prepared. They knock down a shield from boards 3.4 cm thick. Along the center line of the shield, grooves are marked for attaching the future two halves of the pattern, which must be made from the shield. A circle corresponding to the diameter of the lighthouse is drawn in its center. The shield is sawed in half and a circle is cut out. Using the marks made earlier, dovetail-shaped grooves and tenons are cut out to connect the two halves.
The working edges of the ring template are moistened with water or greased with lime paste and fixed on stamps. A clean gypsum solution is poured under the ring. After allowing the beacon to set, the template is removed.
Then the column is primed and using rule 3, which slides along beacons 1, the solution is leveled.
It is very important after priming to carefully cut out the gypsum beacons and fill these places with the same cement mortar that was used to apply the primer.
Round columns can also be finished using templates. To do this, the column is divided along its length into two equal parts. Outside the first half of the cross-section of the column, vertical guide rails are placed along which the half-template (half-ring) will move. A similar operation is repeated on the second half of the column. The places remaining from the slats are rubbed down.
In the same way, you can finish straight multifaceted columns.
Round columns with entasis. These columns have a cylindrical part at the bottom and a conical part at the top. However, if these two parts were plastered and leveled using straight rules, a noticeable fracture would form at the junction of the cylindrical and conical parts, as if the column trunk was concave in this place.
To prevent this from happening, only the lower cylindrical part is leveled using a direct rule, and for the upper part a pattern rule on entasis is used.
What is entasis? This word is Greek and literally translated as “tension.” The pattern on entasis is constructed in such a way that at the junction of the cylindrical and conical parts a certain thickening of the trunk is formed. This is what gives the impression of tension and eliminates the illusion of concavity.
Columns with entasis are also plastered along ring beacons. But for different sections of the column it is necessary to make ring templates of different diameters.
Plastering process
The technology for applying the composition varies depending on the shape of the column or its contour.
Round
Before plastering the column, you need to make a template in advance, and also monitor the vertical in two directions and carefully grout. To do this, you don’t have to draw up a technological map, since everything is simple: just hang the structure, put marks, beacons and pull out the base. A solution is thrown between the installed guides, then the rule is applied and the excess is removed.
When applying plaster, first process half of the column, and then proceed to the rest and laying the grooves. All this is done simultaneously so that the layer becomes monolithic.
tetrahedral
When hanging tetrahedral columns, the elements are fixed to the front and rear planes of the outer structures. The string is pulled through the entire row and the thickness of the solution is calculated. After this, plumb lines are fixed and lower and intermediate marks are set. After it has been possible to calculate the thickness of the plaster, beacons are placed on the columns and the solution is applied.
Multifaceted
Each face is worked on separately, but a template is made in advance. First, they measure each edge, and then hang it and place beacons.
Important! Multi- and tetrahedral columns are processed in several layers, while monitoring the central axis and guides.
With a curved contour
Entasis columns are plastered according to several rules and guidelines. For the cylinder, a straight-line rule is used, and for the tapering part, a pattern is used. The plaster is spread over the entire column at once and then leveled.
Multifaceted columns are plastered as follows
The plaster layer is usually pulled out using a template. To do this, wooden rules are hung plumb on two opposite faces of the column and nailed into place. A template is made that extends half of a hexagonal column or one quarter of an octagonal one. To pull out the plaster layer on all faces of the column, the rules are removed, their places are sealed with mortar and rubbed well flush.
Extruding the plaster layer on a hexagonal and polygonal column using a template:
/ usually 2 skids, 3 skids
Flute finishing
Longitudinal slots on a column are the most difficult to machine. This cannot be done without experience, much less calculate the linear meter and figure out in advance how to evenly apply the material.
tetrahedral
Rectangular and tetrahedral cuts are easier to work with. To do this, use a template with slots that follow the shape of the holes.
Multifaceted
The procedure is performed in the same way as when creating grooves on rectangular pillars. The template is even used when applying decorative plaster.
Round
For round columns, a metal template is created by hand. Since suitable tools are not always available, the template is sometimes ordered separately from workshops.
Finishing columns and pilasters by pulling (part 3)
Columns with entasis and flutes are pulled out in exactly the same way as described above, but a swinging or sliding template is used. For square or polyhedral columns, each side is pulled out separately. Round or elliptical columns are divided into sections. For round columns, the grips should be exactly the same, for elliptical columns - different. It is better to make the number of grips even. Most often, six grips are taken. However, the more there are, the rounder the column.
Let's consider the design of a swinging template (Fig. 99, a) for stretching a tetrahedral column. The profile board is made along the widest part of the column with an allowance of 200 mm, which is necessary for installing the ears in the profile board. Flutes are drawn on the blank for the profile board, a wooden or steel profile is cut out, and holes are drilled in the ears for hinge fastening to the slide.
Rice. 99. Swinging template : a - profile board, b - slide, c - assembled template, d - position of the template; 1 - runner, 2 - slide, 3 - nail, 4 - profile board, 5 - rules
The slide (Fig. 99, b) is made with a length of 300–400 mm from boards of the required thickness and rectangular holes are also drilled into them (100–150 mm long, 20–30 mm wide).
Decorative plaster
Textured or Venetian plaster is rarely used for columns because they require a lot of material to process. If necessary, the covering layer is distributed with a template, but its thickness should not exceed 2 mm.
It is difficult for a person without experience to plaster columns, since many features must be taken into account for their design. When there is enough time, they do the work themselves, but study each stage for several days so as not to make a mistake.
Tyutyunnikov Dmitry
Article verified by a decorative finishing specialist
Cladding of round columns
For cladding round columns, the well-known standard tiles of 200 x 200 mm or 100 x 100 mm are not suitable for us, since these dimensions do not allow creating an elementary round surface. On the other hand, if you use smaller ceramic tiles, it will be very difficult to align the circle, especially if the master does not have enough experience. Therefore, for cladding round columns, special tiles measuring 100 x 25 mm are used, glued to special paper-based mats.
This makes the process much easier, since the tiles are already adjusted and will not move during installation. The whole difficulty comes down to correctly aligning the mats relative to each other during gluing. The glued tiles can have different colors, alternating white, black, gray colors.
The advantage of this method is that the mats do not require laying on cement mortar - glue will be enough, with which the material is attached directly to the concrete or plastered surface. After the glue has hardened, the mats are freed from the paper base and then work similar to that for lining flat surfaces is carried out.
Example of calculation of a metal centrally compressed column:
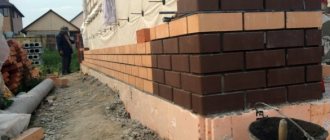
There is: a desire to make a canopy near a brick house approximately like this:
Figure 1. Design diagram of a canopy measuring 10 by 6 meters with columns 2.5 meters high.
In this case, the only centrally compressed column under any fastening conditions and under a uniformly distributed load will be the column shown in red in Figure 1. In addition, the load on this column will be maximum. Columns marked in blue and green in the figure can be considered as centrally compressed, only with an appropriate design solution and a uniformly distributed load, columns marked in orange will be either centrally compressed or eccentrically compressed or frame racks calculated separately. In this example, we will calculate the cross section of the column indicated in red. For calculations, we will assume a permanent load from the canopy’s own weight of 100 kg/m2 and a temporary load of 100 kg/m2 from the snow cover.
2.1. Thus, the concentrated load on the column, indicated in red, will be:
N = (100+100) 5 3 = 3000 kg
2.2. We preliminarily accept the value λ = 100, then according to Table 2 the bending coefficient is φ = 0.599 (for steel with a design strength of 200 MPa, this value is taken to provide an additional safety margin), then the required cross-sectional area of the column is:
F = 3000/(0.599 2050) = 2.44 cm2
2.3. According to Table 1, we take the value μ = 1 (since the roof covering made of profiled decking, properly fixed, will provide rigidity of the structure in a plane parallel to the plane of the wall, and in a perpendicular plane, the relative immobility of the top point of the column will be ensured by fastening the rafters to the brick wall), then the radius of inertia
i = 1 250/100 = 2.5 cm
2.4. According to the assortment for square profile pipes, these requirements are satisfied by a profile with cross-sectional dimensions of 70x70 mm with a wall thickness of 2 mm, having a radius of gyration of 2.76 cm. The cross-sectional area of such a profile is 5.34 cm2. This is much more than is required by calculation.
2.5.1. We can increase the flexibility of the column, while the required radius of gyration decreases. For example, at λ = 130 the bending coefficient is φ = 0.425, then the required cross-sectional area of the column is:
F = 3000/(0.425 2050) = 3.44 cm2
2.5.2. Then
i = 1 250/130 = 1.92 cm
2.5.3. According to the assortment for square profile pipes, these requirements are satisfied by a profile with cross-sectional dimensions of 50x50 mm with a wall thickness of 2 mm, having a radius of gyration of 1.95 cm. The cross-sectional area of such a profile is 3.74 cm2, the moment of resistance for this profile is 5.66 cm3.
2.6. Let's check whether the accepted profile is acceptable in terms of maximum flexibility. The exact flexibility value will be
λ = 250/1.95 = 128.2
the value of coefficient a will be
a = 3000/(0.425 2050 3.74 1.1) = 0.837
then the maximum permissible value of flexibility is
λmax = 180 - 60 0.837 = 129.8 > 128.2
We have met the requirements for maximum permissible flexibility.
Instead of square profile pipes, you can use an equal angle angle, a channel, an I-beam, or a regular pipe. If the calculated resistance of the steel of the selected profile is more than 220 MPa, then the cross section of the column can be recalculated. That’s basically all that concerns the calculation of metal centrally compressed columns, I’ll only add that if you are not doing the calculations professionally and you can’t only take into account all possible loads, but can’t even imagine them, then don’t use the value λ > 80. The less flexibility , the more reliable the design. If you noticed, Table 2 does not provide for flexibility values exceeding 220, although theoretically the flexibility can be 300 or 1000; simply considering rods with such flexibility as load-bearing ones does not make any sense - they are very unstable.
If you follow the above recommendation, then even a pipe with a cross-section of 70x70x2 mm will not be enough, and you will need a pipe with a cross-section of 80x80x3 mm, for which the radius of gyration is i = 3.12 cm and, accordingly, the flexibility will be λ = 250/3.12 = 80.1. For example, you are calculating exactly the same canopy, but not connected to a relatively rigid brick wall, but free-standing. In this case, the value of the coefficient will most likely be μ = 2, but you, without delving into the complexity of the relationships between building structures, decided that μ = 1 would be enough. In this case, the accepted limitation on flexibility will protect your structure from destruction, because with μ = 2, the value of the design length of the column will be lef = 2·250 = 500 cm, and the flexibility of the column λ = 500/3.12 = 160.25 i.e. at the limit of the maximum permissible (and even beyond the limit). If you did not make a mistake in choosing the design scheme, but still used the recommended flexibility limit λ ≤ 80, then as a result you will receive an increased safety margin and a slight increase in the cost of the structure. It’s up to you to decide which is better: to make a structure with an increased safety margin or to completely redo it after a collapse.
And yet, the application of a load exactly at the center of gravity of the column and the absolute verticality of the column are possible only in theory; in practice, there is always some eccentricity in the application of the load, and if for columns with a cross section of 40x40 cm, a change in the point of application of the load by several millimeters or even a whole centimeter can not be taken into account, having set the appropriate safety factor, then for a column with a cross section of 5x5 cm such a deviation can be critical. Why? Let's figure it out now.