Developers often have a question about how to plaster aerated concrete on the outside. Before starting work, it is recommended to determine the important characteristics and, based on this, select the optimal finishing option.
Aerated concrete plaster must meet the basic requirements - the mixture adheres tightly to the surface and has good adhesion. The finishing layer is durable, frost-resistant and has the required level of vapor permeability and water repellency.
When to do plastering work
External plastering is recommended after completion of finishing work in the building. It is generally accepted that if the surface of aerated concrete blocks is not protected from the street, it will absorb moisture. This is not true; primed walls can stand without a protective layer for a whole winter; when the climate changes in the spring, the moisture from the surface will evaporate. In the opposite case, when the house is treated from the facade, evaporation vapor will be directed into the room, which will lead to the appearance of dampness.
Note! An exception is the option of building a house on the seashore or pond. When it is necessary to protect external walls from the influence of humid climates and winds.
Before plastering, the walls made of aerated blocks must dry thoroughly. If during the construction process a cement mortar was used, which has the ability to absorb moisture. For this reason, exterior decoration will not be effective during the rainy season. But especially dangerous for walls is cold water, which then turns into ice. During the melting process, the structure of aerated concrete begins to collapse.
Video description
For more information about economical exterior finishing of aerated concrete, and not just plaster, see the following video:
Optimal conditions for applying plaster
External plastering of aerated concrete must be carried out under certain conditions. It is important to first complete interior work with high humidity levels. The load-bearing structures of walls made of aerated blocks must be completely dry, not exceeding 27%. Otherwise, high humidity will cause adhesion problems and lead to peeling of the finishing layer of the façade.
The optimal time for finishing the interior of the house is spring, the façade of the building is the end of summer.
External temperature conditions for work must correspond to +5-+30°C, with air humidity not exceeding 80%. If it is necessary to perform finishing at low temperatures, it is recommended to use a special deep-penetration primer composition until the onset of acceptable weather conditions.
Carrying out the work correctly will help avoid peeling, cracks and defects. It is forbidden to apply the coating in hot weather, under direct sunlight and in windy weather.
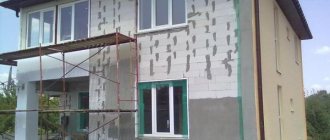
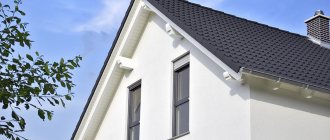
Plastered facade of aerated concrete house Source econet.by
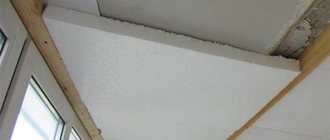
Facade insulation
If the building is properly insulated, you can heat the room faster and save money on heating costs. It is recommended to insulate the outside with mineral wool, polystyrene foam, polystyrene foam or other options. For example, the insulation and plaster of the facade of a house can be replaced by building an additional brick wall or treated with liquid polyurethane foam.
Positive qualities of aerated concrete
When considering aerated concrete as a suitable material for building a house, you should carefully study its advantages and disadvantages. The block has many more advantages, and the impact on the quality and duration of operation of the house of the disadvantages can be successfully reduced or eliminated through the use of the right materials and technologies.
The main advantages of aerated concrete blocks for building a house:
- The material is environmentally friendly and safe - can be used in the construction of residential buildings without worrying about the health and lives of people.
- Creating a pleasant microclimate in the house - due to the fact that the material “breathes” and does not create a greenhouse effect inside.
- The low weight of aerated concrete allows you to save money on transportation, loading/unloading, installation without the use of special equipment, as well as on choosing a less durable foundation.
- Fire resistance - aerated concrete can withstand open fire for about 5 hours or more, preventing it from spreading.
- Frost resistance – at the level of 50 freeze/thaw cycles or more.
- High level of heat conservation - due to the presence of closed pores with air in the material, it provides the maximum level of thermal insulation and does not require the installation of additional layers, and in winter it allows you to save up to 35% on heating costs.
- Optimal strength – sufficient for the construction of low-rise buildings.
- Large dimensions and good geometry with low weight - this makes laying walls from blocks simple, quick, and can be done with your own hands.
- It is perfectly processed - aerated concrete is well cut and sawed, which is also important and facilitates the construction process, and also makes it possible to implement the most original ideas in terms of shapes, configurations, etc.
Among the shortcomings
The hygroscopicity of aerated concrete is usually noted, which is successfully eliminated by the correct choice of finishing materials, the main of which is plaster.
The main thing is to choose suitable materials for external and internal work that will protect aerated concrete from water and will not impair vapor barrier characteristics.
Types of plasters
There are several types of plaster that are suitable for treating aerated concrete walls. There are certain requirements for mixture compositions for outdoor work.
- The material must be permeable and its coefficient must be higher than that of the surface being treated - aerated concrete or sealant.
- The plaster must be resistant to frost and temperature changes.
- To prevent cracks, the applied layer must be elastic.
- The plaster must have strong adhesion properties to aerated concrete.
A little about aerated concrete
Aerated concrete blocks
Aerated concrete is produced industrially using the autoclaving method. There is also a non-autoclave production method, when aerated concrete hardens in molds naturally. But the first option makes it possible to produce more durable blocks that can be used for the construction of load-bearing walls. Typically these are structural and thermal insulating blocks of the D500 and D600 brands.
Cellular aerated concrete blocks are made using quartz sand, lime, water and aluminum powder as a gas-forming agent. As a result of the chemical reaction, gas bubbles are formed and distributed in the solution, forming a large number of pores.
Pore distribution in cellular concrete
Positive traits
Positive qualities of aerated concrete
Due to the presence of air in the pores, aerated concrete is endowed with thermal insulation and other positive qualities:
- Aerated concrete is an environmentally friendly “breathing” material, the microcirculation of air in the pores of which can be compared with the same process in the structure of natural wood;
- Aerated concrete is lightweight, so it does not bear any load on the base. However, the choice of foundation should be approached responsibly - cracks on the surface of aerated concrete masonry appear due to the mobility of the foundation. In this regard, experts recommend installing a monolithic strip base;
- Aerated concrete is a fire-resistant material and can withstand the effects of open fire for more than 5 hours without contributing to its spread. Aerated concrete blocks can be used for fire protection of metal structures;
- Frost resistance of aerated concrete blocks is ensured by the distribution of frozen water into free, dry internal pores when the air temperature drops;
- If you place aerated concrete in water, it will float on its surface, which indicates a certain degree of moisture resistance of the material;
- Aerated concrete is easy to process and lay, which can be done by one or two people. The block is light in weight, it is easy to carry, thanks to the end recesses, and its dimensions, which exceed those of a brick, allow the building to be erected quickly and at the same time save mortar.
Carrying an aerated concrete block
However, some of its positive qualities turn out to be the other side in the absence of external finishing of the aerated concrete facade.
Be that as it may, over time, moisture will begin to destroy the aerated concrete masonry, as it inevitably penetrates the outer layer of the block. It is the hydrophobicity of aerated concrete that requires exterior finishing. And the appearance of the plastered facade looks much nicer. Therefore, the question of whether it is necessary to plaster aerated concrete is not worth it.
Mineral
How to plaster aerated concrete walls? Professionals and private builders recommend using mineral-based plaster compositions. They are among the thin-layer compositions specially created for finishing aerated concrete. Such solutions are made with your own hands; they are affordable, have good vapor permeability and are light in weight.
Ready-made formulations include the following components:
- lime;
- white cement;
- marble chips and other fillers.
The color palette of such plaster mixtures is limited. They can be easily painted; the only caveat is the use of vapor-permeable coloring compounds. Painting can protect the coating from moisture, because a damp environment can destroy mineral plasters.
Let's sum it up
By doing all the work yourself, you can save tens of thousands of rubles. The money saved can be spent on furniture, high-quality finishing materials or something else. If this is your first time doing this work, it is better to study the entire process in detail and only then start plastering gas silicate blocks. Doing everything yourself is quite possible. All that remains is to put all this into practice.
Additional material on the topic: How to plaster without beacons.
Silicate
This type of building plaster is based on potassium liquid glass, which is a binding component.
Advantages of silicate mixture:
- Easy to apply;
- Resistance to moisture;
- Vapor permeability;
- If necessary, it can be painted in any color;
- Acceptable price;
- Long service life (up to 25 years);
- Decorative qualities.
Silicone
It is better to plaster aerated concrete blocks with façade silicone plaster. It has high technical and performance characteristics and is superior to other plaster mixtures.
The advantages of silicone plasters include:
- properties to repel water;
- the building material is easy to apply with your own hands, without the involvement of specialists;
- plaster has a high degree of resistance to atmospheric phenomena and vapor permeability;
- Long service life;
- Fillers have different textures;
- The material is elastic.
Acrylic
The material has high decorative qualities and durability. The big disadvantage of acrylic plaster for processing aerated concrete and other cellular textures is the low level of vapor permeability. For this reason, condensation forms in the inner layer of the plastered surface. As a result, such exposure causes surface deformation - peeling and cracking.
Cement-sand
Cement plaster is not suitable for treating external aerated concrete surfaces. For what reasons is this popular building material not suitable:
- The solution does not adhere to the smooth surface of aerated concrete due to insufficient adhesion properties. The mixture has high density and high weight;
- When applying cement mortar to the surface, aerated concrete absorbs moisture and the adhesion of the materials weakens. As a result of such rapid drying, the integrity of the layer is destroyed;
- Low vapor permeability of cement mixtures means non-compliance with building codes and violation of optimal microclimatic parameters in residential premises.
If cement plaster is used for interior work, it will protect aerated concrete walls from steam penetration into them.
Important! Expanded polystyrene and polystyrene are not recommended for use on aerated concrete surfaces.
Basic requirements for plaster
It is worth noting right away that it is not recommended to apply ordinary plaster to a house made of aerated concrete blocks. Primarily because standard sand solutions are high-density, this leads to poor adhesion when applied to aerated concrete blocks and the rapid appearance of cracks.
Adhesion (from Latin adhaesio - sticking) in physics is the adhesion of the surfaces of dissimilar solids and/or liquids.
The plaster should maintain an optimal microclimate inside the building, protecting the walls from moisture. Therefore, you should choose mixtures with a vapor-permeable base. Otherwise, the steam coming out of the house will get stuck inside the walls, since the plaster will simply block its exit to the outside. Thus, moisture will begin to accumulate in the walls, which will ultimately lead to their destruction. Of course, nothing will happen to the house in a few years, but in six to eight years, an almost irreversible process of destruction will begin.
Plaster for aerated concrete should be:
- resistant to external weather influences;
- have good adhesion (adhesion to aerated concrete);
- resistant to sudden temperature changes;
- high degree of compressive strength (protection against cracking);
- vapor permeable;
- moderately dense;
- improving the thermal insulation of walls;
- have a decorative appearance.
When choosing plaster for aerated concrete, you should not ignore any of the points listed above.
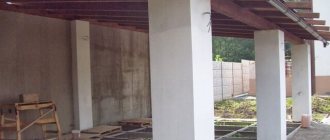
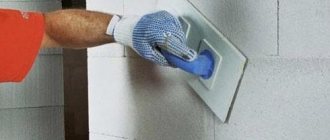
Applying plaster to a house made of aerated concrete blocks Source emupauto.ru
The absence of facade finishing of aerated concrete structures will lead to darkening, deformation, and peeling of the surfaces of the blocks.
Plaster
The plaster base, which includes gypsum, has the following positive qualities:
- dries quickly;
- the solution does not shrink;
- the mixture goes on smoothly;
- no finishing coat required.
Disadvantages of plastering walls with gypsum:
- average level of vapor permeability;
- a larger amount of water is required compared to special mixtures, approximately 10-15 liters per 1 bag of 25 kg;
- the surface will quickly get wet after rain and snow;
- spots appear on the surface that need to be painted over.
Facade
The mixture is most effective for treating both external walls and indoors; the material is easy to apply with your own hands. Plaster has a number of positive qualities - good adhesion to the base, attractive appearance. Including the material has vapor permeability indicators identical to those of aerated blocks. When choosing plaster for building aerated concrete, it is better to choose a high-quality special mixture, this will simplify the process of finishing the house.
If you have to choose plaster or drywall, which is better for aerated concrete inside the house. The following facts should be taken into account: walls made of aerated blocks are smooth, and they do not require leveling. Accordingly, plaster will cost less, and the solution will form an even and beautiful layer.
The most common plaster mixtures for aerated blocks
When choosing facade plaster compositions for aerated concrete, it is best to give preference to ready-made mixtures from well-known manufacturers, which guarantee high quality material, durability, and compliance with all specified characteristics.
The most popular plasters for aerated concrete blocks:
- Ceresit CT 24
– a mixture of mineral type, plastic, comfortable to work with. The coating can withstand about 100 freeze/thaw cycles. For greater protection, it is best to paint the plaster layer 7 days after it has completely dried.
- Ceresit CT 77
– acrylic mixture, used for finishing facades, gives high strength with a thin layer of coating. The plaster is frost-resistant and is not afraid of external influences. Typically used when there is ventilation and waterproofing inside the house.
- Founds Startwell T-21
– cement-lime type plaster, characterized by a high level of adhesion, frost resistance, and is not afraid of moisture and shrinkage.
- Baumit Silicone Top
– good adhesion and plasticity are ensured by the solution due to the presence of silicone resins in the composition. The coating retains its original appearance for a very long time, is decorative, demonstrates dirt-repellent characteristics and good vapor permeability; the grain size may be different. There is a large selection of colors and shades (about 200).
- Weber.pas silicone
– the mixture is made on the basis of silicone emulsion. It is possible to choose the grain size of the plaster. The material is resistant to moisture, is not afraid of sudden changes, low/high temperatures, and various types of pollution.
- Ceresit ST35
– decorative composition with the “bark beetle” effect. It can be applied to mineral wool and any other insulation material, is suitable for painting, and demonstrates good vapor permeability and decorative properties. The consumption is low, the mixture resists various influences well, and is highly durable.
Self finishing
We plaster the aerated concrete on the outside with plaster intended for exterior use. There are two options for applying the mixture - a thick layer or several thin layers, which are applied in no more than 3 layers and no more than 1 cm each.
Work order:
- the surface is prepared for plastering - contamination is removed;
- Next, you should hang the surface with your own hands using beacons;
- spray is applied - the first layer of plaster coating;
- the primer is applied and leveled;
- cutting corners;
- finishing of slopes;
- a covering layer is applied;
- the surface is rubbed.
When to do exterior finishing
Aerated concrete is a porous material prone to shrinkage. This process can last from six months to a year and a half, during which it is pointless to apply plaster - a change in the condition of the surface will lead to the appearance of cracks or peeling of the outer layers. If there is no time to wait for the end of shrinkage, and you urgently need to move into a new house, choose the installation of sheathing, which can be done almost immediately after the completion of the wall laying. This is another reason for the popularity of siding or facade panels.
In addition, the application of external plaster should be done after finishing the interior finishing. If you plaster the outside of aerated concrete walls before finishing the interior, you can create conditions for excessive moisture in the material and a host of problems:
- air humidity in the house increases, the microclimate worsens;
- possible occurrence of mold and mildew;
- walls cannot retain thermal energy, which requires increasing the power of the heating system and, accordingly, increased costs;
- Water frozen in the walls destroys aerated concrete.
These problems can be prevented if you foresee them in advance and install a powerful forced ventilation system in your home. However, for this you need to have experience and special knowledge, which most developers cannot boast of.
External work technology
- If necessary, insulation is installed for the blocks under the plaster.
- Preparing walls - leveling the surface to reduce material consumption and application thickness.
- Before you start plastering the walls, aerated concrete must be treated with a primer. For this purpose, compositions designed for the fine-cell structure of materials are used.
- Applying a thin layer of plaster mixture for aerated concrete surfaces - up to 5 mm. This base will serve to attach the mesh.
- Reinforcement of plaster with mesh.
What tools will you need for the job?
Plastering on gas silicate blocks is carried out using the following set of tools and devices:
- The rule is an indispensable device for pulling mortar along beacons, capable of ensuring ideal surface leveling. Beginners are recommended to choose a not very wide version of the device, 2 meters long;
- plastic container for preparing a working solution of the required volume. You can use a bucket, improvised containers in the form of containers or tanks in which it is convenient to dilute the required amount of plaster composition;
- electric drill with mixer. Since the volume of work ahead is quite large, it is worth using a special power tool to mix the solution. This allows you to significantly reduce time costs, optimize the speed of work and process efficiency;
- a special ladle for throwing the working mixture or a plasterer’s trowel. Depending on your preferences, you can choose a convenient version of this construction tool, which is presented in a wide variety of models;
- grater. Used to level the surface of the plaster layer;
- poluter. The tool is necessary to remove excess working mixture from the surface.
The rule is an indispensable device for pulling mortar along beacons.
The last two devices differ only in size.
Adviсe
It should be noted right away that plastering aerated concrete blocks from the outside with adhesive solutions is unacceptable. Because glue won't do the job. In order to protect and level surfaces, it is recommended to use specially designed mixtures that meet all operational requirements.
When plastering aerated concrete facade work is carried out, it is recommended to follow some rules, which are described below.
- after the building is erected, a certain period of time must be maintained so that the internal moisture evaporates naturally;
- the brand of plaster must be suitable for outdoor use;
- sequence of repair work - first inside the house, then outside;
- the temperature regime must correspond to +8 to +30 C0 - for exterior finishing;
- Building regulations that must be observed in relation to increasing thermal conductivity coefficients. Each material installed or applied to the gas block should be taken into account.
Internal plaster of aerated concrete walls
Internal work on plastering walls made of aerated blocks is carried out with gypsum solutions with various additives. Composites in the form of perlite and marble chips will increase the decorative effect of the finish. There is the possibility of painting the composition in various colors.
Gypsum mixtures without additives have the required level of vapor permeability, which allows the plaster to be used as a base for wallpapering. Standard sequence of work:
- elimination of irregularities and chips on the surface of the walls;
- removing dust and applying the first layer of solution;
- installation of reinforcing mesh;
- applying the second layer.
After complete drying, you can glue wallpaper, paint the walls, or apply a third, decorative layer of plaster.
Interior work is carried out only subject to the preliminary application of a waterproofing compound and priming.
Interior wall plaster Source poradnuk.com
Reinforcement
To the question whether it is necessary to reinforce the plaster, and whether a mesh is needed. The answer is simple, since the plaster layer of aerated concrete can vary from 5 to 15 mm. If the layer exceeds 10 mm, a metal mesh with a fine cell texture is used as a reinforcing layer. For example, a mesh with a wire diameter of 0.1 mm and a cell size of 0.16 x 0.16 mm, or fiberglass mesh with cells of 5x5 cm, is suitable.
The mesh must be installed with an overlap of 5 cm; for the corners of the house, perforated corners with mesh are used. This method will help prevent the formation of cracks in the plaster after the building shrinks. It is better to install the mesh into the applied solution using a spatula. A particularly important point is the installation of the mesh in places with a high level of stress - the area of windows and doors.
Advice! If you attach the mesh to a dry surface, the result will be zero. Because the mesh needs to be fixed to the wall using self-tapping screws, and then a layer of mortar must be applied. Otherwise, the unfixed mesh will move along with the putty.
Work order:
- Level the plaster layer over the mesh using vapor-permeable plaster.
- It is necessary to wait until the first layer is completely dry. Otherwise, it will fall off under the weight of the next layer. This technique involves thin-layer application of the mixture. You will have to wait three to four days for complete drying. Accordingly, the thicker the layer, the longer it takes to dry. Checking whether the surface is dry is done using water. Having splashed the liquid onto the surface, it was quickly absorbed - this means that it is time to begin further work.
- A second layer of plaster is applied, which is considered leveling. Therefore, the layer should be even and smooth;
- A third finishing coat of plaster is applied and will require further grouting if necessary.
- Painting the surface with materials for exterior work or applying putty.
- Treatment with a water repellent. Experts recommend applying this solution 12 months after painting and completion of all facade cladding work. A water repellent gives any coating additional water-repellent properties.
Note! When the plaster layer dries, it must be protected from the influence of such undesirable environmental factors as moisture, snow, rain.
Technology for plastering aerated concrete facades
Conditions for work
It is possible to plaster a facade made of aerated concrete only after all “wet” processes inside the room have been completed and the surfaces have completely dried. This applies not only to plastered and painted walls, but also to screeds on the floor, moisture from which evaporates very actively. The blocks themselves must also be dry - the maximum permissible humidity is 27%. If you plaster wet walls, the intense release of water vapor will cause the coating to peel off.
The walls of the house must be dry
It is recommended to plaster external walls at a temperature of +5...+30 °C, while the relative humidity should not exceed 80%. If for some reason it is not possible to complete the exterior finishing before the onset of frost, you need to treat the entire area with a deep penetration primer. The best option is Ceresit ST-17 primer, applied in 2 layers. This protection will be sufficient until spring, when weather conditions allow plastering to begin.
Ceresit CT 17. Deep penetration primer
Advice. Do not apply plaster compositions in hot weather, strong winds or when the walls are exposed to direct sunlight. These factors contribute to the rapid drying of the solution, and it does not have time to firmly adhere to the base. As a result, many small cracks appear and the plaster peels off.
Prices for deep penetration primer
Deep penetration primer
Surface preparation
As a rule, walls made of aerated concrete blocks are quite even and smooth, so there is no need to specially level them. If there are deep chips or dents, you need to repair them with the glue that was used when laying the blocks.
Adhesive for aerated concrete
To do this, mix a little glue (you can mix it with the dust formed when sawing blocks), scoop it up with a narrow spatula and fill the recesses. Remove excess and allow the solution to dry. Empty seams between blocks are sealed in the same way. When the glue dries, the walls need to be rubbed down to remove minor flaws. Use a metal flat grater for this. Finally, sweep away dust from the entire surface with a brush.
Fill all cracks and dents with the solution.
Padding
For priming aerated concrete walls under plaster, deep penetration compounds with strengthening properties are used. They create a very strong elastic film that allows water vapor to pass through, but does not allow the material to absorb water. Additionally, such primers increase the adhesion of the base and finishing layer. Popular products: Knauf Grundiermittel, Siltek E-110, Aerated concrete-contact-1.
Aerated concrete-contact-1
Knauf Grundiermittel
The primer is applied in 1-3 layers, depending on the climatic conditions of the area. For example, in dry and warm regions one layer of primer is sufficient, but in areas with a damp climate, coastal areas, three layers are needed. To apply the composition, use a roller or a wide paint brush. Prime with a continuous layer, evenly distributing the composition over the base. In corners and hard-to-reach places, use a narrow brush so that there are no dry areas left.
Set of tools for priming walls
You can prime the walls with a roller
Plastering and reinforcement
It is not necessary to reinforce a layer of plaster up to 10 mm thick if the walls are properly primed. For larger thicknesses, reinforcement is indispensable, and for this purpose a fiberglass mesh with cell sizes of 3x3 mm is used. The mesh must be alkali-resistant - this will ensure high durability and strength of the finishing layer. This information is indicated on the packaging, so when purchasing a mesh, pay attention to this point.
Step 1. Prepare the plaster solution. The proportions of water and dry mixture are in the manufacturer's instructions, so read it carefully before starting work. To knead, take a clean container and pour the specified volume of water at a temperature of +15…+20 °C. Pour in the dry ingredients and stir with a construction mixer at a speed of 400-800 rpm. Let the solution sit for 5-7 minutes and stir again.
It is better to prepare the solution in small portions
How to prepare plaster mortar
Construction mixer price
Construction mixer
Step 2. Take a wide metal spatula, apply the solution to the edge and apply it to the wall in an even strip. The spatula should be held at an angle to the surface and not pressed too hard, so the composition will be distributed most evenly. The layer thickness should not exceed 5 mm.
Distribute the mixture over the wall
Step 3. Place a mesh on top of the mortar, straighten it, and then carefully deepen it into the plaster, rubbing it forcefully over the surface with a spatula. If necessary, add the solution in small portions and rub thoroughly again. Having secured the mesh, apply the solution to the next area and repeat all over again. The mesh must be overlapped by 40-50 mm to avoid cracks at the border of adjacent areas.
Attaching the mesh
Step 4. Special perforated profiles with a mesh attached at the edges are attached in the corners. To do this, apply the solution to the very corner, level it in height with a spatula, apply the corner profile and gently press it. Then, like the mesh, it is deepened into the plaster and the surface is smoothed with a spatula. They are placed not only in the outer and inner corners, but also along the perimeter of window and door openings.
The corners and mesh should not protrude above the plane of the wall anywhere. The surface must be flat, smooth, without visible defects. Now you need to let the solution dry thoroughly. Drying time depends on the composition of the mixture and weather conditions, on average it ranges from 3 to 7 days.
Fastening the corner
Finishing layer
Mix the solution for the finishing layer and apply it to the surface with a wide spatula. The thickness of this layer varies between 4-10 mm. Special care is required here, since all defects will remain visible. When plastering adjacent squares, the formation of stripes along the edges should be avoided; all excess should be removed immediately with a spatula.
Applying plaster
Leveling the solution
Applying plaster to aerated concrete walls
When the plaster has set sufficiently, but has not yet hardened completely, begin grouting the walls. For this, it is most convenient to use a polyurethane grater, but a metal one will also work. The grater must be applied flat to the surface, pressed, and smooth the plaster layer with circular movements. Do not press too hard to avoid leaving scratches and dents.
Grouting plaster
After grouting, you need to wait until the plaster is completely dry, and only then proceed to the final stage - painting. You can also use decorative structural plaster, applying it in a thin layer to the prepared base.
After plastering, you can attach the decor
putty
When deciding whether to putty aerated concrete, it is recommended to learn about the types of building mixtures. There are 3 types of product varieties on the market that are intended for finishing. By and large, this is a facade plaster intended for thin-layer finishing of an already plastered surface, differing only in composition. Ready-made mixtures are sold in buckets and come in silicate, silicone and acrylic.
Important! When plastering the outside of a house, it is recommended to use only vapor-permeable building materials. This will provide not only a reliable finish, but will serve as a decoration for the building.