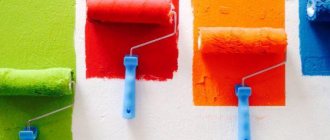
Applying plaster to the walls is only the initial stage of finishing the wall surface. In order to give it maximum evenness for subsequent painting or wallpapering, after applying plaster mixtures, proceed to priming and puttying. And only then can you move on to the final work of decorating wall surfaces with wallpaper for painting.
What to do after plastering the walls? If the surfaces have completely dried after the plaster has been applied to it, you can proceed to priming the walls. To do this you will need to purchase a special tool. It is offered in a wide range by modern manufacturers of building materials.
Primer after plastering does not require special skills from a person. It is enough to purchase a convenient tool and be patient if a person performs this work for the first time in his life.
But if the priming stage has been completed, you can safely move on to puttying the wall surfaces.
The putty mixture used at this stage of finishing the room fits perfectly on a flat wall. However, not many can boast of the ideal geometry of their city apartment. That is why uneven surfaces must first be covered with plaster and primed. And you can do this with your own hands and without the involvement of professional builders.
Types and properties of putties
First you need to decide on the choice of finishing putty. Not all of its types are suitable for wallpaper, and, similarly, for painting. From the point of view of professionals, there are, in principle, no universal ones due to significant differences in composition. Recommendations from manufacturers regarding versatility of use are aimed at the average consumer without special requirements, but not for experienced painters.
The difference is this.
To adjust and trim wallpaper, you need a durable surface that does not get wet from glue, which is obtained by applying gypsum putties. But due to the heterogeneity of gypsum grains, noticeable after grinding in characteristic areas of “stains”, they are not recommended for painting.
For painting, the main thing is “fine grain”, the uniformity of the putty layer, which after sanding and painting gives the effect of a perfectly smooth canvas. Polymer (vinyl) based compositions are indispensable here. However, the latter have a fragile structure and are an order of magnitude inferior in density to their gypsum counterparts. Therefore, it is not advisable to use polymer putties if wallpaper is planned.
It should be said about the role of acrylic primers (primers), supposedly strengthening weak putty layers. Yes, they strengthen, but only slightly. The primer film is not a serious barrier to moisture from wallpaper glue, and accordingly, it is not capable of increasing the strength of the putty. The main purpose of all types of primers is to remove dust from surfaces for strong “adhesion” (adhesion) to solutions, increasing the productivity of work.
Preparatory work
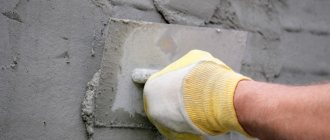
Deep scratches and other rough spots are puttied in advance before applying the general layer. After drying, the designated areas are sanded with sandpaper fixed on a block. The photo shows a working fragment of preparing plastered walls for putty.
Next, the walls are primed. Dust removal of plaster is carried out with Glims primer, which is popular in the field of repair and finishing due to its good performance and versatility of use. In our case, as a finishing putty for wallpaper, we used a dry mixture based on the “Prospectors” gypsum.
The putty is mixed with water to a thick sour cream using an electric drill and a mixer attachment. You should knead in small portions (4 parts of the bucket), because Due to the gypsum content, you can work with the solution for no more than an hour.
What does industry offer us?
So, how to treat walls after plastering? Each putty option is used in certain areas, which often overlap with each other .
Let's take a closer look at the materials.
- Cement is a dry mixture in bags, which is used for sealing joints and finishing leveling brick and concrete walls for painting. Can be used for exterior work when finishing facades as a water-based solution. With its help you can create a layer of 2-7 mm, its price is the lowest.
Preparation of cement putty
- Gypsum is a powder of crushed gypsum that contains some additives. An environmentally friendly “breathable” material, which is used only for interior decoration. Before use, dilute with water until thick as sour cream. Three types are offered:
- fugue – does not shrink, is used for sealing gypsum board joints;
- starting – has a coarse grind, which makes it possible to create a layer of 5-20 mm. Can replace plaster when leveling walls using plaster guide rails (beacons). Does not shrink when dried;
- finishing - a mixture of very fine grinding, makes it possible to create a layer of 0.5-3 mm. Shrinks greatly when drying, so thicknesses greater than 2 mm must be done with caution.
Applying gypsum putty
- Acrylic - offered in the form of a thick ready-made mixture in an airtight container. It is very plastic, makes it possible to obtain ideal smoothness, which is very important for further painting of the surface, and forms a thin layer.
Working with acrylic putty
There are some features of its composition.
For example, when the wall will subsequently be covered with wallpaper, it is not advisable to use this putty:
- there is no need to lay out the surface underneath them like that;
- the acrylic layer under the liquid glue may become soft and come off the wall along with the wallpaper.
How to prepare a solution for gypsum putty
Please note that you must know how to prepare the gypsum mixture correctly, since the surface must be treated immediately. After 40 minutes the material will become hard and impossible to work with.
The instructions on the package usually recommend the amount of water for the entire bag. However, if you are new to finishing, you should not knead the entire mixture at once; it is better to do this in several approaches.
Tools for work
Prepare a clean, wide container, such as a plastic bucket, and fill it one-third full with cold water. Add putty to it with a trowel until it stops sinking. Mix the solution until smooth using a drill with a mixer attachment. After this, the latter should be washed immediately.
Tip: do not apply the mixture to the surface immediately, let it sit for about 5 minutes.
How to properly level surfaces with putty
Let's consider the sequence of plastering work and the technique for carrying it out.
- Assess the curvature of the walls to understand how to level them. To do this, prepare a rule more than a meter long or a piece of drywall.
- Apply them to surfaces with your own hands in different directions and different places. This way you can determine where the work surface has dips or bulges:
- when the differences are large, more than 50 mm, you will have to plaster the surface again, but this time along the beacons;
- if the differences are 10-50 mm, they can be leveled with spatulas using the starting mixture;
- If the wall curvature is no more than 10 mm, use only finishing putty.
How to putty correctly?
Applying putty to walls is not the most difficult job, however, it requires certain skills and experience that only come with practice. But let's look at the theoretical part in more detail.
Alignment of walls . They get rid of unevenness, height differences, depressions and all kinds of wall defects not only with the help of putty. Plaster is also used for the same purposes. How to understand: to putty or plaster?
The walls are plastered if there are really strong defects or if the walls in the room are so crooked that they look like they are “dancing.” We can say that plaster is the heavy artillery for leveling walls. Putty can level the surface only if its height differences are no more than 2 mm. If potholes or depressions on the wall are more than 2 mm, then additional plastering is necessary.
Before applying putty to the walls, the surface is primed and it is determined exactly what unevenness it has. To do this, take a rule and apply it to the surface in different directions (vertically, horizontally, diagonally). Where there are gaps between the rule and the wall, there will be unevenness. If they are located vertically, then the putty should be applied in the same direction so that the material fills all the voids and levels the surface. If the recesses go in a horizontal direction, then the putty is applied horizontally.
Note! The thickness of the layer should not exceed the norm indicated on the packaging of the putty used. It may differ from one manufacturer to another, usually it is 0.5-1.5 mm. A layer that is too thick can crack and crumble, ruining all the work.
Spatula and more . The main tools for leveling and preparing walls will be spatulas. Typically, two stainless steel metal spatulas with a wide and narrow blade are used. But not only this pair will be useful for repairs - it is always useful to have a rubber or plastic spatula for smoothing the wallpaper, which will be needed at the final stages of work.
- A narrow spatula is needed to apply putty from a container (plastic bucket, basin) onto a wide spatula and to remove its excess. A spatula with a wide spatula is used to spread the material over the wall in a thin layer.
- A narrow spatula, if you don’t have one at hand, can be easily replaced with a trowel or trowel. This tool will also cope with its task quite successfully.
- And instead of a wide spatula, you can use a smoothing iron. The main thing is that it does not have jagged edges. Usually, using a trowel, putty is applied in the form of a paste to already plastered walls that do not require additional leveling. The trowel allows you to make a layer of putty very thin.
- And you will definitely need a plastic bucket or other container for mixing the plaster.
Sequence of putty work
- First of all, beacons are removed from the walls. The fact is that iron is susceptible to corrosion and with strong humidity, stains may appear on the walls over time. Some experts recommend leaving beacons in the walls, but it's up to you. At least in those rooms where there is excess moisture, it is better to remove beacons.
- Rough puttying is carried out. Roughly, a layer of up to 20 mm of putty is applied to the walls, thereby covering all the grooves, holes, etc.
- We wait some time until the starting layer dries. During this period, drafts should not be allowed to prevent the putty from cracking.
- Next, a finishing layer of putty is applied, which should not exceed 5 mm. It is necessary to apply the putty slowly, forming all corners as accurately as possible.
- We wait 2-3 days until the finishing putty is completely dry. Do not rush to apply a decorative layer to the walls. Let your walls rest and remove excess moisture so that you can calmly start decorating, knowing that your walls are completely ready for this process.
putty
Next we move on to leveling the walls, for which we use putty. Putty exists in both gypsum and cement. Which one should you use in your case? Remember a simple rule: if the room is dry and stable in temperature parameters, use gypsum putty, because it is more convenient to work with. If there is excess moisture in your room and the temperature varies periodically, for example in the kitchen or bathroom, then use cement putty.
Putties come in the following types:
- Cement based. It resists moisture well, but exhibits significant shrinkage.
- On a gypsum basis. The best option, but this putty is susceptible to moisture absorption, so it should only be used indoors.
- Polymer based. The most expensive putty that does not shrink and is not afraid of moisture.
If you plan to carry out renovations in the bedrooms, then gypsum putty will do just fine. However, if the renovation is being done in the kitchen or bathroom, then you should consider a more expensive option.
Putty
Puttying walls after plastering is a serious area of work, so it is better to separate it into a separate section. Before you start making a topcoat, you need to choose the type of material that is ideal for your conditions. There are three types of mixture in total.
Cement
This material is used for work after plastering and has the following advantages:
- resistance to temperature changes,
- moisture resistance,
- ease of use,
- affordable price.
All these advantages have led to the fact that this mixture is often used after applying plaster to make the final layer. The main reason that the material has not received an overwhelming advantage in the market is a number of disadvantages, including:
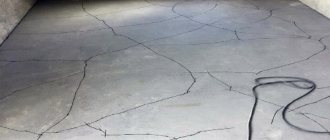
- the possibility of cracks due to shrinkage;
- long drying period;
- low adhesion.
Cement putty is used when work needs to be done in rooms with high humidity. Moreover, it perfectly tolerates harmful environments. It is also often used when, after the construction of a house, it is necessary to finish the facade.
Plaster
Gypsum putty is also used quite often when work needs to be done after plastering walls. It has the following advantages:
- no shrinkage,
- low probability of crack formation,
- high plasticity,
- ease of application,
- high adhesion,
This material is easy to apply. Moreover, it is easy to level it after completing the main work on plastering the walls. But, of course, there were some downsides:
- Plaster is afraid of moisture. Therefore, you should not do any manipulations with it in a room with high humidity.
- Plaster hardens quickly. On the one hand, this is a plus, but on the other hand, you shouldn’t make too large volumes of the solution, otherwise you won’t have time to use it all up.
- To get a high-quality finish you will have to do at least two layers.
If you decide to putty with gypsum, you must take into account that you need to wash such walls extremely carefully, otherwise you will have to make new putty, and possibly plaster.
Polymer
In recent years, more and more companies have decided to make putty based on polymers. This decision is easily explained by a number of advantages that this material gives to builders after treating the walls with plaster and primer, namely:
- Using the mixture, you can make a coating in rooms with water.
- It is possible for craftsmen to make only one layer of putty.
- It should also be noted that it has high adhesion.
- The substance dries quickly, is inert to temperature fluctuations and does not absorb odors.
Polymer putty, which is used to create the final layer of wall finishing after plastering, has a long service life. Moreover, it has high ductility, it does not crack or dry out.
Despite all the apparent advantages, before you start putting putty on the walls using gypsum, you need to learn about the negative aspects of this substance. Fortunately, there are only two of them. This is high cost and difficult to apply.
Most often, polymer mixtures are used when it is necessary to putty walls indoors. Some varieties are even used for external work. Such widespread use is explained by the high quality of the substance.
Packaging
To start making walls, you need not only to choose the type of putty, but also the packaging form. The fact is that there are dry mixtures on sale. After purchasing, you just need to dilute them with water.
You can also buy the substance in buckets. In this case, you won't have to do anything else. The putty can be immediately applied to walls that already have plaster. The first option is best suited for professional builders, and the second for beginners.
Application
For everything to go as expected, all operations must be done in the exact sequence. First apply a starting coat to the walls. This is best done with a thick spatula. Movements come from the corners. You can work in any direction convenient for you.
When the mixture has dried, it’s time to check the evenness of the coating. You will also need to sand the surface again. For this purpose, skin with a fine fraction is best suited. After this comes the finishing layer. Now you can safely glue wallpaper or paint the walls.
Choosing putty for walls after plastering
While the primer dries, you need to choose what to putty on the walls after plastering, since they need to be leveled before further finishing. For this purpose, it is better to purchase a starting mixture: it is designed specifically for treating walls after plastering, and is suitable for eliminating significant differences in height.
Also, when the primer dries after plastering the walls, you can treat their surface with universal or finishing putty. The latter, in comparison with the starting mixture, have comparatively worse consumer characteristics, and are usually used in cases where the plaster layer does not have significant flaws.
Based on the material, putty bases are divided into three categories:
- cement - resistant to moisture, but have a high degree of shrinkage;
- gypsum - cheap, does not shrink, is pliable when applied, but is sensitive to humidity levels;
- polymer ones are expensive, do not shrink, and are resistant to moisture.
Most often, gypsum-based putties are used; however, their scope of use is limited; they are not recommended for use in very wet areas where there is contact with water in the bathroom or swimming pool. Otherwise, why putty the walls after plastering if, due to high humidity, the gypsum-based coating will quickly become unusable.
It is strictly forbidden to use gypsum plasters outdoors since moisture and frost destroy the Rodband mixture and other similar ones.
According to the sales form, putties are presented in two categories:
- ready-made - an already diluted solution that can be used immediately after opening the container;
- dry - mixtures intended for self-preparation, but having a much lower cost than ready-made mixtures.
Thus, the cheapest option is dry gypsum powder, but it also has the lowest quality. Gypsum mixtures are excellent for sealing cracks in walls. The most expensive are ready-made polymer-based putties; these materials are best used for making the finishing layer.
Technology for processing plastered walls
Often, before starting putty work, the question arises as to whether the beacons need to be pulled out after plastering, or whether they can be left in the walls. It is recommended to do this without fail. The beacons are made from metal, and if left, they will corrode over time. This, in turn, will reduce the strength of the plaster layer, and ultimately lead to its crumbling. Cracks and other damage will appear on the surface of the walls.
After the decision has been made whether it is necessary to choose beacons after plastering, you can begin to putty the surface. The bottom, coarsest layer of material is applied. Using mixtures for starting putty, holes and grooves are filled in and large differences in height are eliminated. The thickness of one starting layer can sometimes reach 15-20 mm.
You can put a painting mesh under the putty layer, stretching it over the entire surface of the wall being treated. This will make it possible to achieve a more even laying of the material and improve the strength of the starting layer of putty.
When the starting coating has dried, the finishing process begins, which is carried out using finishing mixtures. Unlike the starting one, it is applied in a very thin layer so that it completely repeats the resulting wall relief. In some cases, the question arises whether it is necessary to putty the walls after plastering with Rotband in order for the surface to be perfectly flat. If you follow the technology, there is no need to apply additional finishing layers, the walls will already be level.
Preparing walls for painting or wallpapering
After completing the putty work, you should wait until the walls are completely dry, and only then prepare them for painting or wallpapering. The technology for performing both types of finishing is the same; the difference lies only in the nuances when choosing finishing materials. You can spend as much time choosing the appropriate finishing method as it takes for the walls to dry after plastering - about a month.
Puttying under wallpaper
For the purpose of further wallpapering, the putty is initially carried out with a wide spatula, covering with each subsequent layer up to ¼ of the previous one. The resulting “sausages” are not ground. Holding the spatula at an angle of 21-30°, maintain constant pressure, which will help distribute the material in an even layer of 2 to 4 mm. The smaller the angle of inclination, the more it leads to the formation of a thick layer, the more it leads to the formation of a thin layer. However, the dependence is typical for variations in the specified degree interval; when going beyond its limits, bumps and breaks form on the surface.
The next step is drying the layer, removing beads with a jointer and abrasive and checking the smoothness using a building code and a torch. The resulting defects are eliminated: protrusions - with abrasive, recesses - with additional lubrication. It is possible that an inexperienced master can approach the wall up to 5 times until the surface becomes perfect.
At the end of the manipulations and long hardening, they go over the wall with a jointer with a mesh size range of 80-120 (with an increase in the number, the abrasive grain decreases). Initially, the entire surface is worked with circular movements, after which, loosening the grip, movements are criss-cross in order to remove the contours of circular manipulations.
Then the wall is again checked according to the building rules with the lantern. If there are no lingering reflections from the rule, the surface is ready, after a day the walls are primed and you can start gluing.
Grinding process and rules
How to sand putty correctly? In order for the sanding of walls after putty to go flawlessly, you need to follow some rules:
- Proceed with sanding only when the surface is completely dry. As a rule, it takes a day for the walls to dry.
- Before starting work, protect all furniture from dust with plastic wrap. If this is not done, subsequent cleaning may take a long time.
- Find the most visible defects. How to identify them? It’s very simple - take a bright lamp, place it as close to the surface as possible, and direct the light along the wall: a shadow will appear from obvious bumps. These irregularities can be marked with a pencil.
Calculation of the required amount of grout
The task of calculating the amount of grout arises quite often. Many manufacturers indicate approximate consumption for standard size tiles.
Several factors influence the consumption of grout:
- tile dimensions (thickness, width, length);
- seam width (optimal dimensions for floor cladding - 2-3 mm, for wall cladding - 1-2 mm);
- joint depth (depends on the total thickness of the adhesive layer and tile);
- density (the indicator is influenced by the formulation of the composition and manufacturing technology, the optimal specific gravity is 1.5-1.8 kg/dm³).
The formula for calculating the required amount of grout mixture (Рз) is as follows:
Pz = M×K, where M is the length of the seam, in meters, K is the joint consumption coefficient, in g.
The length of the seam per 1 m² is calculated using the following formula:
M = (A+B)/A×B), where A and B are the length and width of the facing material, in m.
The coefficient for calculating the reveal is determined by the formula:
K = W × D × R, where W and D are the width and depth of the seam, in mm, P is the volumetric weight or density of the grout.
The obtained result must be increased by 10-15% of the calculated value.
Plastering walls in a new building
The basis of almost any renovation in a new building is work related to preparing the surface of the partitions for applying finishing layers - ceramic tiles, paint, wallpaper. For this reason, plastering walls in a new building is an important stage: the longevity of the operational properties of the room and the overall result of wall finishing depend on the high-quality implementation of this work.
By the way, our craftsmen have the highest qualifications of professional plasterers. You can place a request for individual plastering work or entire repairs in the apartment on this page or by calling 8(495)662-48-33.
What is wall plaster?
Plastering the surface of walls and partitions in a new apartment is a process of applying special solutions and their subsequent leveling. This is the most important element of wall decoration. As a result, the surfaces of vertical structures become smooth and suitable for a fine finish. In this case, both planar (sinks, potholes, bumps) and angular irregularities are eliminated. In the latter case, deviations of walls and partitions from the vertical and horizontal are minimized or eliminated. In this regard, it is customary to talk about aligning angles at 90 degrees. Creating a room geometry that is close to ideal becomes especially important when using ceramic tiles as cladding or when installing built-in furniture, such as a kitchen. The lack of correct “geometry” of the room manifests itself when joining corner furniture elements (for example, when installing kitchen cabinets in an L-shaped line). Taking into account the purpose of the room after renovation, its equipment and the type of finishing, you can make an appropriate decision when looking for an answer to the question of whether it is necessary to plaster the walls in a new panel building. It should be remembered that ideal evenness of walls and partitions is not always required. In some cases, this leads to unreasonable wastefulness in the use of materials, as well as an increase in the duration of repairs due to the additional time required for thicker finishing layers to dry.
Why do walls need to be leveled in a new building?
Once again I would like to emphasize: applying a layer of plaster is not an end in itself. In addition to the insulating properties of this layer, its main purpose should be considered, as was said, to create a flat surface suitable for the installation of finishing layers and installation of attachments. This is the main (not the only) reason for plastering walls in a new building. Here are some examples when you should “bring out the corners”: L-shaped kitchen - if you neglect to match the perpendicular partitions on which the kitchen cabinets are mounted at an angle of 90 degrees, it will become impossible to align the furniture smoothly (a gap and “distortions” will form). Another example is wallpaper with a vertical stripe: the absence of right angles will become obvious when the stripes are brought together in the corners of the room. Once again I would like to write: in the issue of leveling walls in a new building, planning and a reasonable approach should prevail, based, among other things, on the judicious use of finishing materials and compliance with technological requirements regarding the maximum thickness of plaster systems.
During a preliminary discussion of the nature and scope of work with the foreman, it should be directly stated that plastering work should be carried out at “angles of 90 degrees.” In addition, the following should be established as contractual obligations:
- maximum tolerances for wall alignment; for this you can use the term “high-quality plaster” as provided for by SNiPs for plastering work; Please note that these rules are not binding; The exception is cases when their use is directly determined by agreement of the parties;
- the use of “beacons” - special guides that facilitate the creation of smooth surfaces and generally improve the quality of work on plastering walls in a new building;
- reinforcement of plaster layers with a special polymer mesh; as a general rule, such strengthening of plaster is not mandatory; however, it can be recommended both for the entire surface and for places that are most susceptible to the formation of cracks (junctions of building structures, window and door openings).
Please note that the beacons must be removed after the plaster has dried. The exception is galvanized profiles, which do not rust. Otherwise, over time, rust may appear on the surface of the walls.
What is the best way to plaster walls in a new building?
For indoor work, we recommend using mixtures based on gypsum binder. Gypsum dries quickly, provides the necessary strength, has low shrinkage compared to cement binders (has a positive effect on crack resistance), and allows you to regulate the microclimate in the room during subsequent operation. Thanks to its natural properties, it can absorb excess moisture and release it when the level of humidity in the air drops. Special additives increase the viability of a freshly prepared solution and increase its plasticity. The main mistake that finishing craftsmen make is failure to comply with the instructions that determine the amount of water that is needed to mix the solution. Exceeding this amount leads to the occurrence of internal stresses at the stage of drying and strength gain, which manifests itself in the form of cracks. There should be exactly as much water as indicated in the instructions.
The Rotband plaster mixture, produced by the Knauf company, has become very popular. This mixture has high adhesion - greater adhesion to the base, which allows it to be used on smooth surfaces.
The average thickness of the gypsum plaster layer is 20 mm. As a rule, it is applied in one layer. When constructing multilayer systems, the second layer is applied “wet on wet” (it is also possible after the first has completely dried). The general requirement is that the base for applying plaster must be dust-free, free from efflorescence, and dry. Its humidity should not be more than 8%. In the case of leveling the surface of the walls in several layers, it should be remembered that each subsequent layer should be softer (or equal to the previous ones in compressive strength). To increase adhesion to the base, especially in the case of smooth walls and partitions, their surface is pre-treated with concrete contact.
If the unevenness of the walls in a new building is large, then the possibility of leveling them with plasterboard sheets followed by putty should be discussed. This will save time and money, as well as ensure better quality work.
What plaster to use in the bathroom?
With the proliferation of gypsum plasters, the question arose as to whether they could be used in bathrooms . The fact is that gypsum, as already noted, has the ability to absorb moisture. There is a danger of soaking the finishing layers and their subsequent destruction. For this reason, we advise you to pay attention to the recommendations of the mixture manufacturers and the presence of restrictions regarding their use in finishing rooms with high humidity and especially bathrooms. The fact is that European building regulations do not classify kitchens and bathrooms as rooms with high levels of humidity. Materials produced in accordance with these provisions may be limited only in certain areas (for example, saunas) and still remain suitable for plastering systems in bathrooms and kitchens. Therefore, pay attention to the restrictions as they are indicated in the technical documentation published for the specific mixture.
For finishing in the bathroom or kitchen, it is better to use latex paints.
How much does it cost to plaster walls?
The price for plastering work depends on the quality of the work performed, as well as additional services directly related to leveling the walls. The cost of plastering on beacons with a high-quality finish will be higher than the cost of leveling with a lath (such work provides less planar and angular preparation). You should not always strive for ideal room geometry. Eliminating it and creating visually smooth surfaces allows you to save on apartment renovations. Additional services include: dust removal, application of concrete contact, reinforcement and priming. The cost of installing beacons is often indicated separately. All these issues must be worked out before collaborating with a team of craftsmen, i.e. get a cost estimate for all the work in its entirety.
You can always contact us for services related to the alignment of walls and partitions in new buildings. Long-term experience, well-functioning mechanization of processes make our offer profitable both in terms of price and timing.
Author: Attractive Repair Studio.
Links
There is currently no reference in the article on this topic.
Read
Very soon we will supplement this article with indications of third-party sources.
Notes
No notes found for this article. We regularly edit dictionary entries. It is possible that additional materials will be posted at this location soon.
The materials on this site are not a public offer. Any calculations using online calculators are indicative only. Their results cannot be used in the preparation of any project documentation (see also - rules for using the site).
Details
Preparatory stage
Before applying the paint and varnish material, the surface must be smooth, which is difficult to achieve with simple plaster. For this reason, when the plaster dries, the walls are puttied. But it is not applied to the plaster right away, and first the surface should be primed. Why do they do this? There are several options:
- The putty needs to be applied to a surface treated with a primer, and it will be much easier to distribute evenly.
- When the priming agent hardens, a film appears on the surface, which prevents various stains from appearing on the surface.
- Various primer components can improve anti-mold, moisture-proof and other finishing properties.
- The primer composition is partially capable of smoothing the surface and reducing putty consumption.
Remove all dust from walls prior to application.
What to do after plastering
What to do after plastering the walls? These are the following steps:
- Removing beacons.
- Drying the coating.
- Removing dust.
- Surface priming
- Puttying.
Let's look at all the stages in more detail.
Lighthouses
Quite often, after the plastering process, beacons remain in the coating. Lighthouse-type planks that do not corrode can be left in the plaster. But at the same time, the coefficient of thermal expansion of lighthouse materials and the plaster coating may be different. This may cause cracks to form. So it’s better to get the beacons, and seal the emerging grooves with cement (for wet rooms and facades) (or gypsum (in dry rooms) mortar.
Primer and leveling
If after plastering work there are smudges and frozen mortar splashes on the walls, as well as all sorts of protruding irregularities, they need to be removed. Before starting work, the evenness of the surface must be checked using a rule. All plaster defects must be eliminated before filling. To do this, all defects must be primed and then covered with starting putty. In order for the solution to penetrate deeper, the cracks need to be expanded. After this, cover all dents and cracks with a primer, and then with a layer of putty (if the cracks are large, use a reinforcing mesh). After the walls have dried and leveled, it needs to be sanded using sandpaper or paper, and you can also use a grinder with a grinding wheel. After this, the walls will be covered with dust, which is important to remove with a vacuum cleaner or wash off with a damp cloth. After a day, prime. In order for the finishing quality to be at its best, apply the primer in two passes, allowing each layer to dry daily. Select the type of primer composition according to the type of plaster and place of use (indoor or outdoor). For application, brushes or a roller are used, and the composition itself is applied crosswise - first vertically, and then horizontally.
Selecting material for walls after plastering
The consistency of the composition is a paste-like mass, the purpose of which is to level the walls after plastering until the finish, which requires special evenness. Based on their structure, putty compositions can be divided into:
- Starter ones, which have a larger grain size, are used for the initial processing of plaster coatings, and in this case quartz sand is used as a filler. Used for sealing cracks, holes and large recesses.
- Finishing, characterized by fine grinding of the filler, ease of installation and greater plasticity. They are used on top of the starting putty with a layer of 0.05-0.2 cm in order to create almost glossy surfaces that are easy to sand.
- Universal ones are used both instead of finishing and instead of starting, applied in layers. In terms of price, it is more expensive than other compounds.
When choosing a material, pay attention to the basis of the composition, which can be significant for use. Acrylic products are applied in an extremely thin layer, which is not permissible for leveling. They have a narrowed range of application temperature conditions (at least +100 degrees), and they are not used in rooms where coatings must breathe. Popular putties are made from polymer binders, with cement or gypsum. Let's look at everything in detail.
Cement putty
After plastering, the walls are sealed with putty. Like the cement composition, cement putty is the most popular for finishing facade and interior surfaces. The popularity is deserved by the fact that the coating created is very durable, accessible for mass consumption and has many other advantages. It is suitable for damp rooms and unheated buildings. Putty is used to level surfaces and “treat” potholes and cracks. Manufacturers divide such compositions with cement into:
- Used for interior work.
- Facade.
- Thermal insulation (used for thermal insulation type coatings in combination with other products).
Various types of cement serve as a binder, for example, in expensive white cement putties. In addition to cement, the composition contains polymer additives and mineral fillers. The coatings will be smooth, durable, and the finishing and starting paste will be made according to their intended purpose. The latter, with quartz sand in its composition, is used for single-layer leveling of walls with a difference of up to 2 cm. In the composition of the finishing type mixture, the sand is much finer, which gives a smooth surface. You can find two types on sale - ready-made compositions in buckets and dry mixtures.
Control of the process of sanding the wall and ceiling after puttying
This is perhaps the most important rule for an employee. The control process consists of the following points.
- Do not change the location of the light source to avoid refraction of light rays.
- Perform operations in small areas, moving from top to bottom.
- If work defects are detected (for example, an area that has been cleaned too much), you should re-plaster the area, wait until the material dries, and sand it again.
- Use a quality tool and follow the instructions carefully.
- Check the evenness of the cleaned (polished) surface with a building level or a ruler under a light source: if the shadow does not fall, then the ruler is absolutely adjacent, i.e. It turned out to be a perfectly flat plane.
vote
Article rating
Why are these events needed?
The plaster of the walls is not visible in the overall design composition of the room, but it is impossible without it. The presented equipment is necessary to insulate the building and protect it from the influence of the external environment. Moreover, plaster can be an excellent protection against fire, since modern building materials cannot prevent rapid combustion.
When considering plastering walls, we can highlight the following points of need for the process:
- Using a layer of plaster, “rough” walls and ceilings are leveled, which are then simply painted or whitewashed.
- During the construction of houses, partition seams are formed, and numerous, albeit minor, masonry defects can be found. This can be easily fixed.
- The main task of plastering for the common man is the preliminary leveling of walls for decorative work - wallpapering, painting surfaces.
Sequence of applying layers
It was previously explained whether it is possible to plaster over putty, but you need to know in what order the putty mixture is applied after priming and preparation. Use starting putty to eliminate unevenness. When there are large cracks, a reinforcing mesh is installed on them.
The dried layer should be sanded down. The surface is cleaned of dust, the treated areas are primed again, and the final puttying proceeds. Sanding and priming are carried out again.
The dried layer should be sanded down.
The nuances of puttying corners and slopes
Separately, it is necessary to describe the principle of working with corners and slopes. For easier processing, you can make a thicker layer, which is then leveled by sanding. The stage is difficult even for professionals.
The second option to simplify the work would be to apply the solution using a sealant gun, previously cleaned of the old composition. Or you can use a confectionery syringe, which is inserted into the gun, thickening is made using rubber linings and gluing with electrical tape. It works like this:
- Putty solution is drawn into the selected tool.
- Squeeze the putty out of the syringe into the crack in the corner; it is advisable to fill the entire void from top to bottom at one time.
- Afterwards, the layer is leveled with an angled spatula, based on the base, just as plaster is applied to beacons.
- When the layer dries, the protruding parts are sanded.
On slopes they work using an angle trowel, a convenient method. Sanding is also carried out. Evenness is checked by the rule.
On slopes they work using an angle trowel, a convenient method.
How long after priming can I putty a second time?
In addition to the question of whether it is necessary to prime the walls before puttying or not, many are interested in the time after which they can begin subsequent finishing. So, if the treatment was carried out on a cement-sand base, it is recommended to start the next stage of work no earlier than after 2-3 hours. And if the process involved priming a cement-lime composition, you need to wait 4-6 hours.
Primed wood can dry in 1-2 hours, depending on its characteristics. And concrete dries the fastest (within 30 minutes).
Attention! The putty layer, which is applied over the undried primer, moistens it excessively. So, the surface will roll off and peel off with further painting or gluing. Therefore, you need to wait until the layer is completely dry.
Peculiarities
Individual construction and industrial structures are equipped with plaster finishing of the surfaces of walls, ceilings, and stoves. Often, for safety reasons, heat-resistant materials are used during finishing. Fireproof mixtures are used by owners of country and country houses.
Fire safety authorities are considering five types of thermally resistant mortars. Modern construction widely uses the properties of such materials in design. Finishing of facades, interior design of premises for various purposes.
The plastering process differs in that special substances are introduced into the solution. But a reliable and durable layer of plaster undergoes wear and tear. In such a situation, grinding the plaster, what is it? It turns out that this common work is done using a felt or polyurethane trowel, generously wetting the surface. Technological methods are known: cleaning the surface, eliminating damage, applying a new restoration layer, drying and careful operation.