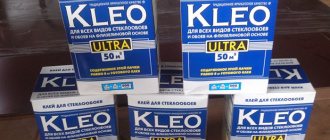
To level the surface of walls and streams inside the house, it is recommended to use ready-made dry mixtures. The most popular option is universal gypsum plaster - rotband.
This is a plaster mixture produced by the Knauf company. More detailed instructions for use and consumption of gypsum plaster Knauf Rotband 30 kg are discussed below.
How to use
To calculate a sufficient amount of dry rotband, determine the curvature of the walls and the thickness of the layer. Use special plumbs and levels. If there are no such devices, use cords that are stretched along the plane. The longest distances are taken into account when calculating.
For example, the distance is 2.5 cm. Considering that 8.5 kg of mixture is required for 1 square meter and a layer of 1 cm, multiply the value by 2.5. The result will be 21.25 kg. Then multiply the resulting value by the area of the room, and divide by 30. This will allow you to understand the consumption of rotband per 1 m2.
How to breed a rotband? For 30 kg of bulk mixture you will need about 18 liters of clean, cool water. 5 minutes after mixing, start working.
Try to use everything within half an hour to prevent the mixture from hardening.
Kneading is carried out in a plastic or metal container.
First, it is recommended to put 6 spatulas of the mixture into it and mix with water until a homogeneous consistency. Stir with a construction mixer so that no lumps remain. If the mixture is too liquid, add a little more dry mixture.
If the base absorbs moisture strongly, it needs to be primed. Thanks to this, the plaster will adhere better to the base. The primer is applied using brushes or a roller. If the work area is large, use a sprayer.
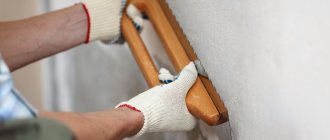
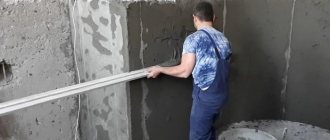
The finished mixture must be applied to the base within a third of an hour. Work on the canvas is carried out with the help of a falcon. Movements should be towards yourself.
It is better to apply the solution using a spatula.
After the rotband is sketched, level the layer.
Scheme for throwing the solution on the ceiling:
The movements should be wavy. If increased coating thickness is required, apply repeated coats. In this case, it is necessary to form roughness on the previous one.
They will enhance adhesion between layers. The second coating is applied only after 24 hours. This is enough for the previous layer to dry.
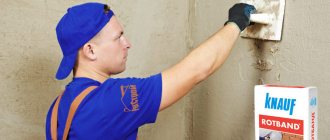
Afterwards you can begin leveling and grouting. According to the technical specifications, setting occurs in the first 50 minutes. Afterwards the layer needs to be leveled using a large spatula or a metal lath.
If there is excess, it must be removed and all unevenness must be covered. This will reduce consumption. If the walls are to be painted or covered with wallpaper, you need to rub them down with a float. The walls are moistened with water and then rubbed in a circular motion. This will ensure a smooth surface.
If relief is required, this can be done quite quickly. Roll over the soft surface with the embossed roller placed on the wheel. A trowel is good for creating a structure.
You can speed up the drying rate of the rotband if you open the windows and doors and turn on the ventilation. Drying should be carried out at a temperature of +5°C. Remember that hardened mortar is difficult to remove. Therefore, it is recommended to wash all tools immediately upon completion of work.
If there are metal elements in the room, they must first be treated with anti-corrosion liquid. Otherwise, corrosion will appear through the rotband, which will ruin the appearance of the room.
How to calculate Rotband consumption, table:
Composition and characteristics of plaster based on gypsum mixture
Dry plaster "Rotband" is rightfully considered a universal mixture. It is used for any interior finishing work, leveling concrete and brick walls or cement-bonded particle boards. This versatility is due to the composition of the plaster.
The mixture is based on gypsum, which reacts well to a humid environment, so Rotband can be used to level walls in bathrooms and toilets. By the way, this is the only type of gypsum plaster that is suitable for finishing such premises. In addition to gypsum, the composition includes polymer materials that increase adhesion (adhesion to the surface). Therefore, the plaster adheres well even to smooth wall structures.
In addition, the composition may contain coloring impurities that give the composition a pink and gray tint. These components do not affect the quality of the plaster as a whole.
Specifications table
| Technical specifications | Unit | Magnitude | |
| Working temperature | WITH | 5 – 30 | |
| Thickness of applied layer | minimum | mm | 5 |
| maximum | 50 | ||
| recommended | 10 | ||
| Consumption of dry plaster mixture with a layer thickness of 10 mm | kg/m2 | 8,5 | |
| The amount of solution obtained from one bag weighing 30 kg | l | about 40 | |
| Time | solution maturation | minute | 10 |
| life of the solution in an open container | 20 – 25 | ||
| drying of a layer 10 mm thick | 45 – 60 | ||
| full strength gain | day | 7 | |
| Density | dry mixture | kg/m3 | 730 |
| dried plaster | 950 | ||
| Strength of hardened plaster | bending | MPa | more than 1.0 |
| for compression | more than 2.5 | ||
| Grit size | mm | up to 1.2 | |
| Plaster color | — | white, gray, pink | |
| Shelf life in undamaged packaging | month | no more than 6 | |
Features of packaging and storage
As mentioned earlier, rotband is packaged in bags of different weights. The bags are made of paper. Despite this, they do not accumulate condensation, which is why the composition is preserved for a long time.
Storage is recommended in rooms with low humidity. It is better to use wooden pallets.
If the bag is open or damaged, try to use it first.
Rotband can be stored in undamaged bags for up to six months.
Main advantages
The range provided by Knauf is wide and varied. Rotband plaster has two forms of release: cement-sand and gypsum. Hand-made plaster cannot compete with Rotband mixtures for a number of reasons:
- Rotband plaster is of better quality,
- the manufacturer guarantees the durability of the results when using its products,
- with proper work
There is no possibility of marriage with Knauf Rotband plaster.
The market for plaster mixtures is rich. High competition forces many manufacturers to constantly improve the quality of their products by adding various additives to plaster mixtures. Knauf Rotband is no exception. Among the variety of plasters from this company you can find both facade and interior decoration, including rooms with constantly high air humidity. Its main advantages are resistance to moisture, mechanical damage, and durability.
In any case, we should not forget that working with cement-sand plaster requires certain professional training. It is better to entrust it to a specialist in order to avoid a low aesthetic effect of the final result of plastering.
Differences from fake
Today, unscrupulous sellers, for the purpose of profit, can sell a fake at the price of the original Rotband.
The purchase of such goods is fraught with discrediting the building material, since in the future the demand for it will be lost.
That is why, in order to avoid further adverse consequences, the Knauf company took care of its reputation.
It was decided to pack the plaster in unique bags. They are made from corrugated paper. The production of bags is carried out only by order of the Knauf company. This means that other brands may not have them. Second-by-second markings are also applied to the bags.
This means that each package contains information about the exact production time. Therefore, you will not be able to find two identical packages on the market. The Knauf company also puts a hologram on the bags. It changes color if you rub it a little.
How and how to plaster drywall: video instructions
When renovating indoors, plasterboard (GCR) is often used to create partitions, walls and multi-level ceilings. GKL sheets are excellent for hiding curved surfaces and in this regard can serve as a replacement for wet finishing. In this article we will look at what and how to plaster drywall before finishing the room. They differ mainly in the grain size.
The smaller the grain of the binding element, the thinner the minimum applied layer, the less roughness. For example, on the popular universal plaster KNAUF Rotband the largest fraction size is 1.2 mm. But in fact, the particles of gypsum are, of course, smaller.
They are simply sifted less thoroughly than in putty. Therefore, after mixing with water, grains are visible in the solution. The putty has the consistency of sour cream.
- Container for mixing dry mixture;
- primer, for example, polymer Knauf Tiefengrund;
- narrow and wide spatula;
- Painting mesh;
- construction knife;
- grater;
- brush;
- dry mixture or paste in a bucket.
Plastering the ceiling is fundamentally no different from working with gypsum plasterboard on the wall. Same tools and materials are used
Particular attention should be paid to the junction of the ceiling and wall. Plasterboard walls are an almost ideal plane and do not require additional leveling
Therefore, their plastering is used only as a final decoration. Also, in small quantities, a leveling solution is applied to the gypsum board to hide the joints of the sheets, small dents and screws used for fastening to the metal profile. In essence, this is puttying, and it is necessary when rough finishing with this material under wallpaper, tiles or decorative plaster.
Briefly about the main thing
As mentioned earlier, rotband plaster is very economical. If you know how to work with similar materials, you can use it as a starting and finishing layer.
Therefore, the surface of the wall and ceiling will be fully prepared for further decorative work. Rotband is a safe material because gypsum and polymer additives are used in its production. Applying the solution to walls is easy and is also suitable for beginners.
The only downside of rotband is that it hardens quickly. Therefore, work must be carried out quickly. At first, try to prepare the composition in small portions. Before using the rotband, you can practice a little on a hidden area of the wall. It is necessary to fill your hand so that the application goes “smoothly”.
How to apply a plaster layer with your own hands?
Let's look at how to properly plaster walls.
The finishing material has another excellent quality. A novice master can learn to work with gypsum plaster, and he does not need to develop a special skill over several years. There are two methods of working with Rotband:
- plaster on beacons;
- plaster without beacons.
Let's consider each type of work separately.
By lighthouses
Any master will tell you: correct drawing of the wall geometry can only be done using beacons. And this rule works in most rough work. Especially where the surface has large differences or a special build-up of a thick layer of plaster is required. The algorithm for working with beacons looks like this:
- The prepared primed base is carefully measured with a building level. This can be either a bubble or a laser tool. The latter is preferable to use, as it gives a complete picture of the geometry of the walls and has higher accuracy.
- On the extreme right and left sides of the wall, marks are placed on the floor and ceiling.
- Based on the marks received, two starting beacons are set. They will define the geometry of the entire surface. Lighthouses are secured to the wall with the same Rotband.
- Two horizontal threads or twines are pulled through the starting guides with a slight tension. It is necessary that the thread does not dangle, but also does not pull the beacons.
- The remaining beacons are placed along the resulting guides, then the threads are removed.
- Throw the prepared Rotband so that it extends beyond the beacons by 5–15 mm.
- The scattered mixture is leveled with a rule of up to 1.5 meters. Excess mortar is removed from the rule using a 1–15 cm trowel.
- The extreme corners are finished at the last moment.
- After the mixture has dried, the beacons are removed, and the resulting grooves are carefully sealed with the same mixture using a rule.
Prepare a clean instrument. The rule and the trowel must be cleaned of old, dried building materials; there should be no dirt on them.
Without beacons
Another way is to work without beacons. It is suitable for finishing walls or for cosmetic repairs. You can work without beacons if the differences do not exceed 3–4 cm.
The algorithm for working without beacons will be like this:
Prepare the working surface, clean and prime it. It is advisable to check it with a level or a long, even stick to find out in which corners or places of the base the differences are maximum. Mark problem areas of the base with a pencil or marker. Prepare a clean rule at least 1.5 meters long and a trowel up to 10 cm.
Mix a small amount of solution. Seal all seams, cracks and potholes. Let it dry. Prepare the remaining solution. Apply the mixture onto the wall in even slaps.
It is important that the solution adheres well to the base, so it is best to throw it on the wall. Gently stretch the mixture over the entire surface. Remove excess with a trowel.
Tip Do not prepare a large amount of solution at a time. The finished mixture is plastic up to 30–40 minutes. After this time, it becomes tough and difficult to work with. It is better to dilute the solution to a wall area of up to 5 square meters. m.
Leveling the ceiling surface
Preparation
First the surface must be cleaned. If there was plaster on the surface, it must be removed. Of course, areas that are firmly held can be left, since they do not pose a threat of collapse. However, it is still recommended to get to the floor slabs. This will ensure higher reliability and quality of the plaster.
Next, the surface needs to be cleaned. This can be done with a stiff brush. Sometimes a spatula and even a punch are used.
When the surface is cleaned of dust and grease, you can begin applying the first layer of primer. You need to choose this mixture taking into account the materials that will be used. In particular, it must be suitable for our gypsum mixture. Therefore, it is better to opt for Knauf primer for these purposes. As a rule, a primer is applied under such plaster, which then makes the surface rough.
Lighthouses
Leveling the ceiling with plaster cannot be done efficiently without using beacons. This applies not only to the Rotband mixture, but to everyone else. The depth of such a profile can be 6-10 mm. It allows you to better navigate the alignment process.
First you need to make a line around the perimeter of the lighthouses. Set the mark 10 mm below the lowest point of the ceiling. Next, we use the levels and put down the remaining marks. We stretch the painting thread between them and mark the lines.
Then you need to make a path from Rotband according to the landmarks, retreating 10-15 cm from the wall. The lighthouse is leveled using a long level.
The second beacon is installed at a distance that should not exceed the length of the rule used. It is desirable that this length be 20 cm less.
Thus, with a rule length of 100 cm, the distance between the profiles should be about 80 cm. After all, do not forget that the rule should not be moved straight, but in zigzags. In this case, the ends should be on the beacons.
Rotband “recommends” creating a thickness of about 2 cm. If the surface quality is poor, the thickness can be increased to 6 cm.
When the beacons are installed, they must be well secured so that they are not torn off during operation. Therefore, it is recommended to wait 2-6 hours.
Description of the alignment process
Before taking action with Rotband, it is recommended to read the instructions and watch the video. This will allow you to do everything yourself better.
Often the solution is made like this: water is filled up to half of the container, then the composition is gradually added, stirring constantly. When the desired consistency is reached, the solution should sit for a few minutes before using it.
Next, using a spatula, apply plaster between the profiles so that the level exceeds their height. Moreover, this needs to be done quite quickly, since the mixture dries in twenty minutes.
Once the composition is laid out on the surface of the ceiling, it can be leveled using a rule that should be kept close to the beacons. All recesses must be covered with the mixture. When all the space is filled, you can wet the grater in water and start grouting. This should be done until the surface is smooth, using circular movements.
In order to avoid the use of finishing putty, you can treat it with a metal float soaked in water within 24 hours after applying the plaster. This is more likely not a rubbing, but a smoothing.
Rotband is an excellent material for finishing the ceiling
If everything in the instructions is not clear, you can additionally watch the video version; due to the clarity, some points will be easier to understand.
Thus, thanks to the Rotband mixture, you will quickly complete the plastering, and the quality will be at its best.
Installation of beacons for plastering walls with Rotband
If it is necessary to level the entire wall, beacons are installed that serve as guides for the rule. For these purposes, factory-made T-shaped profiles made of galvanized perforated steel are best suited. Beacons are produced in heights of 6 and 10 mm.
The latest samples are more rigid, but the dimensions increase the putty consumption by 1.5 times. For Knauf Rotband plaster, the instructions for use developed by the manufacturer recommend beacons 6 mm high.
Beacons are placed in a vertical plane using a building level. The guides are placed at a distance of 200-300 mm from the corners. The tool should be slightly shorter than the length of the beacon. From purchased blanks, cut profiles whose length is equal to the height of the wall. Apply putty to the wide side of the profile every 300-400 mm and lean it against the wall. Place a level on the beacon and check its position.
Press down the profile with a level, moving it in a back-and-forth motion until the rail becomes vertical and the front side is level with the threads stretched above the wall. The maximum gap between the profile and the wall is 0.5 cm. Fill the gaps between the profile and the wall with plaster and let it dry.
Set the next profile at a distance slightly less than the length of the rule. If the length of the instrument is 2 m, the distance between the beacons is 1.8 m. For a wall 4 m long, 2 profiles are sufficient, which will divide the partition into 3 equal parts. First, the area between the profiles is processed. After the plaster has dried, the outer part is processed, using the finished surface as a base for the rule.
Protect external corners with corner profiles made of galvanized sheet metal. They are placed in a vertical plane and fixed with putty. Do not use aluminum ones, they are too soft.
Specifics of working with the mixture
Gypsum plaster should not cause you much trouble while working, but this is only if you carefully follow all the points indicated in the instructions.
And for stronger fixation, apply an adhesive primer to the surface before repair work.
For this purpose, the manufacturer produced the Rotband Grund series, which he recommends paying attention to
Primer Rotband Grund
It is worth noting right away that the solution dries slowly due to its texture. But, even despite this, it is worth diluting it in small portions, especially this recommendation applies to beginners.
In other words, take the square footage of the walls as a basis to correctly calculate the consumption of gypsum plaster. This is especially difficult to do if you plan to carry out spot leveling; in this case, leftover excess solution simply cannot be avoided, so if you don’t want to simply waste material, immediately figure out where you can apply it.
To prepare small portions, you will need an appropriate container. It is better to opt for a round one or one with a rounded corner, as a result of using up all the leftovers. The container should be high enough so that when stirring the mixture, particles do not fly away in all directions.
Preparing the mixture
Many people use a simple classic bucket as a container, which can be purchased at any market.
Initially, you pour water into the container, and only then slowly add the mixture, while simultaneously stirring everything with a special professional mixer for construction. The required acceptable proportions are indicated on the packaging, but, as a rule, this proportion is 2 * 3, where the first number indicates the amount of mixture, and the second - water.
On specialized forums, experts often recommend not pouring all the water at first; if necessary, you can always top it up. And remember, how long the resulting mixture will harden depends on the temperature of the water.
After preparing the solution, and before applying it to the surface, it is advisable to wait a few more minutes. This is necessary so that all the water reacts with the components and starts their work. As soon as 5 minutes have passed, adding anything is strictly prohibited.
When you have covered all the walls with the resulting material, be sure to rinse the bucket thoroughly before making another batch. Otherwise, the pieces of old plaster will become hard and will not create unfavorable conditions, as a result of which the surface will not become perfectly smooth.
The mixer must be cleaned of any remaining mixture immediately after mixing. It’s very easy to wash, just put it in a bucket and turn it on, the residue will wash off on its own.
All the characteristics discussed above indicate that Rotband is the best and highest quality material used for interior decoration. Despite the high price, you acquire quality, and, as you know, it is better not to save on repairs; anyway, as a result, you will spend more.
Before purchasing, be sure to pay attention to the composition and presence of all holograms, and be sure to make purchases only at certified points of sale