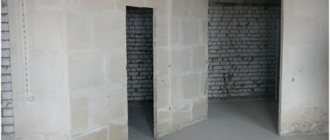
Tongue-and-groove slabs are often used to create a partition in a room. They are distinguished by their ease of operation, weigh little, and last for many years. But for the durability of the structure, it is necessary to use high-quality adhesive seams so that they can withstand the load. For this purpose, a special glue for PGP is produced, but you need to choose it carefully, then the installation process will be easier and faster. The choice of glue will be discussed in detail below.
The main components from which it is made
Glue for tongue-and-groove slabs can create the necessary level of adhesion to the gypsum base, thanks to its constituent elements. The composition may vary slightly among different manufacturers, but the main elements most often used are the following:
- Gypsum, the main element necessary for adhesion strength, when contact with water occurs, crystals form on the layer, facilitating the reliable connection of two blocks to each other. The fixation rate can be improved by using smaller fractions of gypsum;
- Sand with tiny particles serves as a filling agent, helping to apply substances evenly over the surface, increases strength, and due to the presence of sand, the price of the product itself decreases;
- Modifiers play the role of a plastic agent, the service life of the layer becomes longer, and they create protection against biological formations.
Glue for tongue-and-groove slabs can create the necessary level of adhesion to the gypsum base, thanks to its constituent elements.
Technology for installing partitions with doorways
When the partition design includes a doorway, you need to think about how to strengthen the rows that will be located above the opening.
If there is only one row of slabs above an opening up to 800 mm wide, then it is permissible to mount them on top of a door frame or temporary support.
In the case where the opening is wider than 800 mm or several rows will be laid above it, you will need to install a reliable lintel made of a thick wooden beam with a section of 50 x 50 mm or a metal channel 35.
Partitions made of PGP with the arrangement of a doorway are mounted using a technology similar to the construction of a solid wall. The difference is that when markings are made, the location of the opening is noted, the wall turns out to be divided.
Instructions for installing a lintel above a doorway:
- When the row reaches the upper level of the opening, cutouts about 50 mm deep are made in the blocks on both sides. The width of the cutout is equal to the thickness of the timber or channel.
- Lubricate the blocks with glue and insert the jumper.
- After the adhesive composition has hardened, the upper rows of blocks are installed.
Partition with doorway.
If you plan to install an interior door in the partition, the frame under it can be mounted both at the stage of wall construction and subsequently.
The main purpose of glue for pgp
Tongue and groove adhesive can glue not only this material in order to obtain a variety of designs for their slabs. The scope of application of the product is wider; builders also use it for other materials.
You can glue plasterboard sheets to create a flat surface on the wall or ceiling. However, it is important to look at the permissibility of this action; manufacturers indicate on the packaging whether these materials can be bonded with the composition. The use of the product is limited to indoor work, because it is not moisture-resistant and will not be able to withstand natural influences.
You can glue plasterboard sheets to create a flat surface on the wall or ceiling.
Additional Information:
When starting a renovation, we always want to choose the best and highest quality materials for our home, so that we can then enjoy coziness and comfort.
Therefore, by choosing knauf perlfix adhesive, we ensure reliable fastening of drywall sheets or insulation, and we will be sure that they will last for many years.
Knauf perlfix is a dry mixture (mounting mixture) made using certain polymer additives.
Knauf perlfix glue is chosen by professionals because it
- easy to use
- Has excellent soundproofing and thermal insulation qualities
- Made from environmentally friendly materials
Knauf perlfix is used only for work inside the building. This glue is not suitable for outdoor use.
Knauf perlfix 30kg is intended for gluing plasterboard sheets, as well as gypsum panels and other materials on various types of surfaces. It is worth noting that Perlfix Knauf glue is also suitable for working with uneven or already plastered surfaces. The only requirement is to observe the thermal regime and not work at temperatures below five degrees Celsius with a plus sign.
Knauf perlfix (the price of the product is indicated in the price list) is not picky, but before work it is still worth cleaning the work surface of various fats, dust, sand, paint and other elements. This will provide better grip for the knauf perlfix 30 kg.
Knauf Perlfix (the price is presented on the store’s website) is quite easy to prepare for use. knauf perlfix 30 kg is mixed in fifteen liters of water. After the mixture has completely dissolved, let it sit for two minutes, and then stir for five minutes. Next, Perlfix Knauf glue is infused for no more than five minutes and mixed again. That's it - the glue is ready to use!
Which glue to choose
There are many adhesive mixtures on sale; dry types are most often chosen, but it is more convenient to work with foams. When choosing what to glue tongue-and-groove slabs onto, care should be taken that the product has high adhesion rates.
Special compositions are distinguished by the speed of complete hardening, which speeds up the process of constructing the structure, but this also requires a fast pace of work from the master. It is worth studying in advance on the packaging how long this process lasts.
If we talk about foams and mixtures, the former can be used immediately, you just need to shake the container, but they also dry out very quickly, which requires some skill from the master to cope quickly enough with the installation of partitions. But their cost is higher than mixtures, which must be properly prepared before use. Also, more dirt will be generated during operation.
To get a truly high-quality product, it is imperative to request a quality certificate from the seller.
Special compositions are distinguished by the speed of complete hardening, which speeds up the process of constructing the structure, but this also requires a fast pace of work from the master.
Electrical installation in tongue-and-groove slabs
Electrical wiring in tongue-and-groove slabs is carried out by laying wires in pre-made grooves. The depth of laying the grooves has a limitation: it should not exceed 40 mm for a slab thickness of 80 mm, and 50 mm for a slab width of 100 mm. The wires are secured using alabaster or drywall glue. The landing sockets for undercutters should also not exceed the specified depth. Their arrangement is possible in a mirror image on both sides of the partition into a through hole. But in this way the noise-absorbing properties of the structure are lost. For additional insulation of electrical wiring in tongue-and-groove slabs, corrugated tubes are used.
technology for installing tongue-and-groove slabs. Photo
Calculating consumption
When you are planning to create a structure from gypsum concrete, it is important to immediately prepare the materials necessary for the work. If there is not enough adhesive solution for the entire structure, the already erected part may suffer.
For this reason, it is better to make the calculation in advance; first, measure how many slabs will be used in order to understand what total area will be treated with an adhesive layer to connect the parts together. The manufacturer always prescribes the average glue consumption on the packaging; operation under optimal conditions is taken into account. But application tools, the experience of the technician, and layer thickness can affect the consumption.
To calculate approximately how much product you need to buy, the easiest way is to enter the resulting numbers in special cells in the online calculator, which companies usually have on their website. As a result, the number of kilograms of mixture that will be required is obtained, the calculation is made taking into account 5% for the reserve.
When you are planning to create a structure from gypsum concrete, it is important to immediately prepare the materials necessary for the work.
Execution of work
Installation of tongue-and-groove slabs
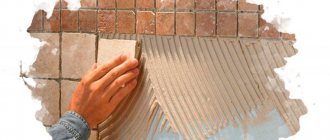
First, you need to mark the room for laying the first row of slabs. The first row of tongue-and-groove slabs is mounted on a pre-leveled base. Apply assembly adhesive into the existing grooves of the masonry elements. After that, the plates should be pressed against each other according to the “groove-ridge” pattern, and the protruding excess mortar should be removed using a spatula. The rows of slabs are installed with vertical joints offset by at least 10 cm. The masonry elements must be laid within 15 minutes after applying the mortar. The position of the masonry elements can be adjusted using a rubber mallet within 10 minutes after laying. Control of the horizontal position of the masonry is carried out using a level. To increase the strength and rigidity of the structure, every second row of slabs is attached to the walls using special metal corners.
Installation of plasterboard and gypsum fiber sheets
— If the base is uneven up to 5 mm, apply the mounting adhesive using a notched trowel in an even layer over the entire area of the sheet. After which the sheet should be pressed to the base and adjusted to the level.
— If the base is uneven up to 20 mm, apply mounting adhesive in portions around the perimeter of the sheet with a minimum interval, as well as in the center in one row along the sheet with an interval of 30 - 40 cm. After which the sheet should be pressed to the base and adjusted according to the level.
— If the base is uneven by more than 20 mm, the surface must first be leveled using strips of plasterboard 10 cm wide, glued horizontally and vertically to the base. The plasterboard strips must be placed at the level of the upper and lower edges of the sheet to be glued, as well as every 60 cm of the sheet width. Then apply the adhesive solution using a notched trowel onto the mounting plane of the sheet. Then the sheet must be pressed to the base and adjusted to the level.
Laying rows of gypsum boards and gypsum boards is carried out with offset vertical joints. During installation work, it is necessary to leave a gap of 5-7 mm wide between the sheets. Subsequently, these seams are filled with special putty compounds. Between the floor and the glued sheets, technological gaps of 10 mm wide should be left, which are necessary to remove moisture from the solution.
General recommendations
It is recommended to carry out further work no earlier than 2 days after gluing the plasterboard or gypsum fiber sheets.
All of the above recommendations for use are correct at a temperature of +21ºС and a relative air humidity of 60%. In other conditions, the setting and drying time of the material may vary.
ATTENTION!!!
To protect your hands while working, you must use gloves. Keep away from children. In case of contact with eyes or skin, rinse thoroughly with water.
Along with the above instructions on the use of the material, when carrying out work, you should be guided by the relevant SP (SNiP) and instructions. The technical description does not replace the professional knowledge and skills of the work performer. If you doubt the possibility of using a material, you should test it yourself or seek advice from the manufacturer.
Preparation of mounting solution
The properties obtained from it as a result depend on the correct preparation of the solution. Be sure to follow the manufacturer's recommendations on this issue. High-quality products are accompanied by detailed instructions, where some points may be reflected.
In any case, take a clean container where the components will be mixed. First, water is poured, it should be at room temperature, after pouring it is left to sit for half an hour. Then, having measured the required amount of mixture per serving, add it to the water, slowly, then it will be easier to avoid the formation of lumps.
It is advisable to mix with a construction mixer or a drill with a mortar attachment. When you have a homogeneous mass, you can apply it to the surface.
It is advisable to mix with a construction mixer or a drill with a mortar attachment.
Usage
Average consumption of foam adhesive for silicate and gypsum boards: for products up to 130 mm wide - 1 strip, for larger ones - 2 strips for each joint. When working, you should follow some recommendations.
- The surface is carefully prepared and cleaned of dust.
- The container is shaken for 30 seconds and placed in a glue gun.
- 1 row of blocks is laid on a classic mortar.
- From the 2nd row, foam is applied. The cylinder is held with the bottom up; when applied, the nozzle of the gun should be 1 cm from the surface of the PGP. The optimal jet thickness is 20-25 mm.
- When used horizontally, the strips are not longer than 2 m.
- The leveling of the slabs is carried out within 2 minutes, position adjustment is possible by no more than 5 mm. If the curvature is greater, it is recommended to carry out the installation again, as well as when tearing off elements at the joints.
- After a break of more than 15 minutes, the gun nozzle is cleaned.
Installation is recommended to be performed in heated rooms or in warm, dry weather.
What can be replaced
The cost of special adhesives is not budgetary, for this reason many are looking for options to replace the product with a cheaper composition. And there is such an opportunity, for this you choose ordinary tile adhesive, to which you need to add PVA. The components are mixed thoroughly to obtain a finely dispersed mass that can reliably adhere to the GGP slabs.
You can also replace tile adhesive with cement mortar, this is an even more affordable option.
The components are mixed thoroughly to obtain a finely dispersed mass that can reliably adhere to the GGP slabs.
You can reliably glue tongue-and-groove slabs using special adhesives that have been developed for them. These adhesives create a reliable and durable adhesion that will not damage the gypsum material itself. But when choosing, it is important to pay attention to the instructions on the packaging, which indicate the possibility of operation. You should also purchase glue from trusted stores so that the composition is accompanied by a certificate of quality, and you do not have to use low-quality types. It is also possible to make a suitable composition yourself.
Types of adhesives
The adhesive is selected taking into account the operating conditions.
Adhesive foam for GGP comes in two types based on performance characteristics: regular and frost-resistant . The first is used in apartments and private houses where heating is available and the air temperature does not reach critical levels. Frost-resistant adhesive is used to create partitions in production facilities, warehouses, and industrial halls. It contains special protective components that allow the slabs to withstand frosts down to -15 degrees without losing their strength properties.
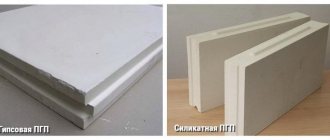
Depending on the characteristics of the room in which the renovation will take place, the glue may differ. There are two main types: based on gypsum and made from sand and quicklime . Construction mixtures are also classified according to moisture resistance .
They produce foam adhesive that can be used to connect tongue-and-groove slabs, bricks, and stones.
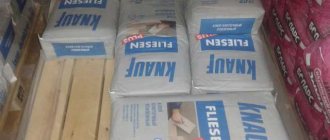
The most popular brands that produce glue for PGP are: Volma, Knauf, Bolars, IVSIL, ILLBRUCK.
Cost of glue for tongue-and-groove slabs
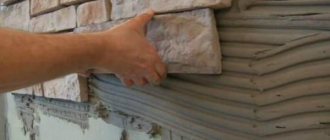
How to glue gypsum tiles?
For work, choose a seamless or suture method. Usually they repeat the pattern of brick walls, or offset the rows by half or a third of the tiles. Sometimes the laying of gypsum stone and other materials is created in the form of a spiral or diagonal lines.
Tools and materials
The list of necessary devices is not so long that you need to stack materials on top of each other:
- Paint or varnish, including those used to process seams.
- Tile adhesive.
- Primer with sufficiently deep penetration.
- Tooth type spatulas, made of rubber or metal.
- A miter box along with a fine-toothed file and a hacksaw for metal processing.
- Rollers and brushes, wide and with natural wax, column type. Which variety is needed in a particular case is chosen individually.
- Pencils.
- Marking cords.
- Vertical plumbs with building levels and tape measures for gypsum products.
Electrical wiring in partitions
After the partition is installed, it may be necessary to install sockets or switches. To install hidden wiring, mark the location of the elements of the electrical system, make grooves for the wires and holes for the boxes.
Technological cavities inside hollow partitions made of gypsum tongue-and-groove slabs can be used for laying electrical wiring. To make it more convenient to lay wires in horizontal channels, blind holes are made on the sides.
They stretch wires, connect sockets and switches. Seal the holes with putty.
The distance between the grooves should not be less than 10 cm.
Low density
To begin with, it is worth noting that the low density of the GWP is not a disadvantage, but an advantage of this building material. Due to its low density, PGP has high thermal insulation performance. An 80 mm thermal insulation slab corresponds to a 400 mm concrete wall.
With GGP sound insulation the situation is not so clear, but it complies with regulatory requirements.
However, GGP slabs are fragile due to their low density. The fragility of the slab and its low density become clear when you start sawing the slabs during installation. They cut easier than wood.
What else can you pay attention to?
When choosing a good glue, it is important to look at the quality characteristics.
- Consumption. Directly related to the size of the plates, the larger or smaller width of the teeth and the condition of the surface. The average figure in most cases is 3-4 kilograms per 1 meter.
- Setting time and adhesion. Here it is important to rely on the characteristics of specific premises. We put everything according to the instructions.
- Cooking time, which differs in the adhesive mixture. While it is not over, the stain can still be corrected even after being applied to the wall.
- The time interval during which the glue retains its properties without hardening. Usually indicate 10-15 minutes. Sometimes special ingredients are added to basic materials to slow down this process. But it is not recommended to do this if there is no need. Otherwise, you won’t be able to fit anything.
- Slip resistance.
There are compositions for external and internal use, combined with dry and wet areas. The official instructions from the manufacturers will tell you how to place the material in a particular case.
Some varieties have additional characteristics. For example, protection from humidity and temperature changes, elasticity. Such materials can withstand increased loads. A correctly laid wall will not be damaged by anything for a long time.
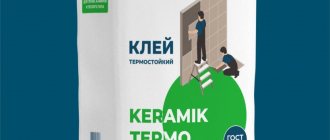
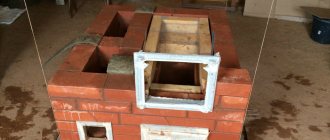
For stoves and fireplaces, another group is often chosen - special heat-resistant adhesives. They can equally resist the low and high temperatures with which the wall interacts.
Reactive mixtures are often considered the most convenient and versatile for practical use. These are products not only with an adhesive base, but also with hardeners in the composition.
The main thing is to work as quickly as possible before everything dries out. At the same time, high elasticity is maintained, even if there are many irregularities on the surface. As a result, the apartment will look beautiful.
The use of so-called wallpaper compositions is also allowed. The setting time in this case depends on the number of main components; the more there are, the longer the process takes. Including when they do everything with their own hands, as expected.