Plastic panels are one of the most profitable and simple finishing methods. When installing such a panel, a small amount of dirt remains; it is easy to install without special tools.
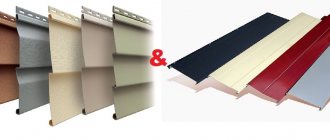
A big plus of PVC panels is the huge difference in colors and textures.
How to properly make a frame for a PVC panel? To assemble the finishing base you will not need any complex tools or skills. It is enough to know how to use a drill, hacksaw, and screwdriver.
How to make a sheathing for plastic panels in the bathroom?
The panel frame allows you to secure the finishing material on uneven surfaces. It can be installed in rooms with unstable temperature or humidity. The frame can be installed without the help of a specialist. Metal, plastic or wooden materials are used to make the frame. When choosing a material, the following are taken into account:
- height of unevenness on the surface;
- moisture level;
- working experience with materials.
When using plastic sheathing under PVC panels, the moisture level is not taken into account. This type of design is easy to install by craftsmen of any level and has a reasonable price. A thin PVC frame is used.
It is recommended to install these frames in rooms with low ceilings. After carrying out work in the bathroom under the PVC panels, the height of the room will decrease slightly.
Minor disadvantages:
— it’s difficult to find profiles for lathing in regular construction stores,
— this frame made of various materials can only be installed on a surface with a minimum number of defects. Otherwise, you won’t be able to get quality work.
Briefly about the main thing
PVC panels of wall or ceiling type are hollow panels with longitudinal partitions inside, which provide rigidity to the material.
To obtain a seamless decorative coating, shaped protrusions and reciprocal recesses are formed along the closed edges for joining products using the tongue-and-groove system.
Installation of PVC panels is carried out in a frameless manner and on top of the supporting sheathing.
Experts do not recommend fixing fabrics using adhesive solutions, since plastic tends to change its physical parameters due to temperature changes.
Manufacturers offer a special plastic profile 10 mm high for installing panels with a groove for clips, which are used to press the mounting edge of the products.
The universal and most reliable solution is considered to be the assembly of a frame from a metal profile for plasterboard.
A less common option is wood, since it requires periodic treatment with antifungal fire retardants; the material is not recommended for use in conditions of high humidity.
To secure PVC panels to the frame structure, self-tapping screws or staples for a construction stapler are used.
Ratings 0
Problems of frameless installation of PVC panels
There are two ways to install PVC panels. With or without frame.
The frameless method looks simple, but installation is more complex. This is due to the following:
- It is necessary to ensure the evenness and strength of the walls. But this doesn’t always work out. If there are a large number of unevenness, the cost of mixtures for leveling the walls will increase significantly. Inexperienced craftsmen will need a lot of time to level the walls; they will need to use a laser level. If minor defects are left, they will be visible due to the decorative surface.
- If the panel is directly adjacent to the wall, it will not be possible to route the cable. If an unusual situation arises, access to it will be difficult.
When installing sheathing under PVC panels, the cost of removing wall defects will be reduced, all necessary communications can be hidden, and it is possible to install several layers of insulation.
If you have a rigid frame, you can ensure good structural strength when connecting two bathrooms.
Ceiling
Fastening the panels to the sheathing on the ceiling
To finish the ceiling, the sheathing begins to be installed from the lowest corner. The first mark is left at a distance from the ceiling equal to the width of the profile used. If you plan to install built-in spotlights, then take into account the height of the soffit. In cases where there is a need to lower the ceiling, thereby reducing the height of the walls, a mark is placed at the desired point.
- Using a hydraulic or laser level, additional markings are made, drawing marks on each wall, retreating 10 - 15 cm from the corner.
- Connect the marks using a tapping cable (a strong thread richly painted with dry powder).
- Mark the ceiling in increments of 50–60 cm.
The resulting lines serve as a guide for screwing the sheathing to the base.
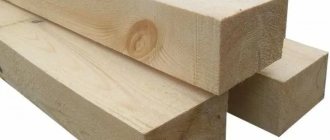
Wooden blocks
To make the lathing, you will need slats without defects: straight, smooth, with mandatory sections of 20x20. There are no difficulties during installation, the material is easy to process and can be installed in any way.
To avoid any defects, the wooden material must be dried naturally.
Mold and mildew may appear on the surface. To prevent this from happening, use paint or antiseptic with varnish. It is recommended to use hardwoods (acacia, beech, aspen) that can withstand high humidity and have good strength.
If you provide a suitable level of humidity, this design will last up to 5 years.
Tool
To install the panels you will need:
- tape measure and pencil - with their help you will mark the places where the sheathing bars are secured and the required length of the panels;
- metal corner and level - to check the evenness of the corners, horizontal and vertical of the mounted elements;
- jigsaw - for cutting panels to the desired length or width;
- construction stapler or nails with a hammer - for securing the panels to the sheathing;
- drill and self-tapping screws (dowel-nails) - for attaching the sheathing bars to the wall;
- screwdriver or screwdriver.
Metallic profile
The metal profile ensures high strength of the frame and the entire structure. All parts have the required dimensions, there is no need to adjust them.
Besides:
- There is good moisture protection and thermal protection. Service life - up to 15 years, if the outer layer was not damaged during the work.
- Less weight compared to wooden products, no heavy loads on the surface during installation.
Installing a metal product is inexpensive, this option is optimal.
Plastic elements
This frame material was invented recently, for this reason it is almost never used anywhere.
Plastic structures have good protection from moisture, mold, and pests.
Plastic elements, thanks to connections with clips, are easy to install. They do not require processing, adjustments, or the use of layers to protect the material.
The material is plastic and easily takes the shape of a wall.
PVC panels cannot be mounted crookedly or skewed due to the clip connection. With such assembly errors, it will not be possible to assemble the structure.
These slats are installed on ceilings and walls. Disadvantage: low strength, high cost.
For which styles is plastic finishing suitable?
When deciding to cover the walls in the bathroom with panels, take into account the overall interior of the room. By definition, these products are completely unsuitable for the following styles:
- Classic.
- Country.
- Art Deco.
The most suitable ones are: modern and minimalism.
However, today the range of products is extensive. They imitate many materials and have original images
Often, owners have the opportunity to paint plastic panels to their liking in any colors.
Calculation of material, choice of lathing design
To get started, you should calculate the exact amount of material required: measure the length and width of the surface to be finished.
Based on this data, a sketch is created that will show the amount of material needed and the level of costs. This will allow you to choose the best type of sheathing for your budget.
The guides should be located at a distance of 30-40 cm from each other, selected based on the location of these guides along the plane.
When planning, the orientation of the PVC panel cladding is taken into account. For horizontal alignment, install the frame vertically, and for vertical alignment, install it horizontally.
The number of fastenings can vary from 30 to 60 depending on the strength of the walls and the method of fixation.
Making a metal skeleton - difficult, but reliable
Lathing the ceiling using metal profiles for plastic panels is the most difficult option for creating a frame.
Let's look at it step by step:
- Draw a horizontal line along the perimeter of the walls. The frame will be mounted on it. If you plan to install external lamps, the marking is carried out below the ceiling by 3 cm, in the case of installing built-in lighting - by 7 cm.
- Fix the metal guides strictly along the line. They are usually attached to the wall in pre-drilled holes with dowels and nails (hardware parameters - 6x40 mm).
- Insert the frame strips into the fixed guides. Do not forget about the distance between them of 40 cm!
- Attach the hangers opposite the profiles to the ceiling surface.
- Connect the metal slats to the hangers, constantly checking the accuracy of the horizontal installation using a building level.
- Bend the excess parts of the hanging elements to the ceiling.
The frame is ready. You can start installing PVC panels.
Metal sheathing is mounted on the walls according to the same principle. Experts advise placing profiles at the level of the shoulder, lower back, knee and ankle of a person of normal height. If you or one of your guests accidentally leans against a wall trimmed with PVC panels, damage to the finish (for example, its deflection) will not occur. Due to the described arrangement, metal profiles will support your weight and keep the plastic cladding in its original form.
Preparatory work
Preparatory work is the assessment of wall defects and their correction.
Typically, large wall defects are found in panel and brick houses. This is due to the long operational life of the facility without repairs or construction errors during construction.
Large defects occur near floor and ceiling corners. The size of the defects can be assessed using a laser level. If the defect is more than 5 mm, leveling is done by grinding or applying a new layer.
If you don’t have a laser level, you can apply a flashlight to the junction points of the walls and look for dark spots. Then level.
A perfectly flat surface is not necessary: it is enough if the unevenness is 1-2 mm per linear meter.
If you save money, you don’t have to level the walls.
In this case:
- Using a laser level, find the most protruding point and make it the starting point.
- Mark the starting point on the perpendicular walls with a marker.
- Installation is carried out at the starting point.
- A metal sheathing is best suited: it has staples that you just need to bend at the desired level.
The only drawback of this method is the loss of important space in the bathroom.
Walls
For walls, it is extremely important to assemble the frame with the correct 90 degree angles. There is no way you can do this without a laser level or a construction angle.
Example of wall lathing
- First of all, bars or profiles are filled in the corners of the room. If necessary, additional gaskets are placed under them. It is important at this stage to position the slats so that the angle formed between the mating surfaces is straight. Check the resulting connections using a construction angle.
- The profiles are fastened along the ceiling and floor coverings.
- Pull the cord between the upper and lower profiles, and, focusing on it, install the horizontal strips of the sheathing.
- Profile slats must be placed along the perimeter of window and door openings.
When installing a frame under a plastic structure on a balcony or loggia, they use the same calculations and methods. However, it makes sense to insulate the room by placing a layer of thermal insulation in strips between the profiles.
Installation work
To begin installation, you need to apply markings. Then two guides are fixed parallel to each other.
The second step is to stretch the threads into the places where the structural parts are attached to provide a guide to the initial level. For smooth walls, this stage is replaced by marking with a marker where the guide parts are located.
In case of high humidity, to prevent the appearance of dampness, a protective layer (vapor barrier) must be placed before marking.
Progress of further work:
- Install a sheathing made of metal or wood material. Installation of the guides begins along the wall, from left to right.
- Based on the type of design chosen, place and fix the bar (horizontally or vertically).
- Additional fastening is installed at intervals of 30-40 cm.
- All the sheathing parts are installed in the same way.
The lathing for PVC panels made of plastic material is installed on specially designed adhesive tape. Before this action, it is necessary to clean the surface from grease and dirt for better fastening.
General requirements for surfaces
One of the advantages of the technology of finishing walls with plastic lining is low requirements for surfaces. There is no need to specially plaster or level the walls with putty; only large cracks are repaired. The height of the unevenness can be up to 1–1.5 centimeters; anything larger needs to be cut down.
Large potholes can be filled with cement mortar or putty.
Repair of major defects
Check the evenness of the walls using the rule
Important point. It is strongly recommended to treat the surfaces under the panels in bathrooms with antifungal compounds and use steam and moisture protection.
Mold Prevention Products
Wiping the walls with an antifungal agent
The climatic parameters between the wall and the cladding are the most favorable for the growth of fungi and other microorganisms; it is then impossible to destroy them. You will have to remove the casing, do disinfection and vapor protection. Only after such events can you begin to install plastic panels. No matter how carefully you remove the skin, you cannot do without damaging the materials. If you manage to buy the missing ones with the same characteristics, great. If not, you will have to buy new materials for the entire scope of work.
Installation features
For subsequent installation, we recommend following the following instructions:
- When renovating a bathroom under PVC panels, you need to create a project to determine where to attach interior elements without damaging the PVC panels.
- To avoid attaching panel parts, they should be positioned exactly vertically or horizontally. In the vertical direction, the ceiling height visually increases. In the horizontal direction, the length of the room visually decreases and the width increases.
When installing lighting, it is worth considering hidden wiring. If you carry it out at the planning stage, you can provide better electrical protection and save wall space for laying cables and ducts.
The process of installing lathing under plastic , wood or metal materials for cladding with PVC panels is an easy process even for an inexperienced specialist.
The best approach to such work is to carry out high-quality measurements and preparatory work. In this case, there will be no difficulties or problems.
Comparison of plastic, wood and metal facade fastening systems: installation
Everything is relative. Therefore, let's look at the key characteristics of battens and evaluate their convenience for users.
The general installation principles are the same, no matter which system you choose. The slats or profiles are mounted perpendicular to the siding panels, strictly vertically and horizontally, in increments of 40-50 cm.
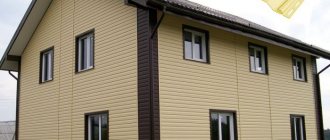
The wooden sheathing is secured using self-tapping screws, dowels or brackets (the latter option if the walls are uneven) directly to the wall. If the house needs to be insulated, then first a sheathing for the insulation is made (usually horizontal). Sheets of expanded polystyrene or mineral wool are inserted into it, and then the counter lathing is made - vertical. Horizontal siding panels are mounted on it.
Installation of wooden sheathing on uneven walls. (photo No. 5)
The length of the wooden blocks is from 2 to 6 m. In fact, the lathing needs to be made on site, cutting out and adjusting the necessary fragments. Do not forget that they will still have to be treated to protect them from fire, mold, and pests. Having the necessary tools, it will be easy to complete all the work. It will just take longer to install.
The metal sheathing is also attached directly to the wall. If the house needs to be insulated, a fastening for the sheathing is fixed on the wall, onto which the insulation and wind- and moisture-proof film are threaded. Then the structure is fixed with dowels, and the sheathing profiles are fixed to the brackets.
Installing siding on plastic sheathing. (photo No. 6)
The plastic sheathing is attached in much the same way as metal sheathing. Only it is lighter, and all the necessary holes are already provided in it. The plastic sheathing can be installed using self-tapping screws, hangers, or using studs. Which of these methods is preferable when - watch the video:
!
When choosing which sheathing to make under the siding, it is worth keeping in mind that the installation of a polymer lattice has its own specifics and may take a little longer. But at the same time, it provides a better result, protecting against possible installation errors and extending the service life of the facade.