The construction of aerated concrete walls in private construction can significantly reduce financial costs. Savings are achieved not only due to the absence of the need to heavily insulate such a structure, but also due to the lower weight of the aerated concrete block compared to other building materials. For the interior decoration of such premises, you can also use inexpensive materials, for example, plasterboard.
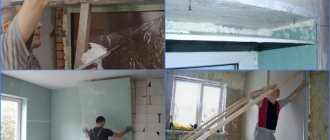
The interior decoration of a house made of aerated concrete with plasterboard can be done on your own, but before starting such work, you need to thoroughly study the theory, as well as select the right materials and tools that will be needed for installing plasterboard sheets.
Materials and tools
To install drywall on an aerated concrete block, you will need to prepare the following tools and materials:
- Plasterboard sheet
- putty
- Metal perforated corner
- Self-tapping screws
- Metallic profile
- Spatula (straight and angled)
- Screwdriver
- Roulette
- Level
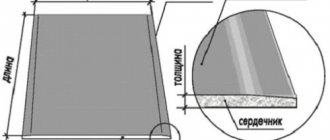
Only if you have high-quality materials and suitable tools can you begin installing plasterboard sheets indoors. If a wall is finished with this material, then to obtain a high-quality surface it is recommended to use a finishing material 12 mm thick. For the ceiling it is better to choose a thinner sheet; usually for horizontal placement it is enough to purchase plasterboard material up to 9 mm thick.
Before the finishing work begins, calculations should be made of the material with which the aerated concrete will be sheathed.
Common Misconceptions
Simply attaching gypsum boards to the wall with self-tapping screws will not work: making the wall level is problematic, with each press the sheet is damaged at the fastening points.
You cannot attach drywall directly to the ceiling. An exception can be made for wooden walls, but such cases are rare.
Some drywallers replace screws with foam. This option cannot be called a budget option, and plasterboard does not adhere well to foam.
Fastening drywall
Calculations
Finishing material should always be purchased with a reserve, regardless of whether a gas silicate house needs to be finished inside or the wall is made of a cement block or wood. Too much stock, on the contrary, will lead to unnecessary financial expenses.
First, the room must be measured around the perimeter in order to accurately calculate the total area of the walls. For an accurate calculation, it is enough to multiply the perimeter by the height of the walls and subtract the area of doorways and window frames from the resulting value.
It will be much easier to calculate the working area of the ceiling. To perform accurate calculations, it is enough to multiply the width of the ceiling by its length. Approximately 5% of the material supply should be added to the resulting wall and ceiling area values.
Calculating the number of sheets of drywall is not difficult. To do this, the total area of the walls should be divided with a margin by the area of one sheet. To calculate the ceiling material, similar calculations should be made.
Installation of gypsum boards with glue
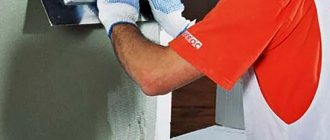
It is possible to install drywall with glue in certain cases. The main factor is the size of the room. In a small room, every centimeter is saved, so the option with profiles is not suitable for installing drywall. Installing plasterboard with glue Finishing walls made of aerated concrete with plasterboard is not difficult, but you still need to call a neighbor to help in this matter.
Selection of adhesive composition
What to glue drywall to? What's better? There are several adhesive compositions on which a sheet of drywall will be fixed.
In the video, the strength of the connection between drywall and aerated concrete is checked.
The process of installing drywall with glue
In order to begin covering aerated concrete with plasterboard, you should very carefully prepare the surface.
It is important to remove dust, level the surface, make markings, and prime. The wall should be coated with the primer mixture twice and wait until it dries completely.
After preparatory work:
- You need to mix the adhesive solution. This must be done in accordance with the instructions on the package. Some types of glue lose their properties with a large amount of water, so this is an important point. Mixing glue for drywall
- After the glue has infused (it takes about 5 minutes), you should begin gluing the gypsum board to the surface.
- The glue is applied to aerated concrete, then onto a sheet of plasterboard, which is laid on a flat horizontal plane. It should be remembered that gypsum board is a fragile material, and when applying an adhesive solution to a sheet, it becomes heavy. After applying the glue, the drywall must be glued to the aerated concrete. To do this, you need to lift the sheet (it’s better if it’s a couple of people) carefully and slowly so that it doesn’t burst.
- The glue is applied to the sheet of drywall with a spatula in small piles (1st full medium-sized spatula). The vertical and horizontal distance should be 15-20 cm. Applying glue to a sheet of drywall
- There should be free space between the floor and the glued sheet. To do this, it is best to take pieces of plasterboard and lay them on the floor. The sheet should be glued so that it “stands” on these pieces.
- Whole sheets are best applied and glued first along the edges of the wall. In the center the place is sewn up with pieces of plasterboard. This is done so that there is no continuous horizontal border of the sheets.
- After applying the sheet to the aerated concrete, it must be leveled. This can be done using a level and plumb lines. You shouldn't press it too hard in one place and don't press it too hard in another. The drywall will bend and a depression will remain. Leveling the drywall sheet with a level
- How to attach the glued sheet? To prevent the sheet from collapsing onto the floor immediately after gluing, it can be supported. The support resembles a mop with blunt ends, made of wood. Support for drywall sheet
- After covering aerated concrete with plasterboard, it should be left for a day for the adhesive solution to set on the surfaces and dry.
- Bevels should be made on the cut parts of the sheet using a plane. Afterwards, this can also be done, but the process will be lengthy and labor-intensive.
- After the glue has dried, it is necessary to cover the surface with a primer and reinforce all joints with sickle tape.
Decorative plaster of plasterboard walls. Further finishing may involve filling the plasterboard surface. It depends on the decoration of the wall. Butterfly dowel for hanging on drywall. It is not recommended to install too heavy objects on this wall. You can use butterfly dowels to hang decorative items. In other cases, it is better to use anchors.
The final finishing of the plasterboard surface can be varied. Wallpaper can be glued to plasterboard, it can be painted and covered with gypsum tiles to look like stone or brick, and plasterboard can also be covered with decorative plaster. There are a lot of different finishing materials. And all of them carry not only the standard of beauty, but also their functions. Return to contents
Preparatory work
Finishing aerated concrete walls indoors with plasterboard without preliminary thorough preparation of the base material is almost impossible. Preparatory work is carried out in the following sequence:
- Aerated concrete is cleaned of dirt and dust;
- The gas block is cleaned of all kinds of irregularities on the surface. If the wall has depressions or cracks, they are sealed with cement mortar;
- Aerated concrete is carefully primed with the obligatory drying of the primer layer for 3-4 hours.
After the primer has dried, you can begin installing the gypsum board on the sheathing or directly on the gas silicate.
Painting aerated concrete surfaces
Painting walls is one of the oldest ways to decorate the interior of a home. However, aerated concrete walls require some preliminary work.
The wall to be painted must have a perfectly flat surface. For these purposes, a special grinding machine is used, and in its absence, the walls are leveled using a special grater or sandpaper. This is due to the fact that paint is not able to hide wall defects. If the wall has defects such as flaws and cavities, they will need to be eliminated using tile adhesive. Subsequently, the repair areas are carefully rubbed down.
Painting any surface requires applying a layer of primer. Decorating walls made of aerated concrete blocks with paint is no exception. Of course, priming the walls and then drying them will take some time, but as a result the paint will lay down in an even layer. To paint walls made of aerated concrete, it is recommended to use water-based paint, which can easily be given the desired shade using color. You should start painting from the far corner of the room.
In addition, when working, consider some tricks. You need to paint the walls in two or three layers, and crosswise. That is, if the first layer of paint is applied horizontally, then the next one is applied vertically, and the third one is applied horizontally again. In addition, you should not wait for the previous layer to dry completely; you can apply the paint immediately.
Plasterboard wall covering
Finishing an aerated block with plasterboard can be done in 2 ways:
- Installing plasterboard sheets with glue
- Fastening drywall to wood sheathing or special metal profiles
To install drywall with glue you need:
- Apply adhesive to the surface of the drywall;
- The sheet is pressed against the wall surface;
- The material is held in this position for several minutes.
These steps must be repeated with each plasterboard sheet or piece of this material.
After the glue has completely dried, you can begin to seal the cracks where the plasterboard sheets join. For this purpose, a putty solution is used, which is prepared from a dry mixture and water. The consistency of the solution is brought to a creamy state, and the mixture is applied to the joints of the plasterboard sheets, followed by leveling this area with a spatula.
To install plasterboard sheets on the frame, you will first need to install a wooden or metal sheathing on the gas block. The gas silicate block has a more porous structure than concrete or stone, so dowels for fastening the sheathing must be selected with spiral-shaped ribs. Such products are securely held inside the wall, which prevents the installed frame from separating over time.
Which is better: heated floors or radiators?
Warm floorBatteries
Walls made of gas silicate blocks are finished with plasterboard installed on the sheathing in the following sequence:
- Wooden slats or a special metal profile are installed along the perimeter of the wall;
- Vertical guides are installed with a distance of no more than 60 cm from each other;
- Jumpers are placed between the vertical guides;
- Plasterboard sheets are installed onto the sheathing using self-tapping screws;
- The joints between the sheets are puttied.
To putty cracks, prepare the same solution as for treating material installed with glue. The layer of putty in such places should be leveled using a spatula. The self-tapping screw, which is used to attach gypsum boards to the frame, must be slightly recessed into this material. This installation allows you to perfectly level the plasterboard surface before finishing.
The gas block has good heat-saving qualities, but if the house is operated in northern latitudes, then a layer of heat insulation must be placed in the internal gap between the drywall and the main wall. The inside of a gas silicate house can be insulated using either cheap polystyrene foam or roll materials.
Installation of metal profile
Finishing walls made of aerated concrete indoors requires a responsible approach, since plasterboard on the wall must last for many years. Therefore, everything should be done slowly and measuredly.
- To begin with, you should secure the guide profiles on the marked lines. When fastening, it is worth making holes in advance. Fastening is carried out with dowels. Fastening guide profiles
- Suspensions are attached to the surface at the designated points.
- Vertical rack profiles are inserted into the guide profiles and secured to the hangers with self-tapping screws. An important factor here is the evenness of the created surface. Each movement made should be checked with a level and plumb lines.
- After installing the vertical profiles, sections for the transverse ones are cut.
- The transverse ones are mounted horizontally. They are connected to vertical profiles using crabs. Fastening horizontal profiles
- In the place of reinforcement, the vertical and horizontal profiles should be made double. Installation of a metal profile for plasterboard
After completing the installation of the metal frame, you need to check it for strength and rigidity. Insulation is placed in a frame made of profiles. Insulation is placed in this frame, and wiring is also made under the drywall to switches and sockets. Other communications are hidden here - Internet cable, cable TV. The wires must be corrugated.
Return to contents
Tips and tricks
- Before gluing drywall to the wall, the aerated concrete block must be well puttied and leveled. In case of significant damage and unevenness of the base, special plaster for aerated concrete materials is used
- To finish a high ceiling, the frame method is most often used as it is more reliable. For low ceilings, you can use glue, but such an installation will require significant effort to hold the plasterboard sheet at a height
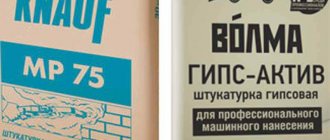
- Internal repairs of an aerated concrete house should be carried out only with the use of high-quality plasterboard sheets. Professional craftsmen prefer products from Knauf, which has been a leader in the global building materials market for many years.
- In winter, finishing using plasterboard should only be carried out if the room is heated. Recommended temperature conditions for such work are from +5 to +25 degrees
- Internal repairs in wet rooms should be carried out using moisture-resistant plasterboard sheets
- In order to apply putty evenly in places where plasterboard sheets are connected at right angles, you should purchase a tool that is necessary in this case, such as an angle spatula
- If a wooden sheathing is installed on an aerated concrete wall, then an antiseptic composition for wood treatment must be used.
The room in which the plasterboard finishing method was used takes on an ideal appearance and can be easily finished with finishing materials such as wallpaper or paint. To gain additional knowledge, it is recommended to watch videos that explain step by step not only the process of installing gypsum boards on an aerated concrete wall, but also how putty is applied and a working mixture is prepared for puttying or plastering the base and plasterboard sheets. If you follow the recommendations outlined in this article and in the videos, you can perfectly finish the room with drywall in record time.
Existing installation techniques
To fix gypsum boards without lathing, you can use the following methods:
- Gluing the material to the rough base using mastic or glue. To do this, a solution is applied at the place of curvature, and it is also applied in a checkerboard pattern to the sheet. The plasterboard is applied to the wall, aligned and pressed, additionally installing a holder. There should be 10-12 mm from the floor to the gypsum board. To do this, you can put a small piece of sheathing material.
- The use of self-tapping screws and foam rubber. This method is used for large curvatures. Fixation is carried out as follows:
- make markings for the material;
- 9-12 holes are drilled on the gypsum board. Their location is transferred to the rough base;
- pieces of foam rubber are glued near these holes on the back side;
- The sleeve from the dowel-nail (plastic part) is inserted into the base according to the marks;
- The sheet is screwed to the wall with self-tapping screws.
- Combined method. Beacons are installed from below and above. The middle is filled with glue.
Methods for finishing the walls of a house and apartment made of foam blocks inside
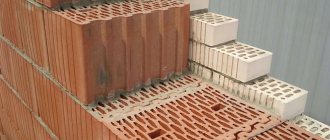
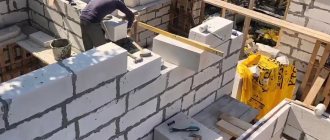
Building blocks made of lightweight cellular concrete “have replaced ceramic and silicate bricks in low-rise construction. Low load on the foundation and high thermal insulation properties explain their popularity. And the finishing of walls made of foam blocks inside is carried out using the same methods and materials as in a brick house: plaster, drywall and painting. It is important to properly prepare the surface and take into account the features of foam concrete.
Useful video
The most reliable way to mask errors is the “dry” method of leveling the surface or covering it with plasterboard. Typically, gypsum boards must be secured with self-tapping screws. The advantage of the technology is the reduction in time and cost of materials compared to other methods. But this method also has disadvantages, which are associated with the use of a frame made of profiles.
Leveling the surface
Plaster
Finishing of foam blocks from the inside is carried out before facing the facade from the outside and after carrying out “wet work on pouring the screed. Any additional layer on the walls makes it more difficult for water vapor from the building materials to escape.
This condition is especially important if the interior finishing is carried out using plaster. And the entire cycle of work must be completed in warm weather so that vapors cannot condense and freeze inside the foam concrete.
At the preparatory stage, the walls are cleaned of remnants of masonry mortar. If necessary, fill empty seams and chips on the edges of the blocks with mortar so that the surface is as smooth as possible.
The order of applying primer depends on the type of foam block.
Foam concrete differs from aerated concrete not only in the chemical method of formation of cells - there is also a difference in the method of obtaining blocks. Aerated concrete blocks are sawn (cut) from a large mass. Foam concrete blocks, in addition to sawing, can be produced by pouring into a mold. And their surface can be either “rough” or “smooth”, and this affects the adhesive properties of the wall.
If the wall is made of sawn blocks, then the primer is simply applied to a dust-free surface. Cast blocks do not hold plaster well, and their surface must be treated with coarse sandpaper or aerated concrete float, and then dusted off and two layers of primer applied.
Using a float for aerated concrete, you can remove minor unevenness in the walls and reduce the thickness of the base layer.
The next stage is creating a base layer and reinforcement.
Base coat for plaster
Cellular blocks are weak bases that are subject to deformation and shrinkage. To prevent cracks from appearing on the interior finishing of foam block walls, the base layer of plaster must be reinforced. Surface strengthening technology can be done in two ways.
The classic method, with leveling the wall with plaster along the beacons.
The technology for creating the base layer looks like this:
- Beacons are attached to the wall in increments smaller than the size of the rule. The beacons are fixed using the same solution that was chosen for the first layer of plaster.
- The plane is checked either in the traditional way using a bubble level and cords, or with a laser level.
- When the solution fixing the beacons has hardened, apply a base layer of plaster and level it to the level of the beacons using the rule.
- A fiberglass reinforcing mesh is pressed into the base layer. For adjacent strips, an overlap of several centimeters is maintained (including when increasing the length of the mesh).
- “Smooth the surface with a trowel, having previously increased the layer thickness by 2-3 mm.
- The next day, the surface is finally “rubbed down, removing minor irregularities and sagging.
If the walls are smooth (or leveled with an aerated concrete float) and the height difference does not exceed a couple of millimeters, then you can use the technology that is used when reinforcing an insulated “wet facade”:
- Prepare putty for interior work on aerated concrete in accordance with the instructions. You can also choose any tile adhesive. It has even higher “stickiness (adhesion) to foam concrete than putty.
- Apply a base layer 5-6 mm thick to the prepared surface.
- The polymer mesh is pressed in, ensuring that adjacent strips overlap.
- Level and rub the “base” with a trowel.
Is it possible to improve the properties of the base in terms of “retention of the finishing layer?” Some professionals practice creating a “horizontal comb using a notched trowel with a cavity depth of no more than 3 mm. But this method is only suitable for a “smooth finishing layer for painting. Decorative plaster requires a perfectly smooth base layer.
Finishing layer
Before finishing the foam block walls inside the house, the base layer must dry. The time required for “ripening” depends on the conditions and composition of the mixture.
For cement starting plaster, the rule is usually followed: 1 mm thickness = one day. Although under ideal conditions (18-20°C and 70% relative humidity), the layer thickness in the formula can be increased to 2 mm.
The maturation time of gypsum plaster is much shorter. Although under unfavorable conditions and a large layer thickness, drying may take from 7 to 14 days.
Before applying the finishing plaster, the wall surface must once again be treated with a primer in two layers.
If you plan to paint or wallpaper, then apply a thin layer of finishing plaster (putty), which, after drying, is sanded with a float.
The method of applying decorative plaster depends on its type.
Types of finishing
Applying plaster
Traditional method of treating concrete surfaces. First, the walls are cleaned of debris and dust, then they are moistened with water or a leveling solution. Then the cellular material is primed in several layers, with the next one applied after the previous one has dried. The next stage is the application of primary plaster, which covers unevenness and damage, and connecting seams. To prevent cracking and shrinkage of the plaster, install a reinforcing mesh, which is pressed into the layer and adjusted with a spatula. Covering is used to complete the final leveling of the walls. When the finish “sets”, level the surface of the wall. Before applying the decor, wait for the applied material to dry completely; the exposure period is 7-14 days.
To complete the interior decoration of walls with plasterboard, lining, plastic panels, a frame of metal profiles is first installed.
Drywall
An alternative to plaster. The installation method depends on the condition of the walls. If they are even, the sheets are attached directly to them; when they are, a special frame with insulation is mounted. Plasterboard walls are an excellent basis for a variety of decor:
- wallpaper;
- painting;
- decorative plastering.
Natural wood
An environmentally friendly product for interior decoration. It has a beneficial effect on the microclimate, makes the room cozy, and the whole house looks like a tower. The thermal conductivity of this material is high. To protect against moisture and the effects of harmful organisms, the lining must be treated with special varnishes. Popular tree species for interior decoration are spruce and pine. Installation requires certain skill from the builder.
Ceramic tiles
This type of cladding is used in rooms with a high moisture content to create a hydraulic barrier that will prevent steam and condensation from penetrating into the middle of the concrete. For installation on wall surfaces, a special glue is used that adheres well to the aerated concrete base. To prevent the development of microorganisms in a humidified room, it should be equipped with powerful ventilation.
Drywall
In fact, this popular material is nothing more than dry gypsum plaster in slabs reinforced with cardboard on both sides. Therefore, plasterboard can be considered both as wall panels for installation on lathing, and as large tiles that can be attached to walls using gypsum glue.
Installation on lathing
There are two types of materials for lathing: wooden beams and metal profiles.
Working with a wooden beam and attaching gypsum boards to it is simple. But it must be dry, and for rooms with high humidity - treated with an antiseptic.
If the walls are smooth, then the timber is attached directly to the foam block.
To level the sheathing on uneven walls in the horizontal and vertical planes, the timber is attached to the foam block using direct hangers for the CD ceiling profile.
The beam layout step is 60 cm. In this case, each standard sheet 1200 mm wide will rest on the sheathing in the center and the edges in the middle of the beam. The most common sheet height is 2500 mm. But if the ceilings are higher than 2.5 m, in order not to add pieces of cladding, you can order gypsum boards with a height of 3000 mm or 4000 mm.
The width of the beam must be at least 60 mm. This is a necessary condition for the location of the screws from the edge of the sheet and the edge of the beam. The thickness of the timber should be sufficient for the self-tapping screw to fit into it without coming out on the other side - 30 or 40 mm.
For finishing foam blocks with plasterboard, metal profiles CD and UD are often used. The reason is the stable geometry, proven installation technology and nodal connections.
The sheathing installation process looks like this:
- Two parallel lines lying in the plane of the cladding are marked on the ceiling and floor.
- UD profiles are mounted along these lines.
- In accordance with the layout pitch (600 mm), vertical lines are marked on the walls, along which direct hangers are attached for mounting the CD profile. 3-4 hangers per profile are enough for a ceiling height of up to three meters.
- Screw the CD profile to the hangers. Check the level of the sheathing and the distances between adjacent elements. Finally fixed to the guide profiles.
- In places where heavy objects are hung on the walls, embedded elements are installed.
After installing the lathing, they begin to cover the walls with plasterboard.
Often, the advantage of sheathing with plasterboard over sheathing is the possibility of insulating external walls from the inside. Internal insulation is not directly prohibited by regulations, but is not recommended. And as a mandatory condition, there is a requirement for a continuous and reliable vapor barrier layer that protects the insulation from the side of the room. Otherwise, it will get wet and lose its properties, and fungus will appear on the walls. Creating such a layer is extremely difficult. Therefore, this option is not an advantage, but a necessary measure when it is impossible to insulate the walls from the outside.
Glue mounting
If the walls are smooth, then drywall is attached to them using glue. Especially for these purposes, the Knauf company produces Perlfix dry mixture, which must be diluted with water according to the instructions on the package. But before finishing the walls of a house made of foam blocks inside, the surface must be prepared. Standard procedure:
- cleaning walls;
- filling seams and chips with mortar;
- leveling with aerated concrete float;
- applying primer.
The adhesive composition is applied to the sheet using a trowel using “cakes”. One trowel - one serving. Along the perimeter, portions of glue are laid close to each other, retreating a few centimeters from the edge. In the middle of the sheet (along the horizon) another strip is laid out, but already thinned out - with a distance between portions of about 35 cm.
Then the sheet is placed in place, a wooden strip is placed, and by lightly tapping it the sheet is aligned in the plane of the sheathing.
!! The lifetime of the prepared solution is no more than 30 minutes. This must be taken into account during the work process. It is useless to dilute dried gypsum glue with water. !!
Finishing drywall
Any finishing of drywall is not complete without “wet work”.
This is natural if the finishing of apartments in houses made of foam blocks is carried out using decorative plaster or tiles. But even for painting or wallpapering, the drywall must be puttied.
Even if the paint has good coverage, surface irregularities and seams may show through two layers of finish. Wallpaper has a different reason. When carrying out cosmetic repairs, they cannot be removed without damaging the cardboard if there is no separating layer of putty.
What to consider
Finishing work is carried out after completion of all construction and installation work, installation of window and door units, laying of pipelines, pouring the base for floors.
- Aerated concrete “breathes” well - it allows air to pass through it along with water vapor, which is always present in living spaces, kitchens, and baths.
- If the outside of the house is lined with vapor-proof materials (brick without vertical gaps, ceramic tiles), then moist air accumulates in the thickness of the wall. Humidification of structures and its consequences is a separate topic. If the external cladding of the specified type has already been completed, then the interior finishing of houses made of aerated concrete must be vapor-tight without any options.
- When using vapor-permeable materials in the outer cladding of a house made of aerated concrete, the interior decoration allows for any design project.
- Given the ability of aerated concrete to absorb moisture, before applying any adhesive or putty composition, the surface of the walls must be treated with a deep penetration primer and allowed to dry completely.
- It is necessary to use steam- and waterproof wall finishing in rooms with high humidity: kitchens, baths, swimming pools. As an option - ceramic tiles, natural stone.
Drywall
When looking for an answer to the question: “How to decorate a house made of aerated concrete?”, we advise you to pay attention to plasterboard, with which you can quickly level and insulate the walls.
Frameless wall cladding with plasterboard (sheets of dry gypsum plaster) has been carried out since the 50s of the twentieth century, and included the following sequence of work:
- preparation of wall surfaces,
- marking the installation sites for drywall,
- cutting and preparing sheets,
- applying adhesive or mastic to the walls in the form of “cakes” about 3 cm thick, arranged in a checkerboard pattern, and gluing gypsum boards,
- sealing seams.
(1 rating, average 4 out of 5)
Coloring
When choosing a method for finishing a foam block from the inside, the option of direct painting is rarely considered due to the porous surface of the walls. But this stereotype applies only to ordinary, “smooth paints. And there are also special compositions with a large thickness and a relief surface of the layer. These are textured and textural paints. Additional volume is obtained in them due to special fillers, high viscosity of the composition and application technique.
How to treat the surface → Room decoration → How to choose the right paint → Surface treatment technologies → Leveling and finishing the walls → Selecting and applying a primer → Removal from the surface → Stretch ceilings and technologies → Reviews and testimonials