All requirements for construction and finishing work are described in the governing documents. A section in SNiP 3.04.01-87 is devoted to laying ceramic tiles. It indicates what and how to carry out preparatory work, the installation process, quality control, etc.
Thickness of the adhesive layer when laying tiles
- When laying tiles on cement mortar, the layer thickness should be 7-15 mm.
Cement mortar is a well-mixed mixture of cement, sand and water. Proportions of cement and sand for laying tiles: 1:4.
- When laying tiles with tile adhesive, the layer thickness can be 5-40 mm.
Tile adhesive is a dry mixture based on cement, sifted, fractionated sand and special polymer additives. When mixed with water, tile adhesive forms a plastic, easy-to-work solution that adheres well to all common types of substrates.
- When laying tiles using adhesive mastics, the layer thickness can be 1-2 mm.
Adhesive mastic is a building material based on water-soluble modified polymer dispersions.
Type of grouting
Now the most popular ones are cement and epoxy. Filling joints with epoxy grout costs 3-4 times more than cement grout, the reason is the same - increased labor costs.
At the same time, I personally like working with her
If we talk about quality, strength, durability, resistance to chemicals. means, pollution - nothing better has yet been invented.
The surfaces after laying the tiles must satisfy the following conditions
- The space between the wall and the cladding must be completely filled with mortar;
- Horizontal and vertical laying seams must be of the same type, single row and uniform in width;
- The surface of all laid tiles must be hard;
- Chips in the seams are allowed no more than 0.5 mm;
- Cracks, stains, mortar drips, and efflorescence are not allowed. Efflorescence is the appearance of building additives on the surface of laid tiles.
That's all! Good luck to you in your endeavors!
Work quality control
The maximum permissible deviations from the standards for wall tiles: if they are laid vertically on the outer wall, then no more than 2 mm per 1 m, and when inside, then 1.5 mm.
The difference between the vertical and horizontal levels for external installation is no more than 2 mm per 1 m of seam, for internal installation - no more than 1.5 mm.
Floor tiles are subject to the following requirements: the width of the seam between the tiles is no more than 6 mm, when checking with a 2-meter level - a space of up to 4 mm.
After installation, the following conditions must be checked:
Exact adherence to the requirements of SNiP guarantees high quality of work and long-term operation of the lined surface.
Source
Installation of floors with ceramic tiles in accordance with SNiP and GOST
Ceramic tiles are a time-tested flooring material. Practicality and other useful properties have made it possible to successfully use it in office, some industrial and residential premises. All this proves that ceramic floor panels can easily compete with more modern materials.
In order to control the quality and technology of tile production, there is GOST 6787-2001. When laying floors, builders must comply with the requirements of standards and numerous SNiPs.
General information
In order for tile floors to last for a long time, preparatory work will need to be done. This includes:
1. Selecting the adhesive on which the floor tiles will be laid.
3. Selection of floor panels, inspection of them for defects.
The installation process must take place at a temperature not lower than +5 and not higher than +40 degrees Celsius, the room must be well lit. When performing work, you must strictly follow the recommendations from the manufacturers of all materials used for flooring.
Specifications
The requirements for installing tile floors are listed in one of the sections of SNiP 3.04.01-87, for screeds - in SNiP 3.03.01-87.
Laying the floor is done as follows:
1. The quality of the tiles and the availability of documents from the organization that delivered them are visually checked.
2. The floor is cleaned of dust and debris.
3. The screed is checked for levelness in the horizon or the slope specified by the project.
4. Beacons are installed along which the tiles will be laid.
5. Direct laying of floor tiles is carried out. In this case, it is necessary to constantly monitor the thickness of the adhesive solution, slopes, the width of the seams between the panels and the pattern of the coating.
6. After completing the work, you should check:
- correctness of the pattern on the floor;
- maintaining slopes and distances between panels;
- Visually inspect the floor for installation defects (swells, stains, cracks and potholes.
- reliability of adhesion of panels to the floor, correct installation of baseboard tiles.
For checking work you will need a tape measure, a construction tape, a level, a staff and a square. All checks must be carried out both during the installation process and after.
It is important not to forget that after finishing the work you need to give time for the adhesive solution to harden. To do this, do not walk on the coating for some time, specified in the instructions for the glue.
In what cases do you need the services of a tiler and how to find a good tiler
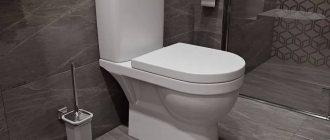
Ceramic tiles or porcelain stoneware are excellent materials for decorating your apartment or house. These materials are mainly used for laying on floors in corridors, technical rooms, balconies, kitchens, toilets and bathrooms, as well as for cladding walls in wet rooms and kitchen splashbacks.
If you are building a house and planning to heat it with a warm water floor, then tiles or porcelain stoneware will be an excellent solution, because it has the best thermal conductivity compared to other floor coverings.
Advice! No matter what anyone says, use only tiles or porcelain stoneware for heated floors. This has been tested by many people and everyone is happy. Solid wood will definitely dry out, and I would not recommend using laminate with heated floors for many reasons.
You can look for a qualified tiler in different ways: ask if the team that is doing your repairs or building a house already has such a specialist; ask your friends about it; as a last resort, a specialist can be found at repair services or message boards on the Internet. Here are some tips on how to find a good tiler, check his qualifications and integrity.
Tip 1! Inquire about the cost of the work. As a rule, it is difficult to determine the scope of work without seeing the object, so a good tiler will either inspect the object first or ask you to answer the following questions.
The required quality of work, it must be understood that when performing work without agreements on a certain quality of work performed (permissible tolerances), we can initially talk about the cost of the work at a reduced cost, which the contractor agrees to. Negotiate for high-quality tile laying, according to tile laying snip 3.04.01-87
The area of the facing surface, the greater the volume of work, the lower the cost
The need for additional leveling of the surface, such work is paid separately.
Format and size of tiles, porcelain tiles or mosaics
Deadlines for completing the work; in some cases, when you don’t have deadlines, you can negotiate a significant discount on the work, since the tiler will be able to plan the work on your site in parallel with others.
An experienced tiler will also ask about the quality of your tiles, their geometry, and during inspection will point out the shortcomings of the tiles. He will advise you to place the most defective tiles in the least visible places. This is normal practice, since perfectly smooth tiles are not cheap and you generally have to work with inexpensive tiles, the quality of which leaves much to be desired. When laying such tiles, it is difficult to achieve uniform laying and this must be understood. But nevertheless, it is necessary to strive for tolerances. After this, a competent tiler will be able to tell you the cost of the work. The market value of the work will be written below depending on various factors.
Tip 2! Inquire about the availability of the tool. Of course, the presence of a brand new tool does not mean that the tiler is qualified, but it is still better to hire a contractor with the necessary tools. Pay attention to the tool equipment; it is preferable to use high-quality diamond cutting equipment.
Tip 3! Even if you have a ready-made tile layout, ask the master where he would start tiling. The correct answer is that the tile trim should go to the least visible corners, in the bathroom this is the wall with doorways
Tip 4! Find out if the installer is willing to meet outside corners by cutting 45 degrees off the tile instead of inserting an outside corner. If the answer is yes, then this is a master.
Tip 5! Ask how the joint between the floor tiles and the wall tiles will be made. The floor tiles should be moved under the ones glued to the wall so that the moisture that flows from the wall flows onto the tiles and not into the seam.
Tip 6! When tiling the bathroom and especially the shower tray, ask the tiler about waterproofing the floor and walls. Waterproofing measures are mandatory. Waterproofing floors will protect you from leaks, and waterproofing walls will prevent moisture from penetrating into the wall material and subsequent peeling of paint on the outside and the formation of mold.
Tip 7! Ask about the warranty on work performed. A conscientious specialist will be ready to correct justified complaints himself, but he will not guarantee ideal quality without a thorough inspection of your property and inspection of the tiles and adhesive.
Requirements
According to SNiP 3.04.01-87, the following deficiencies during installation are allowed:
- the distance between adjacent tiles should not be more than 6 mm for panels laid by hand, but if the vibration heating method was used - 3 mm;
- the recess between the floor and the plinth is not allowed more than 2 mm;
- when checking with a two-meter strip, the difference between the tiles should not be more than 4mm.
You can become more familiar with the types of tiles and the requirements for them by studying SNiPs and GOST 6787-2001. It describes in detail the types of tiles, their appearance and acceptable defects.
The number of external and internal corners in linear meters, as well as the presence of various types of shelves and niches
The more external and internal corners, the more expensive. As for external corners, they must be processed at 45 degrees. This operation is also called “hooking”.
The angle looks much more aesthetically pleasing and neat this way.
do-it-yourself ground loop at the dacha
In the piggy bank of a specialist: A tiled seam is formed on the internal and external corners. They serve as a kind of deformation layer when the tiles expand and contract under the influence of moisture and temperature. If you lay “butt”, there is a risk of cracks in the tiles.
As for the internal corners, it’s the same here - tiles with a sanded edge and a formed seam look much more beautiful and neater than those simply cut using a hand or water tile cutter.
Sometimes the tile and tool allow you to achieve a perfect cut right away, without sanding, but this rarely happened to me. As a rule, I always cut with a small margin at the beginning, and then polish it with turtles and a diamond stone:
The result is a picture that pleases the eye:
Some people also cut internal corners at 45 degrees, but I rarely practice this - it significantly increases labor costs, and, accordingly, the cost of the work.
Standards for laying tiles
WALL COVERING WITH TILES. TECHNOLOGICAL REGULATIONS (extract from TR 95.10-99)
Date of introduction 2000-06-30. DEVELOPED by the State Unitary Enterprise "NIIMosstroy" with the participation of the State Institution "Mosstroylicensiya" and PKTI "Promstroy". Volume 10 “Tiling walls” TR 95.10-99 was developed by the finishing works laboratory of the State Unitary Enterprise “NIIMosstroy”. AGREED with JSC HC Glavmosstroy, OJSC Mosinzhstroy, State Institution Mosstroylicensiya, State Unitary Enterprise Mosstroycertification and approved by the Department of Economic, Scientific, Technical and Industrial Policy in the Construction Industry. APPROVED by the Head of the Department of Economic, Scientific, Technical and Industrial Policy in the Construction Industry A.I. Voronin.
The technological regulations were developed taking into account the requirements and provisions of SNiP 3.04.01-87 “Insulating and finishing coatings”, SNiP 3.01.01-85 “Organization of construction production” and VSN 50-96 “Instructions for wall cladding with ceramic and polymer tiles using adhesives and adhesives” mastics."
The regulations reflect the technological regulations for the device and acceptance tests:
— facing walls indoors with ceramic and glass tiles;
— indoor wall cladding with polymer-based tiles;
- external cladding of buildings with ceramic tiles and natural stone slabs
The regulations set out the basic safety rules when carrying out work on wall cladding.
This regulation does not apply to: covering surfaces in rooms with aggressive environments; for facing of external surfaces in factory conditions; for the installation of mortar-free cladding with slabs of natural stone with their fastening on metal fasteners; for cladding simultaneously with the laying of building walls and special cladding of vertical surfaces using heat-insulating materials; for the installation of cladding at sub-zero temperatures using anti-frost additives and electric heating.
A COMMON PART
1.1. This regulation applies to the external cladding of walls indoors with ceramic, glass, polymer (polystyrene, polyvinyl chloride, phenolite, etc.) tiles and the external cladding of buildings with ceramic tiles and natural stone slabs.
1.2. The technological regulations were developed taking into account the requirements and provisions of SNiP 3.04.01-87 “Insulating and finishing coatings”, SNiP 3.01.01-85 “Organization of construction production” and VSN 50-96 “Instructions for wall cladding with ceramic and polymer tiles using adhesives and adhesives” mastics."
1.3. This regulation does not apply to: covering surfaces in rooms with aggressive environments; for facing of external surfaces in factory conditions; for the installation of mortar-free cladding with slabs of natural stone with their fastening on metal fasteners; for cladding simultaneously with the laying of building walls and special cladding of vertical surfaces using heat-insulating materials; for the installation of cladding at sub-zero temperatures using anti-frost additives and electric heating.
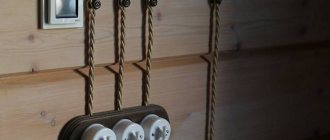
1.4. Before the start of cladding, work must be completed on installing a roof and a waterproof coating over the part of the building being coated, installing frames in door and window openings, as well as on all types of hidden wiring. Cladding of internal walls should be carried out before installing clean floors.
1.5. Cladding of internal walls with mortar mixtures and mastics, glazed ceramic and enameled glass tiles is allowed after the load on the walls reaches at least 65% of the design load.
1.6. Wall cladding in premises should be carried out after completion of general construction and special work in the building (or on a floor, section), such as laying, crimping and testing networks of hidden pipelines and electrical wiring, during the production of which the wall cladding may be damaged. The air temperature should be: not lower than 10 °C when facing walls with ceramic tiles using mortar mixtures; not lower than 15 °C when covering walls with tiles based on polymers and gluing them on mastics and adhesives based on synthetic and natural rubber.
1.7. Indoor surfaces to be covered must not have deviations from the vertical of more than 10 mm.
1.8. Before tiling, the surfaces of gas channels and chimneys, channels for passing heating and refrigeration pipes and other surfaces in places of sharp temperature fluctuations should be reinforced with a metal mesh extending 15 cm beyond the boundaries of these surfaces.
1.9. Solutions and mastics used for cladding work should not form efflorescence or stains on the cladding surface.
1.10. Indoor wall surfaces that have deviations from the vertical of no more than 10 mm must be cleaned of mortar leaks, dirt and dust, grease and bitumen stains before facing with mortar mixtures. Irregularities (bulges) over 10 mm must be cut down. Surfaces that have deviations from the vertical of more than 15 mm must first be leveled with a cement mortar mixture over a securely reinforced metal mesh.
GENERAL PROVISIONS
1.1. This Instruction applies to work on the installation and acceptance of wall cladding with ceramic and polymer tiles using adhesive mastics and adhesives in heated rooms in residential and public buildings.
1.2. Cladding work must be carried out at a positive ambient temperature and the surfaces to be finished are not lower than 10 ° C.
1.3. This temperature in the room must be maintained around the clock, no less than 2 days before the start and 12 days after the completion of work.
1.4. Surface cladding with ceramic or polymer tiles must be carried out in accordance with the PPR in accordance with the project (purpose of the premises and their operating conditions).
1.5. Before cladding in the premises, it is necessary to install hidden electrical and sanitary wiring provided for by the project.