Is it possible to plaster sheet materials?
Chipboards are used for rough finishing; the material is suitable for forming a prefabricated screed, leveling walls, ceilings, and installing partitions. Determine whether it is possible to putty chipboard, depending on the type of subsequent work.
Before decorative finishing of interior spaces, chipboard slabs must be primed, puttied, and then plastered. Putty is necessary for sealing joints, cracks, and correcting chips. After plastering, you can paste wallpaper on different types of surfaces.
Putty is necessary to solve the following problems:
- leveling the base;
- increasing the strength of walls;
- elimination of cracks, height differences;
- protection of chipboards from mold, mildew, and rotting;
- improvement of surface adhesion;
- increasing the vapor permeability of the base.
If the chipboard is not treated with putty and other mixtures, the pasted wallpaper may come off, and unevenness will appear when painted.
Causes
The eternal desire to save money can push one to cover chipboard with decorative materials without prior puttying. At first glance, it seems that you can do without these additional labor and financial costs.
But let's take a closer look at some of the characteristic features of particle board:
- Lack of smoothness. Chipboard is made from wood chips rather than solid material. Because of this, its entire surface is dotted with small irregularities, which are clearly visible after applying certain types of finishes;
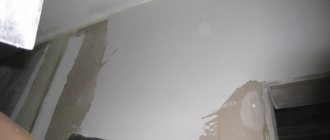
The layer of paint on the compressed sawdust lies unevenly
- Strong moisture absorption . Sawdust, which, as we have already noted, chipboard consists of, absorbs moisture abundantly. Paint or glue will also become absorbed during the finishing process, which can lead to swelling and deformation of the chipboard, as well as overuse of the finishing material itself.
The applied paint is intensively absorbed by the particle board, which threatens its structure.
As you can see, trying to save money on puttying chipboard will, at best, lead to a low-quality result, and at worst, to its destruction.
Advantages and disadvantages of putties for chipboards
Putty for chipboard has the following advantages:
- high elasticity;
- good vapor permeability;
- increased strength;
- moisture resistance (except for gypsum).
The disadvantages of putty are due to the characteristics of different types of compositions:
- acrylic - used only to cover the base for wallpaper;
- oil - takes a long time to dry;
- latex - belongs to the expensive category;
- epoxy - difficult to prepare and apply.
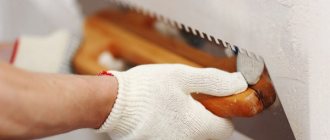
Putty technology
Required materials and tools:
- sanding paper or vibration sander;
- primer composition (preferably fungicidal);
- flat synthetic brush with elastic, hard bristles (width 15-20 cm);
- spatula (metal, rubber);
- reinforcing material (serpyanka, masking bandage);
- prepared composition for putty.
Important! During operation, it is worth turning off the heating to avoid the composition drying out too quickly.
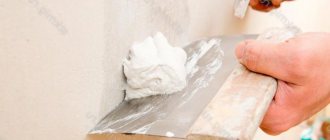
Instructions on how to putty chipboard simply include several steps:
- Irregularities and joints are sanded for leveling.
- Fine dust is removed with a damp cloth.
- Surfaces are degreased (if necessary).
- Holes from self-tapping screws, large dents, and chips are filled with putty. It is convenient to use a small rubber spatula.
- Cover with a primer (roller or brush) in 2 layers, with mandatory drying between them.
- The seams between the canvases, at joints and abutments to other surfaces, are tightly filled with the composition.
- The serpyanka is glued on top and carefully smoothed with a spatula.
- Carefully apply masking tape over the seams and joints and smooth them with a metal spatula.
- After the initial hardening of the composition, the excess is cleaned off.
- To putty large surfaces, use a hard spatula, the length of which is 35 cm, width 10 cm. It is convenient to apply the mixture with a spatula (spatula) measuring 10x10 cm.
- After final drying, clean the seams and surfaces.
- Conduct visual inspection and repeat operations if necessary.
For the installation of finished floors and ceilings, laminated chipboard is often used - a laminated sheet lined with a moisture-resistant film. Professional builders explain how to putty laminated chipboard correctly. The canvas does not require additional painting or plastering. Chips and scratches are filled with a mixture of heated PVA glue and fine sifted sawdust.
When working, you must observe safety precautions:
- Cover your face with a respirator to avoid dust and small particles.
- Use thick gloves to protect your hands.
- Protect your eyes with a mask or goggles.
To save time and effort during repair work, it is worth checking whether it is possible to glue wallpaper onto chipboard without putty. To do this, wallpaper (vinyl or paper) must have a cellulose (paper) base. Related materials (sawdust and paper) will adhere well.
As a final finish, it is possible to paint chipboard surfaces with oil paints. In this case, you can use natural drying oil as a primer. Application will not be difficult.
- It is necessary to saturate the surfaces and edges with drying oil.
- For high-quality impregnation, the drying oil must be heated. For example, in a water bath before processing. Or with a hair dryer after impregnation.
In this case, the putty composition is selected based on oil or oil-adhesive components.
Technology for puttingtying plywood for painting or wallpaper
Which plaster to choose for finishing a bathroom under tiles
How to putty walls for wallpapering for beginners
What primer to use before wallpapering
Source
Types of plaster: how to do the job
Before puttying chipboard, a suitable material is selected in accordance with the type of work (interior, exterior), type of room (living room, children's room), design, method of subsequent decorative finishing, air humidity level, etc.
The list of popular putties includes the following:
- oil;
- latex;
- oil-glue;
- polyester;
- acrylic;
- epoxy.
Oil and oil-adhesive
In such solutions, drying oil is used as a binding component.
The following components are used for fillers:
- chalk;
- driers;
- CMC glue;
- plasticizers;
- water.
Depending on the features, products from different manufacturers may include:
- modifying components;
- coloring pigments;
- thickeners;
- antiseptic substances.
Oil-based putties are produced in the form of paste-like compositions in plastic containers or bags. The putty has a homogeneous composition and low consumption. When applying a solution 1 mm thick, the consumption per 1 m² will be 0.8-1.5 kg. The coating is easy to apply, has increased plasticity, and dries quickly (in 3-4 hours). The thickness of the material applied should not exceed 2 mm.
The shelf life of the mixture is 6-12 months depending on storage conditions. The material is durable and safe to use.
However, the composition is not suitable for facade work due to low moisture resistance and low resistance to mechanical damage.
Latex
The material contains plasticizers, modifying components, water and fillers. Latex is used as a binding base. Many mixtures of this type include antiseptic components to prevent the appearance of mold and mildew on the treated surface.
Using latex putty, you can create a flat and smooth surface due to the presence of polymer components. The mixture can be used to treat the base for painting. The material can be applied in a thin, uniform and durable layer.
Advantages of latex compounds:
- minimal degree of shrinkage after drying;
- no cracks after drying;
- high degree of adhesion;
- easy application, layer thickness does not exceed 1 mm;
- the material is presented in a wide range of shades;
- Manufacturers produce latex compounds in packages of different volumes;
- the coating forms a film that protects surfaces from dirt, dust, and prevents cracking and rapid wear.
Polyester
This putty for chipboard contains resins, fillers, and polyester masses.
The list of components also includes:
- fiberglass;
- glass microgranules;
- aluminum powder powder;
- hardener;
- plasticizers, etc.
The special formula gives the material high performance characteristics.
Polyester mixtures are available in 2 types:
- Starting
— optimal for filling cracks, correcting unevenness, creating a textured base. The mixture has a porous structure.
- Finishing
— allow you to create an even coating with a glossy shine and can be used for finishing the base for painting.
Polyester putty mixtures containing aluminum powder are produced. The additive increases the strength of the composition, increases resistance to temperature increases, and gives the coating wear resistance.
To fill irregularities, polyester mixtures with medium-grain filler are used. To prevent shrinkage of the coating, the putty layer should be no more than 3 mm.
Acrylic copolymers
These mixtures are also on the list of easy-to-use mixtures for preparing wood-fiber boards for finishing. The materials are universal and are used in the processing of facades and interior spaces.
The putty mixture has the following advantages:
- It has a high level of adhesion to decorative coatings (cladding boards, wallpaper, dyes).
- Helps correct unevenness and height differences.
- Increases the moisture resistance of wood boards, shelf life, and ensures the maintenance of the aesthetics of subsequent finishing.
- Increases resistance to temperature changes. Acrylic putty mixtures protect the coating from direct sunlight and frost, increasing the life of the decorative finish.
- Strengthens the mechanical strength of the chipboard base.
- Increases the thermal insulation of treated surfaces.
Epoxy resin
The material is a two-component mixture, which is made by mixing resin with a hardener. Fiberglass, metal dust and shavings are used as filler. The material is suitable for finishing the base for painting.
Epoxy resin is transparent and allows you to highlight the structure of wood fiber boards. The resin hides small irregularities and cracks and forms a smooth surface with a glossy sheen. The two-component composition is diluted in accordance with the proportions indicated on the packaging.
Technical information ARDEX Fix
Mixing proportions:
OK. 0.33 l water : 1 kg dry mixture or
OK. 1.65 l of water : 5 kg of dry mixture respectively
Bulk weight: approx. 0.86 kg/l
Wet weight: approx. 1.5 kg/l
Material consumption: 1.15 kg per m² with a layer thickness of 1 mm
Processing time (20°C): approx. 5 minutes
Ready for foot traffic (20°C): after 30 minutes
Suitable for underfloor heating: yes
Suitable for chairs on wheels: yes
Brinell strength:
after 1 day 20 N/mm2
After 7 days 37 N/mm2
After 28 days 40 N/mm2
Storage: In a dry place, in closed original packaging, approx. 12 months.
GISCODE: ZP 1 = material containing cement
How to prepare chipboard surfaces
Before putting putty on chipboard, you need to choose the material, finishing method, and layer thickness. The technologies for processing bases for painting and gluing wallpaper, for leveling ceiling walls and preparing furniture for tinting differ.
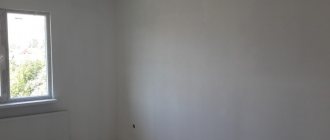
For painting
When preparing the base for painting, wood-fiber boards are carefully treated with sandpaper or an abrasive mesh. Sanding is done after collecting the frame and sheathing. The surface must be flat, without cracks or height differences, because... It is impossible to correct base defects with paint. To firmly fix the putty, you must first prime the base in several layers.
In the preparatory work, it is important to take into account the following nuances:
- The seams between the plates must be carefully puttied. Deep penetration compounds are used to treat seams.
- Along the edges of chipboard sheets, the joints are hidden with finishing materials.
- After eliminating irregularities, fiberglass tape or painting mesh is applied to the joints and seams.
- Putty on the walls before painting is applied in 2-3 layers with a thickness of no more than 3 mm.
- Surface treatment is carried out only after thorough drying, sanding, and cleaning from construction dust.
Under the wallpaper
Before gluing the canvases, it is necessary to cover the base with 2 layers of putty mixture. The composition is distributed evenly, the internal and external corners are carefully processed with a special spatula. Movements are carried out from the corner parts to the center of the wall.
After the material has hardened, they begin sanding the wall. Abrasive materials eliminate chips and irregularities. The first layer of mortar is applied with a steel spatula.
Processing is carried out in small areas. Putty can be supplemented or replaced with wallpaper glue.
Is it possible to glue wallpaper onto wood boards?
There are two opposing opinions on this issue. Some of the craftsmen talk about the complete impossibility of carrying out such internal work, while the other says the opposite.
The fact is that non-woven, vinyl and paper products are usually glued without serious surface preparation. Often this is a simple matter of removing old coating. But this happens in the case of walls finished with plaster, which ensures the necessary adhesion of materials. If the work is carried out on a base of wood boards (chip and fiber), then problems arise. First of all, this is the subsequent peeling of strips in corners and at joints. Such defects arise due to poor surface preparation; it requires much more time and effort.
Choosing a primer for chipboard
The solution is selected to solve the following problems:
- surface leveling;
- increased wear resistance;
- hanging adhesion;
- protection against rot and mold.
In accordance with the location and processing tasks, several priming methods are provided:
- Facade work - for finishing wooden facades, a mixture with moisture-resistant characteristics is selected, resistant to changes in temperature conditions and sunlight. These compositions contain antiseptic components that prevent the appearance of mold and mildew.
- In interior rooms with dry air, you can use universal compounds or mixtures for treating wood boards.
- In rooms with high levels of humidity (bathrooms, lavatories), compositions with antifungal fillers are used. Deep penetration solutions are optimal to enhance surface protection.
When preparing the base for puttying, the following types of primer are used:
- Alkyd
— the composition is universal and suitable for processing wood-fiber boards in different rooms. The primer forms a matte film that protects the surface from moisture. The material can be used for facade work. The primer increases the wear resistance of decorative finishes, is environmentally friendly, but has a long drying time - 18 hours.
- Acrylic
— produced with antiseptic components. the material is non-toxic, easy to apply to the base, and dries quickly (in 2-3 hours).
What you need to restore furniture
The following materials may be useful for the restoration process:
- Wax putty, or soft furniture wax. Used to hide scratches, chips and cracks on the surfaces of interior doors, cabinet furniture, parquet and laminate. Makes the treated surface moisture resistant.
- Hot melt putty, or hard furniture wax. Before use, it must be melted, for which you can use a soldering iron, lighter or gas burner. It is used similarly to soft wax, but is used primarily for the restoration of surfaces whose use is particularly intense (for example, shelves, countertops or floor coverings).
- Retouching products. This includes markers or felt-tip pens that are alcohol-based, fibrous, and valve-based. They are used to highlight the texture of the material in restoration areas, making the wax treatment less noticeable.
- Fixing varnishes and polishes in the form of aerosols and sprays. They are used to process the surface after the restoration is completed. The products allow you to hide minor scratches and abrasions, as well as add shine to the furniture.
- Melamine adhesive edge. Useful for replacing ends.
- PVA, epoxy, wooden plugs and dowels. With their help, you can fill the holes formed in the place of torn loops.
Various professional products can be used to restore chipboard furniture.
You can use regular markers, paints, iodine or shoe polish. The main thing is that they match the shade of the furniture.
For minor damage, folk remedies can be used for restoration. You will also need the following tools:
- plastic spatula;
- sandpaper;
- iron or hair dryer (preferably industrial);
- stationery knife;
- chisel;
- fine sanding sponge;
- non-woven napkins;
- rags (felt fabric).
For DIY restoration you will need certain tools.
Recommendations and whether it is possible to use gypsum putty
When finishing, it is recommended to take into account the following nuances:
- For chipboard, it is optimal to choose ready-made putties. When using dry formulations, it is important to observe the dosage of the mixture and water.
- When purchasing mixtures, the shelf life of the product is taken into account.
- The layer should not exceed 1-3 mm in thickness to prevent delamination of the decorative coating.
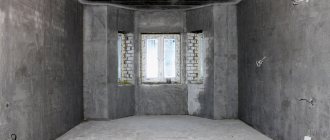
Before decorating, it is also necessary to prepare factory-made particle boards, because... the finish will not last long without sanding, priming and applying putty.
Methods for sealing joints and seams of OSB sheets
When installing OSB sheets (also known as OSB and OSB), it is necessary to leave expansion joints between the sheets themselves or along adjacent walls around the perimeter. It’s impossible to do without them, but it’s better to do the finishing touches by hiding them. What products are best to use for filling gaps and how to use them correctly?
Why do you leave gaps when installing OSB?
All wood materials react strongly to increases in humidity and temperature. And oriented strand board is no exception in this regard. During the heating process, the sheets expand greatly and without the provided compensation gaps, two adjacent panels are capable of deforming each other.
Therefore, compensating gaps of 3 mm and 15 mm along the perimeter of the coating are created between the sheathing elements. They continue to work throughout their service life and should be preserved without affecting the appearance of the designer finish.
The fulfillment of two mutually exclusive conditions is possible if the joints are covered with elastic materials that well hide the joints and preserve their purpose.
How to properly seal gaps and joints between OSB sheets
Practical research helped to determine several types of materials that are best suited for use on OSB. They have elasticity and good moisture-proof properties. The choice of one or another product depends on the external conditions (street, room) and the type of final finishing.
Most often used for these purposes:
- Acrylic putty;
- Parquet elastic varnish;
- Filling with silicone or acrylic sealant.