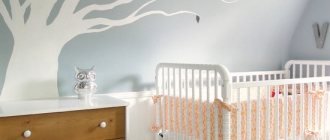
Those who believe that trees have a place in a garden or forest are simply devoid of imagination and creative thought, because a tree on the wall is no less appropriate. This design option is still quite rare, although something similar can be found in old kindergartens. But who said that beauty should be available only to children? Adults also have the right to please themselves a little, especially since you can create a decorative tree for the wall with your own hands. In addition to aesthetic and design purposes, such a solution can also perform camouflage functions if the wall is too crooked or was damaged at the hands of a small, but in the future great, designer. The family tree is generally an eternal hit in interior design. After all, such a decorative element can without any extra effort introduce something new into an old environment.
Volumetric tree on the wall
This unique 3D decoration can be made with your own hands on the wall (and even on part of the ceiling) without any problems. To create a real masterpiece, it is not necessary to have the knowledge of a sculptor or artist.
Important: This decor requires a lot of space.
You will need:
- Master OK;
- Bucket;
- Marker and scissors;
- Acrylic paints and brushes;
- Scotch;
- A bag of dry plaster;
- A large sheet of cellophane film.
Progress:
- Let's draw a contour mirror image on the cellophane film with a marker, and when we cut out the drawn middle, we should get a stencil;
- We stick it on the wall with tape;
- Pour water into a bucket and spread the plaster;
- Using a trowel, carefully fill the empty stencil space;
- Remove the film after the mixture has dried;
- We apply several more layers of gypsum, making the last one round;
- When the solution has dried thoroughly, paint the sculpture with acrylic-based paints.
You can choose a wide variety of palettes. A “natural” image would look great in the living room, or a fabulous tree, unusually painted, on the wall in a children’s room.
Where to find the necessary material
Before making a tree on the wall, it is important to collect the material for its design. To do this, for some it is enough to look through home albums with photographs, interview their relatives, others will have to delve into the archives, talk with neighbors, ask about what their grandmothers and great aunts were like, what professions they had.
Letters and old photographs will help you get the necessary information Source w-dog.ru
When you learn how the roots of different families are intertwined, it takes your breath away. Such a hobby easily develops into a hobby, and then the excavations go too far. In addition to city archives, you can get information from social networks and from sites that specialize in finding acquaintances. Today you can easily study the tree of life of the most famous Russian noble families and prove your belonging to them. The documents contain lists of peasants who lived in different provinces, representatives of merchants and other classes. Processing such documents allows you to create a very voluminous family tree on the wall, creating levels in seven or eight generations.
Decorative tree made from branches
To decorate the interior of your home, you can make large artificial trees with flowers.
Necessary materials:
- Hot glue gun;
- Twigs;
- Moss;
- Sea pebbles;
- Square flowerpot;
- Decorative flowers (can be paper);
- A piece of foam.
How to make a decorative tree yourself from ordinary branches:
- We fill the bottom of the flowerpot with sea pebbles and put polystyrene foam on them, and insert the prepared branch into it;
- Sprinkle it again with sea stones for good stability, insert moss on top;
- Now we decorate the branch. To do this, we glue decorative flowers randomly to a branch using a glue gun;
- After completing this procedure, such a decorative craft will rightfully serve as a decoration for your home or apartment.
On the Internet you can find many photos of trees made by yourself, choose the option that suits you and create your own masterpiece based on it.
Briefly about the main thing
Creating a heraldic tree on the wall is not just decoration, it is a decoration that has many functions. It acts as a kind of amulet, clearly demonstrating the antiquity of the family and the achievements of individual family members. By studying it with children, you can educate the younger generation, teach them not to forget their ancestors and be proud of them.
Before designing a family tree, you need to collect as much information as possible about different generations. It’s easier to do this by using special programs, social networks, surveys of relatives and mutual friends.
Visualization of searches is done in different ways. If you want to demonstrate the importance of the family, it is better to create a family tree on the wall and place photographs of representatives of different generations on its branches. The tree can be drawn by hand or use a ready-made stencil. The easiest way is to stick a vinyl sticker on the wall.
Ratings 0
Bonsai in a pot
We offer another way to easily make an artificial bonsai tree with your own hands. The operating algorithm is simple:
- We select the container. A ceramic flower pot with holes for draining water is ideal.
- Fill the pot with soil. The soil should not be collected from the yard. It’s better not to save money and buy a ready-made mixture at a flower shop. Why is this necessary if the tree is still artificial? We will be growing moss or lawn on top, so good soil is essential.
- For the trunk of a decorative tree, we select a branch that is thick enough and intricately curved to resemble a spreading plant.
- We attach decor to the branches of the wooden frame. It can be made from matte paper, fabric, satin ribbons or any material. The more original the decor, the more spectacular the final result.
- We plant the lawn mixture in the ground and water it generously daily. Very little time will pass, and under the original tree a bright and lush summer lawn will spread out.
By combining natural and synthetic materials, you can achieve unprecedented results in the art of bonsai, turning your favorite hobby into a successful business.
Living room decoration
Wood in the living room interior always looks very impressive and is appropriate in almost any design. If this is a Scandinavian style, then the use of light woods emphasizes the connection with nature; wooden furniture in pastel shades is suitable for Provence. Small and simple wooden details are appropriate in minimalism and hi-tech.
In the photo, an unusual shelf imitating a branch creates a modern living room style in neutral natural shades.
The photo shows the interior of the living room in a classic style; wooden panels with carvings and parquet with a small carpet are suitable for decoration.
Stumps and large saw cuts in the interior of the living room can play the role of a coffee table and become the main focus of attention of guests. You can make an accent wall near the TV from saw cuts and pebbles; from processed sticks and branches you can make a cornice, lamp and other accessories.
The photo shows a wall made of saw cuts in the living room. Natural wood promotes relaxation; in addition, it smells pleasant and retains the aroma of essential oils for a long time.
Preparing tree branches for interior use
Before you start creating, you need to prepare the branches and prepare the required number of different wooden fragments. All other actions are aimed at long-term preservation of the composition. The following sequence of actions is suggested:
All selected branches must be free of contamination. Remove any remaining bark and damaged wood.
All wood that was harvested during walks in the park must be inspected for pest infestation. Forethought will not hurt, so treat it with special mixtures in advance.
The time-tested method of impregnation with vegetable oil to which herbs have been added has proven itself well.
After drying, the wood changes size and shape, and has such a feature as deformation. In order to avoid disruption of the composition, the wood material must be dried before production. This process occurs quickly under sunlight with good access to fresh air.
In order to avoid the appearance of fungus on the product, pre-treat the wood with antifungal compounds.
In order for the finished product to have a stunning look, it is better to coat it with varnish. But this process remains at the discretion of the author of the composition.
The tree branches used are taken into the interior composition as they are used in nature, pre-treated with disinfectants. Varnishing adds charm and style.
But the most expressive result is obtained when making a composition painted in one color.
It would be good if it was a contrasting tone to the interior. In this case, it will easily fit into any style. The most widely used colors are white and black, as well as silver and golden colors.
Wall design ideas for children of different sexes
Companion colors or any other compatible color scheme will allow you to divide the space into certain zones and at the same time maintain the integrity and organicity of the design, and decorate the nursery in the same style. Such decor always looks bright, unique and positive.
It is not advisable to use too dark or contrasting wall coverings and to use too many ornate wall decorations. It is better to give preference to light shades, which will visually soften and increase the size of a small space.
We create bonsai
The tradition of creating bonsai was born in Ancient China more than two thousand years ago. The name “bonsai” is written in two hieroglyphs, which mean “bowl” and “tree”. Later, already in Japan, the unusual method was actively developed and rose to the rank of fine art.
It was the Japanese who brought the method to perfection, creating a special system of canons and proposing rules for exposure. Miniature trees are an aesthetic pleasure for perfectionists.
Many people claim that looking at an elegant bonsai, they are overcome by an extraordinary feeling of calm, tranquility, and anxiety goes away, as if by magic. Decorate the world around you, try your hand at creating amazingly beautiful products.
Do you want to create a luxurious miniature garden at home that does not require special care? Then an interesting master class will help beginners in creating a bonsai tree with their own hands.
Step-by-step instruction:
- We select materials for work. Any gifts of generous nature will be needed: intricately curved twigs, driftwood, juniper, spruce or pine branches, moss, reindeer moss.
- We preserve the branches. For processing, we will prepare a special solution consisting of denatured alcohol, acetone, and glycerin. We take everything in the exact proportion 1:1:2.
Important: The solution for preserving natural materials should be stored in a tightly closed container, as it has a pronounced chemical odor.
- Initially, we wash the branches under cold water, thoroughly cleaning them from dust and dirt, then place them in the solution for at least a week.
- Next, dry the decorative material and paint it if necessary. Let's reveal a little secret: before painting, you need to dip the branches in hot paraffin, the treatment will help to apply the paint evenly to the surface.
- Let's start making a decorative bonsai tree. Cut the branches to the required length and carefully glue each one to the base. To prevent the structure from falling apart, we will wrap the individual elements with wire; after gluing, it can be removed.
- We decorate individual areas with moss, reindeer moss, white sand or decorative pebbles. In our work, we will definitely designate the center of gravity of the structure in order to give the craft greater stability.
After completing the painstaking work, a unique live composition will open to your eyes. An eco-style bonsai will delight the eye for a long time; all that remains is to occasionally brush off the dust from the elegant creation.
Bathroom decoration
Wood in the bathroom interior creates the feeling of a sauna or Russian bath. Wooden walls and stone floors, or vice versa, create a unique design. To finish the bathroom, you need to select moisture-resistant species (Brazil walnut or bamboo, as in the photo below).
The photo shows a bathroom with massive doors and hanging chains. A tree that has been cut down long ago is suitable as a material for such a table.
For a bathroom in an apartment, you can use wood-look tiles, wooden accessories and inserts.
Satin ribbons
This tree will be a wonderful decoration for a wedding celebration. It's very easy to make. It is enough to show a little patience and imagination. The only difficulty that can arise is making flowers from satin ribbons.
So, to create a topiary you will need:
- About seven meters of satin ribbons.
- Threads, beads, yarn, lace for decoration.
- Glue.
- Wooden stick or plastic pipe.
- Flower pot.
- Crumpled newspaper or papier-mâché.
- Earth, decorative stones, shells.
Progress:
- According to the photo above, flowers are made from ribbons. On average, one topiary will require 15-19 roses.
- Now the crown is made. You can take ready-made papier-mâché, or you can crumple newspaper into a ball shape. The workpiece should be wrapped with yarn for greater density.
- The trunk is made from a branch or plastic pipe. Then it is wrapped with ribbon or decorated with lace.
- Next, using glue, the trunk is glued to the crown of the tree. The bottom of the trunk is placed in a pot and covered with earth and pebbles to make it heavier.
- Using threads, satin roses are sewn to the crown. In order for the flowers to hold more firmly, the workpiece is additionally fixed with glue.
- The pot is decorated with bows, lace and yarn. Flowers should be carefully straightened and, if necessary, decorated with decorative ribbons and rhinestones.
Tree in the nursery
This material in the interior of a nursery is most appropriate from an environmental point of view. It is advisable to use wood both for decoration and decoration. If the walls do not necessarily have to be wooden, then the floor and furniture simply need to be selected from wood materials.
A light laminate floor will be decorated with a homemade drawn carpet; to develop the child’s mobility, you can hang a hammock and a rope ladder. For an unusual look, you can use branches in the interior to create small compositions, an organizer for jewelry, photos and notes; they can also be used to decorate wall shelves.
In the photo, the light wood in the children's interior goes well with light Roman blinds; its color can be easily changed with paint, or refreshed with varnish.
Light colors, delicate textiles, bright toys and dark floors are suitable for decorating a nursery for both girls and boys.
Tree with LED garland
The manufacturing process begins with a frame, for which aluminum wire is best suited. It easily bends at any angle, giving the future structure any configuration. A more realistic color is achieved by wrapping the white insulation of the wire with black electrical tape.
- Then, the finished frame is evenly wrapped with a garland, secured to the wire with black electrical tape. If desired, you can create additional decorations for LEDs in the form of decorative nozzles made of transparent plastic. Upon completion of the work, the manufactured tree just needs to be connected to the electrical network and checked for its functionality.
Thus, the question of how to make an LED tree with your own hands can be considered resolved.
- The main advantage of this method is considered to be ease of manufacture. The main disadvantage is the impossibility of producing large-sized wood. This is due to the standard length of the garland, which is not enough to fit on the entire tree. Therefore, this method is most suitable for the manufacture of miniature products, which are also very popular.
Necessary materials - beauty at minimal cost
The price of the issue was important to me. After all, renovations to the house were in full swing, and this is a very expensive undertaking.
So, to create a bas-relief on a wall 2.7 m high and 3.4 wide, I needed surprisingly little material, because the wall was already leveled with gypsum plaster.
I will give a list of materials and tools in the form of a table:
I purchased everything I needed except the palette knife from Leroy Merlin. When I had already purchased everything, I came up with the idea that it would be more convenient to paint from a can.
But don’t let the can of paint go to waste now. Moreover, they already tinted it in the color I liked in the store.
Main materials and tools used
LED tree
Making a tree from individual LEDs is considered a more labor-intensive process. However, this method does not have the disadvantages inherent in ready-made garlands, which makes it possible to produce structures of any shape and size.
The main material is 5 mm LEDs. To equalize the voltage you will need resistors.
Direct manufacturing begins with soldering resistors to the LEDs. The LED contacts have different lengths, so the resistor legs are pre-shortened on one side. You need to solder the contacts of both elements very quickly so as not to damage the LED.
- Heat shrink tubing is then cut into the wires to cover the solder joints and resistors. It is necessary to leave space for soldering the power wire. The tube is inserted onto the resistor leg and heated a little with a lighter to give the insulation the required shape. This operation is performed with each LED.
- After this, you can begin making the tree itself. Most often, the trunk is made of thin plumbing pipes, and the branches are made of wire, approximately 50 cm long. The main part of the branch takes 45 cm, and 5 cm is left for attaching it to the trunk.
- Small branches are cut into sizes up to 10 cm. The number of LEDs on one branch must be calculated in advance.
- At the next stage, small branches are tied with electrical tape to large branches. It is recommended to make the number of LEDs on each small branch equal to the number of LEDs on the large branch. Each LED is secured using electrical tape.
- The wires need to be stretched along the entire length of the main branches, after which they are cut taking into account the bends of the small branches.
- The ends are wound to the trunk, after which all the pros and cons on each branch are connected. Their number should match the total number of branches. The wire connections are insulated. All that remains is to hang the decorative ornaments evenly and connect the finished tree to the electrical network.
What walls to choose for a nursery?
The most common and optimal wall finishing options.
Wooden
This coating is environmentally friendly, natural, retains heat well, but at the same time has a fairly high price. Wooden lining or various panels create a comfortable microclimate and can be used around the entire perimeter of the room or in fragments. This type of finishing is rarely used for children's rooms in city apartments.
The photo shows wooden walls in a children's room for a boy.
Slate
The graphite wall is great for chalk drawing. This decor gives the child freedom for creativity and allows him to apply various designs, erase them and draw new ones, thereby creating a unique interior in the room each time.
Painted
An inexpensive design option with a huge variety of shades and textures. Water-based, moisture-resistant or latex paints without toxic components will be especially appropriate for painting a children's room.
Wallpaper
The most popular and affordable type of wall decor. Wallpaper with a variety of prints will be the optimal solution for a child's room of different ages, and with the help of photo wallpaper you can create a large-scale accent on one of the walls.
Soft panels
They have good sound insulation and make the interior very beautiful, cozy and comfortable.
Brick
Brick finishing is preferable in a room for older children. Brick in light colors will create an unusual accent surface, which, in combination with spectacular decor, will allow you to personalize the room.
Laminate
An original and very successful interior solution. Laminate perfectly decorates and transforms space, stands out noticeably against the background of the overall design and attracts attention.
Cork
Thanks to its unusual texture and high decorative qualities, this coating creates a warm, most comfortable atmosphere and brings a touch of naturalness to the environment.
Making your own wood for the street
When making wood with LEDs for outdoor use, you must take into account the aggressive influence of the environment. Therefore, before you start making an LED tree for the street with your own hands, you need to determine the entire procedure in advance.
The general scheme of work will be approximately the same as for conventional structures intended for indoors. In the outdoor version, it is recommended to pay attention to a more thorough coating of the trunk and branches with high-quality materials.
It is also necessary to take care of good insulation of the LEDs after soldering them with resistors.
The heat shrink tubing should completely cover each pair. If necessary, all unreliable areas can be additionally insulated with black electrical tape. The same goes for wire connections in the plus and minus areas. Decorative items should be secured more efficiently so that they are not torn off by strong gusts of wind.
How to decorate parts of the wall in the nursery?
Wall accents can balance and complete a room.
- Above the bed. This design technique allows you to add versatility and interest to the interior. The decorated space above the bed, in tune with the general style direction, will add individuality to the decor.
- Accent wall. It can be decorated using photo wallpaper, bright colors, wallpaper with variegated and large patterns, or other materials with a voluminous texture. This accent will become the main visual focus and will concentrate the main attention on itself.
The photo shows an accent wall with plant patterns in the bedroom of a teenage girl.
Thanks to the play of contrasts, you can create the main eye-catching visual point in the room.
How and from what to create?
- Drawing is the most original method; it does not require serious expenses. In this case, it is not necessary to contact an artist, just be patient, buy paints and go ahead. Don’t be upset if the outline of the drawing is not the smoothest, nature is diverse and there are no perfectly straight trees. For greater confidence, you can use a stencil.
- Applique is also an excellent option for applying a design. You can use various papers, preferably thicker ones (wallpaper, cardboard). Sometimes there are a lot of boxes left over from things, or several rolls of wallpaper after renovation, all of which can be used.
The idea can also be implemented using more rigid materials, such as gypsum, polystyrene foam, various wooden coverings (fibreboard, chipboard). This will require ingenuity and the ability to work with material.
You can use natural tree branches. For this you will need good technical glue, and the tree branches themselves. Before fastening, it is necessary to treat the tree branches so that they can last longer. This technique enhances the natural effect in the room. It can be combined with patterns and appliques.
- Sgraffito is a more complex decoration option; it can be used when the apartment is being renovated. It involves applying several layers of paint or other coating to the surface, followed by cutting out the design. The result is very attractive, it gives volume to the room and a unique visual effect. It can be applied to rooms that do not use wallpaper.
How to imitate a decorative tree? Various fabrics can be used. Any covering will be useful - burlap, linen fabric. This technique is popular and will add unusualness to the picture.
Visualization options
The easiest way is to print out the obtained data and arrange it in the form of a book, in which each page is dedicated to one family member. The book can be decorated, bound, and illustrated. But this method of processing information will not allow us to assess the scale of the work carried out.
The story of one family in the book Source tildacdn.com
See also: Catalog of projects of stone houses with second light and a terrace.
A family tree on the wall will look much larger - the decor is accessible to everyone, it will invariably attract attention and force any guest to come closer and pay more attention to it. In many people you can see a pedestal of family photographs in the red corner. But only the owner of the home can unite them and tell who is related to whom.
Photos hung on the wall will not be able to show the connections between individual family members Source vannadecor.ru
A tree with photographs on the wall will allow the guest to figure out who is related to whom. All data is publicly available. Everything is in full view: the ancestors of the family are below, its youngest representatives are at the top. There should also be a place for photos of new family members, those who are due to be born in the near future. This tree will demonstrate the connection between generations.
Who is older at the top, who is younger at the bottom Source i.pinimg.com
To create it, you can use different techniques. If you have artistic talent, it is easiest to draw it. The finished picture will radically change the interior of the room, create the right mood and become a real highlight of the overall design of the living space.
Painting always looks impressive in the interior Source i.pinimg.com
The functionality of the room will tell you which style is best to paint. A fairytale tree on a camp in a nursery would be more appropriate. In a bedroom or living room decorated in a classical direction, a large, spreading giant may appear, with clear volumes and structure, made in discreet, noble colors.
Painting for a classic living room Source kakprosto.ru
For the Baroque style, painting with ornate patterns, with images reminiscent of frescoes, is more suitable. Here you can draw branches, increased several times in size, covered with leaves and flowers. Art Nouveau and modernity are characterized by laconic design, monochrome, clear geometric lines.
Baroque tree of life Source t24.com.tr
See also: Catalog of companies that specialize in finishing materials, lighting and storage systems.
The painting is applied to a well-prepared base. Before this, the wall is carefully repaired, leveled, primed and covered with a basic tone. Acrylic paints are used to create the drawing. They color the sketch created previously with pencils. After coloring, the drawing is protected with acrylic varnish. All that remains is to decorate the tree with photographs.
The design style of the frames should match the style of the interior Source i.pinimg.com
They can simply be pinned to the wall, or framed in a style that suits the overall design of the room. Some artists paint small portraits on the walls. It turns out very beautiful. But this type of creation of a family tree is bad because to draw new members you will have to invite the artist again. You can hang the photo yourself.
Portraits drawn by the artist Source squarespace-cdn.com
In the absence of artistic talent, experts advise using stencils. They are easy to work with. Stencil – template – sheet with a cut out design. It is applied to the wall, pressed against it, and then paint is applied with brushes or a roller. It helps to paint over the cut out part and create the desired outline. Then it is additionally outlined with thin lines, small details are drawn with brushes. The result is a beautiful tree, but very simple in execution.
Family tree template Source 3mu.ru
Instead of paint, craftsmen sometimes use decorative plaster. It helps to form volume and make decor that is more complex in execution. The mixture is first applied to the wall with a metal spatula, then a pattern is created on it with a relief rubber roller. There are techniques that allow you to skillfully imitate the bark of a real tree. The result is very beautiful.
Decorative plaster allows you to create three-dimensional compositions Source i.pinimg.com
What can topiary be made from?
One of the advantages of this type of decorative products is that they can be created from a variety of materials.
So, you can make a tree with your own hands from:
- paper and fabric tapes;
- fabrics and lace;
- threads and ropes, sisal;
- beads;
- cones, chestnuts and acorns;
- nuts;
- paper;
- artificial flowers and leaves;
- napkins;
- newspapers;
- pasta;
- shells;
- caramel sweets;
- balloons (not inflated);
- packaging mesh for a bouquet of flowers.
And if you want to make a money tree with your own hands, then the crown will need to be decorated with artificial (or even real) bills or coins.
As an example, we have chosen for you a topiary decorated with cute paper flowers and hearts.
Combination with stone and brick
Combination with different materials in the interior: glass, stone, plastic, gives a different end result, but what remains the same is that wood is a universal and popular finish.
- Stone and wood in the interior as two natural materials complement each other. Warm and soft wood with strong stone are indispensable for creating eco, Provence and country style. Pebble mosaics and plank floors, decorative stone fragments, parquet boards and beams combine perfectly and are suitable for any interior.
In the photo, a wooden wall and a wild stone fireplace are reminiscent of the origins and fill the room with coziness.
- Brick and wood in the interior or imitation brickwork is suitable for the corridor, living room, stairs. Brick can be bleached, aged, plain or of different sizes; such variations create a different image of the room. The use of wood in an interior with brick is necessary to create an unusual design for a country house: wooden frames and doors, stairs, partitions and redwood floors in combination with antique chests of drawers.
Topiary with candies
The highlight of this craft is that you will get not just a decorative product, but also a kind of vase for sweets. This option is perfect as a delicious gift for children, girlfriends, mothers, grandmothers, and loved ones.
Preparation
To make wood, take:
- Ball;
- Scissors;
- Double sided tape;
- Beautiful caramels (without wrappers);
- Stick for the trunk;
- Pot or box for base;
- Pot filler;
- Ribbons, paper and fabric flowers and any other decorative details.
The process of making topiary
- Make a hole in the ball for the barrel.
- Cover the ball with double-sided tape.
- Glue caramels on it.
- Fill the free space with decorative elements.
- You can also decorate the trunk at your discretion.
- Place the stick-trunk in a pot or box, cover everything on top with cotton wool, cardboard or something else and decorate with caramels, only in wrappers. Ready!
Wood color: red, white, gray
Wood can be not only brown and beige, but also other colors. Boards, parquet and laminate are presented in different shades, which can be used to create a certain style in a residential or office space.
- Mahogany in the interior is suitable for creating a luxurious Empire style in the living room. Furniture can have patterns and curves, and textured walls and carpeted floors will create an atmosphere of comfort and wealth. Combines with brick color (sets off wood, but does not stand out against its background), as well as with pistachio in small quantities.
- White wood in the interior creates space and a feeling of cleanliness. Most often found in modern style and minimalism. A white floor emphasizes the brightness of the walls, a wooden ceiling makes the room longer, white furniture is suitable for the bedroom, dining room, less often living room and kitchen.
- Gray wood in the interior is calming and evokes a feeling of coolness. Gray laminate is well suited for the floor in the bedroom and living room. Depending on the pattern, such a floor resembles aged wood and is appropriate for retro and country. Suitable for rooms with two contrasting colors. Wenge furniture and other cool shades go well with gray finishes in a modern interior.
Photo ideas
DIGITAL CAMERABlock house for wall cladding
Block house for wall cladding
Some apartment owners strive to make their home original and in some ways even extravagant. So if you are tired of boring solutions, then pay attention to the block house, that is, a board whose cross-section imitates the rounded log known to everyone from village landscapes. With the help of this material you can achieve a real “rural” interior in your home.
To make the design look even more impressive, it is recommended to resort to a method such as artificial “aging” of the wood. For this, the method most often used is “brushing”, that is, processing the material with a wire brush. During the processing of wood, fibers are removed from it, which creates an interesting relief. After this, the material is painted and, without allowing the paint to dry, it is removed.
Drawings for cutting wood
The procedure for making plywood figures and decorations should begin with creating a sketch - a drawing, which can then be used for cutting. There are several options here. So, you can draw the initial template yourself. An alternative option that will allow you to make a tree from plywood is drawings that are freely available on the Internet.
If you are making plywood crafts for the first time, then it is better to choose the simplest sketch, which will make it easier to subsequently cut existing sheets or leftovers.
The cutting procedure is quite simple and includes the following steps:
- independent preparation or search for a ready-made drawing of a tree;
- processing the workpiece with sandpaper (if it is not a polished material);
- transferring a drawing from a drawing to plywood;
- actual sawing. For these purposes, it is better to use a manual or electric jigsaw, which is often available in everyday life. It is better not to use knives or hacksaws, as they will not allow you to get neat edges of the product;
- the resulting wood is sanded along the edges;
- Additionally, the craft can be painted, varnished or coated with other protective materials (water-repellent compounds), which will increase the wear resistance and durability of the product.
How to do it yourself?
It is best for beginning artists to choose paintings and subjects that are not too complex. And in this case, wood would be a good choice. This bas-relief can be placed on the wall. It can be a large spreading tree or its individual branches.
The first step is to process the wall. The surface must be absolutely flat and clean. When the wall is completely dry, it should be primed for better adhesion and then move on to the work itself.
For beginners, the best option would be not to use a large canvas at once, but to select a small part of the wall or ceiling and place the tree there. It’s even better for your first experiment to build a frame and place a plaster painting on it that can be hung. This will allow the beginner to practice, and if he fails, the wall will not be damaged.
The next step is to mix the mixture. All instructions are on the package. It should be thick, in no case spread, and resemble a paste in consistency.
Then you can move on to creating the tree itself. First, the drawing must be reproduced on the wall using a simple pencil. If you are not confident in your artistic abilities, there is always the option of using a ready-made template. To do this, just attach it to the wall with masking tape, fill the slots with paste, and after drying, remove the template.
While the plaster is still wet, you can correct some inaccuracies. After complete drying, cover with finishing solution and then paint.
Artificial home apple tree
It is advisable to place such decorative artificial trees only in enclosed spaces, because their flowers are made of yarn.
You will need:
- Glue;
- Wire cutters;
- Cardboard;
- Hook;
- Scotch;
- Wire;
- Pencil;
- Cement or plaster;
- Scissors;
- Brown and green fabric;
- Pot;
- Red and brown threads.
Stages of work:
- Using wire cutters, we cut off six wire blanks of 30 cm, five of 25 cm, and twenty-two of 4 cm;
- Attach 3 small ones to a large wire branch with tape. We make several preparations. The branches can be wrapped in fabric, such as velvet or fleece;
- Cut strips 2 cm wide from brown fabric. We wrap the branch blanks (several pieces) with them, leaving 3 cm free at the bottom. We fix the ends of the material with glue;
- We collect the blanks into a single “apple tree”. We cut a strip of 3 cm from the fabric, wrap it around the fabric and branches connected to each other. We also secure the fabric ends with glue;
- To make a decorative apple tree further, we place it in a container with a narrow neck. If such containers cannot be found, then to fix the “plant”, pour cement or gypsum mortar into the container. We straighten the branches and begin to decorate our craft;
- Now let’s cut leaves of different sizes from green material and scorch their edges over the flame, not bringing them too close to it so that they don’t spread;
- We glue the leaves onto the branches and begin to create fruits, which are made from pompoms. Cut out 2 circles from cardboard, 3 cm in diameter. Draw a smaller circle inside and cut it out, we get 2 cardboard rings;
- We connect them into a single piece and wrap a red thread around it using a hook. The yarn should completely “hide” the workpiece. We cut it from the outer edge, lay a brown thread and use it to tighten the resulting pompom;
- We cut out leaves from green material and glue them onto a brown thread;
- We hang the finished “fruits” on the branches. You can also decorate the pot as you wish.
The step-by-step master classes in the article “How to make a bonsai from beads” will also help you create beautiful artificial trees.
Master class on decorating a kindergarten group “Tree “Seasons”
Nadiya Sandzhieva
Master class on decorating a kindergarten group “Tree “Seasons”
Kindergarten is a second home for children. Of course, we educators really want all areas in the room where children are to be attractive and aesthetically designed , because their mental and physiological state depends on this. Having decorated all the zones in our group , there was a little free wall left and I wanted to decorate it with a seasonal tree .
Description: This master class will be of interest to educators and parents. The tree is multifunctional and you can change details on it according to the seasons (flowers, leaves, apples, snowflakes)
.Since it is autumn, I want to offer you an autumn option.
Purpose: Preschool children.
Goal: To develop children’s knowledge about the characteristics of the seasons , their main features, turnover, periodicity and cyclicity.
-Vilina PVC mat in rolls, I took size 130x80
- felt (orange, green, yellow, red,
- black wax pencil
