Sooner or later you have to change your interior doors. The procedure is not so complicated that it is necessary to hire a specialist. If you have at least some skills in handling a saw, a level and a plumb line, you can tighten a few self-tapping screws - you can do it yourself. When replacing, before installing the interior door, the old one must be dismantled. And here too there are peculiarities. About all the subtleties - in photos and videos with detailed instructions.
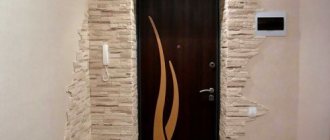
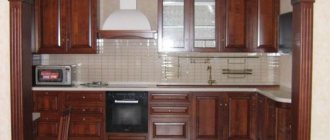
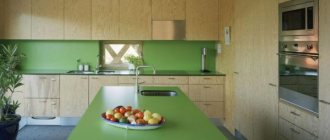
Interior doors are different not only in design, but they are also made from different materials
Interior doors are made from different materials. Moreover, the material of both the door leaf and frame is different. The door leaf is:
- From fiberboard. These are the cheapest doors. They are a wooden frame to which laminated fiberboard is attached. They have low sound insulation, are susceptible to high humidity, and are easily damaged.
- From MDF. They cost much more, but the quality characteristics are much higher. They have better sound insulation, are not afraid of moisture, are stronger and more durable.
- Wood. The most expensive doors. They are made from different types of wood - from pine to oak or more exotic species.
Door frames are also made from the same materials. The worst choice is that fiberboard boxes bend even under their own weight, and hanging the door leaf on them is a real pain. So try to take either MDF or wood. There is another material: laminated wood. It is good because it does not need to be processed or painted, but the service life depends on the quality of the film.
Select the size of the new canvas
This is necessary so that you don’t have to bother with narrowing or, conversely, widening the opening. Standard door sizes are 2 m high and 60, 70, 80 or 90 cm wide. Double doors are usually combined from two panels. For example, 120 cm is 60 + 60.
Since the leaf is installed in the door frame, and even with gaps for polyurethane foam, the opening should be a little larger. As a rule, 8–10 cm. This includes the thickness of the frame and all necessary clearances.
- Measure the width of the opening and choose a canvas 8–10 cm narrower.
- Measure the height of the opening from the finished floor and make sure that it is 6–9 cm greater than the height of the door.
- Take measurements in several places and take into account the smallest result. For example, if the width of the opening at the bottom is 89 cm, in the middle - 91 cm, and at the top - 90 cm, then the width should be considered equal to 89 cm.
Required Tools
You can install a door frame with your own hands using various tools; many owners have some of them, but what is missing will have to be rented or purchased.
- Miter box. A device that allows you to cut timber at different angles.
- Pencil, tape measure, construction tape.
- Acrylic paint on wood.
- Polyurethane foam for sealing the box.
- Chisel for making cuts for hinges.
- Hammer, drill, screwdriver.
- Nail puller, crowbar, hammer. For dismantling work.
- Miter saw, hacksaw and utility knife.
- Building level.
Decide on the opening and hanging side
If the canvas is installed flush with the wall in the corridor, then it will open into the passage. If there is a wall in the room, then the door will open there. Think about what is more convenient and take this point into account.
To open to the right, the hinges must be hung on the right side, and to open to the left, on the left. To avoid mistakes, stand in front of the door and imagine that you are swinging it open towards you. If it has glass, then the matte side should face the corridor, and the glossy side should face the room.
Insertion of hinges
A canvas is attached to the installed awnings, turning the structure into a door of the desired type. The future functioning of the sash depends on the quality of the hinges. Improper installation of the canopy contributes to the erasing of the end of the canvas and the appearance of squeaks when opening.
Inserting door hinges is one of the most important and critical moments when installing doors.
Modern doors are heavy, so they require the installation of at least 3 hinges. The markings are made before installation; they are applied to the sash and frame. Installation of hinges starts from the top. Awnings can be overhead or mortise. The type of fittings is chosen taking into account the door material.
Hang the hinges
If you are installing a door for the first time, it is better to use butterfly hinges. They are universal and suitable for both right-hand and left-hand drives. But the most important thing is that they do not need to be cut into the box, which is very convenient for non-professionals.
- Place the door on its edge with the front side facing you, placing a piece of cardboard underneath.
- Measure 250 mm from the edge of the canvas and make a mark with a pencil - this will be the center of the loop.
- Place the closed loop on the canvas with the side where the holes in the small part are chamfered.
- To determine where to screw in the screws, mark the centers with an awl and carefully drill holes with a diameter of 2–2.5 mm.
- Screw in one of the screws. It will secure the loop and make marking easier.
- Mark all the holes in this way and screw in the screws.
- Remember: the small part of the hinge is attached to the door leaf, and the large part is attached to the door frame.
- Repeat the same procedure for the second loop.
Embed the lock
- Turn the canvas over so that the loops are on the floor, and the opposite side, where the lock will stand, is at the top.
- Position the lock correctly - in the center of the door. The square hole for the handle should be at the top, and the beveled part of the latch should be directed towards the closure. If necessary, the tongue can be easily turned over by simply pulling with your fingers.
- Measure the length and width of the lock mounting plate, as well as the thickness of the door. Make a mark and place the bar strictly in the center of the canvas.
- Turn the lock around and apply it to the door. Mark the center of the location of the mounting holes, drill, and screw in the screws.
- Trace the plank along the contour with a pencil and carefully cut the film with a sharp knife to clearly mark the boundaries of the selection for installation and not damage the edge.
- Remove the lock and separate the cut film from the canvas with a chisel.
- Attach the mechanism to the door, aligning it with the planned location, and mark the width of the body. Measure the thickness of the lock at its widest point and mark it on the canvas.
- Draw boundary lines 2 mm from the edges of the groove on both sides.
- Using a drill with a diameter of 6–7 mm, make holes along the contour of the hole for the lock mechanism. To use the maximum area, arrange the holes in a checkerboard pattern. Act carefully and do not protrude beyond the boundaries of the markings.
- Slowly cut off the drilled wood with a chisel and trim the edges of the groove so that the lock fits freely, but does not dangle.
- Use a chisel to remove the wood little by little until the mounting strip is flush with the wood. Check by applying the lock with the back side rather than pushing it into place - otherwise it will be difficult to remove.
- Place the lock on the side and use a pencil to mark a square hole for the pen shaft. Make a mark on both sides and remember that this figure should be on top and not below when the door is installed.
- Insert a piece of wood inside the groove as a support and use a drill with a diameter of 20 mm to make a hole on one side and then on the other.
- Place the lock in place and secure it with screws, having previously drilled holes for them.
Assemble the door frame
- Place the side posts of the door frame along the edges of the door to avoid confusion. They should be facing a quarter towards the door hinge. That is, you should see the seals.
- Calculate the height of the post for proper trimming. It consists of the size of the leaf (2,000 mm), the gap between the frame and the door (3 mm), the thickness of the frame itself (22–25 mm) and the gap between the leaf and the floor (8–22 mm). The lower threshold is made only in bathrooms; in other cases, a gap is left for carpets and other coverings.
- Calculate the width of the door frame crossbar. To do this, add 6 mm to the width of the door leaf, so that you end up with a gap of 3 mm on each side.
- Carefully cut all planks to size. It's better to use a miter saw, but you can also use a fine-tooth hacksaw.
- Remove the quarters on the side posts to mate with the top rail. To do this, move the seals to the side, make cuts with a saw, and then chop off the interfering pieces with a chisel. Use scraps of the box as a template for greater accuracy.
- Trim the rubber seals on the side posts at a 45-degree angle to avoid an unsightly gap after assembly.
- Place the frame strips together, align the edges and fasten with screws. Pre-drill holes for screws and screw two into each rack. Use box scraps for precise markings.
Do-it-yourself door installation - let's evaluate the scope of upcoming work
Door structures between rooms in an apartment or private house cannot be called very complex technical systems. However, their assembly and installation require knowledge of a number of nuances.
- Firstly, a door installed by yourself should not open spontaneously.
- Secondly, it must close without excessive effort.
- Thirdly, door structures must have a certain strength and not fall apart in cases where they are installed in the homes of “lovers” of slamming doors.
A regular door block consists of two elements – the leaf and the frame.
The latter is made of loop and false beams, as well as a lintel. If you install doors with a threshold, the frame is supplemented with a special bottom bar. In most cases, the door leaf is hung on two hinges.
There are systems with three loops, but they are used extremely rarely. The set of door blocks, as a rule, includes platbands. If the manufacturer does not provide these, you will need to purchase them separately.
In situations where the door frame is smaller in width than the door opening, you need to purchase additional panels or trim the walls with strips or more elegant slopes from a design point of view. Here you need to know that professionals do not recommend plastering slopes if you are installing structures made from wood materials (for example, MDF) with your own hands. Such doors simply become deformed after applying the plaster composition to them.
An excessively wide opening is often reduced with the help of wooden beams. Its dimensions must correspond to the “extra” width.
Such a beam is installed on the side of the door post, where its hinges are located. The beam is attached to the rack with small cross-section universal screws, and it is connected to the wall with anchors. It is recommended to do the installation of interior structures with your own hands after the pre-finishing of the room (it is assumed that you have leveled the walls, carefully and carefully puttyed them, and then plastered them).
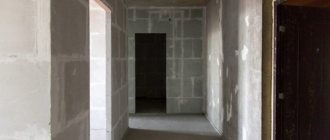
Reducing a doorway using a wooden beam
In other words, the assembly and installation of doors is carried out after completion of all “wet” finishing work without exception.
Otherwise, there is a high probability that the system may “float” due to high humidity.
You definitely need to arrange the subfloor, as well as decide on the thickness and type of finishing floor that you will make. Without this, you will not be able to accurately mount the door frame to the height of the threshold. If you simply decide to change the interior doors in a room where no repair work is being carried out, the latest recommendations do not matter.
Hang the canvas on the door frame
- Place the door frame on the floor and carefully place the panel in it. Place 3mm thick fiberboard pieces around the perimeter to form an equal gap.
- Mark the top of each hinge on the frame with a pencil.
- Remove the screws from the side post and “open” it up on its hinges. To prevent the canvas from falling, place the cuttings of the box underneath it on top and bottom.
- Align the top of the hinge with the mark on the frame and use an awl to mark the centers of the screw holes. Screw in the screws, having previously drilled holes for the fasteners.
- Repeat the procedure for the second loop and fasten it.
- “Close” the box and reassemble it, attaching it to the top bar with screws.
Place the box with the canvas in the opening
- Lift the hinged door and insert it into the opening. Align the canvas with the wall using wedges as spacers. You can buy them or cut them yourself. Insert one wedge into small gaps, two wedges into large ones, turning them towards each other. This is necessary for accuracy of adjustment.
- Align the post with the hinges first, then the rest. Apply a level and recess or pull out the door to achieve a strictly vertical position. If the wall is blocked, the canvas still needs to be leveled so that it can be easily closed and opened.
- Using pieces of fiberboard or other templates, create 3 mm gaps around the perimeter between the leaf and the door frame. Place them opposite each other. This will avoid deformation of the frame while the polyurethane foam hardens.
- Place a level on the edge of the door or two pieces of fiberboard and make sure the door is perfectly vertical.
- Fill the gaps between the door frame and the wall with foam, starting at the bottom and moving up. Use high-quality foam with a low expansion coefficient so that it does not deform the box as it hardens and increases in volume.
- If the gap is large, for example, above the top bar, then fill the space gradually, moving the gun up and down with a snake. Do not fill the foam flush with the wall - it is better to leave a small gap, the composition will fill it after hardening.
Video description
You can see how to assemble a door frame in the video:
See also: Catalog of companies that specialize in the manufacture and installation of doors and windows
The design can be U-shaped or a closed rectangle of 4 parts.
Before starting assembly, all parts are measured again and checked against the opening parameters. The excess length of the side parts is cut off so as to provide for the thickness of the future floor covering. The horizontal strip should be 7 mm longer than the width of the canvas.
- Space is cleared on the floor and the parts are placed next to each other.
- The cutting areas are marked at an angle of 45° so that the vertical and horizontal elements coincide.
- In a U-shaped structure, if a threshold is planned, then the lower parts are cut at a right angle.
- Holes for connection are drilled using self-tapping screws;
- The parts are assembled into a single structure.
Then there are two possible options.
In the first case , assembling the door frame involves the following sequence of actions:
- The box is installed in the opening;
- Using wedges, secure the upper part;
Securing the door with wedges Source rabotai-sam.ru
- The level checks compliance with horizontal and vertical directions;
- Drive the wedges at the bottom;
- The openings are carefully filled with foam, having previously sealed the adjacent parts of the box with masking tape;
- Fastening is done with self-tapping screws or dowels.
The second method is to first attach hinges and fabric to the box, and then install the entire block at once. In this case, spacers will be needed to hold the door until installation is completed.
Mount the handles and strike plate of the lock
- Using the supplied hexagon, loosen the locking screws at the bottom of both handles and insert the square rod into them until it stops. Attach the assembled structure to the door. The distance between the handles should be less than the thickness of the blade. If it is larger, shorten the rod slightly with a hacksaw or grinder.
- Remove the decorative rosettes from the handles by unscrewing them counterclockwise along the threads. Insert the handles into their places so that the locking screw is at the bottom, and mark the locations for fastening with a pencil. Drill holes and screw in screws. Replace the decorative rosettes.
- Close the door and mark the top and bottom of the latch on the frame with a pencil. Measure the distance from the edge of the canvas to the outside of the tongue. Mark this measurement on the frame and draw a line to the latch boundary marks.
- Turn the striker over and align it with the center of the tongue mark. Drill holes and screw in screws to secure the strip to the frame. Trace the contours with a pencil and cut the film with a sharp knife, as you did with the lock.
- Remove the bar and use a small drill to make holes along the contour of the future groove for the latch, and use a chisel to make a hole. It’s okay if the sample slightly protrudes beyond the boundaries of the marks; after installing the bar, all the gaps will close.
- Using a chisel, carefully remove the film along the outer contour of the striker to make it flush with the door frame. Secure the strip in place with screws. Check: if everything is done correctly, the closed door does not hang loose.
Foaming process
Foam is used to seal the space between the box and the opening and level the surface. Foaming begins after completion of the fixation process. The material penetrates into all the cracks between the frame and the wall. The foam is sprayed slowly, in small portions. Feeding starts from the top - this prevents the material from flowing out. Before starting work, all elements of the door structure are protected with paper and masking tape, since removing dried foam is difficult. The material hardens within a day. During this period the door cannot be used.
Install additional strips
They are mounted from the side of the room when the width of the door frame pillars does not allow covering the entire thickness of the opening. Additional strips are inserted into the frame and attached to the wall with foam, and later trims are nailed onto them.
If your frame thickness matches the dimensions of the doorway, proceed immediately to the next step.
- Use a chisel to cut off the pieces protruding from the sides of the frame and use a chisel to keep them out of the way. Remove any remaining foam around the perimeter of the door frame.
- Measure the width of the opening and cut the top trim to the appropriate size. Attach it to the desired place and, if it protrudes beyond the boundaries of the opening, mark with a pencil and remove the excess part. Insert the trimmed board into the box, level it and secure it with wedges on the sides.
- In the same way, measure, cut and fit the side trim strips. Reinstall them and align them.
- Apply a continuous strip of foam at the junction of the door frame and the top and sides. At the outer edge of the additional strip, fill the joint with the wall with small strips. Do not fill the entire space with foam, otherwise it will expand and deform the extension.
Door selection
The first thing you should pay attention to when choosing canvas and boxes is the material they are made of.
Fiberboard is used to produce budget doors and frames. The material does not protect the room from extraneous sounds, absorbs moisture, and filling will lead to damage during the first off-season.
It is strictly not recommended to choose a frame made of fiberboard; it quickly deforms even under the weight of the door.
MDF is a more reliable material with increased density, average in price-quality ratio.
It is strong enough to withstand mechanical loads, does not absorb moisture, muffles sounds and lasts a long time.
Solid wood is ideal for making and installing a box. It will not be affected by humidity, it will withstand the weight of any door. Laminated wood is additionally lined; untreated timber is not inferior to laminated timber in performance, but it will have to be painted or decorated.
The ideal option is to purchase a box and canvas made of the same material. You should not give preference to wood fiber board; doors made from it are short-lived; they are installed on construction sites so that new owners can replace them with permanent ones made of more durable materials.
Ideally, it is worth acquiring a solid solid material as a door filling; to reduce the cost, the canvas can be replaced with MDF, which is also a durable raw material for the manufacture of cheaper door frames.
Additional strips and trims can be made of fiberboard, wood or MDF. They do not carry a load, they only decorate the gaps and disguise the connections.
Double doors are often chosen for large rooms and halls; single-leaf blocks are installed in bedrooms and kitchens. In any case, the size of the box and the number of panels are determined by the size of the opening.
Stuff the trim
- Using a sharp knife, cut off the foam protruding beyond the plane of the door frame.
- Attach the trim to the frame from the side of the hinges, close to them, and see what kind of gap there is to the inner edge of the box. The same distance must be maintained around the entire perimeter on other trims.
- The joints of the top and side trim strips can be made at an angle of 45 or 90 degrees. If you don’t have a miter saw at hand and you’re installing a door for the first time, it’s better to go with the second option. It's much simpler.
- Install the side strip, pressing it against the hinges, and nail it with nails in increments of 20–25 cm. Do not hammer them in completely and do not forget to first make a hole in the platband with a drill of a smaller diameter than the nail.
- Attach the second side strip and, having maintained the required gap, make a mark with a pencil and cut off the excess to the desired length. Nail the platband with nails as before.
- Try on the top bar, cut it to size and fasten it. Important! It should not lie on the sides, but be between them. In this case, the cut end of the upper casing will be hidden.
- Using the same principle, fill the trim on the other side of the door. If additional strips are installed, then align the edges of the platbands with them. If there are no additions, maintain the same gap around the perimeter of the door frame as on the opposite side.
Interior doors can be divided into several types
Manufacturers of door structures on the market offer a fairly wide range of models. Ready-made interior doors can be made of different materials. The most common types of materials are: fiberboard, MDF, natural wood.
1.Fibreboard – door: the frame is made of wood and covered with laminated fibreboard sheets. The advantages of such doors include: low cost compared to other types, light weight, which makes it possible to deliver them from the point of sale to the house on your own, and ease of installation. Considering these points, they are popular among customers, thanks to which their wide range is most often presented in stores.
Among the disadvantages, we can note the low strength of the fiberboard itself, which is why the door breaks and becomes unusable quite easily, poor resistance to humidity, the door can twist. Therefore, we do not recommend installing it in bathrooms with weak exhaust; this material loves dry rooms.
Below, we will consider the step-by-step installation of interior doors with our own hands.
2. MDF - doors that are made from this type of material are the most suitable option when choosing the ratio of quality and price. Clear advantages over doors made of fiberboard are high strength and resistance to moisture, and a higher level of sound insulation. The cost of such a door is several times higher than doors made of fiberboard.
3. Natural wood – interior doors made from this material are the most durable.
Their price directly depends on what type of wood was used for their production. Doors made of valuable wood species are used for installation in rooms with an original design; they will fit perfectly into a classic interior. The width of interior doors is adjusted to the size of your opening.
The list of interior doors by type can be supplemented with all-glass doors, metal-plastic, steel, but these types are not very popular among the general public, so they are not included in the article for a detailed description.