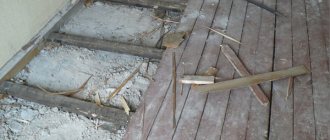
When making flooring from tongue and groove boards, technology is often violated. Each row is nailed, not 4 - 5; after the lumber dries out, after 1.5 - 2 years, the boards are not re-attached and not sanded. Therefore, longitudinal warping of each row or individual deck boards often occurs.
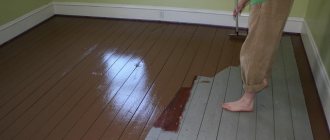
A humped wooden floor can be leveled with chipboard sheets.
To even out these “waves,” a budget option is to install chipboard on a wooden floor as a sublayer. Less commonly used is laminated or veneered chipboard with a thickness of 16 mm or more as a finishing coating.
The industry produces sanded, tongue-and-groove, moisture-resistant chipboard, but this guide will consider a budget option - leveling the boarding (edged board or tongue and groove) with chipboard as a subfloor for the finishing coating.
Advantages and disadvantages of chipboard floors
There are many pros and cons to particle board flooring. These must be taken into account when choosing this type of flooring.
Advantages of chipboard:
- They have a compensation layer that protects them from destruction at the joints.
- A rigid material that can withstand sudden changes in weight and flex up to 5 mm up and down.
- Smooth surface that does not need to be processed.
- The slabs can be laid on joists.
- Chipboard flooring is much stronger than wood, so the coating is strong and reliable.
- Chipboards have excellent heat-insulating and sound-proofing properties.
- They are easy to glue and install, they can be laid without the help of a specialist.
- Low cost - cheaper than plank flooring.
- Durability of the flooring.
- Hygienic material is not susceptible to rotting, as well as the influence of mold and mildew.
- The coating can be laid on any surface - laminate, wood, concrete, parquet, tiles, etc.
Thanks to its quality and availability, this flooring has become very widespread. Chipboard boards are a good solution for renovations on a small budget. But this material is not without drawbacks.
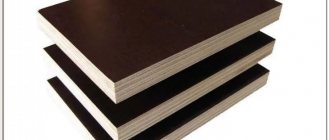
What is chipboard Source polspec.com
Disadvantages of chipboard:
- They contain a lot of formaldehyde, which is hazardous to health and has carcinogenic properties.
- Brittle and brittle edges of slabs.
- The material is highly flammable and therefore a fire hazard. To make chipboards less flammable, some manufacturers add fire retardant to them.
- They wear out easily, so they need to be covered with carpet, linoleum, carpet or other materials.
- The slabs should not be placed in damp areas because they are easily destroyed by moisture. Manufacturers produce moisture-resistant chipboards, but even this material cannot withstand more than 5 wetnesses.
- Nails do not hold well in slabs.
In the room where chipboards are installed, air humidity should not exceed 60%, and the air temperature should not fall below +10°C.
Advantages
Let's consider the advantages of moisture-resistant tongue-and-groove chipboard in more detail:
- Increased density (820 kg/m3) ensures the rigidity and strength of structures made of chipboard (can be installed on joists - the special structure of the material allows you to effectively distribute the load over the entire surface of the floor);
- The process of processing chipboard in production allows you to achieve a perfectly flat surface of the board;
- Simplicity and ease of installation, dismantling, replacement of the entire structure or its parts, due to the system of protrusions and grooves, as well as the small size and weight of the plate itself;
- Increased resistance to humidity, dampness, temperature changes, unfavorable climate, as well as fungi, mold, microorganisms;
- Thermal/sound insulation;
- Low price (compared to similar building materials);
- Possibility of reusing dismantled slabs.
Materials and tools
To work, you need to prepare a lot of materials and tools that should be on hand:
- screwdriver;
- nails;
- putty;
- self-tapping screws;
- dowels;
- drill;
- hammer;
- roulette;
- wooden or metal straight ruler;
- square;
- pencil;
- jigsaw;
- level or builder;
- Circular Saw.
Using these items, you can independently lay chipboard on a wooden floor or any other surface.
How to install logs Source polspec.com
Moisture-resistant tongue-and-groove chipboard: pros and cons
The name tongue-and-groove moisture-resistant chipboard was given to slabs whose characteristics are improved using moisture-resistant polymer materials and a four-sided tongue-and-groove system. Thanks to these features, the material, which can be identified by green spots on the surface, has the following advantages:
- easy recovery option;
- resistance to rot, mildew and mold;
Mold on boards, which will never happen on moisture-resistant tongue-and-groove boards
- low thermal conductivity, providing savings on insulation of premises;
- environmental friendliness, which ensures the use of chipboard in schools, kindergartens, hospitals and other premises and buildings with high hygiene requirements;
- long service life;
- moisture resistance, the maximum value of which is for materials of class P5, which retain their geometric dimensions and structure even after a long stay in water.
Differences between regular and moisture-resistant chipboard
Painted and laminated boards can be used as a topcoat. And among the few disadvantages of laying tongue-and-groove chipboard, it is worth noting the need for additional protection of its ends from moisture and the low content of formaldehyde resins, which are used for pressing chips . This material also weighs more than similar-sized wooden panels and is not suitable for installation on curved structures.
Laminated chipboard
Application of chipboard with tongue and groove
The scope of application of the material is residential and administrative buildings, office premises, sports facilities, warehouses and shopping centers. At the same time, moisture-resistant tongue-and-groove chipboard is suitable for the following structures:
- ceilings. To do this, you should use slabs with a minimum thickness of 12 mm, which are easy to connect and can easily replace drywall. They are also used to level the ceiling surface before applying finishing coatings;
- foundations. The slabs themselves are not included in the design of the bases, but removable formwork is made from them;
- walls and partitions. The plates increase the heat-shielding properties and level the surface before painting, wallpapering or installing panels;
Laying materials on walls
- floor coverings. Dry prefabricated screeds, “floating floors” and raised floors are made from tongue-and-groove chipboard for flooring. With its help, the coverings of sports fields, tennis courts and podiums are also strengthened.
Layout of floors on joists using chipboard
Another way to use the material is to perform roofing work. Due to their increased density and ease of installation, the slabs are the best option for roof insulation. And the relatively small weight allows you to reduce the load on rafter structures and save on their production.
Residential building, the walls and roofing of which are made of moisture-resistant slabs
Related article:
OSB board: sizes and prices. The presented review will help you study the characteristics and capabilities of this raw material, as well as choose the best option for construction work.
Types of chipboard for flooring
In order to properly strengthen chipboard floors along the joists, you need to choose the right flooring. There are several types of chipboards that differ from each other in terms of strength, quality and safety level. The most durable slabs are marked P-A, slightly less durable - P-B. The slabs are assigned 1st or 2nd grade, as well as safety class E-1 or E-2. They also differ in density: low, medium and high.
Conventional particle board is an uncoated sheet. It is used as a rough covering for the floor, as well as as a backing for interior walls and ceilings. This is the most popular and versatile variety.
A drill is used to drill holes for nails and self-tapping screws Source znatokpolov.ru
Where is it used?
Leveling the floor under laminate
The use of moisture-resistant tongue-and-groove chipboard is especially effective for:
- Leveling walls for finishing (wallpaper, plastic panels, wood and PVC lining, laminate, boards, etc.); creating interior partitions;
- Leveling the ceiling for finishing, as well as using chipboards instead of plasterboard to create a suspended ceiling;
- Leveling the floor for finishing (laminate, parquet, linoleum, etc.), assembling the subfloor, installing a “floating” floor;
- Heat/sound insulation of ceiling, floor, walls.
How to choose chipboard for the floor
For a warm living room, a regular single-layer chipboard is suitable. In a cold and damp room, you need to lay tongue-and-groove and laminated chipboard or give preference to another flooring.
The floor must be covered with slabs of only the 1st grade. Grade 2 is suitable for walls and ceilings. It is necessary to take into account the density (low, medium and high) and strength (P-A and P-B) of the material and choose it in accordance with the characteristics of the room. The level of safety plays an important role - for residential apartments it is better to choose E-1 (the least flammable, contains little formaldehyde).
You need to pay attention to the strength of the sheet. During bending it should not exceed 25 megapascals, and during stretching - no more than 0.5 megapascals.
The level of swelling of the material in the liquid plays an important role. In water, the leaf should swell no more than 30%. A P6 stove is suitable for dry rooms, and a P5 stove for wet rooms.
This flooring is not suitable for shops and warehouses where heavy objects are thrown onto the floor.
Laying a floating floor
A “floating floor” is the best way to finish floors with severe unevenness or other rough surface imperfections.
See this topic: laying tongue and groove boards on the floor.
Moisture-resistant tongue-and-groove chipboard is laid on the floor using the following technology:
- If the main floor is concrete, then first a vapor barrier film is placed on it, but if the base is wooden, then glassine;
- Next, expanded clay or slag is poured in and leveled;
- Construction paper is placed on the expanded clay;
- Wedges are installed near the wall from which installation begins;
- Just like when assembling a subfloor, the installation of chipboard slabs is carried out “onward” - from the far wall; connections are fixed with PVA glue or latex mastic;
- There should be a gap of 1 cm between the wall and the sheets.
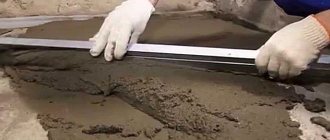
Leveling a concrete floor
How to lay chipboard on a wooden floor
The installation technology is quite simple. After purchasing flooring, you need to learn how to lay chipboard on a wooden floor. This is easy to do yourself, but you will have to complete the work in several stages.
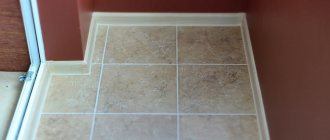
There will be gaps near the baseboard Source remontya.ru
Leveling and preparation
Before starting installation, you need not only to collect the tools, but also to carry out the preparatory work:
- Check the quality of beams and boards. They need to be repaired or replaced. Beams become loose very often, so they need to be nailed down firmly.
- Impregnate the chipboard with anti-fungal preparations.
- If electrical wiring or pipes are located under the base of the floor, the location for the hole (hatch) must be marked in advance.
- If the floor creaks, you need to find and eliminate the cause.
- Remove baseboards and all unnecessary items.
Laying chipboard boards will help level a sagging wooden floor. Mounting it on joists allows it to be insulated. Less dense sheets are suitable for rough coating, but for finishing you need more rigid and dense ones.
You need to check that the boards have bent up or down by 5–10 mm. Thermal insulation, insulation and other auxiliary layers are laid directly on the boards.
Laying
Preparation can take a long time. Chipboard is laid on a wooden floor only after completion of the preparatory work.
You need to prepare:
- chipboard sheets 16 mm thick;
- level;
- plywood 6 mm thick;
- jigsaw or saw;
- self-tapping screws 51 mm and 32 mm;
- drill or screwdriver.
The gaps between the joints are covered with putty Source znatokpolov.ru
How to impregnate chipboard for moisture resistance
The construction budget only seems large at first. When it comes to interior decoration, it turns out to be too small. Therefore, we are looking for any ways to reduce the cost. As an option, you can make moisture-resistant chipboard from ordinary chipboard. Don't think that it will withstand moisture as well as one that is initially made waterproof. But definitely better than usual.
If you need to save money, you can increase the moisture resistance of conventional chipboards
So, how can chipboard be treated to increase water resistance:
- drying oil in several layers;
- PVA;
- varnish (combined, bitumen, wax-resin);
- any water repellent compatible with wood;
- floor paint;
- impregnation for wood.
In general, you can use almost the same products as for wood. After all, chipboard consists of sawdust and shavings. But with any composition it is necessary not to coat it, but to saturate it. And not just once, but at least twice. And from all sides. Pay special attention to the tenons and grooves. In general, there will be more work.
How to insulate a floor
A variety of materials can be used for insulation:
- expanded clay;
- isolon;
- technical jam;
- sawdust;
- penoplex;
- mineral wool;
- glass wool;
- polystyrene foam.
First, waterproofing is laid, and then insulation is placed on top.
Rough coating on the floor Source polspec.com
Installation recommendations
Due to the size of the tongue-and-groove chipboard, installation of a subfloor using it can easily be done alone without the involvement of third-party assistants. Although to obtain a satisfactory result, it is necessary to follow a strict sequence of work. The installation stages can be presented in the following table:
| Installation stage | Image | Description |
| Installing joists before laying chipboard | Work begins with laying logs (wooden beams of a suitable cross-section), the distance between which is selected according to the thickness of the slabs. For 16 mm chipboard, 300–400 mm is sufficient. For 22 mm, take 500–600 mm. | |
| Filling the space between the joists with insulating material | When laying sheets, leave a distance of about 20 mm from their edge to the wall. The space under the beams is filled with sand, and between them - with insulating materials. | |
| Checking floors with a level | The horizontality of the plane is checked with a building level. | |
| Fastening slabs to the base | The sheets are laid from the wall opposite the entrance. The first is secured to the joists with self-tapping screws, the distance between which is chosen from 200 mm at the edges and 300 mm in the middle. The hats are recessed into the floor a couple of millimeters. | |
| Installation of tongue and groove slabs one into another | The edges of the edges of the slabs are sealed (with mastic or PVA glue). Each next one is inserted into the groove of the previous one, trying to ensure that the seams fall on the logs. |
The process of installing floating floors differs from conventional work. At the same time, moisture-resistant chipboard for floors replaces dry screed. And the structure is called “floating” due to the absence of a rigid connection between the coating and the concrete base. It consists of several layers of material, the last of which is chipboard. And the installation process itself looks like this:
| Installation stage | Image | Description |
| Vapor barrier for floating floors | First, a vapor barrier is laid on top of the concrete base, for which you can use ordinary polyethylene film. | |
| Backfilling sound insulation for a “floating floor” | Expanded clay or expanded polystyrene sheets are laid as the second layer. | |
| Substrate device for chipboard | Another layer is a substrate made of membrane, plastic and other materials. | |
| The tongue-and-groove installation method used for tongue-and-groove slabs. | The work is completed by installing tongue-and-groove chipboard. |
When using the same materials to finish ceiling surfaces, partitions and walls, the work is done even faster. Due to the fact that installing sheets on vertical structures does not require the manufacture of sheathing, installation becomes simpler and the cost of repairs is reduced. For wall mounting, standard self-tapping screws are used, the distance between which should be within 300–400 millimeters. The thickness of the ceiling tiles should be no more than 12 mm, and for their fastening, a slatted frame rather than a lathing is installed.
Frame for mounting plates
Video: QuickDeck tongue-and-groove chipboard as a base for a floor
Quick Deck slabs
Premium tongue-and-groove slabs under the Quick Deck brand are produced by the Nevsky Laminate Plant. The product has 2 main specifications:
- Layered structure . The waterproof composite is composed of changing layers of large and very small fractions. This makes it possible to compensate for seasonal deformations and equally distribute the load on the load-bearing foundation.
- Wear resistance . Our VDSPS are highly resistant to wear. The products of the Plus line are characterized by good strength.
There are the following types of QuickDeck chipboard:
- Standard ( P-A , E1 ). Both sides are covered with melamine film.
- Professional ( P5 , E1 ). Suitable for rough cladding of premises.
- Ecoflore ( P5 , E1 ). Used in medical institutions and kindergartens.
- Plus ( P5 , E1 ). Laminated. They belong to wear resistance class 34
The manufacturer creates Quick Dec boards with thicknesses of 12 , 16 , 18 , 22 and 38 mm.
What is chipboard with tongue and groove
A typical composite-based material, commonly known as chipboard, or chipboard , is used everywhere in construction and furniture manufacturing. It is made from shavings of low-value wood species by hot pressing. Phenolic resins serve as fixatives .
The tongue-and-groove version ( VDSPSH ) has 2 design features:
- -and-groove type lock . Recesses are created on two edges of the sheet, and the others are equipped with protrusions. This makes it possible to quickly and reliably join the slabs together.
- Paraffin emulsion . The ingredient provides a high degree of resistance to wet processes.
It is easy to distinguish the special material from substitutes: green inclusions . The product range consists of single-layer , three-layer and multi-layer products.
Chipboards with high water protection are suitable for installation in a bathroom or kitchen. However, in conditions of very high humidity they swell by 10 % of their volume in just 24 hours.
Peculiarities
Tongue-and-groove chipboard is a common building material, presented in the form of panels with protrusions at the edges on one side and gutters on the other. The depth of the gutters (grooves) corresponds to the height of the protrusions, ensuring tight joining of the sheets with each other. During production, a mass of sawdust is compacted under a press with the addition of special resins, ensuring the waterproofness of the material. Therefore, as tests have shown, chipboard, completely immersed in liquid for a day, can increase by swelling by only 10%.
that have been pressed at elevated temperatures have high strength and are therefore often used for rough finishing of flooring. Special laminated chipboard is endowed with noticeable durable qualities.
During its production, a special film coating is applied to first-class products (without noticeable defects), increasing the wear resistance of the material.
Joists and fasteners
Detailed instructions on how to properly lay laminate flooring on the floor in an apartment. Is it possible to lay laminate on penoplex?
According to SNiP 3.04.01–87 (SP 71.13330.2017) “Insulating and finishing coatings”, chamber-dried wooden beams with a humidity of 12–18%, without cracks, bark and traces of rot, are used to form the floor along the joists. In this case, the length of the jointed supports must be at least 2 m, thickness - from 40 mm, and width - 80–100 mm.
Although many experts recommend purchasing slats with an aspect ratio of 1:1.5 and 1:2, in practice, logs of 50x40, 50x50, 50x70 and more are most often used. Moreover, the height of the supporting elements depends on various parameters: the load level, the cross-section of the insulation used, the maximum floor height and even the personal preferences of the customer. There are no universal recommendations; components are selected in each case separately.
To equip a load-bearing frame in apartments and private houses, you need the most even, durable timber made from inexpensive species: pine, spruce. If finances allow, you can purchase products made from larch, aspen, and alder that are resistant to changes in humidity.
It would be useful to mention the support elements for the logs. Building codes do not recommend the use of wooden wedges and bosses due to the fact that the material easily changes shape with changes in humidity. When installing on a concrete or plank floor, mineral screed or point supports under the timber, it is better to lay strips of hardboard.
In practice, many craftsmen prefer to lay pieces of OSB, chipboard, MDF or moisture-resistant plywood on the floor. The minimum size of the lining should be 10x10 cm or 10x15 cm, the interval between them should be at least 30 cm.
Laying joists on glued plywood pads.
As an alternative, which is insensitive to moisture, you can use special support and fastening elements with an anti-corrosion coating, designed for the installation of adjustable floors.
Let's consider another important component of the floor structure - hardware. In addition to the joists, you will need fasteners to secure them to the base, as well as to attach sheets of plywood to the frame. These can be anchors, nails, universal or self-tapping screws, metal corners, etc.
The range of fasteners is huge. To fix the pads or the joists directly to the concrete base, dowels are most often used - threaded nails with a diameter of at least 6 mm or mechanical-type metal anchors. The former are cheaper, but the latter provide more reliable and durable fixation of the slats to the base.
An example of fixing joists to the floor with corners.
Anchor fasteners for concrete and brick are made of high-quality alloys - brass, stainless steel. It consists of a spacer or working sleeve (changes dimensions when forming a connection) and a non-spacer part - a rod. To mount the frame to the base, a hole is drilled in concrete with a diameter equal to the cross-section of the sleeve or 0.5 mm less than it. When hammered or screwed in, the mounting post pushes the sleeve inserted into the channel. And due to this, it is firmly fixed in concrete.
The dimensions of the hardware product depend on the dimensions of the supports. For the installation of underlay elements made of chipboard, plywood, OSB, as well as wooden logs, products of the M6–M12 category are most often used, that is, with a rod or wedge diameter of 6 to 12 mm. The length is selected based on the thickness of the joists and/or support supports, taking into account the depth of insertion into the concrete of 5 cm or more. The approximate interval between fasteners is 30–60 cm.
To rigidly attach pads or joists to a wooden subfloor, you can use wood screws with rare threads or universal galvanized ones with a diameter of 4 mm or more. The distance between hardware is at least 30 cm, screwing depth is from 30 mm. To attach plywood to joists, it is most convenient to use special self-tapping screws for gypsum fiber boards and chipboards or universal galvanized ones. The first ones differ from the standard ones by mixed screw threads and notches on the cone-shaped head, which provide countersinking. The length of the hardware should be 2–2.5 times the thickness of the coating, the diameter should be 3.5 mm or more.
You can also use regular nails with a cylindrical shaft and a sharp end. The efficiency and speed of work will increase several times if you use fasteners not in bulk, but in a cassette designed for nailing. The product is often aimed at the base or supporting frame at a distance of 15–25 cm.
Features of laying laminate over the previous finishing coating
How to lay laminate over the previous coating?
Laminate installation options.
Laminate can be laid over absolutely any old flooring, with the exception of one thing: long-haired carpeting. The latter must be dismantled before laying the laminate and use one of the methods of leveling the floor, as for the rough version (either with a screed or lumber).
Let's consider several coating options on which laminate can be laid.
Wooden floor (boards, parquet).
In this case, you need to make sure that the old dried out floorboards are still suitable. For these purposes, they are diagnosed and, if necessary, restored. Small defects (cracks, holes, chips) are repaired with putty in order to prevent further destruction processes.
Leveling wooden boards by scraping or laying lumber (plywood or chipboard 15 mm thick) is the next stage of work. The sheets must be laid offset, that is, so that the seams do not meet. Dust is removed so that it does not become the cause of annoying squeaking of the laminate in the future (since it can get into the locks of the laminate).
A layer of dense polyethylene film and underlay are laid on top of the prepared wooden floor, that is, the laying pattern is repeated.
Chipboard acts not only as a leveling layer, but also as an excellent analogue of concrete screed. To ensure that laminate flooring can be laid on chipboard without problems, you need to adhere to the above steps.
Linoleum
The structure of household linoleum.
The linoleum must be thoroughly inspected and all depressions and protrusions identified, which can be eliminated by using another layer of backing under the laminate in those places that need to be “raised.”
Before laying the substrate, one or two layers of polyethylene film are placed on the old coating to provide an additional layer of waterproofing. It is fixed with masking tape. You should not leave linoleum that is too worn or soft; it must adhere closely to the floor surface.
Ceramic tile
Technological characteristics of ceramic tiles.
The tile itself is a fairly smooth surface, and installing a laminate on it will not require any additional actions.
Here it is important to pay more attention to the substrate, since the tile for the substrate is a very slippery surface. The substrate must be firmly fixed to the tile with masking tape.
The best option is to use a backing made of extruded polystyrene foam. This material is elastic, does not wrinkle, and can be securely fixed using masking tape. And since tile is a fairly cold coating, it is possible to install a film heated floor system on top of it, specifically designed for laminate flooring.
Which underlay for laminate flooring is better to choose?
The lining, which is placed under the laminate, will play a big role in the quality operation of the floor covering. Today, manufacturers offer several types of laminate substrates.
Expanded polystyrene
The most common type of substrate.
It is moisture-resistant, resistant to mold and fungi, and has good insulating qualities. But under mechanical influence it wrinkles a lot.
Cork
The material is environmentally friendly, with good insulation qualities, resistant to mold growth and stress. This material is the most expensive of all on the construction market.
Composite materials
Bitumen-cork or rubber-cork is something between the first and second types of substrates, both in price and in characteristics.
The choice of substrate must be made based on its purpose and resistance to mechanical loads. Assembling the laminate on the previous finishing coating involves laying polyethylene foam, and it makes sense to lay a cork backing on the concrete screed. Composite materials are versatile.
Substrate laying technology:
- a layer of substrate 0.2 mm thick is laid on the prepared surface;
- sheets or canvases are laid in the transverse direction of the future laminate laying, slightly touching the walls (3 cm in height);
- individual elements of the substrate are connected with masking tape;
- The corrugated side of the substrate is placed downwards, and the foil side is placed up.
https://youtube.com/watch?v=ul8gg_UtxIw
Laying laminate flooring is possible both on the subfloor and on the previous coating. In the first case, you need to prepare a reliable base for the laminate.
Gluing plywood to the floor
Laying plywood on a concrete floor allows you to hide minor irregularities in the screed and make it warmer.
To attach the sheets you will need glue and dowel screws. Tools: notched trowel, hammer drill, screwdriver or screwdriver.
The best glue is with the addition of pine resin (often it is not indicated in the composition, but its presence can be determined by the smell); this is, for example, Thomsit 200 or 400.
For better adhesion of glue to plywood and concrete, the floor is first primed.
The length of the dowels is selected so that they go 4-5 cm deep into the screed.
- Before starting work, thoroughly clean the screed from dust and debris and coat it with a deep penetration primer.
- Apply glue with a notched trowel to the plywood or floor and lay it with offset joints. We also leave technological gaps of 2-5 mm between the sheets and near the wall.
- For additional fixation, we drill holes with a hammer drill, insert dowels and tighten them so that the screw heads do not stick out.
- We fill the gaps between the sheets with gypsum plaster. If you plan to lay the laminate on plywood later, you can leave them as is, or seal them with sealant.
- When the plaster hardens, it is treated with a grout mesh and the seams are taped with reinforced tape.
Video of slab installation
We recommend watching the video, which explains in more detail how to install slabs into tongue and groove:
Moisture-resistant chipboard is an interesting solution for rooms with high moisture. The main thing is to choose the right material and apply it correctly.