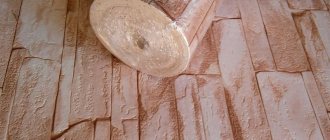
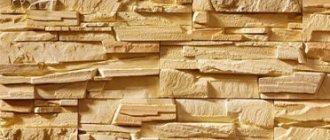
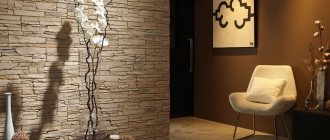
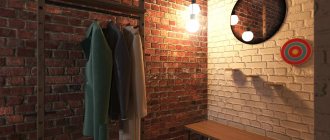
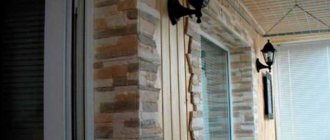
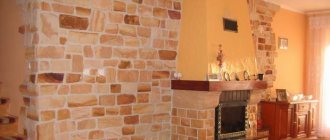
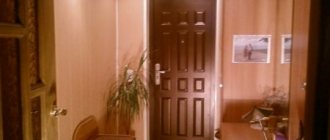
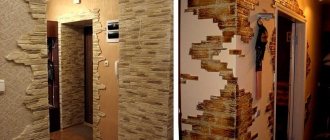
Wall decoration with decorative stone goes well with wallpaper. This option is suitable both for the interior of the hallway and for decorating the walls in the kitchen space. For repairs, two types of stones are used: they are created from artificial concrete or gypsum.
Wallpaper and thin-layer decorative material for kitchen cladding.
About the advantages and disadvantages
The advantages of finishing include:
- harmony with any style;
- a huge range of textures, shapes and colors;
- originality;
- easy maintenance and long service life;
- decorating walls in this way will not be difficult;
- the stone is not susceptible to infection by fungal growths;
- environmental friendliness;
- light weight.
Cons of artificial stone:
- shorter service life compared to natural materials;
- some samples made of soft material quickly take on a shabby appearance;
If you correctly select this decorative element, then the listed shortcomings will remain in the shadows. To protect it from negative environmental influences, its surface is treated with a special impregnation or varnished.
How to choose
The choice of raw materials depends on the walls, how much weight they can withstand. If a strong base can easily bear the weight of natural material, the number of finishing options expands significantly.
Stone blocks must be carefully inspected for chips and cracks. The play of shades and contrasting inclusions will give the overall look a special design.
An example of a quality stone
It is recommended to buy water-repellent stones, otherwise you will have to perform additional processing. The slightest jumps in the humidity level, drops of liquid will instantly be reflected on the surface in the form of spots and streaks. Contaminants cannot be removed; deep absorption occurs.
Combining artificial stone with wallpaper
Decorative stone is unique in all respects, and any type of wallpaper will harmonize with it. To ensure they last a long time, you should choose high-quality fabrics. Liquid wallpaper is perfect for the hallway.
You can also use paper, non-woven or glass wallpaper.
Paper material is cheap, easy to stick to walls, and can be painted well.
Non-woven wallpaper has a porous structure, making it easy to hide any unevenness or cracks. They are also durable and can withstand staining well.
Fiberglass wallpaper combines favorably with decorative stone, as it has a relief surface.
Photo wallpapers will look good. It is important that they match the selected stone as closely as possible.
Surface preparation
The surface of the wall must be thoroughly cleaned of any contaminants, the remnants of the previous coating must be removed and all detected cracks and crevices must be sealed using polyurethane foam or any plaster mixture. It is better to putty the walls with a gypsum-based composition. Gypsum plaster or putty will provide reliable, high-quality adhesion. After the putty has completely dried, it is necessary to treat the surface twice with a deep penetration primer mixture.
This is reliable and effective protection against fungus and mold, high humidity and insects. Now you can start gluing the canvases. If desired, the outline of the proposed panel, which will be created from decorative stone, is outlined in advance so as not to glue extra sheets and calculate the amount of material required with maximum accuracy. The last sheet should extend beyond the boundaries of the picture. After drying in accordance with the specified boundary, the edge of the canvas is carefully cut and work with stone tiles begins.
Often the idea to decorate part of the wall with stone panels comes at a time when the walls have long been completely covered with sheets of wallpaper. In this case, the edge of the decorative coating is marked directly on the surface with a pencil or marker and the canvas is cut along it, so that later the unnecessary part, after wetting with warm water, can be removed.
Laying is carried out so that there is a distance to the edge equal to the size of the tile.
Color solutions
Most often, beige, gray or brown shades are used in modern hallway design.
To visually enlarge the space, use light shades that imitate marble, granite, quartz or pebbles.
It is better to choose light wallpaper for a dark stone finish.
The best option would be if the wallpaper is two shades lighter than the stone.
Various bright colors are also relevant.
Features of the design of a small hallway
In houses built last century, especially in Khrushchev, as a rule, there are very small hallways. They are a small square of about 3 m2. If you want to use stone in a corridor of a small area, some tricks will help. Firstly, it is worth remembering the main rule: light shades will visually increase the area of the room. Bright colors, on the contrary, hide it.
Full cladding of all walls will look harmonious in open hallways that immediately flow into the living room. In this case, the stone can go into the living room area or be combined with other elements of the room.
In remote rooms, you can use a partial finishing option, for example one wall or corners.
Natural stone is massive; it will be replaced by decorative material, wallpaper or imitation tiles. Construction stores have a wide range of materials and often present examples of finishing in ready-made versions.
Styles
The hallway creates the first impression of the home, and therefore it is very important to choose its design. Let's consider design options that use the “stone + wallpaper” duo.
Modern style . Chooses white stone to match the brick and light wallpaper.
Eco style . Slate rocks are used here.
Urbanism . Uses brick-like tiles.
Classic . Decorates the walls with marble or granite.
Country and Provence . They use gray and brown stones of different shapes. Combined with regular wallpaper, photo wallpaper and murals.
It is not uncommon to add “street lamps” to such an interior.
Interesting ideas
So, let's see what we can do to unusually decorate the walls with decorative stone and wallpaper in the hallway?
- Apply jagged edges to make the walls look voluminous.
- Install spotlights to highlight the cladding.
- Add various decorations to the wall. Mirrors, paintings, fakes and compositions will be used.
- Create a living corner.
- In the classical direction, place stone on the columns, emphasizing the overall ambiance.
- Hang shelves to store small items.
Mounting options
So, there are several ways to do this:
- First, the stone is glued, but the outer tiles that border the canvases are not glued, after which the wallpaper is glued. Then the outer rows are installed overlapping.
- First, the canvases are glued, and the areas that will be finished with another material are cut out.
Now let's take a closer look at both of these options.
Pasting stone to wallpaper
If the stone is laid first, the work is performed in the following order:
- Before gluing the panels, you should prepare the base - remove the old coating and clean the walls from dirt and dust. Areas that are peeling or crumbling also need to be addressed. If necessary, the base must be coated with putty and sanded.
- The next step is to treat the walls with a primer composition. This will strengthen the base, improve adhesion between materials, and also prevent the possibility of fungus and mold. This preparation is general for the installation of all materials.
- After the walls are prepared, you can glue the panels. Their installation depends on the shape. Rectangular slabs should be installed in rows, and irregularly shaped panels can be arranged randomly.
Installation of irregularly shaped slabs
If the panels will be laid in rows, then it is necessary to draw a horizontal line on the surface to be finished using a building level. Elements of irregular shape should first be laid out on the floor so that you know in what sequence to install them.
- Then you need to prepare the adhesive solution. For gypsum panels, gypsum glue is used. If the material is light, then you can use liquid nails.
- It is better to start work from top to bottom, especially if the wall is covered completely along its entire height, in which case you will not have to trim the top row. The panel must be coated with glue using a spatula and applied to the wall.
Since the material has an uneven surface, it does not need to be leveled like tiles. Exposed glue should be wiped off immediately with a rag.
- At the junctions of materials, the panels are not glued.
- Next, if necessary, you need to trim the slabs. This can be done with a grinder at low speeds.
- Then the walls are covered with canvases.
- After the walls are completely covered, it is necessary to install the outer rows of panels, which are glued to the canvases with an overlap of 1.5-2 mm. If necessary, they must be trimmed so that the main area of the panel is glued to the base and not to the canvas.
Advice! After gluing the decorative stone, it must be varnished. This will add richness to the color and also protect the surface from dirt and damage.
This finishing method is the most economical, but not very convenient if the transition boundary of the materials has a complex shape.
Artificial stone on the arch
A popular option for using stone in the interior of a hallway is lining the passage to different rooms with stone. Using your imagination, you can choose the best option for yourself.
The decoration of the opening looks exclusive if the brick meets the wall in places.
The arch can be made in any color and style.
You can line one side of the passage with stone.
Or surround it with stones.
Preparing surfaces for finishing
As a rule, areas lined with stone form a ragged edge. To avoid difficulties with trimming the wallpaper, it is better to glue it first, and then finish it with stone with a slight overlap on the paper. To do this, you need to first draw the contours of the areas for finishing with stone on the wall and apply a second contour line with an indentation of about 10–20 mm.
Due to different techniques for finishing stone and wallpaper, wall preparation may have some differences. It is recommended to apply a layer of finishing gypsum putty of about 1–1.5 mm under the wallpaper to create a dense and durable skin with good adhesion to the paper glue. The boundary of the putty coating is the outer contour of the areas with stone - the spatula is placed along this line and stretched in the opposite direction. Subsequently, the putty walls are rubbed down with an abrasive mesh and opened with deeply penetrating soil, thereby removing dust and strengthening the surface, as well as making it easier to remove the wallpaper during the next repair.
Puttying the areas where the stone will be glued is not necessary and even harmful. In order for the finish to last long and reliably, you should ensure a minimum thickness of the adhesive seam and as few preparatory layers as possible. Thus, the stone must be glued directly to the load-bearing layer of the wall; a layer of leveling plaster is allowed. Impregnation with strengthening primer for concrete surfaces is required.
Photo examples in real apartments
Below are a few successful examples of corridor renovations by ordinary people who chose this finish for themselves.
