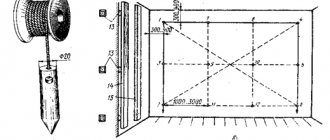
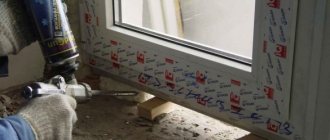
We set the level
Before starting marking, it is necessary to securely secure the level to avoid its fluctuations or movements. The smallest deviations at a distance of tens of meters can result in meter-long misses.
The following methods of attaching a laser level are usually used:
Read also: Gray-brown backgrounds (photo)
- On the floor, table, stand and any solid and stable surface
- On a standard tripod. The retractable rail allows you to raise the device to a height of up to three meters.
- On the spacer rod.
- On a flat wall using vacuum suction cups, sticky circles or magnetic holders.
It is not so much the method of fastening that is important, but its reliability and stability.
Surface preparation
Before installing beacons, the surface must be prepared, regardless of what walls are planned to be plastered - brick, foam or gas block, plasterboard, concrete or others. The foundation preparation process consists of several stages, each of which is very important. You can't miss a single one.
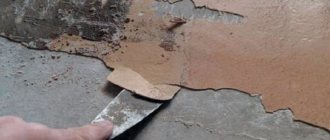
The first step is to remove the old covering from the wall, and we are talking not only about wallpaper, but also about plaster, paint or something else
Please note the specificity of the procedure. So, the wallpaper will have to be removed in any case, just like water-based paint
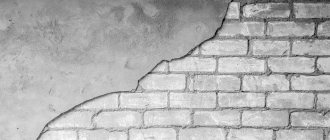
If the walls are covered with oil paint (it is almost impossible to remove), then you can leave the paint, after making notches to improve the adhesion of the plaster and the oil composition. Old plaster can also be preserved if it does not fall off or “bounce”, but if there is even the slightest concern, it is better to dismantle the coating
It is extremely important to take the time and thoroughly clean the surface of the base
Next, the wall is washed from dust and dirt, and particles of the remaining old coating are removed. The surface should be clean and slightly rough.
The walls are well primed using a deep penetration liquid primer
Please note that priming work is carried out 2-3 times. Each time you need to wait until the previous layer of primer has completely dried
Depending on the type of surface, before installing beacons and plastering, you may need to apply a certain material to the wall. So, for brick walls no additional processing is required. Concrete surfaces must be treated with liquid cement mortar. Wooden and metal walls are additionally reinforced with special plaster nets, which are secured between the beacons.
In principle, at this point the preparatory work can be considered completed. Before starting any repair work, you need to protect adjacent objects and surfaces with masking tape: cover the door jambs, stick a strip of tape on the floor and on the ceiling where they are adjacent to the walls. This will completely protect the environment and will not require much time in the future to clean adjacent surfaces.
Installation of beacons for plastering walls in different ways
When installing, the main thing is to securely fix the beacon profiles to the wall. To reliably, quickly and accurately install the beacon on the wall, use ready-made or home-made fasteners, for example, eared ears, clips. Often the installation of beacons for plastering walls is done using mortar.
Read also: blue and lilac IN COLOR BALANCE
To prevent the solution on which the profiles were installed from serving as an accelerator for the crystallization of the plaster composition applied during plastering, the flashings are coated with a primer after installing the beacons.
Installation on plaster mortar or tile adhesive
Round or rectangular “bedside tables” are formed from the slides; the top is cut off along an auxiliary vertical plane at the height of the caps. On such hardened bedside tables, it is much easier to place beacons under the plaster and secure them with plaster mixture or tile adhesive.
After installing the plaster beacons on the marks, fix the position of the profiles between them. Pieces of cut drywall can be useful here, from which you can make a mark of the required height by gluing the pieces with a solution or adhesive mass. If the beacon profiles are located close to the surface of the base, it is enough to place a mortar mixture under them in the right places.
Installation of beacons without mortar
Since our task is the reliable installation of beacons with protection against displacement during the plastering process, we need quick, strong fastening of the profiles to the self-tapping screws. For this purpose, several types of fasteners have been invented.
You can install beacons on hardware using:
Selection and installation of beacons for self-leveling floors
The installation of all existing types of beacons is preceded by several preparatory stages, namely:
- the floor is cleared of the existing finishing coating and traces of its presence, the baseboards are dismantled;
The old floor should be removed - All kinds of stains, dirt, and dust are removed from the surface;
- existing protrusions are polished;
Repair of old floor screed - recesses, cracks, etc. are sealed;
Carrying out screed repairs. Cracks are widened, reinforced, puttied - the base is covered with a primer;
Treating the screed with a primer - waterproofing material is being installed;
Waterproofing is necessary in any room, because... vapors from the lower floors and basement penetrate through reinforced concrete floors - The zero level is determined, marks are placed, and the main stage of work begins.
We invite you to familiarize yourself with Bathhouse: projects of impressive and stylish tandems
Profile on solution
Profile on solution
Often, performers who are engaged in the independent arrangement of self-leveling floors refuse to use beacons, believing that the fill itself will fill the surface without differences in height or other defects. Along with this, qualified craftsmen still recommend not to abandon the use of beacons, especially since in combination with self-leveling floors, landmarks are used that have a simplified design and do not require a lot of time for their installation and subsequent dismantling.
Benchmarks
Benchmarks
A professional beacon, ideal for use when installing self-leveling floors. The design is made in the form of a tripod with a moving central rod. It is the last element that allows you to set the desired screed level.
Before starting work, the floor must be primed, wait about 5-6 hours, and only then pour the selected material. The recommended installation step is 1 m.
Having installed the reference point on the base, the performer, by rotating the central rod, positions the product at the desired height in accordance with the previously made markings. After pouring and leveling the mixture, the guide beacons are dismantled.
Lighthouses made from self-tapping screws
If desired, a self-leveling floor can be made using a homemade analogue of the previously discussed benchmark. To do this, you need to take self-tapping screws twisted into dowels, fasten them with a piece of punched paper tape and align the resulting structure at a given level. Homemade landmarks, as well as benchmarks, are dismantled before the pour hardens.
Beacons for self-leveling floors
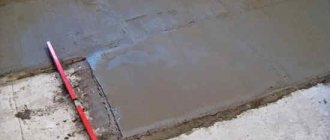
Installing beacons for arranging floor screed is a very important and quite time-consuming process. However, as practice shows, there is no need to rush to the detriment of the quality of the fill, because... this is fraught with extremely unfavorable consequences: the finishing coating laid on top of an uneven screed will not have the most presentable appearance and will last much less than expected.
When placing beacons, check the evenness of their placement using a level in both directions, i.e. along and across, and only if there are no deviations, proceed directly to the stage of pouring the screed.
Aligning beacons using a level
Good luck!
Before installation, you need to familiarize yourself with the information on how to correctly position beacons for floor screed.
Sequence of preparatory actions:
- The baseboards and old finishing coating, as well as everything that remains of it, are dismantled.
- Clean the surface of the base from peeling, dust, all kinds of dirt and stains.
- Grind and cover with cement mortar the existing depressions and cracks.
- A primer mixture is applied to the base.
- Lay a layer of waterproofing material. Sound and heat insulation is placed on top of it.
The first of the beacons is installed in such a way that it covers a protruding point on the floor (for more details: “Installing beacons for floor screed with your own hands - recommendations”).
There is a certain sequence of actions on how to set beacons for floor screed:
- Using a hammer drill, a recess with a diameter of 6-10 millimeters is made in the concrete base (from the side of the entrance door to the room) on the line of the outermost beacon. A wooden chopper is placed in the hole, then a self-tapping screw is screwed in.
- Another fastener is installed at the second end of the line, where the guide will be located.
- Then a rule is placed on the caps of the fastening elements (a long block is possible) and a level is applied to it. The location of the second screw is adjusted so that the two caps are on the same horizontal line.
- A fishing line is stretched between them (you can use a painting cord). Several more recesses are drilled under it in increments of 50-60 centimeters. Choppers are inserted into them and screws are screwed in.
- A similar operation is performed along the line of the second extreme beacon. Then gypsum mortar is laid in handfuls along the outer guides. Instead, you can use a regular cement composition, adding alabaster to it, and then it will set in about 15 minutes.
You should separately consider the installation of the most famous and widely used type of beacon - profile. Installation of beacons for floor screed begins with calculating the zero floor level. Different masters do this in different ways. But the gist of it comes down to this:
- Make a marking from the base up the wall - one meter. It is necessary to measure a meter from the floor along each wall.
- Next you need to find the highest point. Align all other marks using it. Connect all the dots into a line.
- Then we retreat from the resulting base line down to the floor by one meter. Making notes. Then we connect them in a line. It should run parallel to the baseline. This will be the starting point - zero floor level.
- Then you need to step back 3-5 cm from this line and draw a new, final line. Beacons will be placed along it. You need to retreat upward from the zero level exactly as much as the planned thickness of the screed.
Installation of profiles
The first and most important stage ends here. Calculation of zero horizontality is the main point; the general appearance of the floor covering in the future and its service life will depend on this. The next stage will be the installation of beacons. The profile height is usually 27-30 mm.
The work boils down to the following:
- The profile can be attached and positioned in different ways. It all depends on the type of screed. Usually it is mounted on a mortar or a self-tapping screw. The profile can be thin and easily bendable - it is used for small ties up to 3 cm thick. A metal profile, stronger and thicker, is used for ties with a thickness of 4-5 cm. The level of the beacon is adjusted along a line on the wall.
- To prevent the beacons from slipping or deforming, they are placed one inside the other. That is, at the intersection it is advisable to fasten them together. Small piles of mortar are made on the base.
Profiles are mounted on them. Then, using a level, the horizontality of the beacons relative to each other and the line on the wall is checked. The height is adjusted by pressing the rail or placing mortar under it. The space between the sides of the profile is also filled with mortar.
Everything is carefully aligned according to the rule so that the edges of the structure barely touch the further finishing coating. You can start pouring the entire floor only when the solution under the profile has completely dried.
A screed without beacons is unlikely to be level and level, so let’s consider another method of fixing profiles.
- A more reliable method of fixation is screwing with self-tapping screws. A hole is made in the base for the dowel. The pitch between the dowels will be 20-30 cm. A self-tapping screw with a profile is already inserted into it. The height is adjusted by tightening the screws. For greater reliability, the structure is additionally secured with cement mortar. If you use a solution, you must wait for it to dry completely before pouring the area.
- You need to start installing the rail from the wall. The distance will be approximately 10-30 cm. The frequency of installation of beacons depends on the length of the rule that will be used when pouring the screed.
- If a dry type of screed is used, the solution itself will act as beacons. The piles are built in the corners of the room according to the line on the wall. They become the guideline for the basic laying of the mixture. Typically, a profile structure is not used for such a screed.
- If a wooden lath is used, its installation is no different from the installation of a metal profile. After pouring the entire area and setting the cement, the beacon must be removed, otherwise the wood will dry out and cause cracking of the entire screed.
When pouring a self-leveling floor, a profile structure, as a rule, is not used. Either a professional mechanism is used - benchmarks, or self-tapping screws. The screws are screwed into the installed dowels in increments of 20-30 cm. A cord is pulled between the screws. It is used as a guide when pouring the floor.
Installing beacons is not a difficult task; the main point is determining the zero level and drawing a line. It is a guideline for subsequent installation of profiles. When choosing the type of beacon, you should take into account the type of screed - dry or wet. The first usually implies the absence of beacons as such. The mixture itself is used in the form of small piles in the corners. The foundation is laid out on them.
Profiles are often used for pouring concrete screeds. They are easy to work with and install. In the case of large areas and thick screeds, metal profiles are used. They are more durable and reliable. In other cases, a regular profile for drywall is used.
- the floor is cleared of the existing finishing coating and traces of its presence, the baseboards are dismantled;
The old floor should be removed
- All kinds of stains, dirt, and dust are removed from the surface;
- existing protrusions are polished;
Repair of old floor screed
- recesses, cracks, etc. are sealed;
Carrying out screed repairs. Cracks are widened, reinforced, puttied
- the base is covered with a primer;
Treating the screed with a primer
- waterproofing material is being installed;
Waterproofing is necessary in any room, because... vapors from the lower floors and basement penetrate through reinforced concrete floors
- The zero level is determined, marks are placed, and the main stage of work begins.
Linear parameters of the created beacon system
What rules should be followed when placing a beacon system on the floor surface:
- First of all, direction. As a rule, the direction of the beacon lines or installed guides is always (with rare exceptions) parallel to the long side of the room, i.e. exactly the way it will be poured. If the configuration of the room requires changes in the direction of pouring at its final stage, then the beacon system can repeat this pattern.
- The distance from the outer guide to the parallel wall should not exceed 250 ÷ 300 mm. If this is not observed, when pouring, areas with a low level may appear along the wall - dips that will have to be added additionally.
The rule must move freely along the guides with a certain margin on the sides
- The distance between adjacent lines of beacons is, in principle, arbitrary. They are approximately evenly distributed across the width of the room, but taking into account that the rule by which the screed will be leveled protrudes on both sides of the beacon lines by 150 ÷ 200 mm.
There are, of course, exceptions to this issue. So, for example, to lay a dry screed, you may need 6 ÷ 7 support guides per 3 meters of room width, regardless of the length of the existing rule.
How to install: step-by-step instructions
The technology for making mortar beacons is quite complicated, especially for a person without experience, but a definite advantage is that a fixative is not needed.
First of all, it is necessary to apply a sufficiently thick strip of plaster between the marking screws
Please note that the solution must be applied immediately before making the guide, and not immediately on the entire wall. Using the rule, you need to form a lighthouse, flattening it on both sides and on top
In addition, it is possible to install plasterboard guides. When the walls are relatively flat, this option seems to be one of the most acceptable and cheapest. You can use scraps of plasterboard left after repairs.
First, the plasterboard scraps need to be cut into strips 3-4 cm wide. The solution is applied to the preliminary surface with slaps. The distance between the tubercles of the solution should be 20-30 cm. This will ensure good adhesion, at the same time, the drywall will not bend as a rule.
Next, the strips are pressed against the wall with the mortar and aligned using the rule using the screws screwed in during marking. The result is a flat surface on which it is convenient to guide the rule. In this case, the drywall strips will not bend and the wall will not be aligned incorrectly.
Wooden guides are not used in modern practice, since pulling them out of the wall after completing plastering work is extremely problematic. As a result, the wood may begin to rot, and traces of rot will appear on the finish coat. However, wooden beacon bars must be installed using the same technology as metal or plastic ones. The wooden blanks will be slightly wider, but otherwise the fastening procedure is the same.
String beacons require a slightly different approach during installation. When installing them, you must follow the following instructions:
- After the surface has been primed twice and thoroughly dried, you need to secure the brackets of the string device in the places where dowels were installed during marking.
- Next, you need to tighten the strings between the clamps. Their placement and distance from the wall should be as determined during marking.
- The strings are stretched to the point of so-called ringing: if you pluck them, a characteristic ringing sound should appear.
- Next, the string is fixed with a solution. This is done so that during the plastering process it does not sag and the evenness of the wall is not at risk.
- After the applied mortar has completely hardened, you can begin plastering the walls.
Regardless of which type of fastening you choose - with fasteners or on a solution, installing profiles or guides of other types will not cause difficulties. The main thing is to carefully prepare the surface, and then follow the instructions step by step.
Calculation of the number of beacon lines
The number of lines depends on how long the rule is. Its ends should rest on the beacons, but so that there is 15-20 cm left to the edges. So, if the length of the rule is 1.8 m, then the distance between the profiles varies from 1.4 m to 1.5 m. Marking begins from the corners , from which they deviate at least 10 cm. Subtract 20 cm from the total length of the wall and divide by 1.4 or 1.5 to obtain the number of lines.
If the last gap is longer than the rule, it is divided in two.
The number of beacon lines is determined based on the length of the rule
Installation of beacons on gypsum putty
To attach profiles to gypsum putty, first dilute the solution. To do this, prepare tools and materials so that everything you need is at hand, and you don’t have to take time off from your main work to find the right thing.
Preparation
Mix the plaster in small portions, as it tends to set within an hour,
The gypsum solution is diluted in small portions, since the time of its use is limited.
The working process
The solution begins to be applied from the corners. The distance between the throws is 15-20 cm. The greater the deviation from the vertical, the thicker the putty layer is made. The beacon is applied carefully, checking with a laser level or a bubble level, which is attached with tape to a long, adjusted strip.
If the putty layer is not enough, the profile is carefully moved away from the wall and additional mortar is added. All beacons must be located on the same plane.
Beacons must be positioned so that they are all located on the same plane
Completion
When the plaster has dried, the beacons are removed. They are not removed only in two cases: if the wall will subsequently be covered with tiles, if the profiles are made of plastic. In case of wallpapering or painting, beacons must be removed, especially galvanized ones. During plastering, the rib of the lighthouse is usually repeatedly touched, the galvanized layer is damaged, this gives way for corrosion to develop, and rusty spots appear through the putty.
Beacons are fixed using putty
It is better to fix beacons not with plaster, but with putty. Plaster tends to shrink significantly when drying. This will affect the correct geometry of the beacons - they will be attracted to the wall, and there will be a concavity in the places where they are fixed.
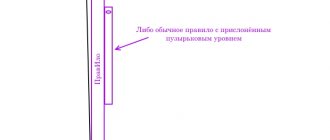
How to check the flatness of a surface with a laser level
When leveling walls using a laser level, it is worth noting only the installation of slats. You need to turn on the vertical plane of the device and fix it so that the projected plane runs strictly parallel to the wall. In this case, the laser does not build the leveled wall itself, but a plane parallel to it.
If the laser is interrupted and does not reach the end of the wall, then the surface is not perfectly flat. The instrument should be moved slightly and the change in the laser observed. To clarify differences on the wall, a wooden or metal meter with a millimeter scale is best suited.
To ensure that there are no moving parts on the instrument, this may cause inaccurate measurements (for this reason, it is better not to use a tape measure).
Next, you should select vertical sections at a distance of several centimeters from each other and install the measuring instruments perpendicular to the surface. It is necessary to note the measurements through which the laser will pass and repeat the procedure after 70-100 cm. Based on these data, you can approximately imagine the degree of curvature of the wall.
If the laser is interrupted and does not reach the end of the wall, then the surface is not perfectly flat.
How to draw a right angle between walls for subsequent installation of beacons
When plastering, it is necessary to remove right angles between all partitions. This significantly improves the appearance of the room.
Extending corners is carried out in several stages:
- First, the master determines which wall will be the base one. If there are windows, this will be the outer wall of the building. In the absence of windows, there is a wall into which the person entering rests his gaze.
- The surface is covered with plaster.
- If the other wall is blocked away from you, then use a square or ceramic tile. A rule will be needed to determine the degree of curvature. You need to set up a beacon to tighten the corner.
- If the wall is piled towards itself, the corner output is made using a vertical level. The maximum inclination is calculated, auxiliary devices are set and a right angle is displayed.
How to set markings for installation of beacons: a
Before fixing the beacons on the rough wall, you need to mark the surface. Determine its depressions and convexities, and also calculate the blockage of the wall (if any). After the markings have been made, it will be clear how many beacons will be needed for plastering work.
To perform markings, 3 methods are used, differing in their specificity and time spent.
Method I is the usual one.
- Measure 30 cm from the corners of the wall being prepared. 15 cm from the floor and ceiling.
- Using the obtained points, lines are drawn horizontally and vertically.
- At the points where the lines intersect, you need to make a hole and fix the screw.
- From the marked vertical lines the surface is marked into vertical stripes. The distance between them is 1 meter, maximum 130 cm.
- On the extreme vertical stripes you need to find the middle and mark it. Connect the dots. You will get a horizontal stripe in the middle of the plane.
- Next, plumb lines are attached to the upper screws. Also, the self-tapping screws in the corners must be connected diagonally with thread.
This way, all the unevenness on the wall is revealed, as well as the percentage of surface obstruction.
Method II – “spider”. The name comes from its resemblance to a spider's web. To apply markings you need:
- Retreat from adjacent walls 15 cm, and from the floor and ceiling 5 cm.
- Self-tapping screws are fixed at the intersection points of the horizontal and vertical lines. The caps protrude 2 cm above the surface.
- Plumb lines are hung on these screws. They are fixed below. The location is marked and self-tapping screws are also screwed into these places.
- Pull 2 vertical threads.
- Horizontal ropes are tied to these threads; they should move freely up and down.
- By moving the horizontal lines, the unevenness of the wall is affected, they are marked with a marker, and the collapse of the wall is also determined.
When marking vertical lines for beacons, an equal distance is noted from the outermost vertical lines. Let's say 1 meter on one side and the other. The remaining surface is also divided into equal parts of 120.130 cm.
Before you start making markings, you need to study how the electrical wiring runs.
After the markings have been made, the number of required guides for the beacons is calculated. They are cut 30 cm less than the height of the room.
On gypsum putty
Lighthouses are placed in different ways according to markings. One of them is gypsum putty. This method is used most often due to the ease of dismantling the profiles after creating a single plane.
Materials and tools
To attach the guides to the solution you will need:
- guides - beacon profiles;
- gypsum putty;
- clean water at room temperature;
- container for mixing the solution;
- construction mixer;
- trowel, spatula;
- level, rule.
The container and tools must be clean. This will increase the time you work with the mixture.
Sequence of work
First you need to mix the solution. To do this, follow the instructions on the bag with the dry mixture. You shouldn't make a lot of solution because it hardens within an hour. Before applying the solution, the wall is cleaned of dust and moistened with plain water.
Installation begins from the first line from the corner. Place patches of mortar in the place for the beacon every 15-20 cm. The greater the collapse of the wall (deviation from the plane), the larger the patch should be.
Afterwards, a guide bar is installed on the solution. Its evenness must be corrected using a level and a rule. If the solution is not enough, it must be added. And if there is too much, carefully remove it on the sides with a trowel.
In the same way, the beacon is installed on the other side along the extreme markings. Only after installing the outer profiles, install intermediate guides.
Each installed profile must be checked for evenness. When the solution has dried, you can begin the main work.
Upon completion of all work, the beacons must be removed, and the place where they are fixed is covered with a solution.
How to set using self-tapping screws
This method has the advantage of reducing operating time. There is no need to wait until the solution sets or the evenness of the installed guide is disrupted if it is accidentally touched. These facts are important for beginning craftsmen.
Materials
To install beacons using screws, the following materials and tools are required:
- beacon profile;
- self-tapping screws with dowels;
- fastenings for profiles;
- perforator;
- screwdriver;
- level, rule.
In this method, it is important to maintain accuracy in performing the work.
Sequence of work
On the lines marked for the profiles, holes are made for the dowels in equal increments of 15-20 cm. Self-tapping screws are screwed into the dowels so that the caps are in the same plane. To do this, use a stretched thread.
A profile mount is attached to each fastener. The beacon is mounted in this mount. The evenness of fixation is controlled by a level or a rule.
After installing the beacons, plastering work begins.
Rubbed plaster beacons
This method is applicable for a flat surface with minimal deviations. In this case, the plaster must be gypsum based. If cement mortar is used, this method is not suitable.
Materials
For rubbed plaster beacons you will need:
- plaster based plaster;
- spatulas with different blade widths;
- Master OK;
- self-tapping screws;
- drill;
- profile;
- screwdriver;
- level, rule.
All tools must be clean and in good working order.
Sequence of work
Dowels with self-tapping screws are fixed on the marking lines with equal spacing. For 3 meters of height there are 6 dowels with self-tapping screws. Fixation is carried out in equal steps. The screw caps are not screwed in completely, setting a single plane using the rule.
Afterwards, gypsum plaster is applied to the marking line. The beacon is fixed to it so that it comes into contact with the screw heads everywhere. Excess solution is removed.
To carry out further work, you should wait until the mixture dries completely. After setting, the profile is removed, leaving only a plaster line on the surface.
The advantage of this method is that there is no need to dismantle the beacon after the work is completed.
Leveling with a laser level
Beacons can be installed correctly and levelly using a laser axle builder. To do this you need:
- laser axle builder;
- rule;
- primer.
The first step is to coat the surface with a primer. After this, markings for the guides are applied. On adjacent walls, marks are placed from the corner by 5 cm.
Next, you need to install the laser level so that the vertical beam follows the marks made on the wall. There are 2 marks on the rule:
- first 4 cm;
- the second 6 mm is the thickness of the beacon profile.
Setting the rule according to the beam, pressing it against the wall, shows how to correctly fix the beacon. If the beam passes along the marks on the tool, then the surface does not have large errors. If the beam moves away from the mark on the rule, this should be taken into account when setting the beacon.
After setting the beam and checking the rule, you need to mix the solution and spread it along the markings. The beacon is applied to the solution and fixed. After this, you need to attach the rule to the beacon, the beam will be reflected on it. In places where the marks and the beam do not match, you need to press a rule that will press on the beacon.
This procedure must be performed with each beacon on the wall. After placing the lighthouse, excess plaster is removed. To carry out further work, you must wait until the solution has completely dried.
How to mount a laser level on a wall
Now there is a large selection of laser systems for construction and repair work. The laser level can be installed in several ways:
- On a tripod – the kit includes a tripod that can be adjusted to the desired height.
- The laser device can be installed on a stand, floor or other horizontal surface.
- The device is also fixed using vacuum suction cups or magnetic holders.
The laser installation is fixed to the wall using the third method.
How to use a laser level to level floors
To level the floor, the laser device is installed in the middle of the room and turned on. A laser beam is displayed on the walls, and markings are made using it. If you hold a ruler vertically, which is also imprinted with a laser, you can find protrusions and depressions on the horizontal surface.
Determining the zero point and fixing beacons
We install the laser level in the middle of the wall and turn on the beam mode so that it is parallel to the plane of the wall at a short distance from it (5-10cm). Our zero point will be the point where the laser beam is closest to the wall protrusion. Let's say it's 4cm. This means that we will need to adjust the screw caps 4 cm from the level beam. It must be taken into account that the plane must overlap the zero point after installing the beacons (take into account the thickness of the beacon). To make it easier to set the distance from the caps to the beam, set one screw to the desired distance (in our case, 4 cm). Make a mark on the screwdriver for the required distance. To make it easier, cover the screwdriver with masking tape. In the same way, align all the screws with the mark on the screwdriver.
Pros and cons of lighthouses
This table will help you choose the appropriate type of guides to create a perfect plane.
| Name of beacons | pros | Minuses |
| Metal | They are inexpensive, available in different sizes, and easy to use. | It is necessary to remove from the wall after use due to the appearance of rust, easy to bend and deform. |
| Wooden | “Old-fashioned” cheap method, for those who do not need a perfectly flat surface. | It doesn't always turn out smooth and neat. |
| Plastic | Easy to install, non-corrosive, light weight, can be left in the wall. | They are used only indoors, they react to frost with brittleness and deformation, and cannot withstand mechanical loads. |
| Reusable steel | Rigid and durable, not subject to deformation, can be used repeatedly. | They are expensive, heavy, very thick, they are removed from the plaster that has not hardened completely, otherwise they will be deformed, and the plaster will be seriously damaged. |
| Homemade | A cheap option, they cannot be dismantled, as they are completely covered with plaster. | They may not turn out completely even. |
| Strings | A budget option, mounted on walls of different heights and lengths. | If fastened incorrectly, the plane will turn out uneven. |
| Laser | The beacons are positioned perfectly evenly on all planes. | The device is not cheap and requires careful handling. |
After weighing all the pros and cons, you can choose exactly the option that is most acceptable in a given situation.
What materials and tools will be needed
To properly install beacon profiles, you will need:
- Building level or plumb line. It can be bubble or laser. The tool is required to bring surfaces to a single level in a vertical or horizontal plane. Auxiliary materials are placed on the basis of the level.
- Pencil for marking the installation of profile locations.
- Scissors or a hacksaw for cutting profiles to length.
When attaching beacons with self-tapping screws, you will also need a screwdriver, a drill with drills and dowels.
If the profiles will be attached to the mortar, you will need gypsum-based glue, a container for its preparation and a spatula for applying the mortar.
Types of lighthouses
Auxiliary materials are used to determine landmarks to create a level surface. Their shape can be any. When plastering, various options for beacons are used (which one to choose is decided by the master):
- Barriers made of mortar in the shape of a trapezoid or rectangle.
- Stretched strings that rest on the mortar to provide even tension throughout the space.
- Metal profile (L- or T-shaped).
- Planed boards.
- Plywood panels.
According to the material, they are metal, mortar, wood and plastic. Metal ones are easy to install and dismantle, but they can deform under load. This drawback can be eliminated by more frequent placement of mortar platforms. Typically T-shaped profiles are used. Their side shelves are used for fastening to the surface, and the edge determines the level of plaster application.
Note! When plastering large areas, metal pipes can be used. They have the required level of rigidity, but their cost is much higher than products made from analogue materials. In addition, in work it is possible to use only products with ideal geometry.
Increasingly, instead of metal devices, builders are using plastic ones. They are easier to install and are not subject to corrosion. The only drawback is brittleness at low temperatures.
Is it possible to do without lighthouses?
There is only one categorical answer to such a question - NO. When installing screeds of any kind, wooden coverings and even some self-leveling floors, which seem to have the property of self-leveling, it is not possible to perform the work efficiently without a beacon system. Judge for yourself:
- No matter how accurately builders work when installing floors, it is simply impossible to achieve their ideal horizontality - certain differences in level are always either immediately obtained, or they arise during the process of shrinkage of the building.
- Reinforced concrete structures (floor slabs), in most cases, due to their external texture, may also not have an absolutely smooth surface, which is required for covering many finishing coatings.
- Very often, floors require mandatory hydro, sound and thermal insulation, heating devices (“warm floors”), which also, according to many technologies, must be covered with a screed.
Relying on your own eye to determine both the required thickness and the level of the screed is, to say the least, naive. The work will only be done efficiently if a beacon system is installed. Moreover, in most cases she will simultaneously play two important roles:
- will become a visual reference for both the required volume of work and the expected floor level;
- will significantly facilitate the labor-intensive work of pouring or backfilling the floor simply from a technological point of view.
We suggest that you familiarize yourself with the Minimum thickness of the screed for water heated floors
Displaying beacons under plaster walls - features
Plaster mortar, when applied to an area, has high plasticity, so leveling it requires auxiliary materials and the necessary tools. Without this, it is impossible to obtain a level surface. Primary processing is carried out with wide spatulas, small spoons and rules. Working with them requires rigid guides, which include the materials described.
The plaster beacon works as a guide stop. During the process of leveling the solution, it will not allow the tool to pass closer to the treated area than necessary. By running a rule along the lighthouse slats, the plasterer removes excess mortar, retaining only the required volume of mass.
Important! When the plaster beacons are installed correctly on the walls, they will form a single plane. If necessary, using profiles you can set a curved surface or plaster columns.
How does a laser level work?
Depending on the model and type of device, the control may differ, but in general it comes down to the following principle. First you need to remove the mechanical locking of the gimbal, which is used to protect against damage during transportation. Often this switch is combined with the power-on function, and when the lock is removed, the device automatically starts.
When installed on a relatively flat surface, the pendulum will self-calibrate. If the tilt exceeds the automatic leveling range, a beep will sound. In this case, you will have to adjust the position of the device using the rotating legs, focusing on the readings of the bubble level built into the case.
One of the buttons turns on the projection of a horizontal line, the second - a vertical one. Repeated presses change the number of lines, and also turn them off completely to save battery power or the built-in battery.
There is a special mode for projecting slanted lines, which is activated by a separate button. In it, the pendulum calibration is blocked, and the level stops squeaking when tilted.
For vertical positioning, the laser level is attached to a tripod, rod, or simply mounted on any support at the desired height. To move in a horizontal plane, the device rotates around its axis manually or using fine adjustment screws.
Rack type beacons
This type of structure consists of elongated bars made of various materials. Depending on the material, they form different groups.
Knowing all types of beacons, you can already understand their installation. Many who have never encountered setting the horizontal level are wondering where to start and what to focus on. Installation of structures is a simple process. It comes down to a few simple steps
idimka
Installing beacons using a laser level
Before placing beacons, markings are applied to the surface to be treated. There are several ways to do this. The simplest one is that line indicators are installed on the solution chosen for finishing work.
- First, the indentations are indicated: from the corner - 30 cm, from the floor and ceiling - 15 cm.
- A vertical line is drawn (use a level to check). The same is done for the other side of the wall.
- We measure the gap between the lines.
- We divide the resulting length into sections of 150 cm (this is done to find out how many beacons will be needed).
- We drill recesses along the lines at the top and bottom where we install the dowels.
- We draw the surface with stripes. There should be a distance of 1.5 m between them.
The technology is as follows: self-tapping screws are inserted into the holes, the heads of which are connected with a thread. At the intersection of the stretched strip and the line, a hole is drilled into which dowels are first inserted, and then self-tapping screws.
It is important that the tops of the screws are the same height. For correct calculation you need to add:
- horizontal distortion;
- thickness of signs;
- reserve 5 mm.
The result will be a sum indicating how far the fastener should be from the wall. Having placed the screws, begin to tighten the threads diagonally. At this stage, the beacon is carried along the plane. It is good if it lightly touches the threads (but does not pass freely and does not tear). Next, the cords are removed and the surface is coated with a primer. This is how plaster beacons are designed.
Marking is a procedure that requires time and patience
There is no need to rush when placing beacons. Let's take a closer look at how to check the evenness of a wall using a laser level. First of all, possible horizontal deviations are determined, for which the device is placed near the opposite surface and the cross-level is turned on. At the same stage, it is determined how thick the plaster layer will be.
Next, the level is set at a distance of 0.4 m from the corner and a vertical line is found. You need to find a place where there is a minimum gap between the line and the wall. Now we take a 50 cm lath and mark a point on its surface equal to the distance just obtained, where we should add the thickness of the beacon and a reserve 5 mm. Lubricate the strips with glue, and use a rack to press the beacon so that the mark coincides with the laser line.
Let's move on to installing beacons. There are several ways to do this job, but the most common is with mortar or glue. Each composition has instructions for use. To make the cement or lime mixture dry faster, you can add a little gypsum or alabaster to the composition. First, apply small portions of the solution - every 150 - 200 mm. The beacons are placed on the same level with the screws, but it is better to determine the mounting points with a laser level. If there is too much solution, then the excess is removed and the following beacons are set.
Only high-class specialists are able to plaster surfaces without using auxiliary equipment, and then we are talking only about small walls. If a beginner is working, then levels and beacons are the products that will help correct errors in time.
Types of lighthouses
Depending on the material and properties, the beacons differ from each other. They all have their own characteristics and specific application.
Metal
This is the most popular version of profiles available in construction stores. Installation of metal beacons is the simplest; no special training is required. They are most often not removed after work is completed. There are metal beacons of different sizes on sale, with small ones used infrequently, while medium and large ones are most in demand.
Perforated beacon profile
Since a thin profile is used for the manufacture of products, it can be easily cut with scissors according to the required dimensions, which is a definite advantage for the craftsman. The disadvantages of metal beacons include the risk of rusting. Such products are made from ordinary carbon steel, which is prone to corrosion. In some cases, this leads to the appearance of unsightly red spots on the finish. In addition, if the beacons are too flexible and thin, to fill them you will have to prepare a special solution to strengthen the structure, or additionally use clips.
Wooden
Such devices are made from rectangular wooden slats with a channel-shaped profile. After the plaster hardens, they are removed. It is necessary to saturate each lighthouse with a water-repellent agent in advance, otherwise the wood may warp and bend, and the coating will not be even.
Wooden guides for applying plaster
Plastic
Such profiles are made of durable plastic. Their standard thickness is 3, 6, 9 mm, length - 3 meters, although there are other options on sale. The advantages of plastic beacons are undeniable:
- light weight, easy to transport and store;
- strength is not lower than that of metal products;
- non-susceptibility to deformation, return to original shape after bending;
- no risk of corrosive destruction or rotting.
PVC profile for leveling
Plastic guides also have disadvantages. They are less resistant to shock loads than their metal counterparts. In addition, the products are not suitable for facade decoration, since they lose strength under the influence of sub-zero temperatures. They require strictly correct fixation on the surface, otherwise they will bend when moving the trowel.
Reusable steel
Beacons, which can be removed and reused after plastering, are an order of magnitude more expensive than disposable ones. They are made of very durable metal (usually stainless steel or galvanized), they will never move even when a thick layer of the mixture is applied. Due to the high price, such beacons are most often used by professional builders.
Reusable steel beacon with fastenings
Homemade
Craftsmen often use various homemade devices that act as guides. For example, when finishing wooden surfaces, wooden blocks of the required size are used, which are easily attached with self-tapping screws. Experienced finishers even make beacons from the mixture, applying it in “heaps” according to the level or on the heads of pre-screwed screws. There is no need to dismantle them, because they will be completely hidden by plaster.
Installation of self-tapping screws for leveling walls
Strings
These products are also homemade analogues of purchased beacons. To install them, screw in self-tapping screws and stretch a thin wire or string between them, checking the correct location with a level. The free space that has formed under the string is filled with plaster. The strings must be removed before the solution has completely hardened. If you make a mistake and install the string beacons incorrectly, you can end up with a crooked surface.
Set of string beacons for plaster
Laser
Such “beacons” are projected onto walls using levels or laser levels. Such devices create marking lines in one plane. If you install the device and set the vertical plane parallel to the position of the base, the laser beam on the floor will outline a line to adjust the thickness of the finishing layer. Using this mark, you can install self-tapping screws with a certain height.
Using a laser level to level the plane