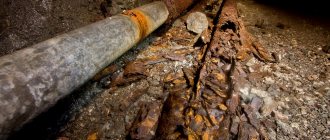
Cracks in the wall are defects in a building structure, manifested in the form of splits or ruptures of building materials under the influence of a weight load. As a result, not only the appearance of the building deteriorates, but the load-bearing capacity of the structure can also be significantly reduced. As a result, there is a risk of partial or even complete destruction of the building, which will make its operation impossible.
To prevent such consequences, methods for studying cracks are used during the inspection of buildings and structures. Their presence is recorded, the rate of expansion, width, depth is measured, the dynamics of development is predicted, and the cause of their appearance is identified. All this is done using special tools and devices. The main purpose of monitoring is to collect operational information about the actual condition and changes in load-bearing and critical structures, and to take the necessary measures to eliminate defects.
Beacons for cracked walls: types of devices and methods of using them
Cracks that appear on the walls of a building not only spoil the aesthetics of the building, but are also a sign of serious architectural problems.
If such a situation arises, be sure to notify the company responsible for operating the structure.
Specialists must conduct a technical assessment of the structure, establish the degree of safety for further use and approve a list of measures to eliminate the problem.
READ ON THE TOPIC: How to repair cracks in concrete: causes of appearance and solutions
During the inspection, the age of the damage is taken into account. Beacons are also installed on wall cracks to determine the dynamics of destruction.
Installation of beacons to determine the size of cracks in walls
The degree of danger of a crack that appears is determined by the location of its formation:
The problem area of the structure is monitored using different types of beacons. Monitoring is also used in buildings identified as emergency or with limited functionality. The development of the resulting destruction is also monitored in structures near which active construction work is taking place or reconstruction is being carried out.
The main purpose of observation is to record in a special log all changes in the parameters of cracks that appear. The following indicators are needed:
When choosing a suitable observation method, they take into account the urgency of obtaining information, the accuracy of the results, the reliability of the method itself and the complexity of the upcoming work.
Types of beacons and features of use
Electronic models
The work uses electronic sensors that can transmit information at a distance. With the help of such beacons on cracks, accurate results of damage to walls or partitions are obtained.
The procedure is expensive and requires the use of several sensors that measure the displacement of the structure in different directions. But such observations are carried out for no more than 15 days, and the results are recorded with an accuracy of hundredths.
Plaster marks on walls
They are considered the most accessible way to monitor the resulting destruction. Before installation, the damaged surface will need to be leveled. If the structure continues to deform, cracks will form in the lighthouse. In this case, control marks are installed nearby.
This takes into account:
The resulting measurement accuracy is also affected by the unevenness of the wall on which the crack has formed. Each tag is assigned a serial number and date. The results are recorded in a journal.
Measurements using plate fixtures
Such beacons are installed using epoxy glue or screwed using dowels. Models are equipped with a signal scale for measurements. The scale shows two axes and additional information, allowing you to fully examine damage in all directions. The measurement results are recorded to the nearest hundredth (in millimeters).
In terms of the ratio of the cost of the device and the effectiveness of the event, this method is considered the most optimal. Also, plate beacons are convenient to use.
Point control method
In the area of displacement of the structure, control points are determined and marked with ordinary dowels or special beacons that are inconspicuous on the wall. In this case, the surface in the problem area does not need to be pre-cleaned from finishing. This method allows one to observe the development of a split in any direction.
The accuracy of the result depends on the error of the instruments used to perform control measurements. Dowels or other devices are rigidly fixed to the plane and do not fall out during the research period.
Massuras
They are a clock mechanism with a high-precision measuring scale. They are visual devices from which readings can be easily taken, and the result allows you to quickly navigate the changes taking place. Considering the high cost of devices and the same probability of vandalism, sentry beacons are used when carrying out control measurements.
It is not recommended to use paper strips or glass devices to control cracks that have formed. Such methods do not allow obtaining adequate results in the process of observing damage to the walls of a building.
Source
How to attach a cable duct to a wall?
Electrical wiring is usually hidden in the walls, but re-drill them to hide the wires, for example, from a television antenna, router, air conditioner, etc. few people want it. In this case, a simple design comes to the rescue - a cable channel, which allows you to reliably hide the wires and, if necessary, get them out.
What is a cable channel?
The usual type of cable channel is a white box of rectangular or square cross-section, but finding a product of a different color or a more rounded shape is also not difficult.
Cable channels can be made from:
- aluminum;
- become;
- plastic.
Due to the low price, ease of installation and operation, the latter option is most common. It can be mounted on a wall made of any material.
Often there is a compartment for one cable in floor skirting boards. But because It is not recommended to place more than one wire in a channel; for several wires you will have to buy a multi-channel one.
Installation
The cable channel can simply be glued to a wall made of any material. But if there are a lot of wires in the box, then the glue may not withstand the load. In addition, it will be difficult to dismantle such a channel. It will only come loose together with the wallpaper and pieces of plaster. When laying a cable channel of great length, glue can make it possible to make holes for dowels and screws somewhat less often, simplifying and speeding up installation, but you should not completely abandon the more reliable method of fastening with screws.
If you attach it to self-tapping screws or dowel-nails on the part of the channel cable that will be adjacent to the concrete wall, you need to make holes. If you don’t do this and immediately screw the screws into the plastic, it may crack. With a narrow channel, the holes can be placed on the same line, and with a wide channel, they can be placed in a zigzag pattern.
Crack observation: methods and regulatory documentation
Cracks in the wall are defects in a building structure, manifested in the form of splits or ruptures of building materials under the influence of a weight load. As a result, not only the appearance of the building deteriorates, but the load-bearing capacity of the structure can also be significantly reduced. As a result, there is a risk of partial or even complete destruction of the building, which will make its operation impossible.
To prevent such consequences, methods for studying cracks are used during the inspection of buildings and structures. Their presence is recorded, the rate of expansion, width, depth is measured, the dynamics of development is predicted, and the cause of their appearance is identified. All this is done using special tools and devices. The main purpose of monitoring is to collect operational information about the actual condition and changes in load-bearing and critical structures, and to take the necessary measures to eliminate defects.
How to Know if a Crack Is No Longer Widening
In order to find out whether a crack has a tendency to expand, beacons are used.
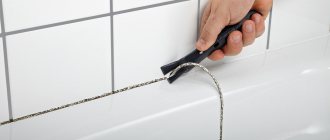
Since this is a long process (sometimes it takes more than a month to observe the development of destruction), then for cracks indoors you can use paper tape as beacons, and outside it is better to use plaster beacons.
- Pieces of paper are glued across the crack in several places. In the same way, plaster marks are applied across the gap.
- The condition of the beacons is checked at least once a week.
If the paper does not deform or wrinkle, but the plaster remains intact, or a crack appears in it, but it does not expand and has chips at the edges, then the main crack in the wall has stabilized.
If the new paper markers continue to tear and the plaster markers burst, the crack is unstable and continues to expand.
Normative documents
The information and regulatory basis for specialists when observing cracks in brick walls and concrete is the following regulatory documentation:
As sources of additional reference information, the “Manual for assessing the physical deterioration of residential and public buildings” and the latest edition of the internal standard STO SRO-S 60542960 00043-2015 “Geodetic monitoring of buildings and structures during construction and operation” (in which more precisely and the nuances of observations were worked out in detail, and the shortcomings of official state standards and rules were corrected).
Methods and means of observation
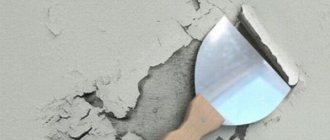
Initially, cracks are identified by visual inspection of the structure. If this is necessary to obtain more accurate data, the decorative finish is partially removed in places where defects occur. Further, as a rule, observation is carried out using beacons.
The objectives of observation are to establish:
For recording, the obtained data is recorded in a log of observations of cracks in the walls.
To measure the physical parameters of cracks,:
The choice of crack inspection technique and instrumentation is carried out depending on the specific conditions in which the measurements will be carried out, as well as taking into account the requested accuracy, material and nature of damage. The economic feasibility of using a particular technique or instrumental base and the capabilities of the customer are also taken into account before the start of observations.
Types of lighthouses
The most common devices for this type of observation are beacons. A beacon is a device or device that allows you to establish the fact of crack expansion, as well as measure the dynamics (if the type of beacon allows). Some types of beacons allow you to observe changes in a defect along its length or relative to the main plane.
Types of beacons for monitoring cracks:
Beacons of the first type only allow you to establish the fact that the crack is expanding, or that the damage is stable and does not develop. The second type of tools makes it possible to accurately measure the dynamics of the development of a defect, and even predict the process for the future. Accuracy depends on the specific type of beacon, as well as on compliance with the rules for using the tool.
Main types of lighthouses:
Rice. 1. Designs of beacons and gap gauges: a - plate beacon; b — gap gauge designed by LenGIDEPA;
c - lighthouse designed by Belyakov:
1 - crack; 2 - gypsum tiles; 3 - plates; 4 - bracket; 5 - measuring scale; 6 - casserole
Rice. 2. Designs of gap gauges: a - with messura; b - for long-term observations;
1 - crack; 2 - messura; 3 — brand; 4 - flange; 5 - anchor bracket
Rice. 3. Crevice gauge for measuring wide cracks and seams
Rice. 4. Pointer lever device for determining intensity
In addition to observation beacons, electronic systems are used, consisting of sensors installed on cracks and a receiving device that constantly receives signals from the sensors. There are models with compensation for temperature changes and other additional functions that increase the accuracy of measurements.
2.2.8. When cracks are detected in building structures
2.2.8. If cracks Information about detected defects must be entered into the technical condition log of buildings and structures with a deadline for eliminating the identified defects.
According to their properties and characteristics, cracks in reinforced concrete and concrete structures can be the following: stabilized (over time) and unstabilized, open and through, hairline (up to 0.1 mm), small (up to 0.3 mm), developed (0.3 - 0.5 mm) and large, emergency, deep, surface, vertical and horizontal, single, parallel, intersecting and in the form of a grid.
To monitor the development of cracks in walls, building structures and equipment foundations, beacons are used (Figure 2.2.5), installed in places that allow daily observation of them. If there is a layer of plaster on the structure where cracks appear, it should be removed and checked for cracks in the body of the structure itself. The number of beacons is taken at the rate of 1 beacon per 2 - 3 m of crack length. Each beacon is assigned a number and the date of its installation is indicated. A sketch of the cracks, data on their development and installation of beacons must be given in the technical logbook for the inspection of building structures.
Figure 2.2.5 – Beacons for observing cracks
a - gypsum; b - metal; c - Belyakov’s designs; 1 - crack; 2 - plaster; 3 — wall of the observed object; 4 — millimeter divisions on the lighthouse plate; 5 - metal pins for fixing the relative position of the plates
Observations of cracks are carried out for 20 - 30 days; if during this time the beacons are intact and the length of the cracks does not increase, then their development should be considered complete. Monitoring of temperature-sedimentation seams of buildings, junction points of fuel supply overpasses to the main building and other buildings and structures should be installed using beacons and gap gauges. If the opening of seams and movements at the interface nodes are not associated with seasonal deformations of structures or do not correspond to them, then the settlements of the foundations of buildings and structures on which these inconsistencies are found must be checked,
The degree of weakening of structural elements due to mechanical (cuts, holes, cuts, etc., not provided for by the design), chemical, electrochemical, biological and other influences should be assessed based on the results of cross-section measurements. The need to determine strength arises in cases where external signs of a violation of the integrity of structures appear (deflections, bulging, cracks, etc.). To determine the strength of concrete using instruments, you should use the methods outlined in [5].
Methods for controlling cracks in buildings
Receive an expert decision on the further operation of the house on the day of departure by conducting an examination of cracks.
The main causes of cracks in building structures: types and features.
To monitor the condition of buildings, special devices are used, which are usually called “beacons”. They are used to monitor the deformation of an object, to monitor emergency structures, and when conducting nearby construction or restoration work that may affect the integrity of the structure.
Installing beacons on cracks makes it possible to accurately record all changes occurring, and thanks to this, monitor the objective condition of the building. Based on the results of measurements, a decision is made as to whether the building can continue to be used, or whether it requires repairs, or the elimination of factors causing the crack to increase (for example, stopping nearby construction).
The choice of beacons for monitoring cracks is carried out depending on the condition of the object and the features of a particular structure, as well as taking into account the following issues:
Depending on these issues, the optimal type of monitoring system is selected.
Types of beacons for cracks in the wall:
We will consider 5 main options for monitoring systems, which differ in price, capabilities and installation features. It is impossible to clearly name the best of them, since each has its own advantages and is used in different situations.
Gypsum beacons for cracks
This is the most traditional method, and at the same time the cheapest, since it is disposable. As soon as it works, that is, a crack or break appears in its body, it is necessary to install a new one nearby. At the same time, the reliability of the indicators is quite low, and usually at least two pieces are installed, at the rate of one piece for every three meters of the fault. It is important to understand that this method of crack control has a number of disadvantages:
Electronic beacons for cracks
The optimal choice if you need to calculate how a crack is affected by changes in temperature and humidity from inside and outside the building. Electronic measuring sensors today can transmit information remotely, recording differences of tenths and hundredths of a millimeter.
Electronic beacons for cracks on walls have their own characteristics:
Plate beacon for monitoring cracks
This is a very simple design, to some extent reminiscent of plaster, but without the inherent disadvantages of the latter. Today, this type is used most widely, since it is optimal in terms of installation cost, ease of observation and accuracy of the results obtained.
Installing a beacon on a crack is very simple; it requires dowels or epoxy glue (sometimes both are used), and any marks can be applied to the surface to facilitate monitoring. This diagnostic method compares favorably with others:
Point beacons on cracks in buildings
These are inconspicuous, but very durable sensors that are highly resistant to vandalism, as they are properly attached to the wall. There are a variety of fastening methods, ranging from the simplest dowels to special mounting devices - it all depends on the specific object. Peculiarities:
Monitoring cracks using sentinel beacons
These systems, also called “messuras,” do not require special measuring instruments; they already have their own scale with high-precision sensors. The most convenient option for tracking the slightest changes and quickly recording readings. Features of application:
We considered only the 5 most popular options. There are also paper and glass systems, but they have a lot of disadvantages, and in this case, installing beacons on cracks will not provide the required measurement accuracy. It is better to choose one of the sensors described above.
Rules for installing beacons on cracks
The state regulates certain norms and standards for various types of sensors, as well as the frequency of readings. Before installing beacons on a crack in the wall, it is necessary to study these requirements and be guided by them during the installation and monitoring process.
If during the monitoring process (usually 30 days) the system does not work, it is concluded that the deformation has ended, and the resulting crack is usually simply covered with mortar. If the lighthouse is deformed (the first 20-30 days after fastening are especially important), it means that the destruction continues, and a decision must be made on further operation or repair of the object.
Source
How to set markings for installation: 2 ways
Marking is one of the important stages in this type of work. Correct markings will help to obtain a flat surface; it will show how to place the beacons under the plaster.
Most people do not have a laser level at home, so 2 methods of marking using a regular building level will be described in detail. Standard markup includes the following steps:
- From both corners of the wall you need to give ten centimeters, 15-20 centimeters are left from the ceiling covering, this is how you get the first points into which the screws are screwed. They should protrude three to five centimeters.
- A plumb line is attached to the top screw, focusing on it, two more points are marked on both sides, one placed at a distance of 15-20 centimeters from the floor covering, the second in the middle. Self-tapping screws are also screwed into them.
- The heads of the screws must be aligned in order to obtain an accurate plane; you need to run a rope from the screw screwed into the top over the head, and the lower screws are adjusted along the part of the rope lowered to them. All actions are repeated on the second side.
- Next, the screws are connected from two corners, the thread is passed along the heads of the screws, connecting them horizontally, they should also be connected diagonally. The intersection of the threads should be in the middle of the surface.
- An indent of 10 centimeters is made from the first points. Next, the distance between the new two points is measured. It needs to be divided into intervals from 1 meter to 1.30, with this step the beacons will be installed, it is better to draw vertical lines with a pencil, the screws are screwed in in the same way as was done in angular measurements.
- To determine the zero level, you need to measure the distance between the surface and the stretched rope; the minimum value will be zero; the first beacon is attached to this place.
The zero level may turn out to be too small, because it is necessary to take into account the minimum plaster layer and the height of the profiles; if special fastenings for beacons are used, then the required distance to cover the thickness of their strips is taken into account. Thus, the zero level must be able to close the sum of these three quantities. Increase the distance by unscrewing the screws.
The second technique, called the “spider method,” helps determine the best thickness for leveling the surface. This allows you to minimize the consumption of the plaster layer. The method consists of the following steps:
- They retreat 15 centimeters from the corners, five from the ceiling. At these points, holes are made for the dowels, into which self-tapping screws are screwed in, protruding 5 cm.
- Having hung a plumb line, determine the place where the hole for the dowels will be made on the floor, also leave 5 centimeters from the floor covering, and make a hole on both sides along the plumb line, screw in the screws until the protruding part is 5 centimeters.
- The thread is tied to the upper screws, two centimeters away from the wall, a plumb line helps to pull the thread strictly vertically to the lower screws, where it is tied, the tension is strong.
- Next, two ropes are tied to the ropes located vertically, which will be located horizontally, and they will have to move along the vertical threads. By moving them, you can find the zero level and understand where the wall has a deviation.
- If the calculated zero point exceeds the distance required for the plaster layer, the height of the profiles and the thickness of the fastener plates, then the screws are screwed in. If the most protruding point extends beyond the edges of the plane obtained from the threads, then this part of the wall is cut down.
- 3-5 screws are screwed in on vertical lines and tightened until the heads come into contact with the threads.