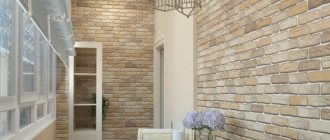
Professional builders always carry out repairs efficiently, neatly and beautifully. How to learn to do repair operations in such an impeccable style? For example, properly sand the walls after puttying, so that you can then apply the finishing coat you like. We offer step-by-step instructions for craftsmen in such a difficult and important task as sanding walls.
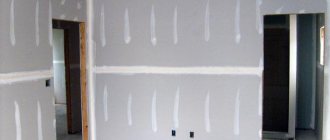
Sanding the wall is a mandatory procedure after plastering
Purpose of wall sanding
Surface grinding is the work that follows the plastering process and consists of smoothing out irregularities in the dried layer.
Plastering the surface of walls pursues the following tasks:
- insulation of the premises outside and inside the building with an additional sand-cement or gypsum layer;
- sealing irregularities, cracks, chips on the surface;
- giving an aesthetic appearance;
- preparation for subsequent design processing;
- obstacle to moisture permeability, fungal development, creation of additional adhesion, sound absorption and other things.
Grinding of the walls is carried out before applying the finishing coating.
The plaster mixture is a cement-sand, gypsum, lime, magnesium composition, including various large and small fractions that cannot be dissolved (that is, they are not capable of turning into a perfectly smooth mass). For this reason, high-quality sanding of walls after puttying is always required.
Often in professional terminology the words “grinding” or “sanding” are found. You need to know that such definitions are synonymous words. Their practical significance boils down to one function: leveling the plastered surface to perfect smoothness.
Wall sanding is a must
Dust treatment
Construction dust is hazardous to health. It may contain harmful microorganisms. After sanding is completed, it is necessary to remove dust from the room. It is recommended to combat dust using:
- household vacuum cleaner;
- dry broom or rags;
- brushes;
- industrial vacuum cleaner.
Attention. When sanding, abrasive dust accumulates on the floor along the walls. From time to time it must be carefully removed with a slightly damp broom.
The degree of moisture should be moderate so that no streaks remain on the surface after cleaning. In rooms with high ceilings, wet cleaning is carried out using a brush with a long handle or a mop with a damp cloth.
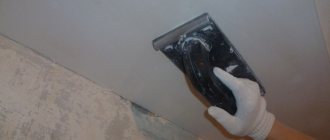
If you properly putty the walls and ceiling, you can achieve a perfectly smooth and even surface for applying decorative plaster and paint.
How to sand putty correctly
In order for the work to be possible even for a non-specialist, and for the result to be excellent, it is necessary to decide in advance: how and with what to sand the walls after puttying? The first rule that must be remembered: mandatory consideration of the holding time, i.e. You need to start smoothing the surface no earlier than after 24 hours have passed since the completion of plastering. This is necessary so that the layer of applied cement-sand (or other type) material dries thoroughly.
In modern construction and repair business, two completely different sanding methods are used:
- dry method;
- wet method.
There are advantages and disadvantages to each of them.
You can sand in different ways
The main differences between the presented methods
For those who want to know how to sand walls after puttying without dust, the wet sanding method is ideal. The main feature is that wet sanding of putty requires that the well-dried plastered surface be thoroughly re-moistened. Dry the treated wall for a day and then wet it again? At first glance, it is illogical. But it is re-wetting that will increase the adhesive properties of the plaster material, as well as carefully remove unevenness. And the most important thing is to really reduce the amount of dust.
Wet sanding produces much less dust
After this method of surface treatment, it is enough to wet clean the floor.
Dry sanding of putty does not involve re-wetting the wall. Here the work is carried out specifically on a dried section of the wall or ceiling. The disadvantage of this method is the abundant appearance of dust, which floats in the air and settles on everything not only within the room. To clean the room from dust accumulations and layers of plaster removed from the wall, it will not be enough to simply wash the floor. Here you need high-quality ventilation, air irrigation from a spray bottle, and dust removal throughout the apartment.
The disadvantage of dry sanding is the strong appearance of dust.
Material selection
In order to get rid of imperfections on the surface, you need to use a universal putty.
It can be laid directly on the plaster. These putties differ in their composition.
They can be:
- Polymer. They have a high degree of strength and ductility. Polymer composites are very easy to process with sandpaper, but over time the coating will never lose its qualities. Acrylic is always used as a base;
- Water-dispersive. Such plasters are easily held on the wall. They are elastic and easy to sand. They are easier to process as they are considered a more elastic material;
- Oil-adhesive. Such compositions are made on the basis of drying oil. They have excellent adhesive properties;
- Cement. Such solutions shrink significantly when they dry out. Due to this, strength indicators are significantly reduced. To get rid of such features, manufacturers introduce plasticizing components into the solution, due to which cement compositions increase in cost.
How to sand walls correctly?
Properly smoothing walls or ceilings after puttying means performing all operations in strict order. And the first operation is the choice of a tool for adjusting the outer surface of the walls. The specifics of the work are determined by the type of fabric that will be sanded and the requirements for the quality of the final result.
Depending on the required degree of smoothing (leveling the surface for wallpapering or achieving ideal smoothness for final painting of walls), the approach to completing the task will be different.
Before you start sanding walls, decide on the tool
Safety precautions
When carrying out the procedure, it is important to consider the following safety requirements:
- Sanding walls treated with putty is a dusty finishing operation, so the work is carried out in a respirator and safety glasses. Furniture is removed from the room in advance, the floor is covered with plastic film to prevent dust in the space.
- The room is cleared of unnecessary objects that impede safe movement around the space with the instrument.
- The lighting in the room must be of high quality for grinding with a machine in a safe mode.
- The work is carried out using ladders or special stepladders.
- The safest machines are those equipped with a long handle to reduce the risk of falling from the stairs when finishing.
- Construction sanders are electric and can therefore generate sparks. Work is not carried out near flammable liquids or objects.
- Grinding with the machine is not interrupted, so the room is cleared of children and animals for safe work.
- If a strong smell or loud sounds appear from the machine, the equipment is turned off and sent to the service center specialists for inspection.
- Safe operation is ensured for electrical appliances. The plug from the machine must go into the outlet. It is not recommended to replace machine plugs to prevent fire. Only original elements ensure safe work. If the machine has a ground connection, the use of adapters is not allowed.
Experts recommend using equipment from trusted manufacturers. The list of rated and reliable in operation includes grinding machines of the brands Interskol, Makita, Sturm.
How to sand the walls after plastering?
Among the extremely necessary construction tools, it is worth mentioning the following.
- A sanding block is a tool, on one side of which a sanding mesh for putty is attached (a fine-grained metal grater for putty with different grain diameters), and on the other side there is a comfortable handle (wooden, plastic, metal).
- There are special semi-automatic and automatic machines. In essence, this is the same grater for puttying walls, but only with an automatic or semi-automatic drive. When performing work with a machine, corners, depressions and complex hard-to-reach places will still need to be done with a sanding block or sandpaper.
Sanding walls can be done in different ways - In everyday practice, repairmen often use sandpaper as a handy tool for sanding walls after puttying. To correctly select the grain number on such paper, it is necessary to select a finer grain at the beginning of sanding, and at the end of the work, select the coarsest one. With this approach, sanding grout will not leave marks or scratches on the wall. It should be said that even despite the inconvenience of working with sandpaper, it is precisely this that is recognized by craftsmen as the most gentle processing method.
- An excellent mesh for sanding putty is an abrasive mesh in the form of rectangular sheets coated with a layer of crushed silicon carbide. This material is considered ideal for high-quality sanding of walls. The assortment in construction stores allows you to choose exactly the carbide fraction number so that the quality of processing of the plaster layer is the highest.
- We should not forget that to accurately identify defects, it is necessary to use good lighting. There will be little ordinary daylight, so you won’t be able to do without a spotlight or at least a powerful lamp.
For quality work you need good lighting
Necessary tools, materials
There is a large selection of sanding devices. There are several groups of tools:
- power tools;
- manual (this type includes hand graters, the models of which differ significantly in design and size).
The popularity of hand tools is explained by:
- ease of use - no construction experience required;
- availability in any price range;
- quality of work performed;
- the versatility of the grouting material - sandpaper of different grain sizes or sanding mesh.
There are the following types on the market:
- The basic tool is a handle in the middle and a threaded fastening with “wings” on the sides. This is a hand-friendly device. The main disadvantage is the time spent on the process of installing a new skin: unscrewing the “wings”, fastening and adjusting the new one, centering the jaws of the fasteners before finally fixing the nuts. The traditional design is a plastic or metal surface with a wooden handle. The first option is short-lived, unlike iron, but lighter.
- A classic grater in the shape of a bar, but with mechanical spring-loaded fasteners for tightening the sanding sheet. The design simplifies and speeds up the installation of a new canvas. On the sides of the timber there are indentations for fingers - this method of holding in the hand is much more convenient during the sanding process.
- Plastic sponge bars made of polymer with an applied abrasive layer. This is an additional device of different shapes - in the form of a trapezoid or a rectangle for grouting corners and flat decor (sockets for chandeliers, stucco).
- Dust removal devices. They differ from the classic device in the pipe located on the body, where the vacuum cleaner hose is connected. This equipment is convenient in the process of sanding the ceiling. Although the suction corrugation slightly limits human actions, if you need to carry out work with a minimum amount of dirt that appears, the inconvenience is worth it.
- Graters with a hinged fitting and a removable telescopic handle. The device can be used under a factory product, which is included in the basic configuration, or under a homemade pen. The equipment makes it possible to clear a large area. For low ceilings, the device is used while on the floor.
For grinding you will additionally need the following tool:
- respirator, plastic glasses;
- light bulb with extension cord;
- spatula with a blade length of at least 30 cm;
- a set of sanding mesh, sandpaper;
- ladder
- pencil.
Important! The light bulb is not for illuminating a room - by holding it up to the wall, you can identify small defects, monitor their correction and the result of the work performed in general. Therefore, it is advisable to use lighting on a tripod; it is easy to make yourself, and the lamp can be held in your hands.
Stages of work or how to properly sand walls after puttying
The surface treated (for example) with a gypsum mixture has dried for more than a day, and now you can begin to smooth it out.
You need to start with a detailed analysis of the plastered walls (ceiling). Direct the light source perpendicular to the wall and as close as possible to carefully examine the condition of the coating and any irregularities. Circle all identified defects with a simple pencil. It is not advisable to use a marker, because... the remaining paint that has been absorbed into the wall will be difficult to remove.
Having examined the top layer visually (i.e., having examined all the irregularities, protruding fractions and other defects), it is easy to determine which mesh should be selected at the beginning of work for sanding the putty, i.e. sandpaper grain size. As mentioned above, you need to complete the work with a mesh with the largest possible grain.
You need to start work with a detailed surface analysis
Sanding the putty on the walls starts from the ceiling and in a circular motion clockwise, the movement is directed downwards. It is convenient to cover the wall area in narrow strips (up to 1 m). You should not use force when performing it, because... As a result, the top layer can be severely damaged.
The range of building materials includes a starting type of putty and a finishing one. The latter has a smoother appearance of the coating and, when choosing which sandpaper to sand (edit) the finishing putty, you should give preference to smoother types of sandpaper (No. 200-220). The master’s movements should also be light and gentle.
When choosing sandpaper for puttying walls after the initial coating, there are no special requirements. The main thing is that the final result is good.
There are no special requirements when choosing sandpaper for puttying walls after the initial coating.
How to sand a ceiling after puttying
Grinding work on the surface of walls is practically no different from ceiling operations. The scheme of work is the same: we select the material, inspect the surface for defects, remove defects using improvised or mechanized means.
The difficulty of ceiling repair work lies in the physical inconvenience for the master. You should not use a ladder or tripod; scaffolding is more convenient for this purpose.
The ceiling sanding scheme is no different from wall work.
Overalls and protective equipment
Grinding is carried out under harmful conditions, so it is necessary to use respiratory, vision and hearing protection. When working with a grinder, you should use glasses with clear polycarbonate glass or face shields.
To protect your hearing, you should use earplugs or noise-cancelling headphones.
The process of sanding putty is accompanied by an increased level of dust formation. Simple means of respiratory protection are gauze respirators. However, it is best to work wearing a professional mask, which also includes safety glasses. This mask has replaceable filters.
Overalls and gloves are available for the convenience of working with a mechanical grinding device.
Expert advice on how to sand putty correctly
In conclusion, there are some practical tips that I would like to share.
There is no need to rush in the process of smoothing the ceiling or walls! Neither when choosing consumable tools, nor when performing work. All tasks are done carefully, carefully and slowly.
If you can’t choose which sandpaper to sand the putty with, ask for advice from a repair specialist or sales consultant. As a last resort, try each tool on a small area, controlling the force and speed of movement on the surface.
Beginning craftsmen should not use power tools. It is wiser to carry out the first experiments in adjusting the external covering of walls using improvised means (sandpaper, abrasive mesh, etc.)
Sanding surfaces must be done carefully and slowly
Control of the process of sanding the wall and ceiling after puttying
This is perhaps the most important rule for an employee. The control process consists of the following points.
- Do not change the location of the light source to avoid refraction of light rays.
- Perform operations in small areas, moving from top to bottom.
- If work defects are detected (for example, an area that has been cleaned too much), you should re-plaster the area, wait until the material dries, and sand it again.
- Use a quality tool and follow the instructions carefully.
- Check the evenness of the cleaned (polished) surface with a building level or a ruler under a light source: if the shadow does not fall, then the ruler is absolutely adjacent, i.e. It turned out to be a perfectly flat plane.