Painting the prepared ceiling surface
The correct painting technology plays an important role in how high-quality the result will be.
For painting you will need:
- dye;
- brush;
- roller
The paint should be chosen according to the type of room - living room, kitchen, bathroom. There are special compositions for bathrooms that are also well suited for kitchen ceilings. They often contain biocidal additives and components that prevent yellowing of the paint due to temperature influences.
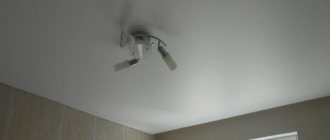
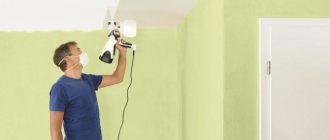
Painting can be done with a brush or roller. However, even if you decide to use a roller, you will also need a brush. It is convenient to paint the ceiling in the corners and around the perimeter.
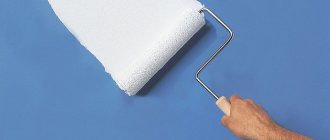
To paint the ceiling with water-based paint, the best tool is a roller with a fur coat (ideally made of sheepskin). It is this tool that guarantees the application of the paint composition as evenly and efficiently as possible.
The painting technology itself is as follows:
- Opening a can of paint and mixing it thoroughly, including the lowest layers (sometimes the composition may separate during storage).
- If the paint is thick, you can dilute it with water, according to the instructions on the label. Usually water is added in an amount of 5-10% of the paint volume. In this case, the composition should have the consistency of liquid sour cream.
- The prepared paint is poured into a special tray, which allows you to evenly saturate the entire surface of the roller with paint.
- Then the roller is rolled out on the ribbed surface of the tray - this allows you to remove excess paint and prevent it from splashing during operation.
- Those places where using a roller is difficult are pre-painted with a brush.
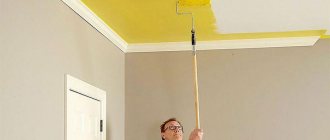
Next steps depend on how many layers of paint you plan to apply. Usually this is 2 or 3 layers. Assume that the last layer of paint is applied in the direction of the light flow coming from the window - this makes the joints between the stripes of the roller or brush invisible.
That's why:
- If you plan to paint in 2 layers, then the first layer is applied across the direction of the light, and the second – along.
- If it is necessary to apply 3 layers of paint, then the first and last layers are applied along the light, and the second - across.
Applying each layer of paint requires the previous one to dry completely. The drying time is indicated on the paint can, but in any case it should be 6-12 hours. You cannot apply a second layer of paint to a still wet base; this may cause the undried layer to begin to “stretch” behind the roller or brush, which will ruin the appearance of the ceiling.
Thus, it is possible to paint the ceiling with a water-based composition over old paint. But this option requires no less careful approach than options for removing the old coating, and is not suitable in all situations.
How to paint a ceiling with water-based emulsion with your own hands
Each of the water-based paints has instructions for use on the can. The operating procedure is described there. Some compositions just need to be stirred well before use: undissolved polymers may settle at the bottom of the jar. Some formulations require dilution. The amount of water added is also specified in the instructions and depends on the application method. For spray guns, the dilution is stronger; when using a roller, thicker formulations are required.
Paint tray makes the job easier
When diluting the emulsion with water, add it in small portions. Stir thoroughly and try on a surface area. If the paint goes on evenly and almost completely covers the base, you can paint.
It is more convenient to pour the paint into a special container with a tray and a ribbed platform. You can use a regular basin and a clean piece of oilcloth spread nearby. It's not as convenient, but less expensive.
Which roller to choose
A roller for painting the ceiling with water-based emulsion is needed with dense short pile. You need to examine him carefully. The pile should “sit” firmly and under no circumstances should it “climb out”, even if you pull on it. Then inspect how the seam is made. Under no circumstances should he stand out. It must be difficult to find. It is best if it is made obliquely.
Rollers for painting the ceiling with water-based emulsion
Pay maximum attention to choosing a roller: the quality of painting - the absence of stripes on the ceiling - largely depends on how good a tool you have chosen. It is more convenient to whiten the ceiling with water-based emulsion not from a stepladder, but from the floor. To do this, the roller is placed on a long handle and secured well.
How to paint without streaks
To avoid streaks on the ceiling, painting the ceiling with water-based paint should be completed no later than in 20 minutes. Immediately after application, water begins to actively absorb/evaporate and stripes appear at the junction of the dried and “fresh” paint. Therefore, it is advisable to prepare the room. It is necessary to turn off (wrap up) the heating radiators and prevent a draft. It is also advisable to wash the floor immediately before whitewashing; even if you work during the day, turn on the lighting, this will allow you to better control the quality of the paint. Afterwards you can start working.
Ready-to-use water-based paint is poured into a container, a roller is dipped into it, then rolled well over the site, achieving uniform distribution over the entire surface. When the roller has a uniform color, they begin to paint.
The corners are painted first with a brush. After applying a little paint, take a small roller and roll it out well. Then they begin to paint the main surface. The first layer is applied parallel to the window, the second - perpendicular.
You need to stand so that you look at the area to be painted at an angle. This will give you a good look at how evenly the paint has spread, as well as where you have already painted and where you haven't. Move systematically, without jumping from one piece to another.
It is more convenient to paint from the floor, and to do this, the roller must be attached to a long but light handle
The width of the strip painted at a time is slightly larger than the width of the roller. After wetting the roller, place it approximately in the middle of the strip. Quickly roll the paint in both directions from one wall to the other. Don't waste a lot of time: you don't have much of it. On average, the water emulsion dries in 10-20 seconds. If you didn’t have time to apply the strip next to it before, the border will be clearly visible, which you won’t get rid of. Having distributed the paint more or less evenly over the strip, dip the roller into the paint and roll it out again from the middle of the ceiling. At the same time, go beyond the already painted strip by about 10 cm. All this at a good pace without stops and smoke breaks. The edges of the painted strip should not dry out. In general, these are all the rules.
After applying the first coat of paint, some areas may not be painted as well. You need to wait for it to dry completely and paint it a second time. This should already be enough to obtain a flat surface. If even after the third layer of water-based paint you still have streaks and stains on the ceiling, you will have to redo it again. It is necessary to level the surface with sandpaper, prime it again and paint again.
What color
The easiest way to achieve perfect evenness is to use “snow-white” paint. All pigments clearly highlight even small irregularities, so the process of puttying the ceiling should be given maximum attention or use an acrylic or silicone-based water-based emulsion.
Stages of work
How to refresh a ceiling painted with water-based paint
If we paint the ceiling over the old finish, the preparatory stage will take minimal time. You just need to remove the peeling elements of the ceiling and, if necessary, putty it, filling all the cracks, crevices, and potholes. Next, a layer of primer is applied, and after it has completely dried, we can finally start painting the ceiling.
Sequencing:
- Preparation of the necessary set of tools and devices. Here we need a brush or roller. A suitable brush width is considered to be 3-4 centimeters. Some people also prefer to use a telescopic extension for rollers and brushes. A tray for paint, a tray with water, a can of paint of the required volume, a rag, masking tape and material that insulates the floor from paint drops.
- Covering the perimeter of the ceiling with masking tape. Nowadays there is special polyethylene on sale in rolls of various widths with an adhesive strip along one edge. This is also necessary when working over an old layer of paint.
- Paint preparation stage. Read the instructions carefully and, if necessary, dilute the paint with water in the required proportion. Once you have the desired consistency, you can get to work. If you decide to use tinting agents, follow the instructions on their packaging.
- A small amount of paint is poured into a special ditch for a roller and all corners and the perimeter of the ceiling are painted using a small brush. Plaster decorative elements, if available, are also painted.
- Next begins the process of directly painting the ceiling surface over the old layer using a roller. To do this, the roller is completely wetted in the wide part of the cuvette with paint, then its excess is removed from the flat part. At the same time, the paint is evenly distributed over the surface of the roller.
- The directions of movement of the roller along the ceiling should be parallel. Each new stripe is positioned to cover more than half of the previous stripe. The rules for applying layers recommend applying them perpendicular to each other.
- There are also recommendations for the direction of the finishing coat of paint, which must be done parallel to the source of natural light, that is, the window. Many people prefer to apply the final coat with a new roller attachment, ensuring the surface is as smooth as possible.
Painting the ceiling is not at all as difficult a task as is commonly believed. Going through this process yourself to renovate and decorate your apartment will bring a feeling of deep satisfaction.
You can pay 30-50% less for light, depending on what electrical appliances you use.
How to renew a ceiling painted with water-based paint
How to properly paint a ceiling with water-based paint using a roller
A high-quality painted ceiling is a decoration for any room. But over time, it may fade, while the surface itself will remain smooth and the putty will remain undamaged. Sometimes it happens that the ceiling repair is not done well and there are grooves and irregularities on it. These flaws must be combated. Let's look at how to update a ceiling painted with water-based paint so that it gets the look you want.
Today, water-based painting can quickly restore the appearance of your ceiling. Despite new technologies for finishing ceilings in the form of suspended or tensioned structures, many are in no hurry to do this for many reasons. Firstly, simply painting the ceiling will cost much less, and you can do this work yourself. Secondly, hanging structures are not suitable for many people, since the height of the walls in the room is not large anyway. And sometimes owners of the old school simply don’t want any innovations. In this article we will learn how to renew a ceiling painted with water-based paint.
Today on sale you can find many materials intended for painting the ceiling. Among the many manufacturers and the variety of shades, you can get confused and buy paint that does not suit you at all. Water-based paints may differ from each other in composition, consistency, and also in their characteristics.
Water based paints division
•Acrylic coatings are considered the best and are popular. They contain resins that bind the paint and give it elasticity. Some of these compounds are resistant to moisture because they contain latex. Acrylic paints spread well over the surface and are durable. Their color palette is based mainly on pastel colors. But to give a brighter color, these paints are tinted to the shade you need. You can do the tinting in a store or at home.
•Mineral paints are made on the basis of limestone and cement and do not have such a wide range of applications. And all because such coatings are not stable and cannot last long.
•Silicone coatings are based on silicone resins and acrylic copolymers. They protect the surface from the formation of fungi and mold and are vapor-tight.
•Silicate coatings are the most moisture-resistant among similar ones. In addition to the silicate base, they contain pigment colors and liquid glass. But it is not recommended to use such coatings in sleeping areas. An excellent option for silicate paint would be the bathroom, as well as other utility rooms and exterior treatments.
If you have chosen paint and know how to update a ceiling painted with water-based paint, then it is worth noting the fact that the ceiling coating can be matte or glossy. By purchasing matte paint, you can hide minor unevenness on the surface under it. While glossy paint, on the contrary, will highlight all the imperfections, glossy paint can be washed. Therefore, it is recommended to use this coating only on a perfectly flat surface.
How to repaint the ceiling surface if it is already painted with water-based paint
We arm ourselves with a roller for painting the main ceiling canvas, and a brush for painting hard-to-reach areas. Mix the paint well, dilute it with water if necessary, and pour it into the painting tray. We take a stepladder and from it we begin to paint the ceiling with the first layer across the room. We make overlapping strokes with a roller, capturing part of the already painted surface.
You should not put a lot of paint on the roller, and before transferring it to the ceiling, you need to roll out the tool on the tray itself. The second layer of paint is applied after the first has dried, but not in breadth, but along the room. If you notice a flaw on a painted surface, you should not repaint it; you will do this when painting the next layer. Large surfaces are best painted with a spray gun.
Now you are familiar with how to update a ceiling painted with water-based paint. But it is worth knowing that after painting the first layer, some flaws become visible. They must be sanded before painting the second layer.
Types of water emulsion
All paints belonging to this category are water emulsions, which consist of pigment particles and binding components. Today you can find many varieties of such compositions on sale:
- Acrylic. This is the most popular option, which is used for residential premises. It is easy to guess that acrylic resins are present in such mixtures. This water emulsion also contains latex additives. All this makes acrylic paint durable and resistant to moisture. Due to its high elasticity, it hides unevenness of the old coating well and penetrates into cracks no more than 1 mm wide.
- Silicone. These are waterproof and resistant water-dispersed compositions, which are essentially an intermediate form of chemically pure organics and substances of inorganic origin. As a rule, they are used for bathrooms and other rooms with high humidity. Silicone resins make it possible to create a reliable coating, but it should be noted that such water-based emulsions are not suitable for ceilings if there are large defects on it. This paint is used if there are cracks on the surface of the spruce tree no more than 2 mm wide.
- Silicate. These compounds resemble silicone ones. Only in this case the basis is liquid glass. Additionally, the composition may contain silicon-organic resin. However, they are very expensive, and their characteristics are more than enough for a residential area, so they are most often used in the industrial sector.
Healthy! If we talk about the best manufacturers, then among the most expensive paints of this type it is worth highlighting the products of Kaporol and Dufa. From the middle price segment, preference should be given to Tex paints.
Mineral and polyvinyl acetate paints are also available. They are not popular because they are highly permeable to water. There are also latex compounds, but they are too expensive.
Healthy! When choosing a water-based emulsion, it is better to choose the composition whose label indicates the highest coverage parameter. The higher it is, the fewer layers you will need to achieve the best result.
Having chosen the paint and made sure that the ceiling is not so damaged, you can begin work.
Determining what has been done
How to paint a ceiling with water-based paint without streaks
This is easy to do - you just need to run your finger along the plane and look at it. If the finger turned white, then chalk was used, as it gets very dirty. In this case, you can get away with a small list of work.
If the coating does not stain your hand, then, most likely, lime has been applied, which will not tolerate simple repainting. It can easily crumble. Therefore, it must be completely removed from the plane.
In cases where a water-based emulsion is applied to the surface, you will also first have to remove the building coating where it has begun to lag behind the surface. This can be done using a spatula and various special compounds.
What primer to use
A primer is necessary for better adhesion of the paint to the surface being painted. It allows you to avoid the appearance of cracks and blisters after the paint dries. If there is no primer, this can happen. You'll have to clean everything off and putty again. Because in order for painting the ceiling with water-based paint to be of high quality, the surface must be well primed.
The base of the primer should match the base paint. Acrylic water-based paint requires the same primer; silicone paint requires a silicone-based primer, etc. Moreover, it is advisable not to save: the quality of this composition determines how smoothly the water-based emulsion will lie on the ceiling.
Acrylic primer for the same water-based paint
There is an economical method of priming: the base paint is diluted with water (1 to 2) and the surfaces are painted with this mixture a couple of times. It's certainly better than nothing, but the primer gives a better grip.
Stains and highlights on a painted ceiling and how to fix it
So, we found out the reasons. We hope to avoid most of them in the future. However, what to do now, when the ceiling is already painted and is covered in terrible stripes, smudges, stains? How to bring it to the desired condition?
Perhaps the only correct solution left is sanding, that is, the ceiling must be sanded until the surface becomes uniform in tone and rough. There is no need to worry about clouds of dirt and dust; there won’t be a lot of them if you use grinding machines. After all, you only need to remove a small layer of paint. Choose a relatively fine skin. Try to work very carefully so as not to reach the putty layer.
After sanding is completed, the surface should be wiped with a damp cloth and inspected in good daylight. If the ceiling looks uniform and smooth, then you can start priming. If not, then it is better to use finishing putty, applying it in a thin layer. Once it's dry, lightly sand it again.
The next step is priming
It is important to purchase a high-quality primer for painting. And it’s better to prime not just once, but several times (at least two)
After each time, you must wait for the surface to dry completely. Only after the ceiling takes on an ideal appearance, that is, it becomes even and smooth like a mirror, can you begin to work.
Don't forget: If the base has stains, stains and unevenness, then all these “artifacts” will be noticeable even after the work is completed! So before you start, make sure your base is completely ready. If in doubt, re-prime
Wak to cope with stains on the ceiling due to old leaks
These areas require special treatment. First, they must be thoroughly cleaned and washed, and then wait until completely dry. Then treat with a biocidal solution. Use, for example, Fongimur. Do not wash off the product under any circumstances! Immediately afterwards use a universal blocking primer. It will help block stains from showing through putty and paint.
Coloring
When purchasing a water-based paint composition for the ceiling, it is especially important to have a good understanding of the assortment. Currently it is represented by five main types of products:
Currently it is represented by five main types of products:
- with acrylic;
- with latex and acrylic;
- with silicone;
- with polyvinyl acetate;
- with silicates;
- with mineral supplements.
The modern range of water-based paints is quite large
Table. Rating of water-based paints according to consumer reviews.
Average and low prices, unstable quality - depending on your luck with the batch.
To choose the right water-based paint and purchase it in the right quantity, you should carefully read the information text of the label. It must contain the following important parameters.
- The purpose of the paint with a list of types of work.
- Consumption per square meter – allows you to calculate the required purchase volume. In this case, the paint must be purchased with some reserve, since the tone of different batches may differ noticeably.
- Covering power is the ability to completely, without gaps, paint over a much darker base.
- Abrasion resistance is the main indicator of durability and resistance to cleaning and washing.
In addition, you should read additional inscriptions, often in the smallest font.
- "Recommended for use in dry areas." Such products are not suitable for either the bathroom or the kitchen.
- “Indelible” or “Highly durable”. The painted surface can be washed exclusively with water without additional detergents.
- “Abrasion-resistant”, “Dirt-repellent”. The coloring composition forms a layer that can withstand wet cleaning using detergents.
Having carefully selected a water-based composition that is suitable in terms of properties, manufacturer, price and purchased it in the required quantity, you can begin painting the prepared ceiling surface.
When choosing paint, pay special attention to the label information text
The process goes in the following order.
- Thick paint must be diluted with water to a kefir consistency. If you want to make a colored ceiling, the color should be added little by little so as not to immediately get an overly saturated tone.
- Using a wide brush, paint the corners, areas around the perimeter of the ceiling lamps, the joints of the ceiling with the walls and, if any, ceiling cornices. In this case, it is useful to use masking tape so that the paint does not get on the areas of the walls directly adjacent to the ceiling. The direction of movement of the brush is parallel to the light, from the wall with the window. If there are windows in more than just one wall, choose the direction from the one that gives maximum light.
- Pour not too much paint into the cuvette tray, immerse the roller in it, be sure to roll it repeatedly along the corrugated inclined surface, squeezing out the excess paint composition.
- Evenly and gradually, in parallel strips, offset each time by 2/3 of the width, apply the coloring composition to the ceiling perpendicular to the direction of light using small zigzag movements. Before it thickens, it is useful to roll a roller without paint over the painted surface to remove any possible sagging. Paint over small defects and gaps with a narrow brush. The first layer should be allowed to dry completely at room temperature for several hours - usually from 8 to 12. There should be no strong drafts. The freshly painted surface should also be protected from direct sunlight. The roller, brushes and tray must be thoroughly washed immediately before the paint dries on them.
Applying the first layer of water-based paint
At a right angle to the direction of painting the first layer, that is, parallel to the main light, apply a second layer of paint using the same technology - pour, squeeze, paint with small zigzag movements, remove excess, let dry, meanwhile wash the tray, brushes and roller. The minimum number of layers is 2, but if a larger number is required, the painting directions must be calculated so that the last of them runs parallel to the main flow of light.
How to paint a ceiling with water-based paint. Step-by-step instruction
If all preparatory operations were carried out carefully enough and the painting process went correctly, the new water-based ceiling coating will be smooth, uniform and durable.
Technology of painting the ceiling with water-based paint
Before painting, the paint must be stirred well. Water-based paint must be applied to the prepared surface in several layers. The first coat of paint is best done with diluted paint. To do this, pour some of the paint into a clean bowl and dilute it with water 5:1, stir very thoroughly using a drill with an attachment. Next, you need to pour some of the paint into the paint tray and wet the roller in the paint. The ribbed surface of the tray will help remove excess paint and distribute the paint evenly on the roller. The procedure for distributing paint on the roller must be performed after each dipping. It is necessary to apply paint to the ceiling in two directions (back and forth), rolling it over the surface so that there are no unpainted areas left (each new stroke should slightly overlap the previous one). The edges of the ceiling near the baguettes must be painted with a brush. The next layer of painting must be done after the previous layer has completely dried. It is usually done with undiluted water-based paint to give the ceiling a matte, slight roughness and texture. For high-quality painting, a layer of 1 mm is enough. The paint drying process should be natural; the use of a heater, direct sunlight and drafts are unacceptable, these factors provoke peeling of the paint.
For color painting of the ceiling
use a special dye. It must be added to white water-based paint in the required amount until the desired color is achieved. It must be remembered that paint that has not yet been applied to the surface looks darker. The dye is added directly to the paint container and thoroughly mixed until smooth using a drill with an attachment. It should be remembered that it is necessary to calculate the correct amount of paint for finishing the ceiling, otherwise, when making a new portion, a color mismatch may occur, and then the whole work will have to be redone. There is also ready-made colored water-based paint. Color painting should also be done in several layers. The first layer should be done with diluted paint, this will help it penetrate into small crevices. Thick paint is more difficult to apply and goes on unevenly. It must be diluted in a ratio of 5:1 (paint: water), stirring thoroughly. If the ceiling is planned to be painted in two colors (two-level), then paint is first applied to the level that is higher. After applying paint to the first level, you need to wait until the paint dries, then use masking tape to seal the places where the colors will meet. This procedure is performed to protect the painted part of the ceiling. For the last layer, it is recommended to use a new roller (new coat) with medium-long pile.
It is better to paint the ceiling in the daytime in good lighting, since it is very difficult to paint evenly and efficiently in lamplight.
After priming the ceiling, the roller must be thoroughly washed with running water and soap; any remaining primer will irreversibly damage the roller. After painting the ceiling, the roller must be rinsed with running water until the water is clear. A poorly washed roller will be unsuitable for subsequent use, since the remaining water-based paint will dry out and then soaking the roller will be very problematic.
Preparing for painting
In order for self-painting of the ceiling with water-based paint to be high-quality and uniform, preliminary preparation of the ceiling is necessary. Uniform coloring can only be achieved on a flat, puttied surface. Therefore, before starting work, you need to clean the ceiling from any previous coating (with the exception of water-based emulsion, which holds up very well).
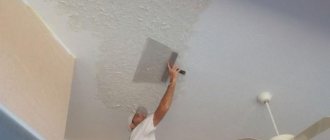
How to remove whitewash
If you have whitewash on the ceiling - chalk or lime - you need to moisten the ceiling with water and remove the coating with a spatula. They clean everything down to concrete. Even the smallest fragments must be removed. Sometimes it is very inconvenient to scrape small areas with a spatula; it is easier to do this with a wet cloth.
It is easier to remove whitewash by wetting it with water.
In any case, after removing the whitewash, the ceiling must be washed with water and detergent. After complete drying, prime and putty with gypsum or cement (preferably white) putty until smooth, which is also called “egg-like.”
How to remove old water emulsion
If the ceiling has already been painted with water-based emulsion, you won’t be able to simply remove it. The procedure depends on how the paint adheres to the ceiling. If it just changed color and you need to renew the ceiling, there are no swelling, cracks or other similar problems, you can get by with a little blood. First, remove the dust (with a cloth and water), dry it, then prime it. After the primer has dried, you can paint it. But once again we draw attention to the fact that this procedure is used only if the water-based emulsion holds well and there are no defects.
Cleaning waterproof emulsion from the ceiling is still a pleasure
If there are cracks or swellings on the surface of the water-based emulsion, it must be cleaned off. There are two ways - dry and wet. Dry means cleaning with sandpaper (manually or using an angle grinder), wet means rinsing off. This method must be used for paint that is not afraid of water. But it is very difficult to remove such paint. If water-based paint holds up well, no tricks help, but there are surface defects and putty is needed, take sandpaper with coarse grain and make the surface rough. After this you can putty. Next - according to technology: we prime and then paint.
Wash off the ceiling painted with water-based emulsion by moistening it twice with plenty of hot water. The water should be almost boiling water - about 70°C. After wetting part of the ceiling, wait 10 minutes, then wet the same area again with hot water. After about five minutes you can remove the paint with a spatula.
Removing old paint is a lengthy process
You can repeat this procedure several times, gradually removing loose paint from the ceiling. Small residues can be sanded off, and then the ceiling can be washed, dried and primed. You can putty and sand over the primer, smoothing out imperfections.
How to paint
The ceiling is that part of the room that is difficult to hide from scrutiny. Such a large and object-free area will be visible to every guest. Therefore, finishing work must be performed at a high level.
And here, first of all, you need to decide on the materials. What kind of paint can be used to paint the ceiling?
Until recently, whitewash was used exclusively for these purposes. Of course, the white color of the ceiling was pleasing to the eye. But such purity did not last long. Whitewashing had to be done almost every year. Plus, such work is very “dirty”. Therefore, this method of “improving” the ceiling in residential premises has long been abandoned.
Modern industry produces a wide range of ceiling paints. Of course, they are not intended purely for these purposes, but they cope with their tasks quite well. Among the most popular ceiling paints are the following varieties:
- acrylic;
- latex;
- silicate;
- silicone
It is worth noting that all these types of paints belong to the class of water-based paints. Such products are applied well and smoothly to any surface. In addition, water-based paints do not emit toxic gases and dry quickly. All this looks very advantageous considering its use in interior spaces.
The most popular are acrylic-based water-based paints. Such products are not afraid of moisture, which means they can be used in the bathroom and kitchen. In addition, acrylic paints are resistant to abrasion.
Another plus is that you will be able to hide small cracks. Acrylic water-based paints are good at filling small “cracks” up to 0.5 mm. This feature will help significantly improve the appearance of the ceiling.
Another type of water-based paints are latex products. This is the most expensive option. Such paints have the greatest water-repellent properties, but are more sensitive to ultraviolet radiation.
The industry also offers silicate-based products. Here the main component is liquid glass. Such paints are suitable for covering surfaces, including ceilings, with a mineral base. For example, if the ceiling is covered with decorative plaster or whitewashed with lime, then it is better to use this type of water-based paint.
Such products do not have elasticity, which means they are not able to hide small cracks. But they perfectly allow air to pass through and prevent the growth of mold. The latter property will allow you to save on the purchase of antiseptics.
The most modern water-based paint is considered to be a silicone-based product. It has absorbed all the best properties of its previous “brothers”. Silicone paint perfectly allows the surface to breathe, while repelling moisture well. This feature will allow your ceiling to remain clean for a long time, which reduces operational problems.
The advantages of silicone paint, in addition to the above, include the following:
- the material is absolutely non-toxic, which allows you to work with it without any protective equipment;
- protects the surface from biological hazards, which means you don’t have to use an antiseptic even when covering the ceiling in wet rooms;
- has good elasticity. If the surface has a network of small cracks up to 2 mm wide, then silicone paint will hide it perfectly
If we talk about minuses, then there is only one. Silicone water-based paint is quite expensive. But in combination with the advantages provided and a long service life, such a material can be considered ideal for use.
Mineral paints
Mineral-based paints are the least popular due to the rather short service life of the painted surface. The whole problem lies precisely in the composition of the paint. Slaked lime and, in some cases, cement are added to it. All this ensures a low price compared to other finishing materials.
As you can see, in order to choose the most optimal option, you will have to carefully search for the right type of water-based emulsion. Therefore, before purchasing, decide what conditions the surface will be in after painting.
Pay special attention to the special markings on the container, namely coverability. The higher this value, the faster you will achieve a perfectly even layer, without streaks.
This means that fewer layers will have to be applied, which will significantly save materials and finances.
Also on the can, manufacturers often indicate in which rooms it is preferable to use this type of paint. Therefore, the choice is greatly simplified.
Advantages of water-based ceiling painting
Compared to other types of ceiling coverings, water-based ceilings have the following advantages:
- The coating is resistant to high humidity conditions.
- Environmentally friendly material. The paint does not emit toxic fumes even when the air temperature in the room increases.
- The water-based composition is easily applied using a brush, roller or spray gun.
- Compared to other paints and types of ceiling coatings, water-based emulsion has a reasonable price.
- By adding pigments you can get the desired shade.
- Paint ensures quick repair work and saves money.
Additional advantages of such paint coatings include the fact that they are suitable for application to concrete, wood and plasterboard surfaces. The question of how to wash a painted ceiling arises only in the kitchen, because in other rooms such coating does not require special care and cleaning.
Is it possible to prime after painting?
However, if the old paint coating does not have any special defects, retains reliable adhesion, the surface is not riddled with cracks, and the paint has a completely presentable appearance, priming can be done
also produce over the old coating.
Interesting materials:
How to change your Instagram password? How to change your email password on iPhone? How to change iphone backup password? How to change the password in iCloud on iPhone? How to change your Google account password? How do I change my account password? How to change the password in jmail? How to change password in Gmail? How to change the password in Google mail? How to change icloud password on iPhone?
Choosing water-based paint
The type of paint we are considering is a suspension of water-based particles. Simply put, water emulsion is an aqueous emulsion consisting of pigment particles and a binder base. This composition is extremely stable in its form and is difficult to disintegrate from external influences.
Let's look at the main types of water-based paint:
- On an acrylic binder base.
- On a silicate base;
- On a silicone binder basis;
- Mineral based.
The most common and in demand acrylic-based paint. As the name implies, this paint contains acrylic resins, providing a balance between price and quality. The addition of latex substances gives the entire composition the property of elasticity. This ability ensures the closure of cracks on the treated surface. The size of cracks that such paint can cope with is no more than 1 millimeter. It is worth noting the increase in price provided by the addition of latex.
The most unpopular type of water-based emulsion is paint based on a mineral binder. The flaw lies in the fragility of the surface created by this product. The reason for the composition is the content of slaked lime or even cement. The cost of the product is the lowest among other representatives of finishing materials.
So, the choice is not difficult. The modern industrial sector provides every opportunity to find the option that best suits your goals.
When purchasing water-based paint, you should pay attention to the marking - coverability. The higher this indicator, the fewer layers you will need to apply to the ceiling to achieve an ideal result.
On the label, the manufacturer often indicates recommended rooms in which the best results can be achieved by painting.
Is it worth applying new paint over old?
There is no clear opinion on this matter. If you ask a specialist, he will say that there must be good adhesion between the two materials, which can only be achieved if the surface is first cleaned of the old coating.
But, in practice, many people carry out such cosmetic repairs and forget about problems with the ceiling for a long time. However, in this case it is necessary to take into account several important aspects:
- It is recommended to apply a composition to the ceiling that will be similar to the one that was used previously.
- If there are already many layers of paint on the ceiling and serious defects are visible, then in this case it is still worth dismantling the old coating. If part of it is already falling off, then a fresh layer will only be able to contain it for a very short period.
- If lime whitewash was previously applied to the ceiling, then in this case there is only one option - remove the old coating and process it according to the standard scheme.
It is worth paying attention to the fact that water-based emulsion and water-based emulsion are different. Gone are the days when there was only one type of mixture available. Today there are paints on sale that are not resistant to water and compositions that, on the contrary, cannot be washed off so easily. If the old coat is water-based and you plan to use the same type of paint, then it is better to remove the old coating. The fact is that while you are applying new paint, the old one will begin to be damaged. This will cause peeling.
How to paint a ceiling without streaks with your own hands
How to paint a ceiling without streaks and make its surface smooth white? In order to ensure that after working with rollers there are as few stripes as possible, movements should be made in the form of the letter W - up and down at an angle.
If a roller or brush is used, the ceiling is painted from the window, in the direction of the daylight falling from it. This is easy to control because paint strokes will be clearly visible on a damp surface.
First, use a brush to draw a line between the ceiling and the wall. Then the seams of the ceiling elements are painted and the areas around the pendant lamps are treated.
Next, a roller is used. It should be lowered into a bucket of paint so that all the pile evenly picks up the paint, and then easily roll it along the bottom of the trough or mesh. Having achieved an even distribution of paint over the roller, you can begin painting.
You should start painting the ceiling from the left corner of the window wall. The surface is processed in one direction. The stripes from the roller should be the same width. When painting, the room should not be too warm. Fast-drying paint will dry out and the stripes will look sloppy, the seams between them will stand out, giving the ceiling a sloppy appearance.
During the painting process, it is advisable for someone at home to help and periodically inspect the surface of the ceiling from a different angle, since unpainted areas are visible only from the floor and it is difficult for a master standing on a stepladder to notice any defects and quickly eliminate them. To avoid rapid drying of the paint and varnish material, it is necessary to turn off the heating in the room or open the windows. However, after finishing the work, the heating must be turned on immediately.
Each layer of paint must be given time to dry - about 12 hours. If, after painting the ceiling, it turns out that dark spots are visible, it is better to spare no effort and repaint the ceiling completely, since covering up a small area will only worsen the appearance of the freshly painted ceiling.
The ceiling cornices are painted last. The corners of the cornice are painted using a handbrake or a flute, and all similar areas are trimmed in advance. This is necessary in order to avoid omissions in coloring.
The part of the wall under the cornice is painted 1 cm lower if it is planned to further cover the walls with a material of a different color. Subsequently, the white paint under the cornice is removed, and this place is primed.
Watch the video of how to properly paint a ceiling - it will help you correctly understand how to perform this important work:
Technology of painting the ceiling over old water-based paint
When repainting a ceiling with water-based paint, it is advisable to use the same color that the ceiling was painted in, otherwise there is a risk that the ceiling will have to be painted many times to achieve the desired result.
A thick paint straight from the can will lay out too prominently, no matter how good the paint roller is. The brush may leave grooves. A small 2-3cm brush can be used to cover corners or hard to reach areas.
Water-based paint must be diluted with water - approximately 10% of the total volume. This will reduce the viscosity and the paint will lay down in an even layer. You need to stir it well. Leave it for a while, usually no more than 5 minutes. Repeat mixing again. To do this, it is permissible to use a drill or hammer drill with a special attachment.
To achieve the best effect of painting with water-based paint, apply it in the second and third layers.
The first layer of paint is applied in the direction from the window (in the direction of light). The second layer is applied across the sun's rays. The third layer is again laid in the direction of the light. In this case, you will get a uniform distribution of water-based paint over the old surface.
Surface preparation
The even, monochromatic coating provided by water-based paint compositions does not hide, but, on the contrary, makes all surface defects, irregularities and stains more noticeable. Therefore, the ceiling must be carefully prepared before painting.
Removing the previous coating
First of all, you need to cover the floor and the remaining furniture in the room.
Then, if the ceiling was whitewashed, you should:
- Gradually, in squares, moisten the old whitewash with a sponge and warm soapy water;
- remove the soaked layer with a spatula, placing a tray in order to stain the floor less;
- finally wash off the previous coating with a sponge.
If there is old water-based paint on the ceiling, it will not be possible to wash it off. You should at least remove this coating where it has peeled off.
To identify and eliminate all such areas, you need to:
- moisten the ceiling generously with a roller;
- let the water soak in thoroughly;
- open the windows and doors and create a draft in the room;
- Use a spatula to remove the old water-based coating from all areas where it has peeled off as a result of this procedure.
Removing old peeling paint
Special processing
If there are rusty spots or dark streaks, they are covered with one of the following compounds:
- 3% hydrochloric acid;
- thick lime “milk” with 50 ml of denatured alcohol;
- 5% copper sulfate;
- 20 parts crushed lime with one part drying oil.
If there is black mold (a common occurrence in kitchens and bathrooms, and other damp areas), you need to follow these steps.
- Strip the plaster down to the concrete. To reduce dust, it should be moistened first.
- Treat the concrete surface with an antiseptic primer. A budget alternative is a detergent containing chlorine, for example, “Belizna”.
- Cover the problem area with a penetrating primer and re-plaster it.
Special ceiling treatment: 1. Stripping down to concrete. 2. Applying an antiseptic primer. 3. Plastering.
Features of dismantling the old coating
If lime whitewash was previously used on the ceiling, the easiest way to get rid of it is to thoroughly wet the ceiling surface. Lime has excellent absorption, so it is best to apply water several times. The thicker the whitewash layer, the more moisture will be required.
After this, you need to open the windows in the room. In draft conditions, the lime will begin to bubble and quickly peel off. After this, it can be easily removed with a regular spatula. You need to wear safety glasses when working, after which it is recommended to rinse the surface again with water.
If you need to dismantle a layer of old water-based paint that is badly damaged, then of course you can try to wash it off or get rid of it with a spatula. But this is a very long and tedious process. Therefore, it is best to use a special chemical composition that will quickly corrode the old paint. However, before using it, you need to carefully study the instructions. Work is carried out in a respirator, safety glasses and rubber gloves. Additionally, you need to take care of good ventilation of the room. The water-based emulsion quickly reacts with the chemicals and begins to bubble, after which it is easily and quickly removed with sandpaper and a spatula. At the final stage, it is enough to rinse the surface with water.
If there are large cracks and potholes in the ceiling, they need to be filled. After this, the irregularities are erased with fine-grained sandpaper.
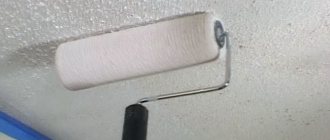
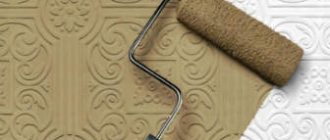
Choosing a roller for painting the ceiling with water-based paint
To paint a large area ceiling, you need to purchase a wide roller with a fur coat. Typically, a fur coat is made from natural materials (sheep, goat, llama, velor, mohair). To add texture to the surface, it is better to choose a roller with a long and thick coat; to give smoothness, you need a roller with a short coat. A foam roller is not suitable for painting the ceiling, because the liquid paint will flow down, and the desired result will not be obtained. You need to remember that a roller with a long coat will help hide small defects on the ceiling. When choosing a roller, you should take into account the weight of the roller; a heavy roller will quickly tire your hands. There are also coats for rollers made of polyamides; this material is more durable and resistant to various chemical solutions.