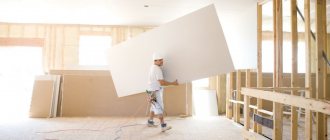
When decorating surfaces today, gypsum tiles are used. It is sold ready-made or made with your own hands at home.
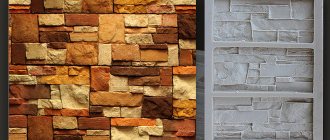
This is its peculiarity, since gypsum tiles can take on different sizes, shapes and types. When developing a form, you can achieve an imitation of natural stone, wood and other building materials.
In this article we will talk about the features of this finishing material and how gypsum tiles are made at home.
Where to start making gypsum tiles
The basis of high-quality building materials is the correctly selected composition of raw materials. Without this, you will end up with something flimsy and dull.
First, let's look at the base of the mixture.
Gypsum, like cement, is produced in various grades, designated by the letter “G” and a number from 2 to 25. The number indicates the strength of the set gypsum sample in MPa. That is, the higher the number, the stronger the casting made from it. On the construction market you can most often see gypsum with the designations G5 or G6.
A casting made from this plaster is only slightly stronger than a regular school chalk. This is usually enough for most finishing elements. Strength can be increased with some additives, we will talk about this a little further.
In addition to strength, for the manufacture of gypsum decorative tiles it is important to know the hardening speed of gypsum and its grinding. The speed is designated by the letters A (up to 6 minutes), B (6-20 minutes) and C (over 20 minutes). Coarseness in Roman numerals from one (the coarsest grind) to three.
If you read something like “G-6-BII” on the packaging, this means that the compressive strength of your tile will be 60 kg/cm2, the grain size is average, and the gypsum will set in 10-15 minutes after you mixed it with water.
In the initial stages, it is better to use slow-setting plaster. But in the future it will start to bother you. The smaller the grind, the harder the product, but it is also more difficult to mix the mixture efficiently.
From experience, we recommend that once you have mastered the basic working techniques, you will choose G-14-AIII plaster. At a reasonable price, it is easy to use, and the strength and hardness of products made from it is comparable to ceramics.
I recommend: Economical houses from prof. timber
The second important component is water. Ideally, it is better to use boiled water. Just straight from the tap will do, but let it sit in an open container for at least a few hours.
Important!
The speed of setting is highly dependent on temperature. By pouring plaster into hot water, you can get a stone in just a minute. It is best if the water has a temperature of about 15-18 ° C
Areas of use
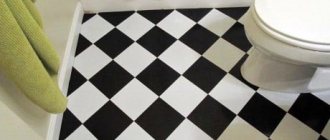
The possibilities for using the material are very wide. Designers offer a lot of options for finishing not only walls, ceilings, but also other surfaces with gypsum tiles. Gypsum decor is found in private homes, offices, shopping centers and other public institutions. The material decorates smooth wall panels, columns, fireplaces, niches, bay windows, and arches well. Such finishing, in the right tone, can diversify the interior design and add solidity, warmth and charm to the room.
When choosing a color spectrum, you need to remember that light shades visually expand the space, while dark shades conceal it. Decor of different shades will help to zone the room, and the thinness of the tiles will not “steal” extra centimeters from the surfaces of the walls and ceiling, and the lightness of the weight does not require the construction of a solid frame.
Finished with tiles:
- walls;
- ceiling;
- window slopes;
- fireplaces;
- spans;
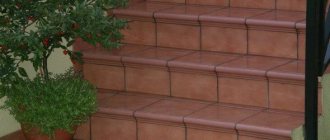
- steps;
- doorways;
- columns and other surfaces.
Before you start making gypsum tiles at home, it is important to consider that the production of decorative gypsum tiles does not require sophisticated equipment, but it is better to select in advance the shape, format and shades of the material that are suitable for the room being restored.
Technology for making decorative tiles at home
Tips for using decor:
- You cannot glue the material to a base that changes shape under the influence of external factors (plywood, chipboard).
- The permissible humidity limit for the use of cladding is 75%.
- If glue gets on the outside of the tile, the lining will turn yellow.
- When laying out the material, be sure to grout the seams with extreme caution; the grout should not get on the front side, because it will be difficult to remove the grout.
The finished material is laid on the surface at a temperature from +10 to +40°C, but it is better to start the jointing process at least 24 hours after installation of the coating.
Preparing casting compound for tiles
The water/gypsum ratio greatly affects the quality. The more water there is, the thinner and more mobile the mixture. However, the casting will turn out to be loose, and therefore fragile. On the contrary, a lack of water will give a thick composition or even gypsum dough. Thick plaster, when poured, will leave shells, and even entire unfinished areas.
For smooth finishing tiles, the water-gypsum ratio is required in the range of 35:65 - 40:60 volume fractions. The mixture should look like not very liquid sour cream. For relief textures, we shift the proportions towards water 45:55, respectively, liquid sour cream.
Even in a fairly simple kneading process, mistakes happen. And if the consequences of individual mistakes are insignificant, their sum can significantly reduce quality.
Let's look at the most serious and common:
- You need to pour gypsum into water, and not vice versa. Sprinkle the powder in as wide a “stream” as possible. Not at one point, but trying to distribute it over the entire surface of the water.
- After adding the powder, do not immediately start mixing the composition; allow the plaster to soak in water for at least thirty seconds to a minute.
- When using an electric mixer, do not use too high a speed - 500 - 800 rpm is quite enough.
- When stirring, try not to trap air. The mixture needs to be stirred, not “beaten.” Bubbles in the thickness of the plaster on the product sometimes appear as shells.
Search for premises
To reduce rent, choose premises away from residential buildings, on the outskirts of the city. You can start with a garage or outbuilding, provided you have electricity, heating and water. It is desirable to have utility rooms for storage and access roads. The temperature should be between +15 and +25 degrees, humidity not higher than 60%, without drafts . The required area is 100-500 square meters, depending on the scale of production.
Additives to gypsum mixture
Gypsum G14 and water are already enough to get quite decent finishing tiles with your own hands. But the result can be improved if you add some ingredients to the composition.
PVA emulsion will increase wear resistance and reduce fragility. We will add it 7-10% of the volume of water with which we will mix the plaster. Pour the emulsion into water in advance and stir until completely dissolved.
The addition of M500 cement will increase the hardness of the finished product. You need to add a little, about 5-8% of the gypsum volume. Add the cement directly to the plaster and mix it thoroughly while dry. Adding ordinary cement gives a noticeable “dirty” tint. If this is undesirable, use white cement.
Product range
At first, the assortment may be modest, but in demand. You can then purchase additional forms to offer customers new invoices. The form costs 4 – 7 thousand rubles. You shouldn’t give up expanding your product range, but to accurately meet demand, you need to have a good understanding of the industry, assess market needs and respond in a timely manner to changing demands.
Tile production
Making a form for filling
First of all, the front side is, of course, important for tiles. It is formed by the base or bottom of the mold. The side formwork or sides of the form prevent the gypsum from leaking out and ensure the required dimensions.
The simplest form is needed for smooth tiles. To do this, we use glass as a base. Since we are not talking about production on an industrial scale (at least while we are just learning), window glass, or even better, display glass with a thickness of 4-6 mm, will do.
I recommend: How to cast interior decoration elements in any quantity from plaster
A large sheet is inconvenient; it is better to make several forms, each for two 25x25 cm tiles.
We carefully round the edges of the glass with a diamond file so as not to cut yourself. To prevent the glass from breaking, we will make a base for it from thick plywood, OSB or a similar material.
Now you need to make the sides. Their height should correspond to the thickness of our tiles.
Let's take pine bars 10x15 mm. For one mold you need two bars 60 cm long, two 30 cm and one 25 cm.
Important!
Gypsum sets quickly, and its crystalline structure is completely formed within half an hour. But the tile will only have full strength when it is completely dry. Thin plates in their raw form are brittle and inconvenient to work with, so you should not make tiles thinner than 10-12 mm.
We cover the bars with waterproof varnish or drying oil. Using thin screws, we attach strips of galvanized steel 0.75-0.8 mm at the ends of each bar, so that they protrude by 23 mm.
Stepping back 15 mm from the ends of the bar, we bend the ends of each strip with the letter “G”. We bend the end not at a right angle, but a little stronger. We will use these “hooks” to connect the bars to each other. By moving the bars, we get tiles of various sizes (see Fig. 1). This design expands in one direction, and the movable jumper allows you to make tiles of almost any size.
How I found a decent way to earn money
While working part-time at several jobs at the same time, I managed to spy on archaic construction technologies and estimate their cost and income for personal use. When a decorative stone appeared on the horizon, I immediately became interested in it.
Interior decoration with decorative stone
A half-cube pack of light tiles for lining window sills surprised me with their high cost.
The idea of interior decoration attracted me even more, because now I didn’t have to put on worn out overalls and freeze outside. Without giving up lucrative jobs, I began to look for detailed information and develop a business plan.
Search for information
Not everything was simple. But today I can confidently share my experience with interested people looking for their place in this world. The desire to earn extra money from gypsum stone led me to exploring the Internet.
Based on the accumulated experience, I sifted through the information at the time of real or unrealistic ideas. Most of them were complete nonsense.
I want to say right away that everything that can be seen on the Internet is partly true, but mostly not. It doesn’t show how much work is put into the business, how much emotion, and most importantly, how much money is spent on mistakes and trials.
All that remains is to mix the ingredients, pour and another silicone mold will be ready.
What was the idea?
I was going to produce gypsum tiles using a matrix. First, real tiles made from granite were purchased. The price of such facing tiles is 2,000 rubles per square meter with a sample size of 20×5×1 cm. This is quite expensive, I’ll tell you. If you cover a wall in an apartment, it will cost a considerable amount.
The cost of gypsum tiles is cheap. But before you do it, you need to spend a little. The price of starting capital for such a business is 10,000 rubles.
Required materials include:
- silicone;
- gypsum;
- roughly speaking, the work itself and fantasy.
Lubricating the plaster mold
Gypsum practically does not adhere to glass and wood coated with varnish. But since we add PVA to the composition, it’s worth being on the safe side and ensuring reliable release of the finished casting and the mold. To do this, treat the sides of the mold and the surface of the glass with lubricant.
In its simplest form, it can be soap suds or mineral oil.
But if the amount of work to be done is significant, we recommend preparing a special emulsion. It has the following composition:
- 25 parts 72% laundry soap;
- 15 parts butter;
- 60 parts water.
The soap is grated on a coarse grater and dissolved in hot water. The resulting “jelly” is filtered through a sieve to separate undissolved pieces of soap and oil is added.
Sunflower is also suitable, but transformer or “spindle” is better.
As the mixture cools, stir thoroughly several times. The resulting composition will resemble thick sour cream or rather butter softened in the heat.
The prepared lubricant is stored in a closed container and applied to the surface to be treated with a soft brush, stirring before use.
The advantage of this lubricant is that it can be used to process molds made of any material, including gypsum.
Why I decided to go into business
Hello. My name is Aleksey. I want to talk about my personal experience of creating decorative stone.
A little bit about yourself
I live in a provincial town in the northeast of the Vologda region. I was born and raised here. My childhood was reminiscent of the early years of the character in the novel Ivan Goncharov. Like Oblomov, I lived in my mother’s house, surrounded by comfort, pies and feminine affection. To understand the atmosphere of these places, it is necessary to delve into the daily life of the inhabitants, and it is known to be ambiguous.
“What about decorative stone?” - You ask. I will answer that such activity does not go unnoticed, and success largely depends on the ability to get along with people and find a common language with them.
Part of the local population is engaged in logging and wood processing. More precisely, he works, or, to put it more correctly, he works as a laborer for someone who is engaged in timber processing.
In our places there was no serfdom, as historians say, but there was kulaks. It has not gone away to this day. People. in fact, they drove themselves into this.
Too much freedom surrounds them: fields, rivers, blue sky above their heads. But in childhood, this is all you notice, and you have no idea what awaits you ahead.
My choice
After graduating from the regional agricultural technical school, I had a choice:
- To join a philistine activity and work for someone, which is actually a mediocre pastime. And the bosses are so good-natured that, sensing “their guy” in you, over time they will inevitably begin to reduce your salary. It turns out to be a kind of sled dog.
- Join the ranks of self-financing individuals and regularly pay repayments to not quite government services, plunging yourself into despondency and sadness. But this is how most people live in the outback. Why am I worse?
- The third option is to go to the city without listening to parents’ excuses about life’s failures.
I decided to stay, realizing that almost everything depends on the person himself, especially in the era of the Internet and high-speed communications.
Pouring plaster and drawing on tiles
Let's move on to filling. Carefully pour the mixture from the container, distributing it evenly throughout the pan. After the mold is filled, smooth the surface of the plaster with a wide spatula and remove the excess mixture. After 15-20 minutes, when the plaster has hardened, we disassemble the sides, remove the castings and lay them out to dry.
I recommend: How to determine a water leak in an artificial pond
The castings literally “stick” to the glass and in order to remove them, you must first move them to the side.
As an option, we turn the mold over and move the glass itself. This must be done carefully and always wearing gloves.
This produces white or evenly colored smooth tiles.
You can get a characteristic “marble”, as well as another chaotic pattern, in one of the following ways:
1.
Pour a little color into the mold, one or several colors. The color can be used liquid, poured or sprinkled in small “puddles”. Then pour in plaster.
Additional “smudges” can be obtained by immersing a wooden stick or even just your fingers in liquid plaster right up to the glass and making wavy or spiral movements, lightly touching the glass.
2.
Pour or pour the color into the gypsum mixture and mix only slightly. At the same time, we make only a few chaotic movements, ensuring that the paint forms veins in the plaster, but does not disperse. Pour the mixture into the mold.
Other options are possible, but the ones described above are good for their simplicity.
Sales channels
To grow profits, you need to take care of advertising your products and finding reliable points of sale. As soon as production starts, it’s time to launch advertising in the media and the Internet. There is no need to save money; the ad must be noticeable and effective. Additionally, you can distribute leaflets on the street or order mailings to mailboxes. If you work without intermediaries, directly with stores and customers, you will be able to keep prices at a competitive level.
Often, gypsum finishing stone is ordered by architects, designers, and developers for finishing finished projects. If production has already started flowing, it’s time to participate in exhibitions and events related to the construction industry. Acquaintances and promising connections are made there. Both large construction companies and private developers are in need of gypsum stone. In order to establish sales, you will have to actively and clearly present your products, find options for offers that differ from competitive ones in assortment, prices, special conditions for wholesale customers, etc.
Final finishing of gypsum tiles
Let the casting dry thoroughly. Then use fine sandpaper to chamfer the edges of the tiles. If desired, you can even round the edges of the tiles.
Finally, we cover the tile with two or three layers of acrylic or alcohol varnish.
Advice.
You can check whether the workpiece is dry by tapping the tile with a hard, dry wooden stick, holding it with two fingers. The sound should be loud and clear.
Gypsum tiles are glued in the same way as regular tiles.
Laying decorative stone with your own hands
Poor-quality installation of gypsum tiles under brick can ruin the final result even when using the best materials. Therefore, perform all preliminary work as accurately as possible.
Back side primer
Preparing the area and material for work
Before laying gypsum tiles on the wall with your own hands, follow a number of steps:
- Clean the surface of the wall or other area from traces of previous decor and level it.
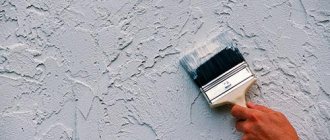
- Prime with impregnation.
- Check the tiles for defects, sand the edges, dip each one in the primer for a few seconds and let dry according to the instructions.
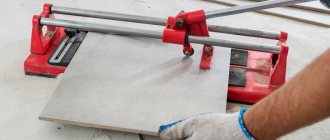
- Start laying gypsum tiles by laying out several rows on the floor. Based on the resulting pattern, make markings and cut off the required pieces.
- Perform the trimming with a hacksaw or a metal grinder, but always at an angle so that the front side is a little wider.
Layout on the floor
How to correctly mark the surface of a wall or other object
To achieve perfect evenness of the masonry, use a building level and 12 mm choppers.
Otherwise, before gluing decorative tiles to the wall with your own hands, mark the surface with horizontal lines. The distance between them is equal to the height of one tile plus the width of the seam or the height of three rows and three seams. The drawn lines will serve as a level.
When marking the height of one tile, laying is carried out along the lower edge, and the space for the seam remains on top (if laying started from the floor). If three rows are taken as a guide, the outer ones are glued first, and then the middle row. The seams are adjusted by eye. Be sure to leave room for the baseboard, floor covering, and bottom seam.
Using a building level
Competent choice of adhesive for gypsum tiles
The choice of adhesive for gypsum tiles depends on the installation method:
- With the seamless laying method, liquid nails, silicone sealant, polyurethane foam or other contact adhesives are applied pointwise in the middle of the tile.
- When laying decorative tiles under brick under jointing, use special gypsum glue or polymer putty, which are evenly applied to the entire surface to be decorated and to the tile. It is advisable to sift the dry glue before diluting it so that small pebbles do not get into the finished mastic.
- It is not advisable to use cement mortar. It takes longer to dry and during this time the plaster absorbs excess moisture. If you still use this glue, then you definitely need a priming step for high-quality installation.
Horizontal gluing
Features of using "Knauf-perlfix"
If you decide to purchase the above-described gypsum tile adhesive, you should familiarize yourself with the features of its use. Before starting work, the base is prepared; to do this, it is cleaned of dirt and protrusions are removed from the surface. If the walls absorb moisture well, as for aerated concrete, silicate, ceramic elements and plaster, then the surface should first be treated with a primer, you can use “Betonkontakt”.
These procedures can improve the adhesive properties of the surface. The base must be left until it dries, only then can you begin further work. It is important to keep the primed surface clean.
Basic properties, material classification
Decorative stone comes in two types - for interior and exterior use. For external stone, cement, sand and various pigments, dyes and other additives are used. The basis of the inner stone is gypsum. It is mixed with white cement, pozzolanic additions, oxide pigments, etc.
This connection produces a fairly strong material that:
- resistant to temperature changes;
- retains color when exposed to ultraviolet rays;
- hygienic;
- has low weight compared to natural stone;
- environmentally friendly;
- durable.