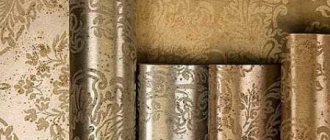
Canvases made from paper are one of the most popular for wall decoration.
They have many advantages - they are inexpensive, environmentally friendly, breathable, versatile, but they also have disadvantages.
Among the main disadvantages: impracticality, fragility. Paper is a rather fragile material and is easy to deform when gluing.
How long does wallpaper last?
Leave vinyl, non-woven, glass wallpaper for 7 - 10 minutes and paper wallpaper for 5 minutes. Wallpaper should be soft, but not soaked through. Remember! The layer of glue on the canvas should be about 2 mm - it will be saturated with glue, but will not get wet.
Interesting materials:
What did ancient people do during the Neolithic period? What does Buddha teach people? What does the author teach in the story The Man on the Clock? Whose poems does a person need little of? What does alcohol do to people? What happens if a person doesn’t get enough sleep? What will happen if a person is in space without a spacesuit? What happens if a person sleeps little? What happens if a person doesn't sleep all night? What happens if you restrict a person on Instagram?
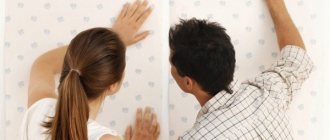
Joining different types of materials
Different roll wallpaper materials have their own set of qualities that determine the method of gluing them. Since the technology of this method of pasting walls requires skills and knowledge, you need to read the instructions for the wallpaper very carefully and take into account their features .
Even the choice of available tools influences the quality of the finished coating. If you don’t have even the slightest experience in repairs, you should use paints of the same shade as the wallpaper. A thin layer at the joints will hide gaps and irregularities.
In this case, a specific glue must be chosen, which you need to ask about in building materials stores, so that the wallpaper receives maximum adhesion to the painted areas. As an alternative, adhesive tape produced by wallpaper manufacturers for such cases may be suitable.
Paper
If paper rolls were chosen for wall decoration, then the following operations must be performed:
- Choose a starch-based glue that contains an antifungal component. Following the instructions on the package, prepare the liquid mass.
- The strip of wallpaper should be lubricated evenly, starting from its center, and kept folded for up to 7 minutes (you should also check the instructions for the roll material and glue for this time).
- Glue wallpaper to the wall, previously marked according to the width of the strip. Bring the edges together as tightly as possible. Additionally, glue the joints with PVA.
Important
As a result of impregnation of paper sheets with adhesive, they expand slightly. After drying on the wall, they are pulled back to the previous size. Therefore, you need to press each strip against the adjacent one as tightly as possible.
If the wallpaper is single-layer, then you should not risk pasting it on the walls using the end-to-end method. After drying, they will shrink and the cracks will be noticeable. It is better to immediately place the paper material overlapping.
Vinyl
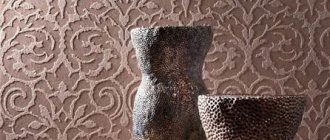
Thanks to this type of roll material, wall defects can be easily corrected. Roughness, dents, even small cracks are well hidden under the foam texture of the canvas. Before pasting, the wall must be treated with a fungicide; you don’t need to prime it. Roughly speaking, vinyl wallpaper is paper sheets coated with polyvinyl chloride. This material is distinguished into the following types and types:
- for painting (read about what wallpaper is suitable for painting and how to repaint the canvas correctly here);
- dense;
- foamed;
- with hot stamping;
- with silk thread;
- compact vinyl.
Also on store shelves there are heavy or light vinyl roll materials on a paper or non-woven basis, with or without embossing. Most often, this type of wallpaper is produced with a pattern, which must be taken into account when cutting into strips.
Non-woven materials are glued to an already greased wall, but for paper ones you need to separately apply glue to the strips and let it soak in a little.
Attention
Vinyl wallpapers are characterized by increased sensitivity to the microclimate of the room. Therefore, drafts or sudden temperature changes should not be allowed.
It is very inconvenient to glue such material in a wide format; it is important to choose the right starting point. It is better to start from the window opening, moving counterclockwise. Due to the large width of the canvases, it is necessary to leave about 5 cm in reserve under the ceiling and near the baseboards. It's easier to cut off the excess with a utility knife than to find a way to close the gaps.
How to work with such material:
- Apply glue to the strip itself to about 0.5 heights and attach tightly to the wall.
- Then coat the wall under the canvas 0.2-0.3 m at a time and re-glue it. At the same time, keep an eye on the junction with adjacent lanes.
- Iron away from the center of the fabric with a soft spatula or a towel folded in several layers (another clean fabric with a soft structure). This will eliminate accumulated air bubbles and press the canvas to the wall.
- All excess glue that comes out from under the wallpaper as a result of smoothing it with a rag should be removed immediately.
- If the corners are far from even, then it is better in such places to abandon butt gluing, but to make a small, uniform indent on the adjacent canvas, but no more than 1-2 cm. After drying, you can remove excess wallpaper from such joints with a metal ruler or spatula.
It is better not to cut wet roll materials with a vinyl backing, as they may simply tear.
The rules for gluing vinyl wallpaper can be found in our material.
Non-woven
The main advantage of the material is its quick and easy gluing . There is no need to soak the canvas with glue. It is enough to lubricate the area of the wall under a specific strip of non-woven wallpaper and stick it. Technology for butt gluing with this type of finish:
- Using a regular glue roller, it is necessary to cover the area of the wall under a separate strip with a homogeneous and uniform layer of adhesive. If there are hard-to-reach places, treat them with a brush.
- Wait a few minutes for the glue to soak into the wall structure and dry. Reapply glue to the fabric that will be used.
- When gluing the first canvas, you need to be especially careful about matching the markings. Only after this, using a roller, soft cloth or other devices, press the canvas tightly against the wall.
- Using smoothing movements from the center from top to bottom, remove air bubbles.
- You need to glue the next strip with a reference point to the previous one. In this case, the joints are adjusted manually: it is advisable that one person aligns the top of the canvas, and another monitors the location of the middle and bottom.
- Each joint must be smoothed out very carefully, and the edges of the strips must be additionally glued with a brush.
How to properly glue non-woven wallpaper is discussed in detail here.
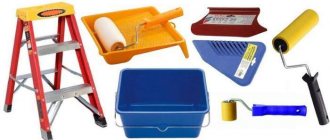
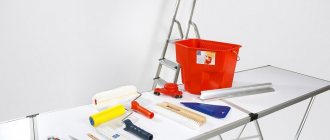
Paper wallpaper pasting tool
To apply wallpaper you will need:
- wide and deep capacity of 10 l. (a bucket of building materials: paints, putties, primers);
- long (1000 mm) wooden or plastic stick for stirring glue;
- a paint roller with a “coat” having a pile of no more than 5 mm;
- construction tape of at least 3 m;
- a sharp knife with a narrow long blade;
- retractable stationery (construction) knife with replaceable blades;
- scissors;
- wide plastic spatula for wallpaper;
- narrow rubber roller for rolling wallpaper joints"
- natural hair paint brush 40-60 mm wide;
- several sheets of fabric (preferably made of cotton material) to remove excess glue from the sheets.
Features of paper wallpaper
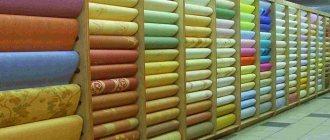
Paper wallpaper can vary in thickness, number of layers and surface texture.
The simplest type is single paper wallpaper - a strip of paper 530 mm wide with a pattern printed on one side. This is the cheapest and most common wallpaper, usually used for low-quality finishing of residential premises.
Despite the large assortment of colors and the ability to realize the most daring design ideas, narrow paper frames, even with the most careful and careful labeling, do not allow the joints between the canvases to be completely invisible. Because of this, you have to put up with vertical stripes on the walls, which are by no means an interior decoration.
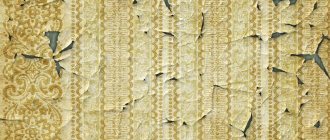
Thin paper wallpapers are subject to severe deformation (drying out) after gluing.
The visibility of the joints between the canvases can be minimized by the use of thin paper wallpapers that have a small, vertically located ornament (pattern) on the surface, which does not require precise joining of the canvases.
Thin paper wallpaper can be glued either end-to-end or overlapping.
How to get a result without gaps and discrepancies?
To get the desired result, follow the rules:
- To begin work, select a door or window opening or corner.
- The adhesive composition must be selected in accordance with the roll material, its type and size. It is necessary to adhere to the instructions for diluting the glue, the rules for applying it to canvas or to the wall.
- It is better to refuse joining in a corner, regardless of its internal or external location, since in such places overlapping gluing is required.
- To prevent future peeling at the edges of the canvases, a more resistant adhesive composition is selected and additional processing of these areas is carried out.
- It is necessary to smooth the seams only a few times, otherwise they will stand out against the main background.
If all the recommendations are followed, then the desired decorative effect when covering walls with wallpaper is easily achieved.
If the joints do come apart, read about how to save the situation in a separate article.
Instructions for gluing walls with your own hands
You can glue two-layer paper wallpaper joint to joint, if this method is provided by the manufacturer. The pattern adjustment is done dry on the floor. The technology assumes that the stripes are smeared first, and then the wall. The step-by-step instructions consist of four stages.
Stage 1: diagram and marking of walls
To ensure that the first strip is oriented vertically, a line is drawn on the surface of the wall panel. Its location is determined using a plumb line, laser level or level. The wall can be completely marked, which will allow you to determine the required number of strips of wallpaper.
Stage 2: preparing wallpaper
Having measured the height of the ceiling, we begin to prepare paper sheets.
- The pattern adjustment is done on the floor. The offset in millimeters is indicated on the packaging. If the measurements are taken correctly, the wall covering will turn out without seams.
- Apply glue to paper wallpaper using a wide brush, evenly distributing the mixture over the surface, grabbing the edges.
Stage 3: gluing
- The coated wallpaper is folded so that about a third of the length remains bare.
- When placing the canvas on top near the ceiling, make sure that after pressing it is vertical. For this purpose, special markings are applied.
- Having glued the top, separate the folded part and press the strip to the very bottom.
- Use a dry cloth to expel air and excess glue from the axle to the edges.
Stage 4: final
- All protruding parts are cut off. There is no need to peel off the strip; trimming is done with a special wallpaper knife.
- The joints are rolled with a special narrow roller.
- Exposed glue is wiped off with a dry, clean cloth.
How to prepare a room for wallpaper renovation
When you are going to refresh the walls in your house with new paper wallpaper, the first condition is to get rid of all traces of the old coating.
Important! If the wall is lumpy and has cracks, you definitely need to level everything with putty, plaster, and finally apply a primer so that the new decoration lies evenly and lasts a long time. And if a dense, embossed duplex can still smooth out some unevenness, cheap paper wallpaper will not forgive you for frivolity.
Then you need to stock up on everything you need to cover the walls. You will definitely need:
- sharp scissors or a special wallpaper knife;
- pencil, plumb line with a piece of chalk or level, long ruler;
- a wide brush for applying glue and a thin brush for joints;
- plastic wallpaper spatula;
- a small paint roller and several pieces of clean, dry cotton cloth;
- damp sponge;
- a bucket for glue and the glue itself;
- stepladder or stool (depending on the height of the ceilings);
- several old newspapers;
- glue for paper wallpaper, how to choose it, we wrote in the last issue.
The room in which you plan to hang paper wallpaper should be draft-free (close all windows and vents, no fans), without power, the floor should be dry and clean. It is better to spread the strips and spread them with glue on laid paper or other material so as not to smear the floor.
Tools you may need for the job
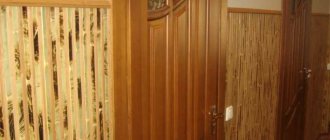
Preparation for the procedure and pasting corners
In order for the wallpaper to lay well and stay on the walls for a long time, you need to carefully select the tool, carefully read the instructions for the materials used, choose the right glue for the canvas, and adhere to the working technology. The corners should be well glued, since this part of the finishing is the most time-consuming and complex.
Algorithm for gluing corners:
- Measure the distance between the nearest strip of wallpaper and the window or doorway. Increase this result by approximately 5 cm.
- It is good to saturate the corner and wall with glue.
- Place the provided reserve on the other side of the corner.
- In the corner and on the wall, carefully align the pasted strip with a rag or rubber roller.
- Since the angle in the vertical direction is not always perfectly straight, determine the narrowest place and make a notch at a distance of + 1 cm from it. Make a marking vertically from it to use it as a marking for the next piece of roll.
- Trim the seam with a wallpaper knife, using a ruler and a paint spatula. Trim the excess from the other canvas to match the pattern.
- Remove excess areas from the bottom and top of the canvas using the same method as the sides.