Natural logs perfectly retain the heat of the bath, giving a unique atmosphere of comfort and closeness to nature. It is the log bathhouse that is most filled with the spirit of a real Russian steam room - exactly the kind that was built in villages and cities in Rus', and that a special connoisseur of steam, Peter I, built for himself on the banks of the French river.
But it is important to properly prepare such a bathhouse, build it and cover it with a protective composition for its durability. But how to paint the outside of a sauna frame and are all paints suitable for this? Now we will deal with this!
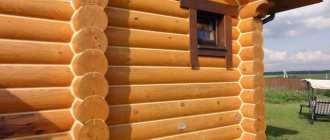
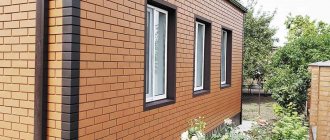
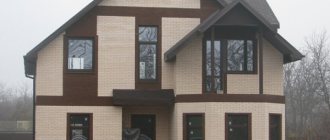
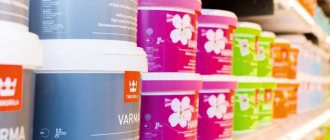
Look at the amazing effect modern paints have on the appearance of a log bath:
Painting the outside of a log house: stages of the process
Protective and decorative painting of a house made of rounded logs on the outside is the key to its long-term preservation without loss of visual appeal. Typically, processing is divided into several stages:
- Antiseptic. Impregnation of the facade with water- or oil-based antiseptics and fire retardants disinfects the wood and prevents new insects and microorganisms from appearing (1 to 2 passes are performed). It is convenient to apply the antiseptic through a spray bottle, so a respirator and safety glasses at this stage are not superfluous. Further procedures begin after the composition has completely dried.
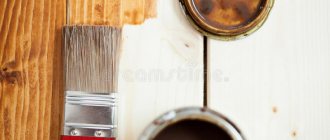
- Primer. The purpose of the treatment is that the composition prepares the surface for final painting. The primer prevents tree resin from escaping (in knots) and staining the paint.
The paint color is chosen taking into account the style featuresSource gomabygg.com
- Adhesive primer (acrylic or oil, optional). The impregnating composition improves the adhesion of the base paint to the wooden wall and reduces paint consumption. Avoid getting dirt and dust on the drying primer.
- Cover paint. The main paint for a log house, the final layer that decorates and protects the walls. The ideal option is acrylic paint, applied in a thin layer sequentially in three steps, using a brush or roller.
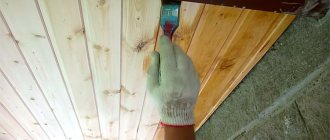
Let's start painting
The sequence of processing walls inside and outside is the same:
- antiseptic;
- fire retardant (fire treatment);
- coloring.
The antiseptic will protect the tree from rot and prevent the proliferation of fungal spores. The fire retardant forms a film layer and contains salts that prevent fire. The paint will protect against temperature changes and moisture, and will retain the beneficial properties of the first two layers for a long time.
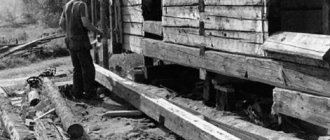
If the bathhouse is no longer new and the wood has changed its color, then before you start painting, you can use special wood bleaches. After using them, rinse the surfaces well, dry them and you can start painting.
Now I turn to modern materials
I will talk about those that are intended specifically for wooden buildings.
Belinka
Professionals speak positively about the Russian manufacturer Tex. In addition to paint, the company has several types of antiseptics, including ground and glaze, drying oils, fire retardant impregnations and wax-based compounds.
Tikkurila
If finances allow, contact the Tikkurila brand, respected in Russia. The paints of this Finnish manufacturer have been tested in the harsh conditions of the northern climate. They contain components containing various additives that prevent the formation of rot, moisture absorption, and protect against ultraviolet radiation.
You can choose from acrylate paint called Pica-Techo, oil Techo, polyacrylate, Ultra-Classic. This brand, in addition to its relatively high price, has another drawback - names that are difficult to remember. Here they are.
And of course, the Finnish company has all EU certificates confirming environmental friendliness.
In general, recommendations for painting a log bathhouse boil down to what needs to be taken into account:
- Firstly: the better (that is, more famous) the manufacturer, the better and more durable its primer and topcoats;
- Secondly: use special-purpose compounds, in our case, intended for external wooden walls. If you find among well-known manufacturers special paints for facades made of rounded logs, it will be even better, but, unfortunately, I don’t know such paints.
Requirements for paints for exterior painting of timber
When choosing a material for painting a bath, it is recommended to determine its characteristics and follow certain rules.
Vapor permeability
This is the main indicator when choosing a material. If the shell is too dense, steam accumulates on the wall underneath it, which leads to rotting of the wood. After several years of operation, gradual peeling of the composition is observed.
The basis
When choosing a material, pay attention to the solvent. For cladding baths, preference is given to organic compounds or paints that are water-based. An organic solvent creates a dense film base that is not capable of fully transmitting steam. When purchasing organic compounds, you need to use paints based on plyolethyl resins.
Water-dispersed paints are developed on the basis of film formers. This is an environmentally friendly composition based on aqueous dispersion or minerals. The first type is:
- Water-dispersed;
- Emulsion;
- Latex;
- Water-based.
For the production of mineral paints, inorganic binders in the form of liquid glass, cement, and lime are used. Enamel paints form a practically non-breathable film, so they are not used for painting baths. When used, the texture of the wood is completely painted over, which leads to its destruction. Timber is not painted with modern synthetic materials, since they contain carcinogens that negatively affect the environment.
Waterproof
On the painted side, the paint should have low absorption capacity, which will protect the facade from getting wet and dirty. When purchasing a composition, you need to pay attention to its absorption level. If the timber is damp, then a temporary antiseptic is used to cover it, which does not form a dense moisture-proof film. Its tinting is carried out to protect it from ultraviolet radiation.
Protection of decorative qualities
The material used to construct bathhouse walls can accumulate dust particles, so care must be taken to ensure that they are washed off by rain. In high-load areas, compounds are used that have a high level of abrasion - over 5000. The floor of the veranda is covered with terrace paint.
UV resistance
When exposed to ultraviolet radiation on the walls of the bathhouse, the possibility of fungus spreading is eliminated. But the sun burns the paint and helps lighten it. Therefore, you need to buy a composition that is resistant to ultraviolet rays. The bathhouse is painted with polysilicon, acrylic or silicone composition. To avoid darkening of the surface, do not use paint based on linseed oil.
Design
We haven’t touched on this topic before, but why not really think with you about what color to paint the bathhouse and what design options there are in general?
What color to paint
We have paints and varnishes at our disposal. The bathhouse itself is either made of wood, or lined with wood, or brick, or plastered. Perhaps it is finished with stone, for example, on the foundation.
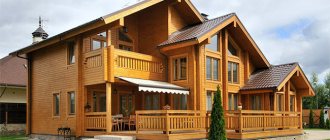
In general, it would be desirable to maintain at least some kind of stylistic unity - at least within the bathhouse itself, and at maximum - in all buildings. That is, if you decorated the house traditionally and in natural wood colors, then painting the outside of the bathhouse pink will look... foreign. But if all the buildings on the site are bright in color, then the bathhouse should be made no less bright.
Now about the styles. We have already said once in other articles that the bathhouse has three conventional styles: tradition, high-tech and “modern” (the latter means the use of modern materials without particularly advanced design ideas).
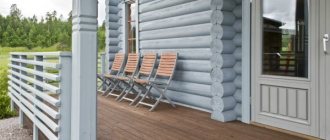
If you choose “tradition,” then you either have timber, a log house, or lining - paint in shades from yellow through orange and reddish shades to dark brown, better with varnish than paint, so that the texture of the wood is visible.
It’s hard to believe in real “high-tech” in a summer cottage. And if it is implemented, it will be according to a design project, where all the colors will be painted.
There is only one option left - the same “conditionally modern” style, which does not have its own face. Try to “revive” it by using brighter colors. And regarding the combination of colors, we advise you to search the Internet for pictures with the phrase “color schemes” - usually this is a photograph from which several colors have been extracted (stripes under it), forming a harmonious combination. It's easier than learning color theory.
Example of color gamut extraction
Reviews, videos
Finally, we’ll tell you about the impressions of the bathhouse owners who took the advice and decided to paint the outside of the bathhouse frame. Reviews are still different. There are those who criticize Tikkurila, citing photographs of what its varnish turned into after two years, there are those who praise Tex, and those who scold it. Neomid deserves praise. In general, there are always those who are happy and dissatisfied from the same things, so you have to try everything yourself, and not take someone’s word for it.
And here is a video review in which the owner talks about how he spent six years in a house made of ordinary timber, there are a couple of phrases about painting:
Of course, it is impossible to fully cover the topic in one article. Read other materials in the section on painting. Just in case, let’s say that we have materials about varnishes and paints for bath floors and how to paint a bath stove.
Source
What is special about steam room compositions?
There is only one thing: it should not release harmful substances into the air under the influence of heat. Especially when it comes to dyes that are used to paint the hottest places - the top of walls and ceilings.
Therefore, in the steam room, preference is given to impregnations rather than paints. They definitely don't emit anything when heated.
At the same time, you should not exaggerate the danger - the temperature on the floor is low, so there is no point in expecting that there will be an active release of harmful substances.
The Finns are ready to cover the floor in their sauna not only with oil emulsions, but also with urethane-alkyd compounds, and alkyd paints are generally not good for our health, at least while they dry.
So use common sense: for shelves - only impregnation, for walls and ceilings - impregnation or acrylate composition, for floors - impregnation, varnish, paint (not forgetting the undesirability of slipping).
How to make a choice
When choosing what paint to paint a wooden bathhouse in the country, you need to take into account the processes occurring in the wood:
- When the sauna is heated, the wood heats up and expands. When using a bathhouse, heated steam actively penetrates the body of the log house;
- When the bathhouse cools, the moisture from the wood is removed outside, and the humidity of the log house gradually decreases to the level of humidity in the surrounding air. The paint should not interfere with the removal of moisture, otherwise the wood will begin to rot.
Valuable tips for painting a log bathhouse
Let's summarize: the main goal of modern paints for timber is to protect wood from blue stains, mold, UV rays and any other atmospheric phenomena. But in order for the protective coating of the timber to do its job 100%, you must do everything correctly.
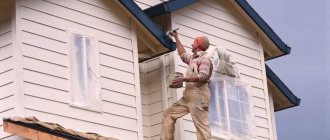
Tip #1. Paint the sauna frame yourself
If you paint a log house yourself, you will gain a lot of advantages. After all, it is quite difficult to judge the quality of the team’s work only by the appearance of the bathhouse, and their main task is to create a finished beautiful object. And, unfortunately, workers often leave unnoticeable small gaps in the processing of the log house from the outside. Over time, these places become a source of problems such as rot, mold and destruction of the walls of the bathhouse from the inside.
Tip #2. Properly prepare the log house for painting
First of all, it is important to properly prepare the surface of the log house for painting. To do this, you need to remove all dust and foreign debris.
It is advisable to rinse the bathhouse walls thoroughly with water using a hose and a stiff brush. Then dry well. If necessary, sometimes it makes sense to carry out serious grinding:
If you notice any lesions at this stage, treat them with Woodmaster Frost Whitening Solution. And for cracks and small defects Eurotex is more suitable.
Advice: if you notice traces of mold on the logs of a new bathhouse, it is advisable to consult a mycologist before painting: it is still “harmless” mold or a real destroyer.
In addition to standard cleaning and sanding of the log house, you need to take care of its protection. If you are not sure of the quality of the delivered timber, do not make do with a standard antiseptic - it is better to use Language, which kills all spores. And as a topcoat, choose a Fungicide, which will help prevent the appearance of algae and mold on the surface. In extreme cases, you need to clean the walls well and apply a clear coat of Log washadvance.
Tip #3. Paint the ends with lime or a modern equivalent
This is done in order to force water vapor to move along the log and escape through the ends. This is a natural process that occurs due to the difference in temperature indoors and outdoors, and here the steam room is at particular risk.
If in this case the park runs along the fibers, and not across, this is how moisture moves in a growing tree, well, what should you do if you have to.
Tip #4. Don't leave any gaps
During the process of painting a bathhouse, it is important to ensure that there are no unprotected gaps, which can easily cause many problems. Therefore, add a signal color to a colorless antiseptic, and then leave it to dry for 3 days during a period without rain, so that the active substances are fixed in the wood and the effect is achieved
Tip #5. Choose the most beautiful paint!
Modern manufacturers offer not only compositions that simply paint over the substrate and hide the natural grain of the wood. Today, decorative protective and decorative texture paints for log baths are in fashion, which not only preserve the wood from atmospheric agents, but emphasize its beautiful texture!
And it has additional valuable features. For example, today the following texture paints for Russian log baths are especially in fashion:
- “Favorite Dacha” is an economy-class paint to protect the log house from blue stains, ultraviolet rays, and fungus - and all this without a primer.
- “Aquatex” is a paint with an antiseptic and a modern ultraviolet filter. On the surface of the walls of a log bathhouse, it creates a semi-matte elastic coating, and also without priming. Moreover, it can be applied even to damp wood.
- The “Aquatex Extra” variety is a protective coating, an elastic coating made of natural oil and microfiber. This paint has ultraviolet protection in two ranges.
- In order to paint an old bathhouse, Aquatex Restorer paint is more suitable for you: you will be very surprised by the result.
The appearance of the bathhouse should please the eye and warm the soul!
Based on the article https://cdelayremont.ru/banya-svoimi-rukami
Useful tips
- For the exterior walls of the log house, it is advisable to choose dark colors - this will help protect it from exposure to sunlight. On the street side, it is not at all necessary to use water-based paint; you can also use it containing alkyd resins (based on a chemical solvent).
- It is better not to treat the steam room with glazes and paints, because this room has the highest temperature and humidity. For this purpose, you can use water-resistant, heat-resistant acrylic varnishes based on water. Their use will protect and emphasize the structure of the wood, avoid a strong odor, and make it possible to touch the walls without the risk of getting burned.
- In the washing room, it should be taken into account that here all surfaces often come into contact with hot water and steam. This makes them vulnerable to rot and insect pests. Before painting, this room must be treated as thoroughly as possible with an antiseptic.
- After impregnation, it is better to cover the remaining rooms inside the log house with varnishes or paints based on water, and not on a chemical basis.
- When choosing a protective impregnation, it is better to give preference to one that contains insect repellents.
- When painting outside walls, remember that the ends absorb paint more strongly. They can and should be applied 1-2 more layers.
- Chemical compounds must be applied only to previously cleaned and dry surfaces.
- Before you start painting the floor, it should be treated in several layers with moisture-proof and antibacterial impregnations.
These simple recommendations will help you easily cope with cosmetic repairs and significantly extend the life of the structure. If you take care of your bathhouse in a timely manner and competently make minor repairs, it will please the owners for a long time.
Application
Can the floors be painted?
Can. Moreover, if we are not talking about a steam room or a washing room, you are generally not limited in your choice. But even the steam room and washing room are no exception - if you use specialized dyes or impregnations.
The floor in the steam room is the zone of least heating, and this applies even more to the sauna, because there the air flow is usually through the bottom of the entrance door, and cold air spreads along the floor, cooling it. In a Russian bath, everything is sealed to the maximum, but there and in the working area the temperature is low, so the floors have a low temperature in both cases.
We have already written about whether it is possible to paint the floors in a bathhouse with paint. However, we consider it possible to repeat that all options come down to oil impregnations (the Finns are not afraid that it will be slippery), as well as acrylate compounds (see Tikkurila products above).
In fact, if you want to paint the floor in the steam room and washing room, use the most environmentally friendly compounds - those that dissolve in water. For example, acrylic bath paints mentioned above.
Walls
There shouldn’t be any problems with this at all, because for the floor you still need to somehow select a composition with the greatest wear resistance, and for walls any composition is suitable - paints, varnishes, impregnations, any composition (preferably harmless).
How to paint stoves, boilers, tanks?
In general, it is correct that all equipment associated with heating water needs protection from corrosion, and certain paints and varnishes can help with this. You just need to figure out what exactly is suitable for these purposes.
For a metal stove
The temperature in the stove depends on the combustion temperature of the wood. Firewood comes in different types of wood and different humidity levels. Plus, another important point is air access: the more air there is, the higher the flame temperature.
Let’s assume that the combustion temperature, which varies somewhere from 500 to 1000 degrees “ideally” (that is, dry ash firewood, for example, with sufficient oxygen), in reality is 600-800 degrees (if you don’t burn it with poplar) . In this case, you should focus on paint with heat resistance of 650 degrees.
In general, either measure the temperature of the furnace with a thermometer, or somehow be guided by the color of the metal's heat (there are tables where the shade of red is converted into degrees, but, of course, it is difficult to determine the shade by eye).
In addition, there is a useful video that tells you exactly what kind of paint and how much paint you will need in your work:
For boiler
The choice of paint for your sauna boiler depends on what type of fuel you use to heat it. Coal burns at a higher temperature than wood. Ideally - at 2000 degrees, in reality - at 1000. Therefore, the boiler should be painted with paint that can withstand up to 1000 degrees.
For hot water tank
The hot water tank does not heat up above the boiling point of water. Therefore, the paint for a hot water tank in a bathhouse can be exactly the same as that used for painting radiators. Although, if there is anything left from painting the stove, you can use that too.
Services of professional finishers
offers its services for painting and varnishing the facade of a wooden house. We have specialized in finishing timber and log houses for more than ten years. The qualified craftsmen of our company have extensive experience working with wood.
We use certified paints and varnishes from well-known manufacturers, which are of high quality and safety. We are ready to perform any amount of work, from local painting to turnkey home finishing.
You can leave your requests in any convenient way using the coordinates in the “Contacts” section.
Calculate the cost of painting and insulating your home right now
Do you have accurate measurements of the house?
I measured it myself. I have a house design. Measurers came. I want to call a measurer.
By clicking on the button, you consent to the processing of personal data
Stages of work on finishing the base - features and technologies
What is better for insulating a wooden house: foam or caulk?
PPU for thermal insulation of a wooden house
On the peculiarities of using oil impregnations indoors
Painting a brick oven
Preparatory stage: If there are minor defects (depressions, bumps, potholes), first plaster and level, and cover the seams with a clay solution. You can learn how to prepare a good clay solution from the corresponding article, which is on the blog...
Plaster is made from clay and crushed asbestos. The resulting mixture is carefully applied to a well-heated stove.
How to paint: The two most popular proven folk methods are lime or chalk. The third method is again heat-resistant paint, which is also used for iron sauna stoves.
Cooking and painting with chalk
- Pour the pieces of chalk into a container (bucket, basin), fill with slightly warm water so as to cover the surface and leave for at least one hour;
- In another container, mix animal glue with warm water in a ratio of 25:1. Animal glues include gelatin, casein, albumin, and bone.
- Mix both solutions and bring to a homogeneous consistency. “To check the quality of the solution, drop it on a piece of glass or mirror placed vertically. If the density is normal, then the droplet will slide down by 2-3 cm.”
- Apply two or three layers. Each subsequent one, only after the previous one has dried. “For a more “clean” whiteness, you can add a tablespoon of blue to a bucket of the finished solution. It will remove some of the yellowness.”
Cooking and painting with lime
- Solution proportions: 1 kg of lime / 1.5 liters of water at room temperature / 1 tbsp. spoon of drying oil / 25-30 grams of blue / 1 tbsp. spoon of salt. Mix. “The most durable whitewash is made from freshly slaked lime, and salt is added to make the lime coating less dirty.”
- Apply in two or three layers. Unlike whitewashing with chalk, each subsequent layer of lime whitewash is applied to the wet previous one. “If the stove in the bathhouse was previously painted with chalk, and you intend to use lime (and vice versa), the surface must be thoroughly cleaned of old paint.”
How to paint the outside of an old wooden house using old paint
There is only one recommendation - if the old layer holds well and is not covered with cracks and there are no areas of film peeling visible on it, then you need to use the type of paint that was used previously. You can confidently apply alkyd paint over oil paint - they combine well. But acrylic ones are not suitable here, although some manufacturers allow such contact.
If you do not know what type of paint was previously used to paint the house, it can be determined by the appearance of the old coating. If the old coating has a leathery surface and is slightly chalked, then most likely the house was previously painted with acrylic paint. Acrylic paint cracks along the grain of the wood.
If you can roll a small piece of paint into a tube, then most likely you are dealing with acrylic paint. If a piece of paint cracks when rolled up, it is most likely oil paint. Oil paint develops net cracking as it wears.
If the surface is covered with a glossy film of glazing antiseptic, then the surface can be repainted with the same antiseptic or with oil or alkyd paint. To repaint with acrylic paint, you will need to remove all the old antiseptic film down to the wood.
Manufacturers and product prices
Bath paint is produced by domestic and foreign manufacturers. Its price depends on the material used and the quantity in the jar.
Belinka
The manufacturer's product range consists of paints, glazing compounds, varnishes, and impregnations. They have a wide range of colors, which allows you to bring any design idea to life. When using materials, the structure of the wood is preserved. Belinka produces polyacrylate paints that have water-repellent and vapor-permeable properties.
Tex
Paint from the Russian manufacturer Tex has protective qualities, which guarantees an increase in service life. The company produces soil and glaze antiseptics, drying oils, wax compositions, and fire-retardant impregnation. This allows you to choose an acceptable option for painting the bathhouse.
Tikkurila
The compositions are produced by a Finnish company in accordance with innovative developments. After production, the compositions were tested in harsh climatic conditions. The materials are developed using special components that protect the coating from ultraviolet rays and the wall from excessive absorption of moisture and rot.
The range consists of acrylate, oil and polyacrylate compounds. The paints are certified by the European Union, which ensures their environmental friendliness. The paint has a high cost, which is explained by its excellent technical characteristics. Before applying the composition, areas that cannot be painted are covered.
Saikos
The compositions of the German manufacturer are developed on the basis of natural oils and waxes. This ensures the preservation of the structure for many years.
Types of paints for timber
According to the peculiarities of production, composition and technical characteristics, several types of paints are distinguished.
Impregnating compositions
Once applied to the timber, impregnating paint penetrates to a depth of 3 to 5 millimeters. It is recommended to paint the bathhouse using antiseptic, fire-retardant and decorative-antiseptic materials. The last of them protects wood from negative environmental influences and improves its appearance.
It is recommended to cover the wood with glazing impregnations, transparent varnishes and oil-waxes. These materials enhance the natural beauty of the wood.
Film compositions
This material creates a thin protection for the wood. They are developed on the basis of film-forming binders. After the paint has completely dried, a high-quality waterproof protection is formed on the surface. Despite the formation of a film on the surface, moisture passes through it and accumulates inside.
To paint timber, it is recommended to use acrylic compounds, as they allow moisture and air to pass through the pores. Silicone-based compositions protect walls from the effects of precipitation and have self-cleaning properties. When using these materials, there is no need to wash the surface, since dirt is washed off by rain.
Another way to protect a sauna stove from negative influences
You don’t have to think about how to paint an iron stove in a bathhouse, since not only paint can protect it. The method of metal bluing, which involves creating a chemical reaction, is widely used.
First the surface must be cleaned. To do this, use a 5% sulfuric acid solution, which should be applied with a brush. Then the laundry soap is diluted in water in a ratio of 50 g per 1 liter. This solution must be used to wash off the previously applied sulfuric acid. Next, the oven is heated to 150-180°C and treated with caustic soda diluted in water in a ratio of 50 ml per 1 liter. The composition should be applied only by spraying to avoid splashing.
Conclusion
In order for the stove to serve for a long time, it must be well treated, and for this you should make the right choice of what to paint the stove in the bathhouse with. The solution to this issue should be taken with full responsibility and there is no need to save money, because the stove is the main component of the bathhouse.
Homemade effective impregnation
Painting lining surfaces outdoors can be done with a product prepared at home. This method is the most cost-effective and simple. To prepare it, you need:
- 10 liters of water (bucket);
- 10 bars of soap, 200 grams each (preferably laundry or tar);
- 10 liters of drying oil.
Approximate shade of do-it-yourself impregnation Source onlinetrade.ru
The entire composition must be diluted exclusively in a galvanized bucket, otherwise its walls will be damaged. The process of preparing the impregnation consists of the following simple algorithm.
- Pour water into a container and rub all the pieces of soap into it on a fine grater.
- Place the mixture on the fire and cook for 15 minutes, then let it cool slightly.
- Separately, heat the drying oil to a temperature of 36-37 degrees, prepare a tank of 20-35 liters.
- Pour two components into it evenly: soap solution and drying oil, and mix the ingredients intensively until a homogeneous mass is formed. For quick mixing, you can use a whisk or special attachments on an impact drill.
- After obtaining a homogeneous consistency, the homemade impregnation can be considered ready. Cool it to about 20 degrees, and then apply it to the wooden wall using a roller or brush (as convenient).
The next day, weather permitting, it is necessary to cover the wall with the same slightly heated composition again. A hardened finish coat with homemade impregnation can last up to five years.
The facade of a clapboard house, protected by impregnation Source skachat-kartinki.ru
Harmful factors
Lining is a natural material. On the outside of the building, the best results in terms of durability are shown by finishing made from coniferous wood, however, it is not as durable as plastic or metal. The following negative factors affect wooden lining:
- changes in humidity that occur both during the day and due to the change of season;
- negative temperature outside the house in winter and heating of the walls by the sun in summer;
- ultraviolet radiation, which gradually destroys wood fibers;
- various microorganisms, many of which are constantly present in the atmosphere;
- fungal infections affecting the tree;
- elementary mold, which can form due to improper installation and lack of ventilation;
- various pests - from small insects to rodents.
Naturally, over time, the wooden lining outside the house loses moisture, dries out, and can become deformed. Therefore, it will be best if painting and finishing is done immediately after its installation is completed.
Frame partition
A frame partition means a structure made of a wooden frame, which is insulated with mineral wool and covered with clapboard. The partition is mounted on a concrete curb. The process of installing a frame partition consists of several stages. Next, each stage will be considered in detail.
Preparatory stage
The first step is to make a border. Its height should be 100 mm and width 125 mm. This border is needed to strengthen the structure, as well as to lay ceramic tiles along it. It will completely isolate the tree from water. The threshold is made when pouring the screed (if the floor is concrete). You can also do this work during the installation of the partition. To do this, install formwork from boards
It is important not to forget about the presence of a doorway, according to the standard 940 mm. The base is treated with a deep penetration primer for better adhesion
To ensure that the poured border is not damaged, before pouring, drill holes inside the formwork and hammer in small pieces of wire or screw in dowels 1/2. When the poured concrete has dried, it is necessary to lay two layers of roofing material on top.
Frame construction
At this stage, blanks for the base of the frame are first made. The dimensions should be as follows:
- 6x10x210 cm;
- 6×10×176 cm.
Drill holes in the blanks for anchors and lay the bars on the curb. So, the base of the partition is fixed to the floor with anchors. On average, each workpiece will require 3 anchors. The side posts are mounted in longitudinal grooves made in the walls and screwed in with screws. After this, you need to make a supporting frame for the structure. Place the outer stands, the size of which is 6x10x235 cm, on the base and secure with screws. Be sure to place a washer under each screw!
It's time to design the doorway. For the frame, place two vertical posts measuring 6x10x206 cm. Secure the frame frame with jumpers using self-tapping screws. As for the top beam of the frame, at the top it is necessary to leave a gap of 30 mm between the ceiling. Due to this, the expansion or settlement of the log house will be compensated. For this reason, the side grooves in the walls are made at full height.
Thermal insulation and lathing
As for thermal insulation, for this you can use mineral wool 10 cm thick. Cells of 120 × 60 cm should be made in the frame. This size corresponds to the standard size of mineral wool slabs. The cotton wool is covered with polyethylene on both sides. It is secured with a stapler. These actions achieve several goals at once:
- Protection against moisture penetration.
- Thermal insulation.
- Noise insulation.
At the final stage of manufacturing the frame partition, the lining is attached to the sheathing (the sheathing is made from 2.5x5 cm beams). The lathing can be secured on top of the film and secured with self-tapping screws to the frame.
Door frame
If the resulting opening has a size of 82x206 cm, then the frame should be 80x205 cm. So, there will be a gap of 1 cm on each side. When the frame is installed, fill all the cracks with foam. Cut off the excess frozen foam with a construction knife.
Finishing with tiles and lining
When the partition frame is ready, the washing room should be tiled. Although this process can be performed after laying the lining. Installation of the lining is very simple using the tongue-and-groove technology. The lower beam of the sheathing from the sink side is attached to the curb, and from the steam room to the floor. It only needs to be attached to vertical posts. The lining is attached to the sheathing using clamps.
Skirting boards, trim and final finishing
You can use lining as platbands. Clean the edges of the lining with a hand router (you will need a radius cutter), and cut it to length using a circular saw. Cut the top casing at an angle of 45° and join it together. Also secure the baseboards.
This is the technology used to install a frame partition between the steam room and the washing room. If you follow it step by step, you will succeed.
Simple Methods
The simplest and most common methods of painting lining outside a house include staining. With its help, you can achieve not only protection from various adverse factors, but also create various artistic effects.
In addition, today you can find stain of any color, so the method can be compared with the use of colored translucent impregnations. This method is one of the simplest and cheapest, but its main drawback is the fragility of the coating. It is better to update the appearance of the walls outside the house once every year or two.
As you can see, high-quality painting of the exterior of the house is affordable and quite easy to implement with due diligence and care. Modern formulations can provide different protection properties, and the market offers a variety of color shades. Therefore, if you want a great looking house, just make it like this.
https://youtu.be/1uRf3OwjSwU
Secrets of decorative wood staining: techniques and tricks
City dwellers want to preserve the natural color of wood as much as possible. For those for whom wood in the house is a boring everyday thing, paint the interior lining in some unusual color. Modern paintwork materials allow you to achieve different effects. For example, textured or brushed lining, but in two colors. This technique is often used in loft style interiors.
Brushed lining in two colors is an excellent choice for decorating walls
The trick is to apply two layers of different colors. The first layer is a dark color, the second is a light or brighter color. After playing with colors and the order of their application, you can create your own version. Watch the video - how to get lining brushed in two colors.
Painting in two colors may not be the same. You can make the recesses a darker color, and only slightly tint the face (front part) or do everything exactly the opposite. The result is a striped wall made of clapboard - the effect of a slatted wall.