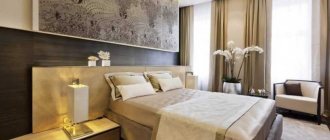
Despite the huge selection of modern floor coverings that imitate any surface, classic parquet has not lost its popularity. Plastic is not able to convey the natural warmth of wood, which makes a home truly cozy. In terms of service life, parquet is superior to laminate and carpet, and technologies for gluing tiles from layers of valuable wood and coniferous species have significantly reduced the cost of parquet floors. But the most significant advantage of piece dies is the different types of parquet laying that create a unique pattern.
Using piece parquet, you can come up with and create a unique pattern, with its own shape, texture and color
One parquet, hundreds of drawings
With all the variety, parquet designs are divided into 2 groups: simple (geometric) installation and artistic parquet. In residential premises, they use schemes from the first category - complex compositions hidden by carpets and furniture lose their charm. A simple layout consists of repeating elements, which allows for the free arrangement of objects in the room without disturbing the harmony of the pattern. This is where the simplicity ends - geometric layout provides considerable scope for creativity, and several basic schemes result in dozens of derivatives. Classic parquet laying options:
- deck, or run-up;
- chess, or square layout;
- regular and French herringbone;
- Swede;
- network;
- basket, or well;
- Sheremetyevo parquet.
Complexity or simplicity
Of course, non-traditional parquet installations - artistic, modular and others - are good in their splendor and originality. But there are pitfalls in this:
• A special attitude to the process is required. All dies should fit into place as tightly as possible with high adhesion. • Small parts are more difficult to find. Artistic or type-setting parquets are made as a single set to order with preliminary measurements. When the time comes for repairs, it is almost impossible to find and install a plank or board on your own. • Caring for such parquet flooring is more difficult than simple installation. In addition to weekly cleaning, regular sanding and refinishing is required. These procedures are also carried out carefully. • It is much easier to snag or damage a complex installation piece than a simple thick parquet board. Children and animals will take advantage of this opportunity for their own interests and games.
But the final result still depends on the wishes of the homeowners. Complexity and capriciousness pale in comparison to the beauty of some species, with which the room becomes exclusive.
Deck laying
The simplest is considered to be deck laying, or “Number One”. This pattern is suitable for any premises and ensures the lowest consumption of raw materials. The rivets are laid “in a staggered manner”, with the end joints overlapping. This installation is reliable and simple, which makes it the best choice for DIY installation. When laying in a room with an area of more than 10 m2, a reserve of 2-3% of parquet is sufficient. The greatest savings are achieved when laying the planks in an arbitrary manner, without a fixed step.
The pattern is varied by shifting the seams - from half, reminiscent of brickwork, to very slight - by the width of the plate. Deck parquet can also be enlivened by using several shades of the same color, but without sharp differences. Usually the dies are oriented in the direction of the windows or entrance. Laying across a narrow room will visually expand it, but will lead to greater consumption of material. It is not advisable to use a diagonal layout for this pattern.
One of the deck laying options
Laying out the coating
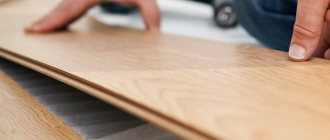
Before laying the parquet, it is necessary to keep it indoors for several days. During this time it takes on working humidity. You will also need a notched spatula for this work. The tooth size is 3-4 mm. The width is small - 2-3 rows of dies. You will need a piece of parquet flooring - a piece 10-15 cm long and a rubber hammer. This piece and hammer are used when joining block parquet. The piece is inserted into the installed board and hit with a hammer. This way the gap disappears and the parquet is not damaged.
- A starting strip is nailed to the wall along which the installation will take place. It will provide a technological gap and also provide the opportunity to weld the coating together.
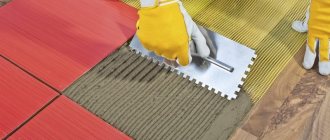
- The glue is applied to a small area so that several rivets (dies, planks) can be laid.
- Lay the parquet flooring with a spike against the block and press it. Using a piece of parquet and a rubber hammer, ensure that there is no gap. If you choose the laying method with nails, we install them in the groove - two on the edges and one in the center (or only two), one on the side.
You need to work carefully so as not to damage - We place the second rivet, tap it, fasten it, and so on until the end of the row. The last die is usually cut off and there should be a gap of 1 cm from its edge to the wall. To maintain it, we drive a spacer wedge between the edge of the die and the wall.
- We start the second row not with a whole board, but with a cut one. Additionally, coat the groove of the installed die with glue. This requires a brush. We don’t apply too much - no glue should get on the surface. When installing, make sure that the board is pressed tightly against the already laid row and to the previous one in the row. To eliminate cracks, we use the same piece of parquet flooring and a rubber hammer. Sometimes, if the geometry is not ideal, you have to tap it again after you have already installed one nail.
When laying the parquet is finished, leave it until the glue dries completely. The exact time is indicated on the package, but it also depends on the room humidity and temperature. After this, we remove all the auxiliary parts - the bar at the first row and spacer wedges around the perimeter.
Chess field
Laying out parquet in squares is a little more complicated. The length of the dies allows you to assemble a square-shaped tile from 3-4 pieces, and the resulting modules are easily joined together with side and end locks. Trimming is required only along the walls, which allows you to stay within 3-5% of additional material consumption for straight installation, and 5-8% for diagonal installation.
To clearly distinguish the squares, it is enough to place the strips of adjacent elements at 90˚ relative to each other - the blocks will be united by the texture of the fibers. A more contrasting checkerboard field is obtained by using wood of different species, tonal selection of tiles or pre-treating half of the parquet with stain. Diagonally placed squares look very impressive.
One of the options for laying parquet in squares
Features of parquet board layout - what to consider
The general appearance of parquet as a floor covering must be combined with all elements of the interior - rule No. 1. Artistic, otherwise palace floors are inappropriate in minimalism or hi-tech, and so on. Also take into account the following:
1. Color selection. Parquet boards and dies have a wide range of shades. In addition, the cutting method also affects the overall combination of tones. Before purchasing a set of parquet, it is important to imagine the entire area in advance and understand whether the chosen palette is in harmony with the overall design of the room - the color of the walls, furniture, windows and doors. 2. Texture. Parquet boards can be varnished, glossy or brushed, that is, with exposed coarse wood fibers. The latter is appropriate for simple installation, since the peculiarity of the board is already emphasized by the structure of the fibers. 3. Lighting. If it is only central, then laying it with a pattern under a light source is appropriate. Spotlights will add splendor to even a simple deck board if they illuminate its entire length. During daylight hours, the direction of installation matters – diagonal will visually expand the room, standard will compose. 4. Geometry of the room. Different methods of laying parquet boards will help smooth out awkward elongated or narrow rooms, help increase the height of the ceilings, or, conversely, reduce too large spaces.
When purchasing parquet for a specific installation, you should carefully ensure that the units are from the same batch - otherwise you may simply not find identical elements later. It is also important to take into account that the more complex the parquet layout, the greater the consumption of dies or boards. This naturally affects the cost of parquet.
Herringbone layout
The next most complex pattern is laying parquet in a herringbone pattern. In its classic form, the pattern requires trimming only at the walls and the waste of parquet when laid diagonally does not exceed 3%. A straight layout looks more impressive, but increases consumption by another 5-7%. The planks do not require trimming and are joined with ready-made locks. Maintaining the diagonals of the pattern and joining the dies requires more professionalism compared to previous methods.
A beautiful variation of the pattern is the “French Herringbone”. With this layout, the ends of the dies are cut at an angle of 45˚ and joined by cuts, forming an even arrow. For normal joining at the ends, cutting of locks is required, and the consumption of materials can reach 15%. Herringbone parquet can be either a single color or a combination of several types of wood.
Herringbone parquet installation option
Sanding, putty
It is known how to lay parquet, but there is still a lot of work to be done. About a third more. The next stage is sanding the parquet. They do this with special machines. Moreover, they usually use two different ones - for the middle and under the walls. You can hire a professional or rent a sanding machine. In the second case, it is worth knowing that grinding takes place in several stages. Sandpaper with different grain sizes is installed on the machine. The first pass is 40, then 80, 100 and finally 120. By the way, do not throw away the wood dust from sanding, but carefully collect it. It will be useful in making putty. In any case, the dust that remains when passing 100 and 120 sandpaper.
Several passes (about five) are required with sandpaper of different grits
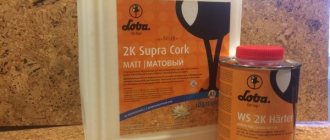
The next stage of laying parquet is putty. No matter how hard you try to lay the dies tightly, there will still be gaps between them. It is at this stage that they are sealed up. Stores sell parquet putty liquid (Lobadur EasyFillPlus, Bona Mix-fill, Ecofill 2010, Parkettgrund and others). Add the collected wood dust to it. The amount of dust is to the point of a thick paste.
Mix the composition with a wooden or plastic bar or stainless spatula. We do not use ordinary metal. The putty is applied to the parquet using a stainless spatula. Moreover, it is recommended to take a wide spatula, and not try to fill only the seams, but go over the entire surface. The process goes faster, the method does not affect material consumption, and defects in the dies are also filled.
This is how parquet is puttied - apply the composition to the entire surface, removing excess with a spatula
A very cheap option for parquet putty is carpentry PVA with the same mixed dust. But this option is not suitable for water-based varnishes, as the wood will darken. Darkening will not be noticeable under solvent-based varnishes. Or rather, not so - solvent-based varnish itself makes the wood darker. Due to this, the darkening of the PVA primer will not be so noticeable.
If you decide to putty PVA parquet, do not use a metal spatula, but a rubber or plastic one. PVA darkens very quickly from contact with metal, and this will make the parquet even darker.
Putty parquet can also be sanded by hand, but this takes a lot of time.
After the putty has dried, the floor is sanded with a belt sander with sandpaper of 100 and 120 grit. After leveling, the dust is removed with a vacuum cleaner. The surface is ready to apply varnish.
Scandinavian style
The “Swedish” pattern allows you to get a beautiful ornament with little waste of wood. The figures forming the rows consist of a pair of rivets, limited at the ends by a half die. The adjacent row is laid with the half dies shifted to the middle of the element of the previous row. An interesting effect is achieved by using dividing plates of a different color.
The complexity of the installation process is caused by the need to mill locks on the ends of the dies cut in half. Installation of halves without fixing on one side is acceptable in some cases, since it has a slight effect on the strength of the floor. The diagonal “Swede” is practically not used, and with a parallel layout, a reserve of dies of 3-5% is required, caused by trimming the first and final figures of each row.
“Swedish” is one of the styling options
Why this material
The appearance of your apartment or house will depend on the choice of flooring. Therefore, before settling on any specific option, it is worth studying all the types and thinking about which one will be optimal for you. It is worth noting that wood flooring is significantly different from the well-known laminate. Firstly, these planks consist entirely of valuable wood. Secondly, its materials differ significantly in size from all floor coverings.
Instagram @deparket_kz
In addition, it is not inferior to laminate either in beauty or wear resistance. This type of floor has a very long service life, and in case of damage, replacing one board is not a problem. In addition, it absorbs sound well and retains heat. Therefore, it can be called the strongest and most environmentally friendly material.
Braid and its varieties
The parquet “Pletenka”, similar to squares, is very popular, formed by rectangles assembled from several planks and laid crosswise. Small free areas in the corners are covered with square inserts. The installation is quite difficult to do independently due to the large volume of carpentry work. Both straight and diagonal layouts are used, with the latter looking the most advantageous.
By varying the number of plates in the figure and the color of the wood, decorators create unique ornaments. An example is the “Pavlovian braid”, when laying which the dies are joined one at a time, and the filling squares are larger in size and made of a pair of plates. Depending on the pattern, consumption for straight laying ranges from 5-15%, while diagonal laying may require up to 25% of additional material.
Option for laying parquet “Pletenka”
What tools and materials will you need?
In general, this will depend on the parquet laying technology; the list of necessary tools is the same:
- Wooden hammer (mallet). Its impacts are much softer, thanks to which the expensive parquet will remain intact and unharmed.
- Fasteners I take into account the method in which you decided to lay the parquet, choose nails, glue, or install it using built-in locks.
- Jigsaw. A thin blade will more accurately highlight the desired area, unlike a hacksaw.
- Measuring tools – tape measure, square, level. Easily erasable markers are best - chemical ones can remain on the surface forever.
- Wooden wedges. They are used to maintain gaps during linear expansions between the board and the walls.
- Drill.
- Grinder machine.
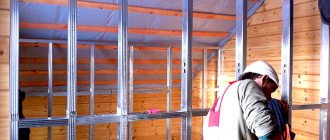
If you need to work on the base at the very beginning, then you need to purchase tools and materials for it: wooden beams, plywood, dry mixtures for screed. Perforator, reinforcing mesh. Before proceeding with the installation of parquet, the base must already be prepared for further work.
Parquet preparation
Before you start installing the parquet, you need to do the following: it needs to be freed from packaging material and laid on a horizontal surface. It is necessary to leave them for several days in a room where adaptation to the climate will take place. This action will play a positive role on the quality of the surface - it will not move or warp, the slats will quietly lock in the position in which it was installed. After a few days, you need to make a selection of the parquet, that is, boards with minimal defects need to be put aside, because they will be used for trimming or inserting.
Preparing the base
Due to the fact that the installation technology is different, the floor preparation will also be different. For example:
- On concrete. Using a hammer drill, remove the old screed. The floor is cleaned - you can use a vacuum cleaner - and primed for better adhesion with the new composition. For parquet flooring, two types of screeds are used - semi-dry and dry. This will allow you to start working in a maximum of a week or immediately, in the case of using a bulk composition. With classic mixing of the solution, you have to wait a whole month, constantly measuring the humidity of the floor - it should be no more than 2%. Before laying the parquet, the screed is covered with waterproofing material.
- On the logs. Exactly the same work is done with the base. Next, in relation to the level, logs are installed - wooden beams with a cross-section of 2 cm and a width of 5 cm. The fastening step is every 10 cm, otherwise there is a risk of breaking the parquet board. External ribs must be in the same plane - an important condition for the future position of the parquet. If desired, mineral insulation can be placed in the formed boxes.
- The “plywood” method is considered not difficult, but time-consuming. Plywood, just like parquet boards, is cured and laid on prepared logs or waterproofing in a checkerboard pattern. There must be gaps, otherwise with linear expansion, the risk of fracture increases, especially if the quality of the wood is questionable in terms of drying. Then the finished surface is scraped.
- The floating floor can be laid on any of the described bases. There is only one rule - this is a classic parquet board - not an artistic or modular parquet.
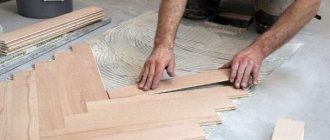
Installation of piece and modular parquet
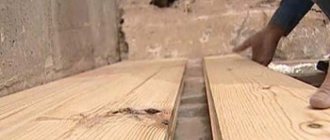
The base and boards for laying are already ready. All necessary materials and tools were purchased. Finally, you can start laying the parquet. The instructions are as follows:
It is necessary to draw a plan on paper, indicating the markings of individual planks and actual dimensions. So, it will be much easier to navigate the plane.
You also need to decide which method will be used: adhesive or floating.
Regardless of the type of installation - herringbone, classic - the first parquet board is laid in the far corner of the room. A wooden wedge is installed between it and the wall. A tight fit is strictly prohibited, as this can lead to deformation of the entire canvas.
In the glueless method, the planks are inserted into one another, forming an angle or continuing a row. Working with glue involves coating the locking mechanism of all lamellas and the required layer on the base before laying the parquet board. The elements are driven together with a mallet.
You cannot immediately cut the parquet according to a specific pattern. There is a great risk of making a mistake. It is better to carefully measure each parquet board. If the work seems tedious to you, you can always turn to specialists for help.
Work continues until the entire area is covered. After this, the wooden wedges are removed.
Puttying and sanding parquet
During operation, the parquet board gets damaged, especially if it is of low or average quality. Therefore, it is necessary to bring the finished surface into ideal condition. To do this, prepare putty and cover joints, cracks, and possible chips.
All that remains is to sand the entire area of the finished parquet.
Using a special machine, the procedure will be much faster. If it is not available, use coarse and fine-grained sandpaper. The first time they remove all the unevenness, the second time they polish it.
Priming and varnishing - the final stage
The choice of varnish depends on what effect you want to achieve. Glossy will emphasize the beauty of the design, matte will mute the intensity. Before covering the area with varnish, the surface is vacuumed and a primer is applied. Thanks to this, the varnish will lie much smoother. It is applied in several layers - from 3 to 9. One layer is absorbed within one day.
The varnish is left to dry in absolute calm - it is forbidden to open windows, doors, or turn on ventilation.
Laying parquet in a “well”
The squares framed by single or double tiles, butted together as in a chess layout, are called “Well”. Another name is “Basket”, the pattern received for its similarity with a lattice. For greater effect, the internal strips and frame are made of wood in contrasting tones. Laying out parquet is complex and is not recommended for DIY installation without sufficient experience. The consumption of dies with a diagonal or parallel layout is comparable to a “braided” one.
One of the variations on the theme of the basket is “Petersburg parquet”. Its frame is made of several plates of different colors and thicknesses, and the rivets of the interior are often replaced with corners or other complex geometric shapes. For parquet, valuable types of wood or staining are used. The photo shows what laying parquet in this way looks like.
One of the options for laying parquet “Well”
Options for laying parquet flooring
The parquet board is laid: on the screed, on the logs and on the rough surface of the floor. To begin installation, you need to consider:
On the screed
Laying parquet is done completely on a perfectly level base - otherwise differences may form between the boards and in the future the lamellas will fall out of their places due to loose joints. Another disadvantage can be considered moisture in the base - laying parquet boards on a freshly prepared screed is prohibited
It is necessary to wait the required time, then measure the surface humidity with a special device, and after satisfactory data is obtained, you can begin to work. This method is very time consuming.
On the logs
If we compare it with the method discussed above, this one has more positive aspects:
- You can put insulation or communication in the box (only a water-based underfloor heating system is prohibited).
- Sound insulation increases.
- High installation speed.
The only negative is that with this installation method, figured installation is not available.
On plywood
If you want to get an excellent surface for your parquet, then this method is right for you. But in order to get such a result, you need to do scrupulous work:
- High-quality tongue-and-groove, moisture-resistant wood is required.
- The concrete floor is waterproofed.
- The laid sheet of plywood must be checked for level.
- Particular attention should be paid to fastening. Large gaps and bumpiness are prohibited.
- After laying a rough wooden floor, the entire surface must be impregnated with antiseptics and moisture-repellent chemicals.
All stages take quite a lot of hours, but the result is worth it.
"Sheremetyevskaya Star"
Another popular geometric shape found when laying parquet is a rhombus. Hexagons are assembled from simple elements, with a laying pattern reminiscent of a honeycomb. The parquet was called “Sheremetyevsky” and is one of the most spectacular patterns. With the correct selection of the tonality of the edges, the floor pattern takes on the appearance of volumetric cubes arranged in rows.
Consumption greatly depends on the width of the strips used - waste of rivets can range from 15% to 25%. You can save money without losing quality and make your work much easier if you purchase ready-made Sheremetyevskaya Zvezda modules. In this case, all that remains is trimming the walls, for which it is enough to purchase 3-5% of the parquet above the norm. It is better to entrust the installation work to specialists.
Option for laying parquet “Sheremetyevskaya Star”
Advice! Some patterns, such as "Herringbone" or "Square", require the use of parquet with left and right locks. Departure from the standard layout can increase the consumption of dies by up to 20-25%. All these little things are difficult to take into account. When purchasing parquet yourself, it is better to show sketches to an experienced consultant and purchase the recommended amount of material.
Surface preparation
Before laying wooden material, it is necessary to prepare the surface. It should be perfectly flat and smooth. If the unevenness on the floor is more than 2 centimeters, then it must be filled with cement screed. Before doing this, take measurements using a level and place beacons throughout the room. To fix them, 3 metal strips are installed. They are placed in parallel across the entire room on cement posts installed in those places where there are recesses. The strips should lie strictly horizontally, then fill the floor exactly according to their level.
Pixabay
If the unevenness does not exceed 2 centimeters, then a self-leveling mixture can be used. However, this type of filling has a significant drawback - it will take about three weeks for the screed to completely dry and harden.
The work can be considered completed after you treat the dried screed with a primer and then with adhesive mastic. The floor is ready.
Artistic parquet layout
The use of artistic parquet gives a richer ornament. In this case, the composition is thought out even before its elements are manufactured. In the production of staves, valuable wood species and inlay with other materials are used. Cutting that disrupts the design is avoided by using friezes. Artistic parquet does not tolerate sanding restoration well, so it is advisable to apply a thick protective layer of varnish.
One of the options for laying artistic parquet
All about block parquet
Why this particular material?
Correct selection
Types of installation
Surface preparation
Step-by-step DIY installation instructions
Recently, many have begun to think about how to make their interior as environmentally friendly as possible. Therefore, we propose to consider several options for laying block parquet, and give some tips on its selection.
Frame for a masterpiece
The deck layout is democratic and does not require special framing, but more complex designs only benefit from the frieze. Laying a simple edging does not cause problems even for beginners. Parquet rivets are laid perpendicular to the walls or diagonally, and the corners are made end-to-end or herringbone. If desired, the pattern is complicated by additional elements in the form of trim parallel to the walls.
Options for laying block parquet are limited only by the imagination of the designer and the skill of the installers. To make the floor in your home uniquely beautiful, you don’t have to buy the most expensive wood - you just need to approach the issue with inspiration!
Frieze - edging of an artistic parquet floor
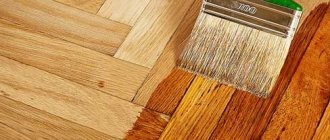
How to apply varnish to parquet
At this stage I use a roller or brush. I take into account the consistency of the varnish. If it is viscous, then after application the surface is not smooth. I apply the varnish in two layers without changing the condition of the surface. Before forming the third layer, I dilute the varnish a little, reducing its consistency. It turns out to be slightly below standard.
I take my time with the work; the next layer is formed after the previous one has completely dried. I apply the varnish, spreading it evenly over the surface. I eliminate puddles and drips immediately.
When the layer dries, there may be drips. I remove them with 120-150 grit sandpaper. The next layer is created after removing the dust.
Putty and sanding of parquet
During operation, the parquet board gets damaged, especially if the quality is low or average (see price and quality table). Therefore, it is important to bring the finished surface into perfect condition. To do this, prepare putty (wood dust and glue) and cover joints, cracks, and possible chips with it.
All that remains is to sand the entire area of the finished parquet.
Using a special machine, the procedure will go quickly. In the absence of it, they use coarse and fine-grained sandpaper. The first time they remove all the unevenness, the second time they polish it.
Priming and varnishing - the final stage
The choice of varnish depends on the desired effect. Glossy will emphasize the beauty of the design, matte will mute the intensity. Before opening the area with varnish, the surface is vacuumed and a primer is applied. This way, the varnish will lie flat. It is applied in several layers - from 3 to 9. Each layer is allowed to absorb for a day.
The varnish is left to dry in absolute calm - you cannot open windows, doors, or turn on ventilation.