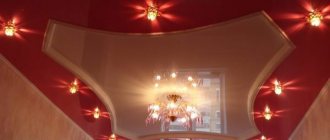
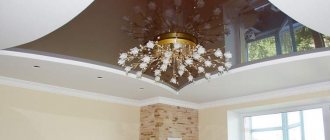
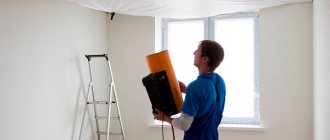
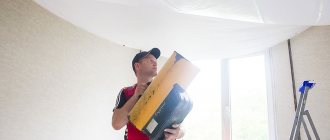
Stretch ceilings are modern structures designed for finishing premises. A panel of film or fabric is attached around the perimeter of the room to a mounting rail - a baguette. A perfectly smooth surface, matte or glossy, is created.
The tension covering material is not strong enough to withstand the load from ceiling lights, cornices and curtains. Therefore, before stretching the film or canvas, embeds are placed on the base ceiling, to which, after finishing, all the necessary equipment is attached.
Built-in wardrobes are located along the wall. The role of the mortgage in this case is performed by the supporting beam, to which the upper tracks of the furniture and the ceiling molding are attached.
Special platforms are used to install suspended hoods in kitchens and ventilation communications in bathrooms. With their help, the exhaust duct is securely fixed under the stretch ceiling film.
A beautiful aesthetic coating of a stretch ceiling will hide communications and fasteners that are unnecessary to the eye. And all the equipment necessary for coziness and comfort can be securely fastened to supporting structures using mortgages.
Device.
Embeds on the ceiling
Embeds look like strips or rings that secure lamps, cornices, ventilation grilles and other decorative elements to avoid damage to the coating.
The low price and wide range make it possible not to waste time creating parts with your own hands.
The appearance and size are selected depending on the element being installed. A strong frame is attached to the main ceiling to support lighting, grilles or trim. Reinforcement is needed to reduce the likelihood of breakthrough or spreading of films and fabrics, eliminate the influence of the weight of lighting and decoration on the canvas, and increase the service life of the structure.
The mezzanine is in the way
Installing a ceiling panel on a mezzanine is not as difficult as it seems at first glance. If the height of the mezzanine doors touches the main ceiling, then the mezzanine needs to be redone so that a top panel appears. To do this, you will have to saw off 8-10 centimeters from the top of the mezzanine doors. Chipboard or “plywood” must be attached to the top of the doors.
Electrical work is performed at the stage of installation of the mortgage. This also applies to marking the location of lamps on the future ceiling and their installation in the closet. For lamps in the wardrobe, choose LED or halogen lamp models.
Types of materials.
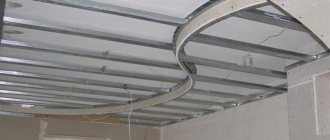
Installation of a two-level ceiling
Mortgages made of heat-resistant plastic are often used. They prevent overheating of PVC film and fabric. For the strength of fastening of heavy chandeliers, wooden, OSB, and plywood parts are also used. To install spotlights, you can attach elements of cut metal hangers to the base surface.
Self-production
Factory embedded elements are made mainly from heat-resistant plastic. It is very difficult to process such material at home, so homemade mortgages are made from wood. Wood has the advantage that it is easier to level and will not deform even under load from heavy chandeliers.
The simplest design option is made from timber:
- You need to take the fastening strips, bend them so that there is a minimum of space between the base and the platform.
- Make a cross shape from the beams. To do this, you need two identical pieces of wood, cut grooves in the middle, and fold the element into one structure. Self-tapping screws are used for fixation; the connection can be further strengthened with glue.
- The planks are connected to the platform and attached to the ceiling.
The result is a durable timber structure.
For lighter structures, boards, OSB boards and other similar materials can be used instead of beams. In such structures, it is not the wood that will be responsible for adjusting the height, but the fastening strips.
A hole is first cut in the platform. It is necessary to remove the wiring.
Video tutorial: The nuances of installing plywood embeds.
Preparing for installation.
A structure prepared for ceiling installation. There are elements whose diameter and shape change, and standard ones with fixed parameters. They are used depending on the required purposes. Before installing the mortgages, you need to buy a sufficient number of parts and make some preparations:
- mark the fixation points of the reinforcing elements on the lighting layout diagram.
- choose methods of tensioning and fastening the fabric.
Basic mistakes
Before you get started, consider the following tips to help you avoid common installation mistakes.
Accurate calculations. “Measure twice, cut once” - this rule is appropriate in this case. Before drilling holes for fasteners, check the markings several times using a ruler and level. Calculate the correct distance from the wall. This must be done before purchasing curtains and cornices. It is necessary to take into account how much the window sill protrudes from the wall and the depth of the folds of the curtains
Also take into account the length of the curtain.
By following all the tips and instructions described above, you can easily hang any curtain and decorate the window with it.
General installation rules:
Multi-level ceiling frame
- installation of the tension surface structure is carried out before fixing the lighting platforms. In the case of concrete floor slabs, installation occurs on the main surface;
- mortgages for baguettes and massive chandeliers are fixed only to the base;
- a covering structure is installed along the edges of the room, elements are mounted;
- timber and beams are attached to the base ceiling;
- the coating is cut through after tensioning where the elements are installed;
- for plasterboard ceilings, sheets are reinforced with mortgages at fastening points to strengthen the structure;
- wooden parts are impregnated with fire retardants, antiseptics and dried before work begins;
- the canvas can be attached to a plasterboard-covered ceiling using harpoonless, harpoon or cam methods;
Installation of profile (baguette)
Before installing the profile on the walls, drill holes in it with a screwdriver at a distance of 7-10 cm. In the future, this will make installation easier and there will be less risk of damaging the walls and wallpaper.
You should start from any of the corners. On the ribbed side of the baguette we cut it down to the middle and bend the stick.
We apply the ribbed side to the wall, along the lower edge of the profile, on the marking line. We drill and hammer in the dowel-nails.
We fasten the next profile stick joint to joint with the installed one, the lower edge should be smooth. We seal all joints with paper tape.
Having reached the next corner, the question arises: “how to make it?” Using a tape measure, measure the length from the corner to the edge of the baguette, subtract 1 cm, and remember. Take the next stick and mark the resulting length on the back (ribbed) side. We saw along the line to the middle, bend it, try it on in a corner on the wall, and fasten it.
When installing the profile on drywall, tighten the screws at an angle. This will give additional rigidity to the fasteners and, while stretching the canvas, will not allow the baguette to pull away from the wall (form cracks).
Afterwards, if necessary, we install the mortgages and lay the wiring.
For spot lighting.
Installation diagram of spotlights Lamps
are selected paying attention to the intensity of the glow and heating temperature. First, the wiring is pulled, which is installed on the main ceiling, and then reinforcing fasteners are installed.
Mountings for spot lighting look like rings of different sizes made of heat-resistant plastic with a height adjuster. They are:
- universal pyramidal type, in these they make a cutout along the diameter of the lamp;
- stable with an existing hole, they are selected based on the size of the lighting fixture;
After placing the areas for lighting, the canvas is stretched and masks additional details. Afterwards, a thermal ring is glued to the covering above the platform, a hole is made and a lamp is installed.
How to install mortgages correctly
Let's consider the sequence of installing mortgages in a suspended ceiling under a chandelier and spotlights. To do this you will need the following tools:
- ladder;
- perforator;
- screwdriver;
- roulette;
- painting cord;
- pencil or marker;
- hammer;
- construction or stationery knife;
- pliers;
- metal scissors.
Note! All work on installing mortgages, including laying and connecting electrical wiring, is carried out before the web is stretched.
Marking
When marking, you must adhere to the following rule: the minimum distance between spotlights should be 30 cm, from the wall - 20 cm. The optimal luminous flux is achieved by installing one spot for every 1.5-2 m².
There are many options for arranging lamps on a suspended ceiling; let’s look at the most popular schemes:
- In a straight line. Using a tape measure and a pencil, the places for attaching the mortgages are marked on the rough ceiling. With this scheme, as a rule, the lamps are placed in two rows, taking into account the minimum spacing and the recommended number of light sources. If you have a laser level, it is more convenient to mark on the floor and then transfer the marks to the ceiling. To do this, pieces of masking tape are glued to the locations of the lamps and marks are placed on them so as not to stain the floor covering.
- Around the circumference. First, diagonals are cut off using a painting cord; the point of their intersection will be the center of the room. At this point, a self-tapping screw is strengthened, a thread with a pencil at the end is tied to it and, controlling the tension, a circle of the required radius is drawn like a compass. Then you need to calculate the circumference using the formula L=2PR (P - Pi=3.14) and divide the resulting value by the number of lamps to determine the distance between them. After this, make the appropriate marks on the line.
- In an arc. The marking is carried out similarly to the previous method, only the self-tapping screw is attached in the corner of the room. Then a part of the circle is constructed and its approximate length is measured. Here you can use the same formula and divide the resulting value by 4. After this, the distance between the lamps is determined and marks are placed on the line.
Read more: How to place lamps on a suspended ceiling
The chandelier is usually mounted in the center of the room. The mounting location of the lighting fixture is determined by beating the diagonals with a paint cord, and a mortgage is installed at the point of their intersection.
Platform assembly and fastening
The platforms are attached to the sub-ceiling using metal adjustable stands, punched tape or flexible steel hangers. The latter option is the most preferable, as it is easy to install, can withstand quite a lot of weight and is suitable for all types of mortgages. The product is a galvanized steel plate 0.8 mm thick and 60x27 mm in size with holes in two rows. Additionally, you will need plastic platforms, self-tapping screws and dowel nails.
Let's consider the process of assembling and attaching platforms for spotlights:
- It is necessary to measure the diameter of the base of the lighting fixture. When using universal platforms, a ring of the appropriate size is cut inside so that the lamp fits freely into the hole. To do this, use a construction or stationery knife. Trimming is done along a special groove between the rings.
- Then the metal hangers are prepared. The plates are cut in half or bent to form a U-shaped stand.
- The prepared parts are screwed to the inside of the plastic platform in two opposite places, which have small protrusions and perforations for screws. For fastening, self-tapping screws “bugs” 3.5x9.5 mm are used - 2 on each side.
- The mortgage is applied to the ceiling and the places for fastening are marked with a pencil. Then holes are drilled using a hammer drill and plastic dowels are inserted.
- The platform is fixed to the floor slab with dowel nails or 5x40 mm self-tapping screws.
Installation of embedded parts in a suspended ceiling is carried out after installing a frame of profiles around the perimeter of the room. A cord is stretched between them. This allows you to control the level of the parts. The platforms must be level with the suspended ceiling.
The mounting for the chandelier is assembled and fastened in a similar way, but to support the weight of the lighting fixture, four support points and 3 self-tapping “bug” screws are used for each suspension.
Electrical wiring
To complete the work, you will need a two-core wire of the ShVVP 2x0.75 brand, terminal blocks with a rating of 3-5 A and plastic dowel clamps for fixing the cable. If there are more than 20 lamps, 1.5 mm2 hard copper wire is used.
Note! You should not use pieces of hangers instead of clamps, this creates a risk of short circuit. In houses with wooden floors, the power cable must be placed in a corrugated pipe made of self-extinguishing PVC.
Electrical wiring consists of the following steps:
- The wire is attached to the ceiling using dowel clamps every 50-90 cm.
- In the places where the mountings for spotlights are installed, a loop is formed approximately 10 cm below their level.
- The cable is cut in a rounded section, and the insulation is removed from the ends.
- Next, using terminal blocks, two brown and blue wires are connected to each other. This way the lamps are connected in a parallel circuit and the failure of one lamp will not affect the operation of the others.
- The terminal block is placed on the mortgage so that it does not interfere with the tension of the fabric.
- Then the entire group of luminaires is connected to the power cable.
Important! The wire insulation must fit into the plastic housing of the terminal block. This will prevent accidental short circuit when connecting power.
Installation of lighting fixtures
After attaching the embedded platforms and connecting the electrical wiring, the fabric is stretched. Lighting fixtures are installed when the PVC film has completely cooled.
Installation of spotlights is carried out as follows:
- In the places where the mortgages are located, protective rings made of heat-resistant plastic are glued with special Cosmofen glue. They remove heat from the PVC film and prevent it from coming apart when cut. The diameter of the thermal ring should be slightly larger than the base of the lamp.
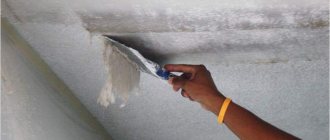
- Then a hole in the canvas is cut out inside the ring with a stationery knife.
- Next, check whether the lower part of the platform coincides with the plane of the stretch ceiling. If necessary, the structure is pressed or lowered a little. The platform should come to the level of the canvas, but not put pressure on it.
- The cable is removed through the hole and connected to the wire from the lighting source.
- Then the springs are clamped on the lamp body and inserted into the hole. They snap into place and securely hold the lamp in place.
Read more: Installing lamps in a suspended ceiling
The chandelier is attached using a mounting strip. Five holes are made on the PVC film using tread rings. The power wire will be brought out into the central one, the rest are intended for fixing.
The mounting strip is fastened with self-tapping screws to the mortgage. The studs on the bar are then aligned with the holes on the light fixture platform and secured with nuts.
Under the chandeliers.
Embed for a chandelier
Installation begins before the covering is pulled onto the profile. Durable forms made of plastic, plywood or timber are attached to the main ceiling. They are pre-drilled with holes for wiring. Then the wiring is laid in the corrugation, the fabric is stretched, thermal rings are glued to the surface, a hole is cut for the chandeliers and the lighting is connected.
There are several options for mounting the chandelier:
- for I-beam or cross-shaped mounting.
- on the hook.
- on the bar.
- fixation with hangers and dowels.
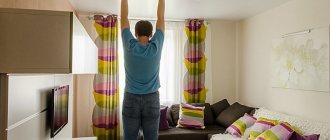
- for curtains with curtains.
It is a beam attached with the help of hangers to the main ceiling at the level of the stretch ceiling. Afterwards, a film is installed under the beam and the rings are glued in places for the curtains. Plastic rectangular parts with rounded edges and perforations for self-tapping screws are also used. Such platforms are mounted in places where the cornice is attached.
Why do we need mortgages in a suspended ceiling?
Mortgages for stretch ceilings are plastic or wooden parts of various configurations. They are used for reliable installation of lighting fixtures, curtains for curtains on the supporting slab, formation of niches for hidden cornices, installation of sliding wardrobes, mounting of a projector for a home theater, fire sensors, as well as placement of an extractor hood or ventilation system in the inter-ceiling space. In each case, different embedded structures are used.
Most of the listed elements are found infrequently, but not a single suspended ceiling can do without platforms for a chandelier or spotlights. Let's take a closer look at these details.
Types of lamps
What kind of lamps are suitable for lamp stacks?
Despite the fact that energy-saving lamps are gaining more and more popularity every year, incandescent lamps still occupy a leading place and this is due, first of all, to the low price that buyers focus on.
In addition, incandescent lamps are extremely unpretentious in operation: unlike an energy-saving lamp, which can only work for a few hours in a room such as a sauna, the service life of a conventional incandescent lamp is several times longer and it can only fail under sharp conditions. cooling the flask with water.
However, incandescent lamps are used extremely rarely in spots. This is primarily due to the fact that in cases where the light should be as close to natural as possible, incandescent lamps are not entirely suitable. For example, for artists, designers, or people who work specifically with colors and light, incandescent lamps are not suitable.
Moreover, the extremely low energy efficiency results in the light being converted to only 2.6% of the energy spent, while the rest of the light is scattered throughout the room. To obtain more targeted lighting, spots have to be equipped with displays, since strong heating can damage the plastic housings of the lamp, and sometimes even the wiring.
It is worth paying attention to the fact that it is precisely because of the strong heating that incandescent lamps with a power of more than 60 watts are not mounted near suspended ceilings. An ideal option would be halogen lamps, which have a number of advantages.
The temperature inside the coil rises to approximately 3000K, which means that the light from the lamp will be almost identical to sunlight, and objects will look almost the same as in natural light
An ideal option would be halogen lamps, which have a number of advantages. The temperature inside the coil rises to approximately 3000K, which means that the light from the lamp will be almost identical to sunlight, and objects will look almost the same as in natural light.
Such lamps are extremely economical, since at such a high temperature most of the energy will be presented in the form of a spectrum rather than infrared radiation. Thus, by gradually increasing the supply voltage, it is possible to ensure that halogen lamps will last up to 12 thousand hours.
However, it is worth paying attention to the fact that at such a high temperature the bulb itself will also heat up: this is why it should not be handled by hand when replacing the lamp. Fat left on the flask from the fingers, when burned, will cause darkening and uneven heating, which means that such a lamp will quickly fail
LED ceiling spots are divided according to several main criteria: for example, LED ceiling spots can have either one powerful LED or several LEDs at the same time, but with much lower power; have one power converter for all or have an independent converter for each lamp separately.
If we summarize all the numerous advantages that LED ceiling spots have, it is worth noting their maximum efficiency, while the period of operation of such a lamp does not at all depend on the number of on and off cycles. It is important that a reflector is not necessary for such lamps due to the fact that the LED emits all the light into one hemisphere.
It is important to note that the light beam is close to natural only in expensive lamps from only a few manufacturers. To adjust the brightness, it is better to use special dimmers for LEDs, since with the normal range the brightness will be insignificant
Additionally
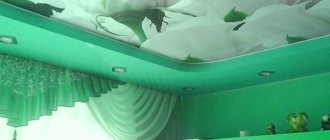
Separately, it is worth mentioning the embedded elements for “floating” curtains. For them, the cornice is made hidden - thanks to this, the effect of floating in the air is created. The decorative element itself is hidden in a special niche near the window. In such cases, mortgages are made not from plywood, but from pieces of high-quality wooden beams. Sometimes even dowels act as parts. Moreover, in this case, the structure is not completely covered with a PVC tension fabric. A metal profile is mounted on the inside of the wooden beam beam. And the ceiling covering itself seems to be wrapped behind the beam to create the feeling that there is no clear edge.
If you can handle the installation of embedded elements for lamps or chandeliers yourself, then such a design for a cornice will be much more difficult. Therefore, it is recommended to seek help from specialists who can solve a problem of any complexity, make the correct calculations and carefully install all the parts that are assembled into a single whole.
How to make lighting in a niche with the effect of floating curtains
To illuminate the curtains, an LED strip is glued into the niche on the side of the room. If you choose the option with a profile for two-level ceilings, purchase a baguette with special recesses.
This creates the impression of a higher room. The LED strip can be mounted independently or combined with hidden lighting around the perimeter of the entire ceiling.
Some tips:
- Tapes are available in different colors and even with the ability to change lighting, the latter option allows you to give the interior of your home a different mood;
- for curtain lighting, it is better to mount a separate switch;
- Tapes with a remote control are available for sale, which allows you not only to conveniently turn the light on and off, but also to change the color of the lighting.