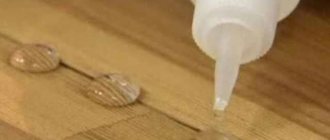
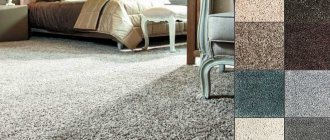
Liquid glass is one of the few materials used that can work in the presence of high moisture. Liquid glass is used for flooring as a penetrating type of insulation. The resulting film protects the floor from moisture penetration and the formation of mold and fungi. Before starting work, familiarize yourself with the application technology and operating rules.
Functions of liquid glass for floors
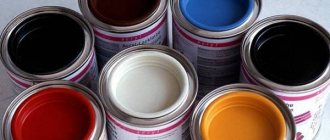
Silicate belongs to alkaline solutions. Manufacturing proceeds by calcining materials containing silicon for 15 minutes at 600 degrees. This is followed by treatment with lye at temperatures up to 95 degrees. The mixture is ready.
When liquid glass is applied to the floor, a moisture-proof layer is formed, which prevents bacteria from multiplying and prevents the spread of mold and mildew. This layer can withstand the effects of acids and grinding elements, has antistatic properties, is non-flammable and prevents the spread of fire. But it will not be possible to resist open fire for a long time, since at high temperatures and time of more than 20 minutes, it spreads.
The finished mixture from different manufacturers has different degrees of viscosity. In the open air it quickly hardens.
What is liquid waterproofing?
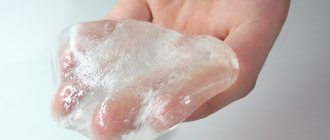
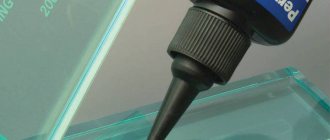
Liquid waterproofing is a polymer viscous liquid of synthetic origin, which turns into a monolith after drying. Unlike typical moisture barrier methods, this type is applied to the surface using tools and then forms a waterproof layer.
It is usually additionally coated with coating materials with adhesion, which improve the structure of the concrete.
And its main feature is its close contact with the surface, which ensures the best effect.
Its action is based on the principle of diffusion, that is, the molecules of the liquid composition interact with the molecules of the working surface or concrete, forming a more durable crystalline structure. Such deep penetration allows you to get rid of all irregularities and construction defects.
The liquid composition can be applied in 3 ways:
- The pouring method is used to waterproof concrete on the floor, using a two-component type of liquid, which is obtained by mixing filler and hardener. This mixture is prepared immediately before pouring. Then the mixture is poured onto the surface and leveled evenly with a spatula.
- Painting, this method is most suitable for walls, and the liquid mixture is applied using painting tools.
- Spraying is a relatively new and complex application method, since it requires special equipment that sprays liquid over the surface.
Types of liquid rubber
There are three main types of liquid waterproofing:
- Liquid rubber, the simplest and most popular type. It is a specially prepared silicate-based mixture that turns into liquid after heating to a certain temperature and is sprayed onto the surface using special equipment. After which it hardens, forming a monotonous and uniform layer without any flaws that does not allow moisture to pass through. It is used for waterproofing foundations and roofs, as well as reinforced concrete, asphalt concrete and wooden surfaces.
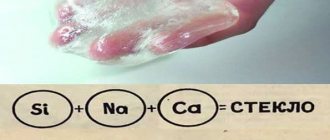
- Liquid glass is a solution of water and potassium and sodium silicates. When using a monocomponent composition, it can improve such properties of building materials as moisture resistance, resistance to low temperatures, as well as resistance to chemicals or reagents, and mechanical loads. Most often used for internal waterproofing of basement and utility rooms, as well as wooden surfaces. But this does not mean that it cannot be used for external waterproofing or for domestic purposes, it will just be much more difficult. For example, it is often used for arranging swimming pools.
- Liquid moisture insulation using resin. This method can be considered one of the most ancient, so in the modern world it is used much less frequently. The process is quite long and painstaking, since the resin must be heated and applied to the surface very quickly to avoid untimely drying.
Advantages and disadvantages of the material
This latest technology that allows you to isolate moisture has managed to recommend itself in the best light, thanks to the following properties and results:
- the surface becomes smooth and even, without seams, flaws and defects, that is, it also plays the role of leveling the surface and practically replaces the primer;
- a very simple and convenient method of application to the surface, and to be precise, the spraying method, which allows you to evenly distribute it over the surface;
- contact with the working surface at the molecular level, which ensures strength and deep penetration;
- durability and versatility;
- the ability to improve the structural composition of concrete or other surfaces;
- resistance to temperature changes;
- environmentally friendly and safe material;
- resistance to chemical and mechanical influences;
- the presence of several methods and the ability to choose, and others.
As for the disadvantages, there are simply none, unless we talk about the cost of equipment for spraying liquid rubber or glass.
Regardless of the chosen method of waterproofing, it is worth recalling the need to strictly follow all instructions for working with such materials.
Source: https://planken.guru/otdelka-i-montazh-fasadov/gidroizolyaciya/zhidkaya-gidroizolyaciya-raznovidnosti-metody-naneseniya.html
Advantages and disadvantages of use
The operational warranty is 5 years. During this time, there is a gradual decrease in the thickness of the protective layer, up to approximately 1 mm per year. To extend the life, experts recommend applying a layer of paint over the glass.
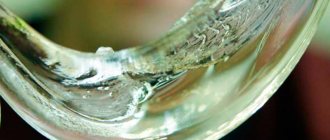
The composition completely penetrates into the structure of the coated material, filling the cracks and pores.
It is beneficial to add silicate directly to the concrete solution itself. At the same time, it becomes more transparent and stable. But the setting and hardening time is reduced, which is very important if the work is being done for the first time and leveling takes a lot of time. The frozen mixture is not suitable for reuse. Therefore, it is advisable, when pouring screeds over large areas, to prepare the solution in portions.
If more than 10% silicate is added to concrete, it will become weak and easily damaged by mechanical influence.
When the floor is filled with liquid glass, the result is a very even, smooth plane, a beautiful appearance, and maximum resistance to mechanical stress is achieved. This surface is easy to clean and prevents the emergence of pathogenic microorganisms. Therefore, such spraying is often used in hospitals.
The coating can be carried out independently, without the involvement of labor. This is an inexpensive material.
In certain options, additional materials are added that extend the service life of the interlayer.
What tools are needed?
Working with bare hands is inconvenient and ineffective. Of course, you need tools. In order to apply the solution evenly, you should have at hand:
- wide spatula;
- squeegee with a long handle;
- needle roller.
When you take on a specific job, you will need other tools, but without the ones listed above, you simply cannot fill liquid glass:
- The spatula serves to disperse the solution over the surface more or less evenly. Since large areas have to be processed, the tool must be large.
- Using a roller with needles, bubbles and unevenness are removed by rolling the entire surface.
- The final rolling is done with a squeegee, the floor should be as smooth as possible. The layer thickness is from 3 to 5 cm.
Important! You need to calculate your time so that you can fill the floor in the room in one go, and you need to work quickly in order to use up the entire prepared composition in an hour.
Comparison of potassium and sodium based glass
Potassium and sodium solutions are available. They have almost identical properties, but there are also differences. General properties:
- Dilutes well with water.
- When completely dry, they form a durable waterproof film.
Differences:
- The sodium mixture is cheaper.
- The potassium layer is more resistant to atmospheric changes and chemicals.
- The sodium layer has better fire resistance and antiseptic properties.
- When processing a surface, the potassium mixture does not leave whitish spots and has an anti-reflective property. The sodium type does not have such properties.
- The potassium product is more viscous, but the sodium product is used for strength in the cement composition.
Is it possible to refuse waterproofing a bathroom?
Some people think that there is no point in spending money on waterproofing when you can decorate the entire room with waterproof tiles. Yes, ceramic products are indeed resistant to moisture, but this does not apply to tile joints.
Another disadvantage of this finish is the difficulty of dismantling and replacing plumbing. When you sooner or later need to change pipes and other elements, you will have to break the tiles. You'll end up paying a lot more.
Therefore, it is recommended to completely waterproof the floor and apply protective material to the most “dangerous” areas (around the shower stall, sink, etc.) or completely to the walls.
To do this, you can use coating, pasting, impregnating, cast or plaster waterproofing. All that remains is to choose the most optimal option.
Floor waterproofing
Floor insulation with liquid glass is much cheaper compared to other types of material. This method is being used more and more often.
The composition is similar to liquid rubber, but when the silicate hardens, a sealed layer is formed. With such insulation, moisture and air will not enter the treated surface. The basis of the substance is potassium and sodium silicate with the addition of quartz sand and soda.
When applying waterproofing in the form of liquid glass, the fact that after five years the layer gradually degrades itself is taken into account.
Before starting work, you will need to prepare materials and tools:
- Liquid glass.
- Water for diluting the solution if the purchased mixture is viscous.
- A clean rag for removing excess material or quickly wiping down a surface that has not been prepared for treatment.
- Container for silicate.
- Brush, roller.
- Tools for pre-cleaning the floor: vacuum cleaner or broom, dustpan.
Technology for applying a waterproofing layer:
- Thorough preparation of the surface: remove the previous layer, clean it from dirt, dust and other debris. It is better to use a vacuum cleaner to completely eliminate dust.
If dust is not removed, it will prevent the absorption of the insulating composition.
- Spread the mixture evenly in a thin layer using a roller or brush. The distribution is carried out in stripes along the wall.
- To remove bubbles and unevenness, use a needle roller.
- Wait for the first layer to dry (1–2 hours), then apply the second.
Preparing for work
The first thing you need is to acquire special tools. Namely:
- Rollers. Painting and aeration with spikes;
- Deep capacity;
- Drill with a nozzle for mixing components;
- A spatula, the length of which is from 1.5 meters;
- Building level;
- Wide paint brush;
- Varnish with a polyurethane base;
- Primer;
- Mixture for liquid floors.
Having collected a complete set of tools, you can safely begin work. The first step is to remove the old flooring. It is worth noting that liquid flooring is not a product that can independently hide all flaws and irregularities. Therefore, it is important to prepare the foundation well.
After removing the screed and the old surface, you need to clean everything from dirt and debris. The entire area of the cleaned surface must be treated with a primer. To better level the surface, you can add quartz sand to it.
Important! A mixture of this sand and primer can cope with unevenness of no more than 0.5 mm.
Carrying out any procedures before the primer has completely dried is strictly prohibited. After this, the surface is waterproofed using polyethylene or roofing felt.
After this, you can proceed to the next stage, which is leveling the floor. The procedure is carried out using a concrete screed. Or you can replace it with cement-sand mortar. Having installed beacons that determine the plane, you can fill the screed. These beacons are mounted on plaster cones and then leveled using a level. The solution is distributed over the entire required area and left for a day. After the allotted time has passed, the beacons can be pulled out. And the remaining cracks can be easily sealed with a spatula. To protect the surface from rust, all steel profiles are removed.
After that, the hardest thing remains - to wait. After all, the drying process of the concrete screed lasts a whole month . Accordingly, further work must be suspended.
Important! The first few days the screed should be covered with film. And then, at certain intervals, it is necessary to moisten it with water.
Use with concrete
Silicate is used with concrete in 3 directions:
- To waterproof it, spray it in a number of layers.
- Additive during the production of concrete mortar.
- Admixture for the purpose of creating several types of marks. When dry, a monolithic state is achieved.
Concrete should especially be supplemented with liquid glass, which is used to fill floors in buildings located in damp lowlands, where groundwater is located directly in the upper layer of the earth. It is also worth making a foundation with such an additive in such buildings. This will help protect the building from moisture, even without treatment with other antiseptics.
With the appropriate knowledge, it is possible to prepare such solutions yourself at home.
When the composition is added to the concrete mixture for pouring the screed, it will make the base stronger and acquire waterproofing and heat-resistant properties. The coating with such concrete is created in swimming pools, furnaces, and wells.
The addition of silicate is permissible in cement grades M300, M 400.
It is unacceptable to add more than 10% glass to the concrete mixture; the best option would be 7%. The higher the percentage, the faster the initial setting occurs.
Silicate is not added to the ready-mix concrete. First, if necessary, dilute the glass with water, then add the dry cement mixture.
When sodium silicate is added to cement, its mass increases by 25%.
We recommend watching the video instructions:
Concrete has a disadvantage - porosity. It is in them that moisture, water, etc. can penetrate. Untreated concrete pavement will encounter problems over time. To avoid them, they are treated with a silicate compound.
Application in the bathroom
To decorate the bathrooms of houses and apartments, materials with a high moisture protection factor are used, since a humid microclimate and difficult air circulation in this room damage less resistant coatings. Waterproofing is used in places where walls and floors come into contact with water: near the sink, under and around the bathtub, under the washing machine. Using liquid formulations the following is processed:
- Floor. The bathroom floor especially needs a reliable waterproofing layer, since when it leaks, water seeps through it into the lower floors, leading to flooding. Liquid compositions that create a barrier to liquids have become an alternative to roll materials. Waterproofing with liquid glass or rubber creates a monolithic protective layer without joints or connecting seams, preventing possible leaks. The best way to apply insulating compounds to the floor is by pouring. This technology allows you to simultaneously level the surface.
Floor waterproofing - Walls. Bathroom wall decoration often suffers from contact with water, despite the use of resistant materials (tiles, plastic panels). The liquid usually seeps into the joints between the tiles, causing the concrete base to deteriorate and mold to spread. The surface of the walls near the sink and bathtubs suffers especially acutely from splashes and direct hits of water, so they are treated with liquid waterproofing. The best ways to apply protective compounds are painting and spraying. Applying liquid waterproofing with a roller or brush is convenient in bathrooms with a small area. If the amount of work is large, spraying waterproofing will significantly speed up the process.
Wall waterproofing
Experienced finishing craftsmen recommend an integrated approach to waterproofing a bathroom. This technology involves applying two layers of protective compounds: first, the walls or floor are treated with glass, and then, after drying, with rubber.
Decorating a liquid glass floor
Since covering a concrete floor with liquid glass becomes transparent, through which the gray base is visible, and afterward there is no provision for covering it with a beautiful finishing layer, decoration is created before the waterproofing layer. Decoration is created by painting, drawing, and adding additional elements. Then layers of silicate are applied.
Decoration is also carried out using paper phlox: apply the first layer of silicate, then lay out pieces of torn paper for wrapping or any other, apply two more layers of liquid glass.
When the 3D effect is achieved, translucent drawings are laid out on top of each other on the floor. Then the mixture is carefully poured. This coating will give superiority to the design.
Two words about liquid rubber
For self-leveling floors, not only liquid glass is used, but also special rubber. This coating can also be laid outdoors, which is often used when equipping sports or children's playgrounds. To make this material, rubber crumbs are used, which are painted with special dyes and diluted with polyurethane glue. To apply this coating you need a special spray bottle.
The advantages of this floor are obvious:
- laid on any base - it can be not only concrete, but metal, ceramics, asphalt and much more, as long as the site is level;
- holds well not only on the floor, but also on the walls (this may seem especially interesting if you decide to make a children's playground in the countryside next to the house or fence);
- lasts 10-15 years (in this it is inferior to glass, which is almost eternal).
Important! The most serious disadvantage of rubber self-leveling flooring is its price. It will cost more than liquid glass and other rubber surfaces. In addition, a sprayer is also an expensive thing, and it hardly makes sense to buy it for one time. Therefore, it is most often used for landscaping public areas.
Safety precautions during operation
The material used is safe and does not contain any harmful elements, but during preparatory or glass coating work itself, alkaline reactions occur when the product comes into contact with exposed areas of the skin.
Therefore, PPE is used during work. Work with rubber gloves and boots.
In the room where the work is being carried out, there should be a container with clean water in case of immediate washing of the skin area if glue gets on it. And the damaged area is treated with a vinegar solution, which acts as an anti-alkaline compound.
Questions about choosing waterproofing for your bathroom
This is a rather complex question that cannot be answered unambiguously. The choice of insulation type depends on many factors. First of all, this is the floor material. If it is wood, it is advisable to use adhesive insulation. Any type will work for concrete.
It is also important to understand how serious the repair work is planned to be carried out. If you have the opportunity and desire to perform the highest quality waterproofing, it is better to choose adhesive, laid under the screed, followed by treatment with coating compounds.
Such a tandem will provide guaranteed protection against any leaks for decades. However, this is the most time-consuming option. If relatively minor repairs are planned, only coating waterproofing can be laid.
It is worth considering the number of floors of the building. If the bathroom is located on the ground floor of a private house, insulating the floor and walls will be sufficient. For a high-rise building, you will also need work on the ceiling.
When choosing a material, it is also important to take into account the possibility of changing the height of the room. If this is extremely undesirable or impossible, it is worth using impregnated or liquid coating insulation. Any of the existing types of materials can be selected to work with the floor.
It is worth considering the configuration of the room. It will be extremely difficult to install a rolled panel in a bathroom of complex shape. For walls and ceilings, only impregnating and coating compounds are used.
Rules for working with material
Carrying out work on covering floors with liquid glass requires compliance with the rules for working with the material used:
- The room temperature is maintained within the range from -5 degrees to 30 degrees.
- For large areas, the mixture is prepared in portions to avoid premature hardening. Since this composition is not reused.
- The composition is not added to the finished mixture; it is first diluted with water and then poured into the dry mixture.
- When pouring, avoid drafts and the use of air conditioning and heating devices. Drying also occurs under the same conditions.
- The concrete surface must be degreased and, if necessary, puttied.
- Liquid glass can penetrate into a concrete floor to a depth of 2 cm, so for maximum surface protection, the treatment is carried out at least 2 layers.
- Upon completion of the process with the material, you should definitely wash off the remaining mixture from the devices and hands.
We recommend watching the video instructions:
After the screed has dried
As soon as the waterproofing base is completely dry, it is treated with varnish so that the surface becomes glossy and durable. 24 hours after completion of work, the coating can be used.
As soon as the waterproofing base is completely dry, it is treated with varnish so that the surface becomes glossy and durable.
Liquid glass has a lot of advantages that make the floor not only visually attractive, but also moisture-resistant and antibacterial. And the low cost of the material makes it accessible. Using the recommendations of experts, you can make a floor covering with liquid glass with your own hands.
Methodology for carrying out insulation work
There are many options for how to properly waterproof a bathroom with your own hands. We will consider the main points without which it is impossible to obtain high-quality coverage.
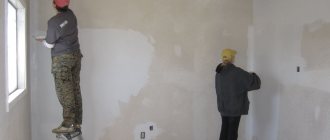
We carry out preparatory work
Once the insulation material has been selected, you can begin preparing the base. The most difficult work lies on the floor. Especially if you plan to lay adhesive insulation under the screed.
We start by cleaning the base. If renovations are being carried out in a bathroom that is already in use, you will have to completely dismantle and remove all the equipment, remove the floor covering and remove the old screed.
The latter is the most labor-intensive, but necessary. As a rule, the old screed is not in the best condition. It is most likely dirty, cracked and crumbling.
You can, of course, use it as a base for adhesive insulation, but then you will have to lay a new screed directly on the old one. This will be an extra significant load on the floors, in addition, the floor will rise, which is extremely undesirable for the bathroom.
According to the rules, the floor in the bathroom should be lower than in any other rooms, which is additional protection in the event of a possible “flood”.
The old screed is disassembled using special tools: a hammer drill, an angle grinder or a concrete hammer. After removing all the debris, an inspection of the exposed base is carried out.
All irregularities, chips and cracks are repaired and rubbed. Dust is removed and then treated with a special fungicidal composition. This is necessary to prevent the appearance of fungus. Next is priming. It is best to apply two or three layers of a suitable primer.
The work is carried out with the obligatory capture of the lower part of the walls. It is primed about 30 cm up from the base level. It is advisable to slightly smooth out the corners between the floor and the wall, this will make it easier to lay the insulating sheet.
Features of laying roll insulation
For work inside the building, it is optimal to choose self-adhesive insulation. The one that is laid on glue will be more difficult to work with. First, the material is cut. It is cut into panels, the length of which includes overlaps on the walls.
In addition, you need to remember about overlaps, which must be present when laying roll coverings. Their average size is 10 cm. If this is not the case, the manufacturer indicates this in the instructions.
We roll out the panels on the bathroom floor and leave them until the next day so that the material is leveled. Now you can start installation. From the upper edge of the panel we retreat a distance corresponding to the amount of approach to the wall and place the covering on the base.
Carefully pry off the edge of the sheet and remove the protective film, while simultaneously pressing the insulation into the floor with force. We do everything slowly, carefully. To better press the panel, use a roller. After the first panel has been laid, you can lay the second one, not forgetting about the necessary overlap.
Important note. When cutting and subsequent installation, it must be taken into account that the junction of the two canvases should not be in the area where the wall and floor meet. Otherwise, a leak will inevitably appear over time, and the tightness of the insulation will be broken.
Particular attention is paid to engineering communications. To remove pipes, holes are cut in the insulating sheet. In order for the insulation to fit tightly, their diameter must be smaller than that of the pipes.
We thoroughly coat all the joints of the plates and the edges of the resulting waterproof “trough” with bitumen mastic and once again forcefully roll the entire coating with a roller. If the canvas does not stretch well, you can slightly warm it up with a hair dryer.
Method of applying coating insulation
Coating type insulation is very easy to apply. If the work will be carried out using a dry mixture, first you need to prepare the working solution exactly according to the instructions.
It must be remembered that after a relatively short time it will harden and become unusable. Therefore, the material is diluted in small portions. If you plan to use an already prepared coating, you only need to open the jar.
The prepared base, which can be the floor and the side wall of the bath screen, is slightly moistened to improve the adhesion of the materials, after which they begin to apply the solution.
It is advisable to move strictly in one direction; when applying the second layer, the composition is laid perpendicular to the first direction.
Do not forget that the first layer must dry completely before laying the second. All corners and joints are additionally covered with a special waterproofing tape.
It is placed in damp mastic and pressed forcefully into the material. Before applying the last layer, a reinforcing mesh can be laid on the base, which is then covered with a continuous layer of mastic.
The composition is allowed to dry completely and harden. At this time, you need to protect it from possible dust and debris. Even small particles of dirt will spoil the quality of the finished coating.
Source: https://sovet-ingenera.com/santeh/vanna/gidroizolyaciya-vannoj-komnaty.html