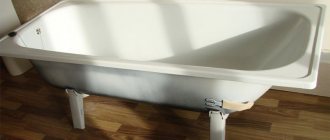
The siphon performs important functions: thanks to the water stopper, it prevents odors from the sewer from entering the room and protects the pipes from frequent blockages. If the drain system is worn out or faulty, replacing it does not need to be put off until later. Changing the siphon under the sink yourself is not difficult; it does not require special skills or complex tools, the main thing is to know how to do it correctly.
Purpose of the siphon
A siphon is a very simple device, but it performs several important functions at once:
- The main purpose is to drain water from the sink into the sewer.
- Due to the presence of a characteristic bend, constantly filled with water, a water seal is formed that does not allow unpleasant odors from the sewer to enter the room.
- The siphon also prevents clogging of sewer channels due to the installed grates, and many models have easily accessible sumps. Their periodic cleaning will prevent silting of sewer pipes.
Only high-quality installation will ensure the performance of all these functions. Therefore, it is important to know how to properly assemble a siphon. But initially you should choose a new model in the store, and there are not so few varieties.
Siphon and its internal structure
A typical siphon kit includes the following elements:
- A rubber stopper used to plug the drain hole of a bathtub or sink.
- Exhaust pipe nut, made of plastic.
- Gasket for the exhaust pipe, made of rubber.
- The outlet pipe itself, while some types of siphons take into account an additional outlet for installing the drain of a washing machine or dishwasher. This may be a special outlet for mixers with bottom valves.
- Rubber gasket - it is placed between the washing body and the outlet pipe. As a rule, the thickness of the gasket is from 0.3 to 0.5 cm.
- Protective grille - it is installed in the drain hole of the bathtub and sink. Such a part will not retain large waste, and will also prevent clogging of the sewer system.
- Siphon body – “bottle” or “elbow”.
- A connecting screw made of stainless steel with a diameter of 0.6 to 0.8 cm; some manufacturing companies make this element from simple iron coated with chrome and nickel to reduce the cost of the product. Such savings often lead to the fact that the screw begins to quickly rust and collapse. You can check the quality of the metal using a magnet, because stainless steel is not magnetic.
- Sewage outlet - plastic pipe, flexible hose, corrugated pipe or plastic pipe.
- Rubber flat gasket - will ensure a tight fit between the siphon cover and the body.
- Nut for securing the plastic adapter.
- Sewage outlet - located on the side of the siphon body.
- Cone-shaped gaskets made of rubber or plastic - 2 pieces.
- Plastic tie nut.
- Metal nut (copper, brass or stainless steel).
The kit includes instructions with a detailed description of how to install a sink siphon. The assembly and installation process should begin only after you become familiar with it.
Dimensions
There is not much space under the sink, so the size of the structure is limited. In most cases, this siphon size is sufficient. For the device to operate efficiently, its bandwidth must also be taken into account. We should not forget about the distance between the outlet pipe from the siphon and the inlet of the sewer system. As a rule, the maximum height of the structure does not exceed 250 mm.
There are no exact standards here, except for the diameter of the drain pipe
Putting a siphon on a kitchen sink when the diameter of the drain and sewer pipe are the same size is not a problem. However, when there are differences in pipe diameters, it is necessary to think about their connection in advance. In this case, various cuffs and their connecting pipes are used. For example, a 50 mm internal double-socket tee will allow you to connect a 50*40 sink and a 50*25 washing machine with sealing collars.
Various adapter sleeves allow you to hermetically connect the necessary devices to the main sewer system
Installing a siphon on a sink with your own hands. How to install a siphon on a bathroom sink?
The process of installing a new siphon under the washbasin with your own hands is simple and does not require much effort. Read on to learn about the main nuances of the work, the necessary tools, dismantling and installation.
What tools/facilities are needed?
- screwdriver (any shape);
- grinder or hacksaw;
- odorless silicone sealant (with or without a gun).
Attention! During the process of replacing equipment, the sewer pipe will remain open for a short time. Toxic fumes can harm the body, so wear latex gloves, safety glasses and a respirator to be safe.
How to remove the old structure?
Important! Before starting work, turn off the water at the common valve of the bathroom or, if provided, at a separate tap for the bathroom. We place a container under the siphon device and lay out rags on the floor to collect any residual water that flows out.
Let's perform the operations sequentially:
- unscrew the top nut, then gradually remove the side bell from the product;
- remove the siphon body from the top tube;
- disconnect the corrugation from the sewer pipe by turning it around its axis and holding it with your hand;
- remove all seals (or cut them off with a knife);
- Unscrew the top nut counterclockwise;
- We pull out the drain part of the siphon from the sink by removing the screw.
unscrew the side nut connecting the device to the corrugated tube;
On a note! This is where a cutting tool can come in handy if the old parts are rusty.
Preparatory work
Before starting the main work, we will carry out several necessary procedures:
- Wipe the washbasin dry on both sides.
- Let's inspect the sewer pipe. If there is dirt in its upper part, remove it with a rag.
- To choose the right replacement, we measure the diameter of the old equipment (at the connection to the sewer - these are standard values) and buy a product with the same size. If suitable options are not found, then you can use a transition collar; it will create a tight connection.
- We check the purchased copy for quality: its surface must be even and smooth, without cracks or chips.
- We take into account additional connections (dishwasher, etc.), they will require an additional fitting.
What should be included?
Before purchasing a suitable model, you should make sure that it is fully equipped. The following details must be present:
- two plastic nuts (possible diameters 32,40 and 50 mm, these dimensions apply to the next two components);
- cone-shaped gasket;
- cuff with plastic skirt;
- device body;
- bottom cover with seal;
- sewer outlet (in the form of a corrugated tube, flexible hose, rigid plastic pipe);
- several drain elements: a stainless screw (for fixation), a decorative cover, a gasket (made of silicone or durable rubber), a rubber plug, a protective grille.
metal threaded insert in the outlet tube, with a seal;
Installing a new siphon
Let's move on to the main operations:
- install the drain piece into the sink hole;
- At the bottom of the washbasin we place the lower plastic part of the drain, secure it with the screw of the drain grate, without excessive force, so as not to break the thread;
- We equip the outlet pipe with a nut with a flat seal (3-5 mm thick) and screw it to the drain structure;
- We put a gasket on the lower part of the siphon “glass” (it is necessary to place it evenly so that there is no twisting), then screw on the lid;
- nut and cone gasket (minimum size, wide side up) are placed sequentially on the outlet tube;
- take the siphon, fix it to the outlet part with the installed nut;
- we put the nut and then the cuff on the corrugation (or other connector with the sewer), attach it to the outlet of the siphon;
- The final stage is connecting the liner to the sewer pipe; to make the task easier, you can lubricate the contact areas with liquid soap or silicone.
We fix the drain gasket to the protective grill using sealant (note that the seal is not used for stainless steel sinks, creating extra thickness);
Important! If the elements of the device are made of plastic, then carry out all manipulations manually, without using wrenches or other wrenches, so as not to damage the equipment. Do not use much force when twisting. It is advisable to treat all gaskets with sealant - this will ensure no leaks. Align seals installed with errors using a screwdriver. Connect additional equipment through a special fitting last.
Knowledge of plumbing work will help you not only feel like a real owner of your home, but also avoid the expensive services of a professional. It is only important to strictly follow the sequence of operations to avoid unnecessary problems with neighbors. By following all the steps correctly, you will install a device that will last a long time and be stable.
What to look for when choosing
Given the current criteria for choosing the required siphon, you first need to take into account:
How to get rid of fruit midges in an apartment: effective ways and methodsHow to clean the oven from grease and carbon deposits: tips and more effective methods
What to do if your kitchen sink is clogged: how to clear the clog yourself
- Matching the calibration of the sink, washbasin and pipe.
- The metric characteristic of the maximum amount of liquid into the channel must be increased when connecting secondary plumbing units. In this case, the number of sewer outlets must be increased.
- Matches with available space. With a tiny square footage, you should choose a compact corrugated spillway.
- The selection of a water seal should be in accordance with the design of the sink.
- Carefully check the device for nicks and defective punctures.
When purchasing a siphon, special attention should be paid to its design. Photos of chrome, metal and polymer samples of spillways can be viewed on the pages of Moscow online stores. You can buy a high-quality product at the manufacturer’s price and significantly save your effort and money, without even leaving your home.
Basic selection rules
To ensure effective drainage of used water in the kitchen, you need to choose the right siphon. To do this, consider the following recommendations:
- You need to purchase the kit immediately. In addition to the siphon, it must contain all the necessary components for connecting it to the sewer. If parts are purchased separately, there is a possibility that they will not be able to be assembled into a single structure.
- It is necessary to measure the free space under the sink in advance. If it is minimal, you should give preference to a short siphon.
- With closed installation, there is no need to purchase an expensive designer siphon. It is better to buy a less beautiful product of good quality, but at a lower price. After all, no one will see it, and it will not spoil the interior of the kitchen.
- If the sink siphon is open, it makes sense to buy a product with a decorative design.
Each device always comes with instructions - you need to study them carefully before installation. It is also necessary to pay attention to the absence of damage to the siphon, the quality of the threads, sealing elements and plugs.
Price
The price may vary significantly. A simple plastic siphon of any modification can be bought for 100–300 rubles. For a product with chrome plating or with additional outlets you will have to pay from 400 to 1000 rubles. The price of brass devices starts from 1000 rubles. and can reach 15 thousand rubles. The most expensive are chrome-plated bottle-type siphons made of brass or steel.
Important points
Like any other repair job, replacing a sink siphon requires thoughtful action. It is very important to pay attention to the choice of drain pipe. As you know, such pipes can be of two types - corrugated and rigid. Corrugated ones are great for the bathroom, while they should absolutely not be installed in the kitchen, since the internal pockets of the corrugated ones will become clogged with rubbish.
The second point to remember is choosing the right sealant, without which it will not be possible to make a replacement. It is best to purchase silicone sealant, which is justified not only by its affordable cost, but also by its technical parameters. However, you should not buy sealant with your eyes closed, as it may be acidic. Acid sealant is not suitable for replacing the siphon. A suitable sealant should be odorless.
Selecting siphon material
Most of the models offered in stores today are made of metal and plastic.
These models differ from each other in their features, advantages and disadvantages. Plastic structures are valued by consumers due to their affordable price, especially when it comes to models made of polyethylene. Most often they have a simple design and a minimum number of connections. Polypropylene structures are considered more expensive in this category, however, this is not surprising, given their increased strength and long service life.
Another positive quality of polypropylene is its increased resistance to high temperatures. Because of this, experts advise owners who plan to connect a washing machine with a boiling function to choose these products.
During the operation of a plastic product, a nuisance such as leakage may occur. However, this problem is quite easy to solve if you tighten the threaded connections.
Metal siphons for kitchen sinks are a more expensive proposition compared to polymer models. This difference in price is explained by the increased service life. Most often, metal products are made of bronze or brass. Their advantage is that they are not susceptible to oxidation processes or corrosion.
An alternative to the listed devices are stainless steel models, however, they are noticeably more expensive than their main competitors, so they are not widely used.
If you want even such a part of your sink as a siphon to look attractive, then you should pay attention to models with a chrome finish. But keep in mind that you will have to pay the maximum price for such a plumbing product.
DIY siphon installation tools
In principle, each owner can cope with the task of installing a siphon for a kitchen sink with an overflow or other functions on his own.
Although it wouldn’t hurt to have minimal skills in working with plumbing and a minimal set of tools. However, all this can be found in any household, so dismantling the old device and installing a new one can be done without major problems. The tools that will be required to complete this work include the following:
- screwdriver;
- hacksaw;
- roulette;
- sandpaper.
In some cases, the pipe may need to be cut, so you will also need to have scissors ready.
Preparatory work before installation
Before starting assembly and installation, you must check that you have all the necessary parts from the kit. If you do the work yourself, you should prepare a tool. In addition, it is necessary to dismantle the old siphon and carry out the work carefully so as not to damage the sink itself, the faucet and other parts.
Before dismantling, it is recommended to place a bucket or basin under the sink to drain the remaining water and dirt.
Old equipment is attached with a bolt; it often becomes sour, and it will be difficult to unscrew it with a screwdriver. A screwdriver with an attachment can come to the rescue. If the siphon does not have a bolt, or rather there is no notch or it has worn out, then you should simply cut the drain mesh. Wire cutters, metal scissors and other tools are suitable for the job.
After dismantling, everything is removed, the sink is completely wiped of dirt and remaining water. Be sure to disconnect the device from the sewer. The problem may be with the rubber seal, which makes it difficult to remove the tube.
If a major renovation has been carried out in the kitchen, all plumbing has been replaced with new ones, then there will be no dismantling. In this case, you just need to install a siphon on the new sink after its preliminary assembly.
Assembly instructions
Removing the old siphon
Before installing a new kitchen siphon, you need to remove the old one. To do this, take a strong screwdriver and unscrew the screw in the center of the grille in the drain hole as shown in the photo on the right. Be sure to place a basin under the siphon. Once the trap is removed, wipe the drain hole clean.
- The nut and screw of the drain grate often stick to each other over time, and therefore are very difficult to unscrew. If you cannot unscrew the screw, then you need to disconnect the lower part of the siphon, leaving one pipe, and then try to twist it to help the nut and screw release. Most often, these manipulations are sufficient.
Installation of a standard siphon
After assembling the device, the connection is made, and the installation diagram for standard types is as follows:
- The corrugated ring for sealing is applied to the siphon pipe with stripes facing up.
- The grate itself with the gasket is placed at the top of the kitchen sink, and a siphon is placed underneath the drain. Holding both parts, you need to equalize them.
- Screw the screw into the grille.
- Now you need to connect the siphon to the sewer using a corrugated or rigid tube. A corrugated product will be easier to install; it stretches to the desired length, but so that there is no tension. Rigid pipe is more reliable and durable, but installation is more difficult.
Corrugations for sewer connections can be prefabricated, and the connection is made using gaskets and fittings.
If the length of the pipe is too long and the structure itself is smooth, then the excess can be easily removed with a hacksaw.
The pipe itself is inserted into the sewer drain through an O-ring in the form of a rubber gasket. Lubricant in the form of detergent will help simplify the connection. It is enough to pour a few drops and spread in a thin layer so that the tube fits into the adapter more easily.
It is much easier to install on a removed sink, and after installation and connection, check the structure by opening the water. When the water seal is filled with liquid, there should be no leaks. In this case, installation and assembly is done correctly.
Features of assembling a semi-automatic (pipe) siphon
Assembly of a semi-automatic siphon is complicated by the presence of additional parts. At the top of the tubular structure is a stainless steel control rod. It is secured with 3 screws of the same material. The aerator is also located here.
A bathroom siphon always has 2 overflows. The photo shows a view of the central or walk-through and shut-off overflow. The first is installed in the bathtub drain, and the second - in its end. The drain pipe is mounted on the side overflow, and the sewer pipe is connected to the collector
Its installation requires a minimum of space. Only the siphon head is visible from above. Water is supplied from the side using a threaded connection.
The tubular semi-automatic siphon has good throughput and a reliable water seal. A high-quality device is designed in such a way that water never flows down the wall of the bathroom.
The components of a semi-automatic siphon are 2 overflows connected by a cable and a pipe, a pipe, filters, sealing gaskets. Using a pipe, the device is connected to the collector
Assembly is carried out according to the following scheme:
- The manifold pipe is connected to the central overflow, pushing the pipe all the way through. The gasket at the joint is already installed, so there is no need to insert anything additional.
- A metal filter is also mounted on the overflow, having previously installed a double seal on the drain.
- Flat-shaped metal caps are connected to the movable adjustment cable, and then secured to the drain hole. The assembly is connected to the overflow using a bolted connection.
The joints must be equipped with appropriate gaskets - the side ones with an ordinary thin seal, and the central one with a “butterfly” gasket.
How to install a siphon for a double sink?
A two-section sink must be equipped with a specially designed double siphon. Such siphons have two outlets, which are united by one siphon, which can be either flask-shaped or tubular. They may also have outlets for a washing machine or dishwasher, as in the photo on the left.
The installation is carried out according to the principle described above, with the only difference that you first need to screw two pipes with a drain to two sinks, then under the sinks you need to connect the two pipes with a conductor, and then screw the remaining parts of the device to the conductor. If necessary, the pipes must be cut to the required length with a hacksaw, sanding the edges with sandpaper.
We connect the corrugation to the sewer riser
The last step is to simply connect the corrugation to the sewer, extending it to the required length.
- Typically, the diameter of corrugations for sewerage is 50 or 40 mm, and the corrugations themselves are often produced in a diameter of 50 mm, which can be cut with a hacksaw to 40 mm if necessary;
- Instead of a corrugated pipe, it is possible and even desirable to use a rigid outlet.
Now we check the siphon for leaks, fill it with water to form a water seal. If it doesn’t leak anywhere, then you did everything right.
Waterproofing check
To check, you need to open the water tap for a while. The tightness of the connections is checked visually and by feeling. If a leak is detected, tighten the nuts or coat the gasket with silicone.
Design Features
The need to purchase or replace this product arises when the old device becomes unusable, as well as for a reason that is not specifically related to it.
For example, you have purchased a kitchen set and now you need to replace not only the sink, but also install a new siphon on the sink. It often happens that the design of an existing device must be different.
To install a water seal under the sink, today manufacturers offer different types of siphons, which are:
- bottled;
- knee.
Devices of the second type are in turn divided into:
- hard;
- elastic (corrugated).
All of them can be of a more complex design if a siphon is required to be installed on a sink with an overflow. Also, knee products are produced flat. They are suitable for placement under a shower stall, and double ones are mounted under double sinks.
Siphon repair
If the drainage device begins to leak, there may be several reasons for the malfunction:
- poor-quality installation - incorrect joining of connections, skewed threads, not fully tightened union nuts, use of unsuitable gaskets;
- blockage;
- wear of seals - over time, gaskets harden and shrink, so they begin to leak water;
- damage - cracks or chips.
For repairs, it is necessary to install a container from below to drain the liquid.
- If the assembly quality is unsatisfactory, the product simply needs to be disassembled and reassembled correctly.
- If the lower part of the siphon is clogged, you need to unscrew it, then clean the sewer with a cable or wire.
- In the place where the drain is leaking, replace the rubber seal with a new one, lubricated with Vaseline or liquid soap. In this case, the joints are treated with sealant.
Advice from a plumber: if it is not possible to buy new gaskets, the old seals should be generously lubricated with sealant or silicone glue and installed in place. Water can be released after the material has hardened. This connection will last for several more years.
- It is advisable to replace a cracked siphon immediately. If for some reason this is not possible, repairs will require epoxy glue and a bandage or fiberglass. The cracked part - a pipe or bulb - is dried and treated with sandpaper and solvent. The glue is diluted according to the instructions, applied to the surface of the part, then it is wrapped in a bandage or cloth. After the composition has hardened, the device is ready for use.
Let's sum it up
As you have seen, the siphon installation process is quite simple and quick. But installing such equipment will save you from the appearance of an unpleasant odor in the house. After all, the siphon can be called one of the most important elements of plumbing.
Regardless of where you need to install the siphon, be it in the kitchen or in the bathroom, you can handle this task without outside help. Now you don’t need to call specialists and pay them money. Thanks to the Internet and your abilities, you will save money and learn new skills.
Manufacturers
The choice here is simply huge, from cheap Chinese goods to expensive branded ones. The choice for each situation is individual and is based on the installation location of the device, what kind of work it will perform and financial capabilities.
Some manufacturers:
- Akvater is a Russian company, quite well known and has its own sales market.
- AlcaPLAST - products of this company, a compromise of price and quality.
- Hansgrohe is a brand from Germany, a leader in quality and design.
Device and principle of operation
Regardless of the type, any siphon works on the principle of a hydraulic seal. It is the water plug inside the structure that prevents fumes from the sewer from penetrating into the room.
A siphon consists of 2 communicating vessels with a container filled with water located between them.
The siphon is divided into 3 zones:
- An inlet (filler) pipe where liquid is supplied directly from the sink. Located at the top point of the siphon.
- The outlet (drain) pipe from where the liquid is drained into the sewer. Located below zone 1.
- The water seal zone where the liquid remains permanently, forming a plug. In different types of siphons it can be a curved pipe or glass. Located at the bottom of the product.
Water entering the filler pipe creates enough pressure to push it into the drain pipe. When all the water flows out of the sink, the pressure in the pipes is equalized. Water remaining in a bend or glass cannot flow out on its own. This is how a water castle is formed.
Sink siphon diagram
It is important! In compact types of siphons, the volume of the water plug is small. If you do not use the sink for a long time, the water gradually evaporates. The water seal disappears, allowing sewer fumes to enter the room.
Kinds
On the modern market you can find many types of devices:
- Pipe;
- Corrugated;
- Bottle;
- Flat;
- Dry.
They all have different builds and dimensions. Application depends on the shape, specific use and location of the sink.
Pipe
Created in the form of a pipe with an S or U-shaped bend in the middle. Plastic or metal is used for manufacturing. Can be integral or collapsible.
The collapsible siphon, in order to increase ease of installation and maintenance, is often divided into 3 components:
- The upper part is attached to the sink drain neck with a regular bolt.
- Hydrodispenser in the form of a curved pipe. The pipe goes down vertically, then bends 180 degrees. Just below the top it bends again 90 degrees away from the neck of the sink.
- Graduation part. It is a rigid or corrugated pipe, one side is connected to the water seal, the other to the sewer.
Collapsible pipe siphon
The kit includes O-rings and nuts for connecting and sealing components. In solid metal pipe siphons, a plug is often placed at the bottom or at the end of the water seal for maintenance work. These siphons are visually attractive, so they are installed in open areas.
Due to the small capacity of the water seal, water may evaporate during infrequent use. Reducing or completely eliminating the water damper can lead to an unpleasant odor in your home. The rigid design of this siphon requires precision in selection when purchasing and complicates installation.
It is important! Due to the likelihood of frequent blockages, it is not recommended to install it on kitchen sinks.
Corrugated
The simplest and cheapest siphon. It is a corrugated pipe, one side of which is bolted to the neck of the sink drain, the other to the sewer pipe. The installer can bend the corrugation in any direction to create a water seal of the desired depth. This is especially true with a non-standard sink location. The final form is fixed with a special frame.
The cheapest and simplest - corrugated siphon
It is important! Due to the flexibility of the corrugation, it is possible to move the sink without disconnecting from the sewer system, which is especially convenient during repairs.
The disadvantages of this design are:
- Ribbed inner surface, facilitating the accumulation of debris;
- When in contact with hot water, the material becomes hard, complicating the maintenance of the siphon;
- Unaesthetic appearance that limits installation locations.
Bottle
Named due to its resemblance to a bottle. One of the most common types of siphons. There is the possibility of adjustment to almost any gap between the neck of the plumbing fixture and the sewer pipe.
Compared to previous types, it is more difficult to design, install and maintain. Comprises:
- Inlet pipe connected to the neck of the sink;
- A vessel for water in the form of a glass, flask;
- Drain (discharge) pipe connected to the sewer system;
- A set of O-rings and clamping nuts for assembling and sealing components.
The siphon is often equipped with a corrugated drain pipe, which makes installation and disassembly easier during cleaning.
Bottle siphon device
The flask is capable of retaining debris, hair, and grease, preventing clogging of the pipes. Needs periodic cleaning. To do this, simply unscrew it from the siphon body, shake out the collected debris, and rinse it under running hot water.
The capacity of the flask is enough for a long time to preserve the water plug without using a sink.
It is important! Over time, gaskets lose elasticity and leaks may form. To eliminate it, it is enough to replace the failed seal.
Made from plastic and metal. Metal siphons look more aesthetically pleasing, but are more expensive, less practical, and more difficult to maintain. Located in visible places.
Flat
It is a compact version of collapsible pipe and bottle siphons. The water seal is made in the form of a deep plate or a flat U-shaped element.
Can be installed in hard-to-reach places with little free space under the sink.
Compact flat siphon
The disadvantages include the complexity of installation, easy clogging, and small water seal capacity.
Dry
The main difference with the classic siphon is the design and principle of operation. In this form there is no water seal as such. Its function is performed by a rubberized tubular gasket or membrane. They allow water to flow freely into the sewer system, preventing vapor from penetrating in the opposite direction.
The siphon has the shape of a cylinder or tablet. Can be installed both vertically and horizontally. Small dimensions allow it to be mounted in any space, good design - in open areas.
Dry siphons can be installed both horizontally and vertically
The absence of a water container allows the installation of a dry siphon in unheated rooms. It also cannot dry out, so you don’t have to worry about sewer gases entering your home while on vacation.
Additional structural elements
Siphons installed in modern plumbing fixtures are additionally equipped with:
- An overflow system that protects the sink from being completely filled with water and flooding the room;
- Additional outlets on the filler pipe for the possibility of connecting other devices to the siphon (washing machine, dishwasher);
- A bottom valve that acts as a plug, actuated by pressing it or using an adjustment wheel located on the surface of the sink.
It is important! The bottom valve, when closed, prevents the penetration of fumes from the sewer into the room.
Siphons with two filler pipes are also available for connection to a two-section sink.
Siphon with two filler pipes