Residents of houses built in the 50s have a problem. The old boards begin to creak. The boards sit on joists that sit on top of concrete slabs.
The creaking sound becomes noticeable if you try to move quietly around the room or corridor at night, but eventually your family wakes up.
First aid methods
To eliminate squeaking wood floors, you can use one of the methods below. All of them belong to the category of short-lived, momentary. That is, sooner or later the creaking of the floorboards will return anyway.
Polyurethane foam
An unpleasant squeak can be eliminated using polyurethane foam if there is a large distance between the floor boards. At the same time, they shift, rub against each other and creak. To fix the problem, take polyurethane foam and blow out all the floor cracks in the problem area. After some time, the foam will swell, filling all possible voids and spaces. All that remains is to cut off the protruding parts.
This method has a number of disadvantages:
Spot fixation
If you see that some wooden floorboards in a Khrushchev-era building are loose, practically moving when you step on them and creaking, then you can pinpoint the wood. To do this you will need screws and a screwdriver.
Here you need to determine the exact place of friction of the floorboard or parquet flooring on the joists. Using a screwdriver, screw in the screws in these areas. That is, press the wooden elements tightly against the joists. Seal the fastener caps with special wood wax.
Plywood
You can eliminate the creaking of wooden floors without disassembling the apartment using a more radical method. Here you will need fairly thick sheets of plywood at least 12 mm thick. They need to be laid as the upper base of the floor directly on creaky boards. That is, you will slightly raise the base of the room and remove these hated sounds. In this case, plywood will play the role of an additional shock absorber.
To complete the work you will need:
The work looks like this:
Newspaper
If the floor creaks under the old linoleum, then you can use a budget repair option. That is, eliminate the squeak using newspaper. It must be carefully deformed and the cracks between the boards must be caulked with this mass, after first lifting the old linoleum. This method eliminates the problem just as temporarily as polyurethane foam.
Foamed polyethylene cord
Here it will act as a shock absorber between the dried floor boards. Using a chisel and hammer, carefully push the cord between the dry floorboards. It is important to do this so that there is about 5 mm of free space on top of the cord. Putty is later filled there flush with the floor. Excess is removed with a dry cloth.
Foamed polyethylene cord
As soon as the putty dries, it is sanded with sandpaper and, if necessary, varnished and the old wooden floor is painted.
How to eliminate sound without dismantling the floorboards, without opening the floor?
To eliminate unpleasant sound, you need to limit the amplitude of movement of the boards under load. This can be done by wedging, re-fixing, or creating an additional layer of flooring.
Polyurethane foam
Using construction foam, you can fill the gaps between the floorboards and the cavities under the joists. This makes the structure more rigid and eliminates mutual friction of the boards.
To eliminate the squeak you need to:
- Clean the work area and remove any clogged debris from the cracks between the floorboards.
Spray the inside of the gap with a spray bottle. Shake the foam container and fill the defect to 30% of the volume.
It is recommended to repair wooden floors at a temperature of +5…+25°C. If the foam was stored in a cold basement or cellar, it is recommended to warm it up in a bucket of warm water.
- Wait for it to harden and repeat. If you blow out the crack right away, then when curing the foam will expand and protrude onto the floor surface.
- Trim off excess polyurethane foam. Cover the surface with wood putty and varnish.
- To save material, the lower part of large cracks can be filled with diluted alabaster or cement. The consistency of the solution should resemble tile grout or thick glue.
- identify creaking areas, drill several holes in them down to the concrete floor;
- dilute the cement to the consistency of liquid sour cream;
- using a large syringe without a needle, inject a small portion of the solution into each hole;
- pump cement into the cavities under the joists until the solution stops entering the openings made.
As you walk, the foam gradually cracks, so the creaking may occur again. If a problem occurs, repeat the procedure. Foam blowing should be carried out wearing gloves, goggles and a respirator.
To reduce the mobility of lags, you need:
After the solution has hardened, the holes are filled with plaster or wood mastic. To ensure uniform hardening, cement should be poured in small portions, allowing them to dry for at least 24 hours.
Using self-tapping screws
You can firmly fix the floorboards to the joists using self-tapping screws:
- Find movable floorboards. Determine the position of the lags underneath them by the heads of the nails and make marks. If the caps are recessed into the floorboards, then you can find the fasteners using a magnet.
Drill holes where the boards are attached to the beams. The holes should be located in the middle of the floorboards.- Prepare self-tapping screws with incomplete threads. If the thickness of the board is more than 40 mm, then full-threaded fasteners can be used for fixation.
- Using a screwdriver, screw the screws into the holes, sinking them into the wood 2 mm. If there is no joist under the floorboard, the cap will remain on the surface.
The reason for the lack of support may be the destruction of wood or the use of shortened timber. In these cases, you need to unscrew the fasteners and continue fixing in other areas.
The holes should be 1-2 mm smaller than the diameter of the screw so that the fasteners are screwed in with tension.
The video will show you how to eliminate squeaking without opening the wooden floor:
Wedging method
If the creaking of the floor is caused by cracks and gaps between the boards, then small spacer wedges can be used for fixation. When wedging, the boards will be pressed tightly against each other, which will prevent them from moving under load.
How to eliminate squeaking using wedges:
- Prepare a mallet, wood glue and thin wooden slats 10-15 cm long. The number of slats depends on the area of the room, the number of creaking floorboards and the frequency of placing wedges.
- Clean cracks, joints and cracks in the flooring.
- Coat several wedges with glue. Its layer should be thin so that when wedging, a minimum part of the glue is squeezed onto the surface. For more reliable fixation, wood glue can be mixed with PVA in a ratio of 1:2 or 1:3.
- Hammer the treated wedges into the gaps at intervals of 20-25 cm. Coat a new batch of spacers with glue and repeat the procedure.
- After fixing all creaking boards, leave them until completely dry. When the glue has hardened, cut off the protruding ends of the wedges with a plane.
- Fill small cracks and gaps around the spacers with a mixture of wood glue and fine sawdust. After the composition has dried, sand the filled cracks and cover with paint and varnish.
Using dowels
If the boards come apart at the joints and move under load, they can be secured with dowels. They are small wooden rods that connect two adjacent boards.
How to solve the problem using dowels:
identify and mark any squeaky floorboards;- prepare an electric drill, a mallet, glue and 2 dowels for each joint of the moving board;
- drill holes in the floorboards at an angle of 45 degrees - the directions of the drill should be perpendicular to each other, so one hole is made from the side of the movable board, and the other from the opposite side;
- coat the dowels with wood glue or its mixture with PVA;
- drive the fasteners in with a small mallet;
- wipe off any glue that appears on the surface;
- after the composition has hardened, cut the end of the dowel flush with the floorboard, sand and putty;
- Paint and varnish the sanded area.
Additional flooring
An additional layer on top of the floorboards helps distribute the load evenly and muffle squeaks.
To strengthen the floor you need:
- Calculate the area of the room, prepare the required number of large-format sheets of plywood or chipboard with a thickness of at least 12 mm.
- Determine the location of the creaking floorboards, secure them to the joists with self-tapping screws;
- Lay the underlay on the floor, and then 1-2 layers of plywood.
- To firmly fix the sheets, you need to coat them with wood glue.
- Secure all wood-based sheets with self-tapping screws at equal intervals of 25-30 cm.
You need to plan the installation of chipboard or plywood so that the joints of the sheets do not coincide with loose boards.
The disadvantages of the method are high cost compared to fixation with self-tapping screws or foam, as well as low efficiency. When the joists and boards wear out, the sheets can only muffle the creaking, but will not eliminate its cause.
Other means
In addition to the methods listed above, to combat squeaking you can:
- fill the gaps in the joints with cord treated with glue;
- fix the joints with wood putty or sealant made from varnish, sawdust and paint;
- fill cracks with talc-based powder.
Preventing squeaking
If you decide to install wood floors in your new home, it is important to take a number of steps to prevent floorboards from squeaking in the future. These methods include:
If all this is taken into account, then a wooden floor will not cause problems in the future. And if suddenly such problems arise, now you know how to eliminate the squeaking of wooden floors without disassembling them.
Write in the comments: How did you eliminate the creaking of floorboards in an apartment without dismantling the floor?
Source
Some design features of floors in Khrushchev
To begin with, it makes sense to say a few words about the structure of the floors in Khrushchev buildings. It’s just that some owners are afraid to decide on repair work only out of ignorance of what can await them after dismantling the plank covering.
As a base for wooden floors, one of two options can be found - these are wooden interfloor beams, sheathed underneath with subfloor boards, or a concrete slab. It must be said that the floor on beams is still a phenomenon in “Khrushchev” buildings - an extremely rare one, characteristic of the earliest series, and there are practically no such houses left. So in the overwhelming majority of cases, you should expect to see the floor slab under the removed flooring.
Traditional layout of wooden floors
This is the picture that may appear before your eyes after removing the plank flooring in a Khrushchev building.
The design of floors on joists is a fairly rational option, as it allows for sound insulation or the installation of modern insulating material. That is why the owners of “Khrushchev” buildings are in no hurry to abandon old plank floors in favor of concrete screeds, of course, if the former are not subject to complete dismantling due to complete disrepair. In some cases, floor boards are dismantled only in order to lay sound and/or heat insulating material between the joists and solve the problem with squeaks. That is, even old floorboards sometimes return to their place.
Broaching with self-tapping screws
Pulling with self-tapping screws will also be a very effective option that will help eliminate floor squeaking at the point of contact between the floorboard and the joist. In this method, however, the main problem may be the location of the joist itself. You are also required to determine whether there are any communications under the floorboard that has a defect.
This whole procedure consists of screwing two or three self-tapping screws into the damaged board. Using a drill, you need to drill a hole on one side of the floorboard through the board into the beam or joist. Next, you need to drive a nail or screw the correct size screw into it. Attention should also be paid to the head of the screw or nail used. It should be completely recessed into the board.
How much can you reduce noise?
There are different types of noise. There is, for example, the aerial type - these are sounds transmitted through the air. These may include talking, shouting, laughing, etc. These sounds enter the room through windows, cracks and doors. But the impact sound passes through the walls. This type of sound includes the noise of a drill and other tools. There is also a structural type that appears due to vibrations. It also goes through walls. Its sources can be tools used in construction. Typically, structural and shock types occur simultaneously.
Loudness can be measured in decibels. There are acceptable levels considered optimal for humans. They are somewhere between 40 and 45 decibels. This sound level is not harmful. An example of such a sound is a simple conversation between people. But this norm is permissible only from 07 am to 11.00 pm. Then the person can only perceive a whisper, which is approximately 20 decibels.
Working workshops produce sounds up to 85 decibels. At the same time, people often work inside such premises for 8 hours a day. But during this time the noise will not harm the body. If the sound is stronger, then it will be necessary to use protective equipment. The critical level can be considered 110 decibels. If the level rises to 130, then the discomfort will be noticeable even on human skin. Therefore, shouting from neighbors can be a nuisance. But soundproofing will help solve the problem.
Types of flooring
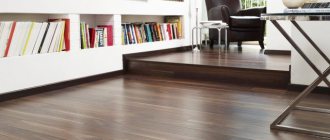
If you want to turn a room into a luxurious hall in a classic style, to give the room harmony and attractive aesthetics, then it is difficult to imagine something better than parquet.
Types of parquet installation
Moreover, parquet today is laid not only in the standard way, boards of the same color, one shape, but they make composite compositions, even combining parquet boards with other types of flooring, which allows you to highlight several zones and give the room expression, style, and brightness. This option is especially good for the living room.
It is better to choose parquet boards from coniferous wood; they are characterized by increased hardness, durability and excellent appearance. Experts say that conifer boards are in no way inferior in strength even to ceramic tiles.
There are also plenty of options for parquet patterns: checkerboard pattern, “deck”, wicker, herringbone, etc. The advantages here are attractive appearance, reliability, and versatility. The disadvantages include instability to high humidity and sudden temperature changes, in particular, if something very hot falls on the parquet, marks will undoubtedly remain.
Parquet
Laminate has absorbed many of the advantages of parquet: it is also an aesthetic floor covering, quite durable, adding a touch of coziness to the atmosphere. Being a compressed layer of wood waste covered with a film, laminate is much easier to install than parquet boards and is resistant to external aggressive factors. But it is believed that this material is less environmentally friendly.
Laying laminate flooring in Khrushchev
Tiles are good in spacious living rooms and kitchens. At the same time, large plates with an original pattern, of which a great variety have appeared recently, look very good. These tiles can create the perfect baroque style that inspires big ideas. Unlike parquet, tiles are absolutely resistant to moisture and temperature changes; if a hot iron falls on the tile, if it is of high quality, no problems will arise. But it is less comfortable than parquet and, moreover, slippery.
Ceramic tile
Linoleum
| Flooring | Prices, rub/m2 |
| Linoleum | 100-700 |
| Polyvinyl chloride coatings | On average from 1000 |
| Cork covering | On average from 1600 |
| Laminate | 170-1250 |
| Tile | 300-1500 |
| Carpets | 70-2000 |
| Parquet | 1000-2600 |
| Self-leveling floors | On average from 800-1000 |
Methods for restoring wooden floors in Khrushchev
Let us immediately outline the possible methods of repairing old plank floors so that you can decide which one is suitable for a particular case.
Note that in some cases it is not at all necessary to completely dismantle the plank covering. Very often, really high-quality lumber was used for flooring, well-processed and able to withstand decades of use.
Of course, it is important to take into account the regularity of floor maintenance during their long service life.
Recycled wooden floors in Khrushchev
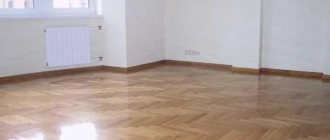
If the plank covering does not sag or creak, but the boards in it are slightly deformed, then it can simply be scraped, puttyed, sanded and painted or varnished again.
Partial replacement of boards in plank floors.
Laying plywood on top of an old plank floor
Plywood floors on joists
- plywood covering on the joists, which can then be covered with linoleum, laminate, parquet board or parquet;
— concrete screed followed by coating with any materials;
Dry screed can be very useful when it is necessary to level floors over old floors
- dry screeds using expanded clay mixture and gypsum fiber (GVL) floor slabs, which can then also be covered with almost any floor finishing coatings.
Source
Laying linoleum, laminate, cork or parquet
All types of flooring listed in the subtitle are laid either on a self-leveling screed or on a rough wooden floor. Sometimes it can be laid on a layer of heat and sound insulation made of EPS - extruded polystyrene foam. But in this case it is necessary to use a material with a bulk density of at least 35 - 50 kg/cubic. m.
The parquet is laid with glue or heated bitumen mastic. Less often, parquet is laid directly on a wooden subfloor. But at the same time, it is nailed with parquet nails in the tongue and groove area on the side of the die.
Before permanent gluing, linoleum must lie spread on the floor for at least several hours to allow wrinkles and folds to straighten out. If the linoleum has a pattern, then its joints are moved until the patterns match and cut with a sharp knife so that the patterns match.
When gluing, bubbles and un-glued areas are not allowed, since these places can later become places of tears under load, for example, when moving furniture.
The laminate is first laid dry and the pattern on the panels is adjusted. After this, it is carefully glued in accordance with the drawing.
Cork slabs, as well as linoleum, are glued to a carefully leveled finished floor.
The floor surface must be vacuumed to completely remove dust, not to mention debris. The humidity of the subfloor should be no more than 5 - 6%, and the room temperature + 22°C.
Skirting boards are attached only to the wall, but in no case to the floor.
Interlocking or tongue-and-groove cork panels are installed directly on the floor without gluing. The installation procedure is similar to laying laminate flooring.
If you carefully and slowly carry out the work described above in accordance with the instructions for using new materials and construction technologies, then the floor in your 60s Khrushchev house, inherited from your grandmother, will look like the floor in a country house. It will serve you and your children for decades.
Bogdan Natalia, Bogdan Vladimir
Why the floor creaks in Khrushchev-era apartment buildings and how to get rid of it
Residents of houses built in the 50s have a problem. The old boards begin to creak. The boards sit on joists that sit on top of concrete slabs.
The creaking sound becomes noticeable if you try to move quietly around the room or corridor at night, but eventually your family wakes up.
Why do floors creak?
It is necessary to analyze the occurrence of creaking floors. The reasons most likely lie in its design. In older apartments, the following options were used to a greater extent:
In the first and second variants, wooden beams with a thickness of 4 cm were used as the basis for laying the cladding material.
They were placed horizontally. It was precisely this space that, according to technology, allowed the floor to “breathe”, and it was also insulated in this way. The top layer of sheathing was secured with nails.
Over time, due to the deformation of the nails, the boards began to move away, sagging appeared and creaking began. The bonding density of the concrete and the floor may have weakened due to the loosening of the lag. Beginning of the form.
Causes
Let's figure out why floors squeak?
To do this, you need to understand how the floor structure in your apartment works. Popular designs come in two types.
- The first one consists of a floorboard laid on logs in increments of about 40 cm. The boards are secured with nails.
- Secondly, the joists contain a top layer of chipboard/plywood sheets.
Logs are bars about 4 centimeters thick, which are located horizontally and serve as the basis for the cladding.
They are not secured to the base in any way; they are held in place by being attached to the sheathing. The logs create a technological retreat from the concrete, which allows the floor to breathe and insulates it. Since the sheathing is nailed to the beams using regular nails, they become loose over time. The boards begin to sag and creak when walked. The logs themselves can also become loose and shake.
What should you do if the floor creaks?
There are many options for getting rid of the annoying, squeaking sound of floors. A radical method is to completely replace it. The new floor will last a long time. But this method will require large financial investments.
A simple solution could be floor screed. This repair can be carried out if the condition of the floor is satisfactory, except for some defects. With walking joists, additional fastening with dowels to the concrete is required.
For the top covering, you can choose linoleum, laminate, tile, however, what your choice will be on.
If you want to cost little to eliminate squeaks, we suggest covering it with plywood, securing it with self-tapping screws. If the log is in poor condition, replacement is required. As a result, you will simply renew the floor, which will begin to creak over time.
What can be done
Depending on the cause of the squeak, it can be eliminated in one of the following ways:
- Fill the gaps between the floorboards with foam. This will provide rigidity and the squeak will disappear. This is the simplest and most inexpensive method, but short-lived. Over time, the foam will crumble and the problem will return;
- if the creaking occurs due to gaps between the boards and beams, driving in wedges will help. They will make the connections tighter;
- using anchor bolts, you can reliably strengthen the floor by connecting through boards, beams and a concrete base;
- if, in addition to eliminating squeaks, you plan to update the floor surface, plywood would be the best solution. Thick sheets, 12 mm or more, must be firmly sewn to the boards using self-tapping screws. Such fastening sometimes completely eliminates the problem of a creaky floor, and linoleum or other covering can be laid on top of the plywood;
- loose logs are strengthened using long self-tapping screws that connect the boards and beams.
In cases where these measures do not help, the only option is to completely replace the floor.
Strengthening the old floor
If in your house the creaking comes only from the boards, a simple solution would be to secure them with self-tapping screws. Determine the height between the concrete floor and the floor. It is necessary to drill a hole in the floor and measure the depth using a wire.
Select self-tapping screws according to the length required so that they fit into the floor and do not stick out on the surface of the covering.
Determine the location where the logs are located. This can be seen from the nails nailed in a row, and also if you dismantle the baseboard against the wall, you can easily determine their location. Drill holes slightly smaller than the diameter of the screw and use a screwdriver to secure all the boards.
If the creaking does not go away when scrolling, for example, the joist is cracked, then blunt the end of the screws and tighten the screws to avoid destruction of the concrete.
This will serve as support and prevent the boards from sagging.
Do you know what to do first? Share your experience in the comments.
Source
Useful tips
The following recommendations will be helpful in troubleshooting the problem
- to secure the boards, use only anodized, not black, self-tapping screws;
- holes in the floor should be 1-2 mm smaller than the diameter of the fasteners;
- Before screwing in the fasteners, blunt the end of each self-tapping screw to prevent damage to the concrete flooring;
- to avoid severe shrinkage, instead of polyurethane foam, you can use epoxy or polymer glue to fill cracks;
- If there is a slight creaking, the cracks at the joints of the boards can be rubbed with a soft wax candle.
Repairing floors in Khrushchev: step-by-step instructions for repairing an old floor
Today, the secondary housing market offers many apartments in old Soviet urban buildings. They are often called “Khrushchevka” (series launched into mass construction in the fifties and sixties) and “Brezhnevka” (late sixties - seventies). They were built in huge numbers, with the hope of relieving the tension of the acute housing problem to the maximum. So the “at the forefront” was not the comfort of housing, but the “shaft” - millions of square meters put into operation annually.
Repair of floors in Khrushchev
A feature of most houses of this type is not only the small area of the rooms (the people were incredibly happy about this), but also plank floors. Interestingly, some of these coatings have survived even to this day. Naturally, during operation they have become seriously worn out, and most often require replacement or “deep restoration”. Such repairs to floors in Khrushchev can be done in different ways. They will be discussed in this publication.
Some design features of floors in Khrushchev
To begin with, it makes sense to say a few words about the structure of the floors in Khrushchev buildings. It’s just that some owners are afraid to decide on repair work only out of ignorance of what can await them after dismantling the plank covering.
As a base for wooden floors, one of two options can be found - these are wooden interfloor beams, sheathed underneath with subfloor boards, or a concrete slab. It must be said that the floor on beams is still a phenomenon in “Khrushchev” buildings - an extremely rare one, characteristic of the earliest series, and there are practically no such houses left. So in the overwhelming majority of cases, you should expect to see the floor slab under the removed flooring.
Traditional layout of wooden floors
This is the picture that may appear before your eyes after removing the plank flooring in a Khrushchev building.
The design of floors on joists is a fairly rational option, as it allows for sound insulation or the installation of modern insulating material. That is why the owners of “Khrushchev” buildings are in no hurry to abandon old plank floors in favor of concrete screeds, of course, if the former are not subject to complete dismantling due to complete disrepair. In some cases, floor boards are dismantled only in order to lay sound and/or heat insulating material between the joists and solve the problem with squeaks. That is, even old floorboards sometimes return to their place.
Installation of new boards
Before this stage we treat them with varnish. After complete drying, we install them on the joists. We fasten them tightly to each other.
When we re-lay the floors, we use dowels with parameters 10 x 1000. To improve the strength under the joists, we arrange supports every 50 cm. For this we use bars.
The positions of the lags in relation to the boards are perpendicular. The interval between adjacent logs is 50 cm.
Next, we check them for evenness using threads. We stretch each thread. There should be a millimeter gap between it and the lag.
We fasten the boards with self-tapping screws 6 cm long if the material density is 3.5 cm.
At the joint areas between the boards we keep tiny gaps. This prevents squeaking.
The final stage is laying the flooring. Its choice is made by clients based on their preferences.
When we carry out the indicated operations to re-lay the floors in a Khrushchev-type apartment, we usually end up laying linoleum. This option is chosen most often.
Methods for restoring wooden floors in Khrushchev
Let us immediately outline the possible methods of repairing old plank floors so that you can decide which one is suitable for a particular case.
Note that in some cases it is not at all necessary to completely dismantle the plank covering. Very often, really high-quality lumber was used for flooring, well-processed and able to withstand decades of use. Of course, it is important to take into account the regularity of maintenance of the floors during their long service life.
Recycled wooden floors in Khrushchev
Partial replacement of boards in plank floors.
Laying plywood on top of an old plank floor
Plywood floors on joists
- plywood covering on the joists, which can then be covered with linoleum, laminate, parquet board or parquet;
— concrete screed followed by coating with any materials;
Dry screed can be very useful when it is necessary to level floors over old floors
- dry screeds using expanded clay mixture and gypsum fiber (GVL) floor slabs, which can then also be covered with almost any floor finishing coatings.
Briefly about the main thing
A wooden floor creaks due to the nature of the material used. The wood is soft (crinkles), fibrous (flakes), afraid of water (rots), cracks under load and supports the development of fungus, mold, and is attractive to insects and rodents.
To extend the life of the floor without sound, you need to choose the right wood material with fasteners, treat the structural elements with protective compounds, and comply with the requirements of the installation technology.
To eliminate a squeak, it is necessary to determine the cause of its occurrence. There are several methods with varying effectiveness: local repairs, filling cracks and voids, local or complete replacement of structural elements.
Ratings 0
Cosmetic (surface) repair of plank coverings
This section will look at some of the ways to repair wood floors without completely dismantling them. Perhaps it will be discovered after an audit. that you are lucky, and, most likely, you will be able to get by with minimal financial investments and physical effort.
Surface scraping and damage repair
If the floors are strong and do not creak, but are covered with numerous layers of paint, and the boards are somewhat deformed, that is, they have bent or sagged along their length, then the situation can be corrected with the help of sanding.
If scraping is carried out using a tool specially designed for this purpose - a scraping machine, then the work of an experienced craftsman will take one day. This procedure will help get rid not only of old layers of paint, but also of uneven boards.
Floors after the first stage of sanding
After the floors are leveled, they should be thoroughly cleaned with a vacuum cleaner. The clean surface should be carefully inspected for cracks in the boards and excessively wide gaps between the floorboards. If any are found, they need to be repaired using ready-made wood putty or a self-made composition of PVA glue and small sawdust. Homemade putty should have the consistency of thick porridge.
Applying putty mixture to surface defects found on the floor.
The putty is applied using a metal or rubber spatula, so that the recesses in the wood are filled to the level of the main floor, and the surface is as level as possible.
Sealing wide gaps between boards
If wide gaps have formed between the boards, you cannot fill them with putty, as it will simply fall down. But to close them, you can use narrow slats or silicone tape.
Installing tape in the gap between the boards
Silicone is elastic, and the tape needs to be bent in half so that it forms a kind of channel in the gap, thanks to which the putty will stay at the desired level. The edges of the tape should be recessed into the gap and rest against its walls.
Making wooden wedges
Sometimes it is possible to eliminate squeaks simply by driving several wooden wedges between the wall and the parquet flooring. Using a hammer and mallet, specially prepared spacers are inserted into the cracks near the wall. In a Khrushchev apartment it may often be necessary to do some repairs yourself and the presence of a hammer in the apartment should be mandatory. Having made several wedges, you should hammer them in so that the surface of the wedge does not protrude above the floor level. In order for the spacers to last longer, the sides of the wedges must be lubricated with ordinary PVA glue. Wood glue is difficult to find, but PVA is always available.
Small cracks in the parquet boards can be sealed with homemade putty. To do this, you need small sawdust, which you can also make with your own hands, and the same PVA glue. A mixture of glue and sawdust allows you to make a small crack in the parquet invisible and eliminate unpleasant sound. It is most convenient to spread the mixture with a metal spatula.
Repairing very small cracks in parquet can be done using talc or graphite powder. By adding a little PVA to them and coating the crevice, you can get rid of the squeak.
If it turns out that the sound does not come from small cracks in the boards, but because of serious deficiencies in the arrangement of the joists, then making repairs will be much more difficult.
Major renovation of floors in Khrushchev
The overhaul of floors in a Khrushchev-era building includes all its types associated with the complete dismantling of the wooden covering and the creation of another one from new materials. It could be:
Cement-sand screed in Khrushchev
On our website, many publications are devoted to the arrangement of cement-sand screed , where the process is described in detail.
Installation of floors on joists
The technology for creating wooden floors on joists is also described in detail in the corresponding article.
And in our article we will further discuss in detail the option of repairing floors in a Khrushchev-era building using a “dry screed”.
But first, we recommend watching a video that showed the very difficult process of dismantling the old floor in a Khrushchev building. A wide variety of “surprises” may await you there.
Video: Dismantling an old wooden floor in a Khrushchev building
Major floor repairs in a Khrushchev-era building using a dry screed
In the example demonstrated, the craftsmen perform work in a small apartment, from the rooms of which it is difficult to remove large furniture, for example, a wardrobe. Therefore, we have to adapt to these circumstances. It took one working day to repair the floor in each room of the apartment.
The advantage of this technology is the following:
To work you will need to purchase the following materials:
Instead of expanded clay, granulated foam glass backfill can also be used. True, it is much more expensive.
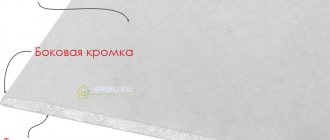
GVL - floor elements for laying a covering over dry backfill
The online calculator below will help you calculate the amount of materials for a dry screed.
Calculator for calculating materials for dry floor screed
A few nuances regarding the calculation of materials.
The maximum thickness of dry backfill is 80 mm. That is, taking into account the thickness of the GVL slabs, the floor rise is allowed up to 100 mm.
If more is needed, then an intermediate layer of gypsum fiber board is made, approximately in the center of the thickness of the backfill. For this layer there is no particular need to use the same floor elements with a thickness of 20 mm - just a sheet of gypsum fiber board with a thickness of 10 mm is enough.
When specifying the required dry screed thickness, the program will evaluate whether an additional layer is required and, if necessary, include it in the calculation. In this case, an additional data entry field will appear - for choosing the material for this layer. This will affect not only the amount of GVL, but also the total volume of backfill.
Complete replacement of flooring
Recommended when identifying a loss of properties of a wooden floor covering by more than sixty percent. In addition, major repairs of a wooden floor can extend its service life by several years; in the future, replacement is inevitable. It is often more cost-effective to replace the old flooring completely with a new one. The work procedure is as follows:
- The wooden floor covering is completely dismantled. Construction debris and other waste are removed from the room.
- An external inspection determines the condition of the subfloor (ceilings). Detected chips (potholes) are eliminated using plaster mixtures.
- A plastic film is laid on the surface of the base, the joints of which are secured with tape.
- Construction beacons are installed to ensure a smooth finishing surface.
- A solution consisting of one part sand, three parts cement and three parts expanded clay granules with water is poured onto the screed. Using the rule, distribute the mixture evenly over the floor surface. Work begins from the far corner towards the front door.
- Lighthouses are removed on the second or third day. The resulting seams are filled with mortar.
- After the surface has completely dried, a new floor covering is installed.
Laying laminated boards
The presented reference and methodological material allows us to determine possible options for restoring the floor covering of Khrushchev-era apartments at different levels of wear. Carry out repairs yourself, using the minimum necessary tools and high-quality materials. If you have any doubts about the reliability of the repaired floor covering, having the financial ability to carry out a complete replacement with modern samples yourself, radically changing the style of the room and its perception by others.
The video material presented below offers for viewing the option of replacing old flooring with modern samples.
Replacement of old flooring.
average rating
more than 0 ratings
Share link