To perform putty work correctly means to carry out this process taking into account all the subtleties. Any uneven surfaces: dents, bumps, potholes require special attention. Violation of process technology will further affect the quality and will cost additional money and frayed nerves.
There is enough advice on how to properly putty surfaces. Most of the controversy surrounds the rules of priming and the need to apply primer before each new layer of putty.
Primer of walls between layers of putty
Priming as the basis for all putty work
The main requirement for a putty surface is that it must be smooth, even and not crumble. If you apply ordinary gypsum putty over the previous dry layer, then instead of adhesion, the previous layer will absorb water from the second or any other subsequent layer. With all this, the quality of the surface will noticeably decrease. In the future, such a wall or ceiling will definitely begin to peel off and crumble.
Therefore, in the process of work, before each new layer, the second and each subsequent one, in an indispensable order, the putty surface must be primed :
- Between the loose lower layers of plaster and before the putties that follow them, a primer is applied, which has the ability to penetrate deeply into the thickness of the applied materials. This ensures adhesion within the two layers. The primer will not allow the putty to “slip” and crumble in the future. In addition, primer mixtures with the special property of deep penetration retain the loose previous layers of plaster.
- It is better to apply an acrylic-based primer to a layer of moderately moisture-absorbing putty. If it is not available, a deep penetration primer will do.
- For waterproof putties, it is better to use primers that are compatible with them. To find out which materials will be suitable, you need to look at the jar in which the building material was purchased. The putty container will indicate on what basis it is made.
- In some cases, it is necessary to apply the primer twice in order to create better adhesion.
READ Wall panels for bathroom interior decoration
to contents
Useful tips
Don't rush to pick up the tool and put the finishing touches on the repair. Once the basic steps are covered, it's time to consider additional recommendations from professionals.
If the color of your concrete wall is too dark, then before priming, apply putty to its surface in the lightest shade. A pure white putty color works well, then the gray concrete will not show through the wallpaper. In general, pay attention to the compatibility of the color of the wallpaper and the wall on which it will be glued, especially with thin wallpaper.
You can save on primer. To do this, purchase its dry mixtures, to which water is added. By observing the proportions, you can always use them effectively for many surfaces. Of course, their application requires more time and additional tools. It is much more convenient to use ready-made liquid compositions, but if you are undertaking repairs over a large area and are looking for cost-saving options, then dry primer mixtures will be one of these options.
Saving is appropriate, but sometimes it can play a cruel joke. Supermarkets may offer low prices on one type of primer, but the result will be that it will cover a smaller area than a higher priced mixture. In this case, you do not need to focus only on the size of the package, since much depends on the quality of the primer. The higher it is, the fewer layers of it will have to be applied to the wall to achieve a good result.
The plasterboard surface, no matter how ideal it may seem, must be treated with putty. The fact is that the next time you want to change the wallpaper, you can remove it only by partially tearing it off the drywall. Therefore, if you do not put putty on top of the drywall, it will have to be replaced along with the old wallpaper. Take all this into account in advance so that you don’t spend extra money, effort and time later;
One of the most favorable conditions for working with different types of primers is a temperature of no lower than 5 degrees and no higher than 30 degrees Celsius. Regarding air humidity, it should not be higher than 75%. For certain types of primer mixtures, the manufacturer has stated exceptions in this regard, but it is still better not to carry out priming outside these limits.
Do I need to prime each layer of putty?
To perform putty work correctly means to carry out this process taking into account all the subtleties. Any uneven surfaces: dents, bumps, potholes require special attention. Violation of process technology will further affect the quality and will cost additional money and frayed nerves.
There is enough advice on how to properly putty surfaces. Most of the controversy surrounds the rules of priming and the need to apply primer before each new layer of putty.
Why sand walls between coats? Do I need to prime each layer?
Application technique
How to prime walls before puttying? To obtain an ideal result, you should follow the following recommendations:
- The tool for covering walls with a primer is chosen from personal convenience; it can be either a wide brush or a roller.
Do I need to prime the walls before plaster or putty?
Compliance with primer application technology. the key to a good result and long-term preservation of the subsequent finishing coating.
Priming as the basis for all putty work
The main requirement for a putty surface is that it must be smooth, even and not crumble. If you apply ordinary gypsum putty over the previous dry layer, then instead of adhesion, the previous layer will absorb liquid from the second or any other subsequent one. In this case, the quality of the surface will noticeably decrease. In the future, such a wall or ceiling will certainly begin to peel off and crumble.
Therefore, during the work process, before each new layer, the second and each subsequent one, the putty surface must be primed:
- Between the loose lower layers of plaster and before the putties that follow them, a primer is applied, which has the ability to penetrate deeply into the thickness of the applied materials. This ensures adhesion within the two layers. The primer will not allow the putty to “slip” and crumble in the future. In addition, primer mixtures with the special property of deep penetration retain the loose previous layers of plaster.
- It is better to apply an acrylic-based primer to a layer of moderately moisture-absorbing putty. If it is not available, a deep penetration primer will do.
- For waterproof putties, it is better to use primers that are compatible with them. To find out which materials will be suitable, you need to look at the jar in which the building material was purchased. The putty container will indicate on what basis it is made.
- In some cases, it is necessary to apply the primer twice in order to create better adhesion.
to contents
Types of soil
The modern market offers a large number of different soil mixtures for use in construction. There are 3 main types:
- Concentrate.
- Dry mixture.
- Ready to use primer.
For independent use, acrylic-based primer is considered the best option. It is universal, so it is suitable for any surface. In addition, acrylic primer does not have an unpleasant strong odor, dries quickly and forms a durable surface.
In addition to acrylic, there are several other types of mixture:
- Alkyd. Ideal for wood processing as they have anti-corrosion properties. However, they are not suitable for drywall and plaster surfaces.
- Mineral. are characterized by a high rate of hardening (2-3 hours). Suitable for all surfaces.
- Quartz. form a rough surface, which is ideal for subsequent application of decorative plaster or paint.
The choice depends on personal preferences and requirements for the final result.
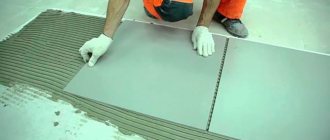
Types and features of putty mixtures
Using putty, you can eliminate unevenness and defects that have differences from 5 to 12 cm. These building materials differ from plasters in their composition: they do not contain those substances that allow filling large potholes, they are only suitable for leveling out minor defects and flaws.
After applying putty, the surfaces are smooth and even, and minor flaws must be eliminated by using sandpaper to sand the surface.
- glue and chalk (gypsum, cement) - they are sold in the form of dry mixtures, to which you need to add water before use;
- polymer fillers (these materials are more resistant to moisture) - diluted with water twice: the first time for swelling, the second to bring to the desired consistency.
In addition, there are finishing and leveling putties (first layer putties). The first two layers of putty are intended for rough work; with this layer all unevenness is leveled. Manufacturers of this type of building materials set the task for their products to be able to apply them in several layers.
It is necessary that with this method of carrying out work, the surface of the walls and ceiling does not crumble or crack. Finishing putties (putties for painting) are applied as the last layer on top of all the others.
Selection of plaster
Choose a material taking into account the use of the room, the type of base and finishing coating.
Types and purpose of plasters
| Type | Purpose |
| Plaster | Interior work, dry areas with normal temperature and humidity conditions: corridors, living rooms, halls, children's rooms, bedrooms. Choice of paint, wallpaper. |
| Cement, cement-lime | Premises with specific conditions: bathrooms, kitchens, unheated areas, facades, structures operated under atmospheric influences and in conditions of high humidity. Universal base for finishing. |
| Decorative, structural | Finishing work: original texture, relief, imitation of natural stone. |
| Special: waterproofing, acoustic, thermal insulation | Wet areas: basements, kitchens, bathrooms, cold rooms. Creating a soundproofing barrier and protection from external noise. Increased thermal insulation. |
Is it necessary to prime between layers of putty?
To perform putty work correctly means to carry out this process taking into account all the subtleties. Any uneven surfaces: dents, bumps, potholes require special attention. Violation of process technology will further affect the quality and will cost additional money and frayed nerves.
There is enough advice on how to properly putty surfaces. Most of the controversy surrounds the rules of priming and the need to apply primer before each new layer of putty.
Checking the quality of work
must during the work process . If you try to pick off a small piece of the coating and it peels off, it means that the putty work was carried out poorly and adhesion between the layers was not achieved.
To correct the situation, before applying the next leveling or finishing layer, you need to apply a deep penetration primer.
In addition to priming the surfaces to be puttied using factory-made and home-made mixtures, craftsmen can advise before each new stage of work to wet the surface with water once or twice. Thus, the layering of materials is carried out using the “wet” method of applying putty.
To use this advice and carry out putty work in this way, you need to have extensive professional experience. Beginners in this business who are trying to do finishing work with their own hands should not take on tasks of increased complexity.
Priming as the basis for all putty work
The plastered wall should be smooth and not crumble. This requirement is basic for any surface. You cannot apply simple gypsum putty to the previous dry layer. Otherwise, instead of adhesion, this coating will absorb liquid from the subsequent one.
At the same time, the quality of surface treatment will deteriorate. Then later the ceiling or wall will peel off greatly and crumble. Therefore, before each new coating, the treated area must be primed.
To do the job correctly, you should use step-by-step instructions:
- Apply a primer between the loose lower layers of plaster, penetrating deeply into the applied materials for better adhesion within the 2 coatings. The product prevents the putty from crumbling in the future. Deeply penetrating mixtures hold other plaster layers.
- If the surface moderately absorbs moisture, it is recommended to use an acrylic composition. If it is not available, use a deep penetration mixture.
- For waterproof putty, it is recommended to use a special primer. To understand which material is suitable, you need to read the composition of the product on the can.
- If necessary, apply an additional coat of primer. Sometimes it helps create better grip.
Types and features of putty mixtures
Before starting finishing work, many doubt whether the walls need to be primed. Beginners have a lot of questions, for example, why do you need to putty the surface? It is the basis of all repair work. The procedure is not complicated. Each defective area needs careful treatment. Therefore, it is important to understand whether it is necessary to prime between layers of putty.
First, you should find out the need to use a primer mixture, find out its properties and purpose. Special compositions affect the base of the structure and the applied coating. You don’t have to deal with all the intricacies if you entrust the repairs to a good craftsman. However, many people want to save money, which is why they carry out repair work themselves.
When purchasing a primer, it is useful to study the information on the packaging. There the manufacturer provides detailed information about the building material.
There are several characteristics that are common to all primer mixtures:
- increasing the coefficient of adhesion between coatings, ensuring retention of layers on the surface and improving the reliability of the finish;
- filling micropores and small cracks through polymerization of the composition, which prevents damage to the finish by moisture and protects against possible destruction;
- the formation of a thin film on the surface to reduce water absorption by materials and even laying of each new layer of putty.
The use of a primer mixture helps strengthen the working layer. It ensures dust removal of the surface, because the smallest particles bond with each other.
Additional components increase the cost of the mixture. To avoid unnecessary expenses, it is advisable to choose formulations with the desired properties.
There are various tips on how to putty surfaces. Most disputes are related to the rules of priming and the need to apply a special composition before each subsequent layer of putty. It allows you to get rid of irregularities with differences of 5-12 cm.
READ Attaching wooden slats to the wall
The main difference between putty and plaster is its composition. There are also no substances that fill large depressions. Any type of plaster is only suitable to hide minor flaws. After using the building material, the surfaces become smooth. To eliminate minor imperfections, you should use sandpaper for sanding.
They can be made from:
- chalk and glue - dry mixtures dissolved in water before use;
- polymers - such fillers are more moisture-resistant and are diluted with liquid twice: to swell and bring to the desired consistency.
Putty manufacturers produce products suitable for multi-layer application.
For what surfaces can it be used?
This type of putty is suitable for finishing surface filling. Sometimes you can use it to repair more significant surface defects, depending on the elements used in the composition. Can be used on many substrates, concrete, cement, plaster, gypsum, plasterboard sheets and others.
The possibility of use should be studied on the packaging of the specific mixture.
This type of putty is suitable for finishing surface filling.
Checking the quality of work
During finishing, it is worth checking the quality of each applied coating. You need to try to remove a small piece. If it peels off, the putty was applied incorrectly. Adhesion between the first, second and remaining layers was not achieved.
To correct the situation, before the next layer of putty it is necessary to use a primer that penetrates into the thickness of the coating. The method is equally suitable for leveling and finishing layers.
For high-quality finishing work, it is not enough to know whether it is necessary to prime between layers of putty. Often, craftsmen advise moistening the surface with water 2 times before each subsequent stage. This layering of materials is carried out by applying putty “wet”. For priming surfaces, you can use both factory-made and home-made compounds.
To correctly apply the “wet” application method in practice, a lot of experience is required. It is better for beginners to refuse it, because... This is a method of increased complexity. Otherwise, there is a risk of encountering a crumbled layer of putty.
Features and types of mixture for putty work
Using putty, you can remove unevenness and defects that have differences from 5 to 12 cm. These building materials are distinguished from plasters by their composition: they do not contain those substances that allow filling large potholes, they are suitable exclusively for leveling very small defects and flaws.
After applying putty, the surfaces are even and smooth, and small errors must be removed by using sanding paper to sand the surface.
Putties are made on the basis of:
- glue and chalk (gypsum, cement) - they are sold in the form of dry mixtures, to which you need to add water before use;
- polymer fillers (these materials are more resistant to moisture) - diluted with water 2 times: the first time for swelling, the second to bring to the required consistency.
Moreover, there are finishing putties and leveling putties (leveling putties). The first two layers of putty are intended for rough work; with this layer, all irregularities become smooth. Manufacturers of this type of construction materials set the challenge for their products to be able to be applied in several layers.
It is necessary that with this method of carrying out work, the surface of the ceiling and walls does not crumble or crack. Finishing putties (painting putties) are applied as a finishing layer on top of all others.
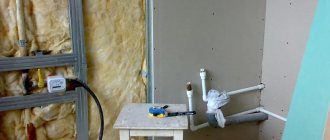
Surface preparation
Since the application of primer will take place for the purpose of subsequent puttying work, the preparation of the wall comes down to the following operations:
- clean the surface of all types of old finishes;
- remove dirt, wash away dust and, if necessary, degrease individual areas;
- dry the surface by ventilating the room or supplying air from a fan.
If the surface is plastered
Despite the increasing popularity of drywall, the plaster leveling method has been and remains number one. The reason is simple: it does not take up useful space from rooms that are often already too small. And then, covering walls with sheets of hypocardboard (see Cladding walls : how to do), although it is called the “dry” method, also includes wet processes.
- We will talk about them a little later, but for now we will consider the option when you need to make repairs without stripping the surfaces of the walls or ceiling to the base. This is only possible if layer still retains its strength, and its finishing coating requires updating.
- No matter how hard you try to remove it so as to preserve the smoothness of the covering layer of the old plaster, you will not succeed. And it doesn’t matter what decorative covering was on the walls: wallpaper or whitewash.
- When removing it, you will have to use a spatula, which means that in some places you will definitely get potholes and cracks will be exposed. To hide them and make the base smooth again, a new covering layer is applied, or this operation is also called puttying (see Puttying walls is easy: selection and proper execution of the job).
Note! When purchasing putty mixtures, you need to consider some nuances. For example, you can apply gypsum putty to cement plaster, but you cannot do the opposite. Gypsum screed has less strength and therefore cannot serve as a basis for applying cement-based putty. Therefore, if the base is gypsum, then you need to putty it with a gypsum mixture.
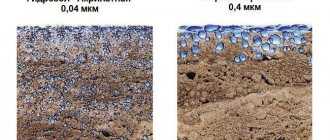
Universal primer suitable for all types of surfaces
- Now let's figure out how to select a primer for putty. Let’s say right away that the type of putty composition does not play a role here. What matters is the type of base that needs to be primed. Typically, the primers indicate which surfaces they can be applied to: wood, heavy concrete and brick, gypsum screeds, or cellular blocks (see Types of construction primers and their scope).
- If the label says o, which is what we see in the photo presented, it means that the composition can be used for all types of surfaces. The primer should be applied to the leveled base in one layer, and be sure to allow it to dry before starting to putty.
- Since it is not always possible to eliminate all potholes on the surface with one layer of putty, it is often necessary to apply several layers. In this regard, many people have the following question: “Is it necessary to prime between layers of putty?” We’ll answer right away: there is no such need – and we’ll explain why.
Important! Layers applied with the same solution have excellent adhesion and therefore do not require priming. It’s a different matter when plastering is performed with different compositions - first with the starting (base) composition, and then with the finishing one.
In these mixtures, the filler has a different fraction, and accordingly, screeds are obtained with different mechanical properties. In this case, priming between layers is necessary!
The putty - that is, the covering layer of plaster, is primed before starting the finishing of the surfaces, and this technological operation completes the preparatory process.
Do I need to prime the walls before puttying?
Applying primer is an important technological process for preparing walls for the next stage of finishing. The primer will provide:
- strengthening the surface layer of the enclosing structure;
- improving adhesion and reliable fastening of finishing materials;
- reduced absorbent properties of the surface, higher quality of finish.
In addition, most brands of soil contain antifungal additives that prevent the risk of mold. in more detail why you need to prime the walls here.
Almost all wall materials have a porous structure with small microcracks and small chips, which actively absorb any moisture and reduce adhesion. A wall primer for putty can fill these small voids, creating a kind of film layer on the surface associated with the internal structure of the wall.
Therefore, after applying and drying the primer, the putty will not lose moisture and the subsequent process of setting the material will ensure the best strength of the layer and its reliable fastening to the wall.
Necessary tool
To apply primer to walls you need to have:
- a stable stepladder or a durable lightweight table;
- a paint brush for finishing corners and a wide brush;
- spatula for removing dirt;
- container for preparing consumables.
The paint roller can be replaced with a long-handled paint roller. It may even be more convenient to work this way.
Soil consumption
The amount of primer used to treat the surface depends on the structural porosity of the wall . But the average recommended consumption is usually determined by the manufacturer and indicated on the packaging.
Here you can notice that high-quality soil may be required during repairs not only for impregnation of walls, but also for covering the ceiling, cement screed and floor, when installing slopes and other work.
READ How to raise the wall of a frame house alone
Therefore, read the amount indicated on the packaging of the material, multiply it by the surface area to be treated and add 10-15%. If the soil remains after, you can always use it in another place.
Checking the quality of work
The quality of each applied layer must be checked during the work process. If you try to pick off a small piece of the coating and it peels off, it means that the putty work was carried out poorly and adhesion between the layers was not achieved.
Do I need to Prime and Sand between coats of putty? Expert's answer.
To correct the situation, before applying the next leveling or finishing layer, you need to apply a deep penetration primer.
In addition to priming the surfaces to be puttied using factory-made and home-made mixtures, craftsmen can advise before each new stage of work to wet the surface with water once or twice. Thus, the layering of materials is carried out using the “wet” method of applying putty.
To use this advice and carry out putty work in this way, you need to have extensive professional experience. Beginners in this business who are trying to do finishing work with their own hands should not take on tasks of increased complexity.
Question that requires an understanding of technology
If you look at the range of offers on the construction market, at least half of it is occupied by all kinds of primers, putties and plasters. All these materials, if we put aside special decorative options, are intended to prepare the rough working surface for the main finishing.
Primer of drywall is often not carried out, but this is one of the few coatings that do without a special increase in adhesion
Moreover, the first two are in direct contact with the surface - primers and putties. Both are recommended for use, simultaneously and in that order. Although, as they say, there are no rules without exceptions.
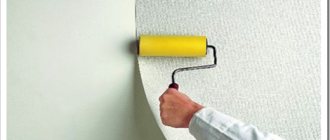
In the photo - one of the signs of a primer is a roller, although for this you can use a simpler one, but it absorbs liquid better, such a “decorative” one is already too much
But in order to manage these exceptions, it is necessary to accurately understand the purpose of each material - what it is intended for and what it is not intended for.
- increasing the adhesion of the main finishing material, paint, primarily with the working surface,
- strengthening the structure of the working surface material, thanks to deep penetration into it, which is especially important for old concrete, brick and wood,
- increasing protective antiseptic properties to combat microorganisms,
- increasing the water resistance characteristics of the entire created multilayer coating, as its component, but not an independent element for solving this problem.
The primer does not set itself the task at all:
- leveling the surface and removing deep cracks, joints and seams - suffice it to say that many primer options are simply deep-penetrating liquids, there are options with a denser consistency, but even they are not able to solve the problems of cracks, their working depths are 2 mm, and in in any case - no more than 15,
- increasing the mechanical strength of the surface being finished, resisting wind influences,
- increasing resistance to chemicals - this is basically impossible when using liquid primers and is difficult to achieve when using thicker ones, since the thickness still remains no more than 2-3 mm.
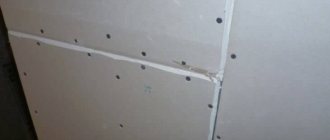
This is what the instructions for drywall require, it is mandatory putty and reinforcement of joints and fastener holes
- the fight against seams and cracks of any kind comes to the fore,
- putty is also designed to level the surface,
Helpful advice Let's not forget, according to the requirements of SNiP, a surface is considered flat if there are no bumps or depressions larger than 2 mm between any two points located at a distance of 2 meters from each other, they can easily be connected by a two-meter-long rule bar. Moreover, SNiP does not allow a difference in height of more than 8 mm between any two points at a distance of 4 meters.
In the future, the putty will be covered with a finishing coating, so the following security requirements are imposed on it:
- high adhesion,
- mechanical strength of the created finish,
- also water resistance, chemical resistance,
- resistance to microorganisms.
When working on ceilings, the question of whether it is necessary to prime before putty does not even arise, given that it helps to significantly reduce the consumption of material and the nerves of the master
Based on the listed assignments and non-assignments, the progress of work can be represented in the form of a general mowing line of behavior and nuances that can correct it.
In the vast majority of cases, the work on primer-putty looks like this:
- the surface is carefully examined and cleaned of mold and mildew,
- all weakly adhering fragments are removed, and this will be a reason to use a strengthening primer in the future,
- if possible, then everything is sanded - this cannot be done on brick, but on concrete we recommend using even mechanical grinding,
- the surface is coated with special antiseptic substances,
- Next, you need to wait until the entire surface is completely dry, and
- let's start with the primer, which must be laid in two layers, with the first one having a thicker consistency, if possible,
- be sure to wait until each layer is completely dry before continuing work, which can be done with a roller or wide brush,
- when the primer has dried and it’s time for the putty, which is already placed in one layer , but thicker, designed, if necessary, to meet the requirements of SNiP for the quality of the prepared surface.
The problem of whether it is necessary to prime between layers of putty arises on such heavy surfaces with large irregularities (photo “A”, see description in the text)
The given even general fishing line can bend and sometimes very significantly:
- Firstly, if you have such a problematic surface as in photo “A”.
That’s when you have to answer positively the question of whether it is necessary to prime after puttying, because the order will be as follows:
- you cannot overcome such irregularities in the traditional way,
- Therefore, first we wet and putty deep seams and cracks,
- then, after drying, we process the putty with sandpaper, and
- we proceed to the priming stage in 2 layers - the first layer will just go over the putty,
- When the primer has dried, we apply putty again over the entire area.
- Secondly, in principle there is no need for a primer if you have a plasterboard wall in front of you, then:
- carefully putty the seams and fastening holes,
- without allowing the putty to dry completely, reinforcing paper tape is placed on it to strengthen it (the inner and outer corners are even more subject to strengthening),
- the tape is puttied at least 2 cm further than its own width,
- when this primary putty has completely dried, it is sanded, and,
- They already putty the entire surface, perhaps using liquid putty, but then in 2 layers.
- Thirdly, if the work is carried out on metal that must be painted, then putty is not necessary:
- It’s enough just to apply, of course, an anti-corrosion primer, for which a spray from a can would be a very good option - also in two layers,
- and then paint it yourself.
Usually the thickness of the primer is much less, but to enhance the impact of the special one, you can the layer , then the brush comes into play
The price of correctly understanding the purpose of primer and putty is quite high - the health and integrity of the surface for many years. Be sure to understand the purpose of both materials, then there will never be any problems with their correct use.
Sources:
https://kraska.guru/gruntovki/rabota-s-gruntovkami/nuzhno-li-gruntovat-kazhdyj-sloj-shpaklevki.html https://1beton.info/shpaklevka/nuzhno-li-gruntovat-mezhdu-sloyami-shpaklevki https://ekobloc.ru/nuzhno-li-gruntovat-mezhdu-sloyami-shpaklevki/
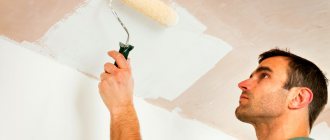
How to properly putty a ceiling for painting
Very often I am asked, is it necessary to putty a ceiling made of plasterboard?
For what? For what? And so on. Of course, it just needs to be painted. After all, a previously assembled ceiling structure requires finishing, which means that it also requires mandatory puttying of its plasterboard surface. Without this process, it is unlikely that you will be able to achieve a high-quality and competent renovation of your ceiling.
Preparatory work
In this article I will talk about my method of puttingtying the ceiling. I'll start with the set of tools that you will need for the job:
- One spatula is 12 cm wide. They are using putty.
- One spatula is 35 cm wide. It is actually needed for filling the main surface of joints on drywall.
- One spatula is 45 cm wide. It is convenient to apply the finishing layer with a wide spatula, distributing it over the entire surface of the ceiling.
- Grinding mesh and a grater under it. Personally, I use meshes 100, 150, 220. The size of the number in this case is inversely proportional to the fineness of the mesh. You can use other types of sanding mesh - it all depends on the type of putty you choose and your level of professionalism.
- Bath. Needed under primer and paint.
- Roller. Each master chooses a roller for himself - how much more convenient, faster, simpler, better quality, more reliable, etc. he works with.
- Swing brush. Optional, but may be useful.
- Drill. Or a hammer drill.
- Screwdriver. This will come in handy if there are loose screws sticking out of the ceiling. If there is such a problem, you can look for a spatula, additionally equipped with a screwdriver on the handle. These “2-in-1 spatulas” are used specifically for working with drywall sheets.
- Construction mixer.
- Planer for drywall. This tool is needed mainly during installation, but it will also be needed in cases where it was not done entirely correctly or the drywall sheets do not shine with quality. However, this will not be discussed. Yes, just in case.
- Knife with replaceable blades. It is used at the stage of preparation of joints, for surface correction, and cutting of reinforcing mesh.
- Containers. Two pieces are enough: one will contain the finishing putty, the other will contain water for washing equipment.