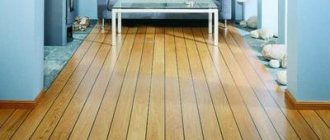
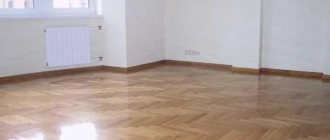
Wooden floors, for all their wonderful qualities, have a significant drawback: creaking. This problem usually occurs in old buildings, where the flooring was installed 10...30 years ago, but sometimes the floors begin to creak almost immediately after installation.
What should you do if the wooden floor in your apartment or house creaks? If the owners do not want to leave this phenomenon as a kind of security alarm, it is advisable to find the cause of the creaking and eliminate it.
Why do floors squeak?
- The most popular floor designs are floorboards laid on joists or plywood (chipboard).
- Typically, the sheathing is nailed to the beam with ordinary nails, which become loose over time. This leads to sagging of the boards and, as a result, to their creaking. And the logs can also become loose, which only adds to the creaking.
- Perhaps the floors are creaking due to the friction of the boards against each other - a wooden wedge driven between them will help.
- Creaking can be caused by poor drying of wood , which leads to cracks and cracks in it during operation. In this case, individual elements may rub against each other, producing a creaking sound.
- Excessive gaps between joists or excessively sagging floorboards that are too thin can also cause squeaking.
Creak
- If the varnish layer of the parquet is worn out, the adhesive layer is destroyed and the connection of the elements becomes less strong, creaking is inevitable.
- In the absence of a compensation gap, floors made of chipboard and panel parquet can become deformed and creak.
- Boards can dry out and reduce the degree of their fixation with nails, screws or self-tapping screws. Then a creak appears in these places.
- Deformation of the floor itself as a result of wear, swelling, etc.
Loose logs
If, after checking, it turns out that the joists were not installed entirely correctly, then in such cases, it is often necessary to re-construct the floor, be it in an apartment or a private house. There are cases when this problem arises in a specific place, it is easier to solve it - you just need to remove part of the sheathing and replace the pads under the joists or on them.
It is worth noting that the logs should not be fixed to the base, thus deteriorating the soundproofing qualities of the floor.
What can I do to prevent the floor from creaking?
- This can be done without spending significant money. The easiest and cheapest way is to use self-tapping screws , duplicating the fastenings with old nails if the floors creak. If everything is fine with the lags, this method should solve the squeaking problem.
- A more expensive method, but at the same time more reliable and durable, is to replace the floors. You can choose to install a new floor on joists or replace the floorboards with dry, semi-dry or wet screed.
- Please note that with a new screed you will increase the height of the floor and you will also have to replace the door. The advantages include the fact that now you can lay a porcelain stoneware covering on the screed, and also add a heating function.
- To maintain the previous level, you can compensate for the missing thickness with expanded clay or extruded polystyrene foam. Along the way, you will increase the level of noise and heat insulation. And, of course, it is necessary to take into account the permissible load values.
- Scrolling the floor with self-tapping screws is quite simple: determine the required length of the screw by drilling a hole and inserting a wire into it, and then, walking along the joists, screw in the screws.
The rescue
- You can also focus the length of the screws not on the joists, but on the concrete, just do not forget to blunt the tips of the screws so that their points do not destroy the concrete screed.
Errors that can make the squeak worse
Many craftsmen believe that it is easy to eliminate the creaking of a wooden floor; just nail it. This method will ensure silence for no more than a month or two. Then the sound appears again, but few people worry about it.
This is explained by the fact that in places on the floor where there is strong tension in the wooden joists, the nails swing and come out. Therefore, if there is little time for repairs, the best option would be to use long screws.
Another big mistake is made when chipboard sheets are laid on an old wooden floor.
Important! This solution will also help only for a while, but when the squeak returns, it will become even stronger, and correcting such an omission will be much more difficult.
The floors are creaking: what to do without opening it?
If your floors are squeaking, try one of the following:
- Try using a regular stearin or wax candle, covering the seams at the junction of adjacent floorboards with it.
- Check all the boards and find any that are loose . You need to drill a hole in it and, using a syringe, fill it with liquid cement mixture. Wait until the solution is absorbed and repeat the procedure.
- Drill small holes at a distance of half a meter from each other and secure the dowels in them with glue, sanding the caps that will protrude above it to the level of the floor.
- Inject polyurethane foam between the parquet boards. Having increased and hardened, it will make the floor more rigid, which will prevent squeaking.
- Use a special sealant designed for wood and pour it into the joints of the floorboards.
- Fasten the screws together at a distance of about 15 cm from each other - this will eliminate the creaking if it is caused by the floorboards rubbing against the joists.
- A more labor-intensive method is to lay plywood around the perimeter of the room (the thickness should be over 12 mm). Secure with self-tapping screws.
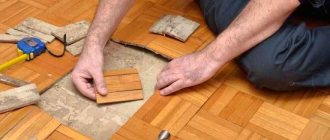
- Determine which boards are creaking and replace them, again, using self-tapping screws or simple nails.
Replace the boards
Do not forget that after removing the skip using any of the described methods, the floor must be finally treated. If there are any cracks left, cover them with mastic and then open them with varnish.
The chipboard floor is creaking: what to do?
- If there are no gaps between the wall and adjacent elements , you can use a circular saw to make the gaps wider. The main thing is to make sure that you do not touch any nails or screws.
- If the creaking is caused by insufficient thickness of the slabs , it is worth laying another layer. This method is acceptable for lag pitches up to 60 cm.
- Do floors squeak due to slab bending? You will have to dismantle the coating, and then use a circular saw to cut a square with sides of half a meter in the chipboard board. Insert the bars into it, restore the chipboard and secure it with the bars using self-tapping screws. Fill the seams and restore the coating.
Gaps between boards
If there are gaps between the boards that cause the floors to creak, what to do without disassembling them, in this case, is to fix them using wooden wedges.
Sequence of operations:
- plan wooden wedges from wood, determining the desired size;
- cover them with glue and hammer them into the gap, the wedges should fit tightly;
- After the glue has dried, the excess part of the wedges can be cut off flush with the base.
The disadvantage of this method is that the rail needs to be adjusted to the size of the slots each time, and this is a very long process.
It’s easier to use a cord instead of a rail:
- You will need to buy a braided cord with a synthetic base. Next, it is impregnated with wood glue or PVA glue, and using a core or punch, the cord is driven between the boards to about half their thickness.
- The upper part of the cracks is filled with homemade putty, which includes sawdust and PVA glue. It should have a paste-like consistency.
- The putty should be applied with a slight excess so that after drying, the excess can be cut off flush with the main floor. When replacing the floor in a Khrushchev building with your own hands, slightly different methods are used.
Wooden floor creaks: what to do?
- If the creaking occurs as a result of the boards drying out , try filling the gaps with talcum powder or graphite powder. You can drive wedges in there and then putty them.
Is the house too damp and is that why the floors are creaking? Dismantle them and cover the logs with roofing felt, placing it on the walls. Dry floorboards that are not rotten and treat them with an antiseptic.
- If the materials of the beams and boards are different, try laying them with a damper layer.
- If only one floorboard squeaks, drill a hole where the squeak comes from and squeeze foam into it.
Laminate floor creaks
- This can happen if the base under the laminate is uneven. Therefore, before laying the laminate, you need to make sure that there are no holes or bumps in the base. If the floor still creaks, you need to remove the panels in this place and remove the unevenness with cement mortar.
- Check the thickness of the substrate - it should not exceed 3 cm. Otherwise, it will have to be replaced with a less thick one.
- If between the wall and the laminate (about 7 mm), noise may occur and the floors may begin to creak . The reason is that the laminate will rest against the baseboard or wall. It is necessary to remove the plinth, trim the edges of the laminate, creating free space between the wall and the laminate, and then restore the plinth.
- Changes in humidity in the room are another reason. Here the weather itself will come to the rescue, since in this case the appearance of a squeak depends on the change of seasons, weather conditions, damp or dry atmosphere, etc.
- Debris on the surface when laying laminate flooring can cause crunching. The ingress of dust and sand into the joints of panels, and even into the screed, almost always leads to similar consequences. Therefore, before laying the laminate, the surface must be thoroughly cleaned. Otherwise, you will have to dismantle the creaking areas, re-fill with cement, level, dry, prime and clean.
- also creaks due to locks of different sizes Only a complete change of coating will help here. So don't skimp on quality.
Poor quality laminate needs to be replaced
- Creaking may occur due to pressure in the place where the elements of the laminate locks are connected. If you purchased laminate from a guaranteed manufacturer, you should wait a couple of months - perhaps it is simply “grinding in” to the surface of the base. In addition, the presence of the necessary gaps near the walls is also important.
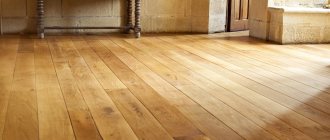
Parquet floor creaks
- Floors can creak due to periodic moisture, which causes the planks to swell and lag behind the base. The reason may be a mechanical impact leading to a crack, breakage of a ridge or groove, non-compliance with the size or lack of a gap between the wall and the coating, or laying directly on the screed.
- If only a few planks are creaking , it is enough to pour PVA glue or wax under each one, having previously melted it. This can be done using a syringe through drilled holes. If the problem is with a significant part of the planks, they need to be replaced by removing, cleaning off the old mastic and laying a new plank on a layer of fresh mastic.
Needs to be filled with glue
- If there is a wooden covering under the parquet, the planks should be secured with nails.
- A completely creaky floor can only be saved by complete re-laying, which is best left to specialists.
Preventive actions
Let's consider what must be taken into account at the stage of assembling the floor covering to prevent the occurrence of squeaking. Knowing the reasons for this unpleasant phenomenon, several main points can be highlighted:
- the wood must be dry (acceptable humidity is about 12%);
- the pitch between the lags is selected correctly, while for furniture the recommended values are reduced by 50-100 mm (the tables show examples with average values);
Log device Source stpulscen.ru
| Room length (m) | Cross section of timber (mm) |
| 2 | 60*110 |
| 3 | 80*150 |
| 4 | 100*180 |
| 5 | 150*200 |
| 6 | 180*220 |
| Board thickness (mm) | Step between bars (mm) |
| 20 | 300 |
| 24 | 400 |
| 30 | 500 |
| 35 | 600 |
| 40 | 700 |
| 45 | 800 |
| 50 | 1000 |
- the work site is completely cleared of debris and treated with compounds against possible destructive factors (moisture, fungus, insects);
- logs, boards, plywood and other wood materials must be impregnated with antiseptic agents and completely dried;
- During installation, the horizontal and vertical levels are strictly observed (if a stepped structure is being constructed).
Installation of timber is carried out only on the edge. This will ensure greater rigidity of the sheathing. To fix the elements of the floor structure, you can use galvanized nails (preferably with a twisted leg), but wood screws can handle the loads longer due to the threads with a relatively wide and deep pitch (when compared with universal ones).
You can attach logs to the log using corners. The concrete base must be covered with waterproofing material; the timber should not reach the walls by 30-40 mm. It is recommended to lay the sheathing on the monolith using supports to prevent direct contact. Hardware with dowels are used as fasteners, which are immersed into the monolith to a depth of about 40 mm. If there is only soil under the floor, then it is necessary to mount support pillars, for example, made of brick. Roofing felt is used as a gasket here.
Special supports for joists Source plasticpedestal.com
See also: Catalog of companies that specialize in home repair and reconstruction work
New floors squeak
- If new floors squeak, in this case you should re-read all the above tips and, depending on the material from which the floor is made and the factors leading to the squeak, try to find the reason.
- Perhaps the whole point is that you chose “cheaper” materials and craftsmen when laying? Then you will have to pay twice and spend money on quality material.
Even new floors can creak.
Remember that when installing, you must take care to fulfill all the requirements for both the wood and the metal connecting it, because these are two different materials, each with its own load limits, permissible temperature and humidity. Preparation of the base is no less important - the correct installation of it largely guarantees the absence of squeaking in the future.