Before laying the finishing floor covering when renovating an apartment, it is necessary to prepare the base. The service life of the floor in the future will depend on this.
The base must be made strong and absolutely level. Self-leveling flooring is fully consistent with these qualities; it is a self-flowing and quick-hardening mixture.
If desired, everyone can fill a self-leveling floor with their own hands, regardless of the manufacturer, the technology is almost the same for everyone.
Self-leveling floors can be poured onto concrete, wood, metal and other substrates. After complete drying, ceramic tiles, laminate, carpet and other floor coverings can be laid on it.
Pros and cons of concrete floors
In multi-storey new buildings, reinforced concrete floor slabs serve as the basis for the floors.
In private two- and three-story houses this is not such a strict rule. But the popularity of the technology is obvious. Flooring made of reinforced concrete slabs has a number of advantages. First of all, it is durability. Reinforced concrete, often with prestressed reinforcement, provides reliable flooring. Thanks to the air-filled cylindrical voids of the slab, it provides a comfortable level of thermal and sound permeability. With careful installation, the floor and ceiling come out smooth and suitable for final processing.
Such ceilings are installed using a crane. The slabs are laid on load-bearing walls or columns of a reinforced concrete frame. A cement-sand screed is poured over the floors. Ceiling seams are puttied.
The advantage of this type of floors is that they serve as a universal basis for final finishing of any type. The variety is very great:
- from laying linoleum to type-setting parquet on a subfloor lying on joists;
- from painting the ceiling with water-based emulsion to stretch ceilings with designer lamps.
Pure concrete floors are rarely installed in private homes. An exception may be a painted concrete screed in the basement. There are no strict requirements for coating, especially if you do not install waterproofing.
Repair of linoleum, carpet, stone coverings
Repairing the floor in an apartment with your own hands is carried out in stages as follows:
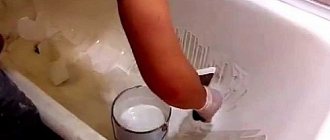
- The most common defects in linoleum can be swelling, cracks, peeling or tears. Such problems can be easily solved like this:
- using special glue, which should be drawn into a syringe and injected under the damaged area;
- then place a weight on this part of the floor and allow time for the glue to dry completely;
- if the damage to the coating is significant, then in this case the sections are replaced with new ones.
- In order to repair defective areas of carpet flooring, you need to have spare parts:
- the damaged area is cut out and a patch is put in its place. It is attached using double-sided tape or glue;
- to prevent the edges of the patch from unraveling, they are pre-treated with latex glue;
- Before cutting and gluing the patch, it is worth considering the pattern, as well as the direction of the pile.
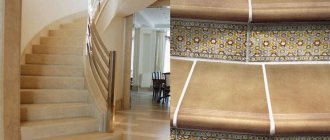
- In order to give an aesthetic appearance to the stone flooring, the following series of actions are carried out:
- various cracks and chips can be easily removed by grinding the stone and then polishing it;
- polishing is performed with special chemicals that are rubbed into the stone and make the coating impervious to dirt;
- Such simple manipulations will help get rid of cracks up to 5 mm deep.
Flooring in a private home: what you need to know to make the right choice
The desire to equip your home with a durable and super-reliable floor haunts any private developer. In order to find out which floors are better in a private home, let’s briefly look at the characteristics of the most used structures. These floors can be wooden, concrete or formed on a screed base.
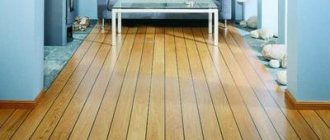
Wooden floors
Wood is known to retain heat well and is environmentally friendly. However, wood is not resistant to moisture, so there will be a need to use waterproofing materials.
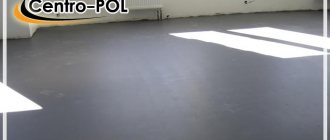
Concrete floors
Concrete floors in a private home are considered to be the most durable. But there is a drawback here too. Such a monolithic floor must be supplemented with careful insulation, since concrete itself is a very “cold” material.
Dry floor screed
A floor with a dry screed is relatively young. Dry floor screed has excellent thermal insulation; the main thing is to lay and compact all layers perfectly so that there are no distortions.
Clean coating from an environmental point of view
Wood floors come in different types.
When choosing, both price and prestige play a decisive role:
- Solid board is an expensive classic material that is often used for flooring. Perfect for a log house. Solid layers are always quite good.
- Parquet boards are made of wood and are equipped with grooves that make joining easier. The thickness of the standard material reaches 0.25 cm, and the length up to 200 cm.
- Parquet glue board is not much different from the previous version and is not inferior in quality. Has a long service life. Its top layer is usually made of valuable wood, its thickness can be up to 5 mm. Other layers are not so large.
- Regular parquet is a set of planks that have grooves. This material is ideally suited and is often used for creating exquisite floors.
Double wooden floor
If you are wondering how to make a wooden floor, then you are in luck, because we will look at this option in detail, since it is used most often.
If you want to do everything as efficiently and correctly as possible, then try to follow all the points of the instructions below as accurately as possible. So let's get started:
The first step is to lay the beams. They are placed on top of the installed pillars on the support beams. The beginning of any flooring construction begins with this.
Already on these installed parts you need to lay a subfloor made of boards, which should be fitted as tightly as possible to each other.
Absolutely any boards are suitable for this, as long as they have a thickness of two to four centimeters. It doesn’t matter what quality they are, but it is advisable to use coniferous wood material.
Pre-prepared boards are fastened with nails; they should be driven in at an angle of forty-five degrees. The distance from the edge should be at least twenty centimeters.
After the final installation of the subfloor, you need to begin laying the thermal insulation layer. To do this, use foam sheets or mineral wool mats.
On top of the laid layer you need to lay out a six-centimeter layer of expanded clay, and on top of it you need to apply a polymer film. She will be involved in vapor isolation.
Once you have completed all these processes, you can begin laying the finished floor. For this it is better to use high quality boards; they will be attached with nails.
Linoleum on the floor
Manufacturers produce natural and synthetic materials. Natural products are made from natural ingredients, and therefore they are quite expensive.
Linoleum of different colors, made on the basis of synthetic polymers, is affordable and has different wear resistance. As for installation, it does not require any special skills. It will be enough for the home craftsman to read the installation instructions and have the desire to do the work himself.
Types of floors for private houses, their advantages and disadvantages
Wood flooring and concrete are most often used as flooring. Currently, self-leveling floors are becoming popular and are often used to furnish one or more rooms. Which material is better to choose for your home? In order to make the right decision, it is necessary to consider the advantages and disadvantages of each type of coating.
Wooden covering
Wood attracts consumers with its environmental friendliness. Pros of wooden floors:
- when choosing high-quality material, there is no need for flooring;
- retain heat well;
- do not create a large load on the supporting structures of the building;
- a damaged board can be easily replaced with a new one;
- you can change the design, since wood lends itself well to staining.
When arranging wooden flooring, you need to take into account the construction features. If a private house does not have a basement floor, then it is better to build a double floor to place a layer of insulation between the rough and finishing coating. Wooden boards of lower quality are used as a rough layer. Wood floors have a number of disadvantages:
- for installation it is necessary to provide additional structures - logs, which makes installation labor-intensive;
- it is necessary to treat materials with fire retardants and special substances to reduce fire hazard and increase service life;
- with increased humidity in the room, the wood begins to rot;
- wood is susceptible to rodents and insects;
- When it dries out, cracks form and the boards crack.
Concrete floor
The popularity of concrete floors is due to their durability. The benefits also include:
- quick and easy installation;
- cheaper than wooden ones;
- moisture resistance;
- high strength;
- not interesting to rodents and insects;
- fire resistance.
However, concrete creates additional load on the foundation and supporting structures of a private house, so you need to make calculations first. For wooden cottages and the second floor, a concrete floor is not the best solution. Other disadvantages:
- if the installation technology is violated, the concrete may crack;
- filling requires the use of rules and special beacons to control the level;
- after pouring, you cannot immediately begin using the premises (it takes about a month for the surface to completely dry);
- In living rooms, concrete floors should not be left without a floor covering, as they are cold;
- Without a fine finish, the surface looks unattractive.
Self-leveling floor
Self-leveling floors attract consumers with their ability to give the room an unusual and attractive look. They are made from special mixtures that can self-level after application to the surface. Advantages:
- a smooth and beautiful floor is created;
- the materials used save the owner from the need to use another decorative coating for the floors;
- There are numerous design options;
- you can move on the floor within 12 hours after applying the mixture;
- coatings retain heat well.
The main disadvantage is the high cost. The disadvantages of the coating also include:
- the need for preliminary preparation of the concrete screed;
- special equipment is required for application;
- If the technology is violated, bubbles form on the surface.
Preparatory work
When choosing materials and methods of floor installation, you should first pay attention to the average soil moisture under the house. In some residential areas, logs are laid on the ground, with cut-off waterproofing laid under them. Such floors reliably last for several decades, but such dehydrated soils are quite rare.
Below we will consider a method of preparing the foundation, which is used almost everywhere in our area. The whole point of this method is to install a concrete screed on a waterproofing pad. In a country house, a concrete screed will serve two functions at once: to insulate the floor from moisture and to serve as a rigid foundation for a wooden floor.
When starting to lay out a concrete base for a wooden floor, you must make a small pit in the house and carefully compact its bottom. A layer of sand 20 mm thick or more must be poured into the hole. You can also add an additional layer of crushed stone under the sand, but this step is often skipped. After you have made the sand cushion, cover it with a cut-off waterproofing material, which can be used as cellophane film or roofing felt. It makes no sense to use vapor-permeable waterproofing, because its properties are not needed at this stage, and the overpayment will be significant.
Choosing a floor base and a method for constructing a good floor
Arranging a floor in a country cottage, in a country house or in your own home is a serious and responsible task that many try to solve on their own. However, without studying the features of the technology, it is problematic to give a clear answer on how to make a floor in a private house. It is important to think through not only design issues, but also decide on the method of installing the floor base and the materials used.
A serious and responsible task: arranging the floor in a country house
The most common in the private sector are the following self-installed flooring options:
- wood. The main advantages of wood flooring are environmental friendliness and increased thermal insulation characteristics. At the same time, wooden boards are characterized by increased hygroscopicity and require effective waterproofing protection. The wooden floor is laid on support beams located above the ground surface, on wooden beams resting on brick pedestals, as well as on planks laid on a concrete or cement screed. Building a wooden floor is not difficult. The plank base is durable, maintainable and attracts attention with its original texture. The correct selection of material for a plank base determines the performance characteristics. It is important to use dried wood, the moisture concentration of which does not exceed 12-14%. The use of boards with defects in the form of cracks, falling knots and chips is not allowed. The materials used are coniferous trees and hardwood. Impregnation of boards with antiseptic compounds ensures the durability of the structure;
Environmental friendliness and increased thermal insulation characteristics are the main advantages of wood flooring
- concrete. It surpasses all types of floor bases in terms of strength characteristics and service life. When making a concrete screed of increased height, the concrete mass is additionally reinforced with a reinforcement grid. It prevents cracking of the monolith. However, the concrete base has a serious drawback - increased thermal conductivity. To ensure a comfortable temperature of the concrete floor and reduce heat loss, be sure to lay insulation in the form of granulated expanded clay, polystyrene foam or extruded polystyrene foam. A waterproofing material is placed on top of the insulating layer, and then the concrete mixture is poured. It is important to use a fresh concrete solution made from Portland cement grade M400 and higher. To improve the appearance and increase thermal insulation, a concrete base is combined with a wooden one;
- floor base in the form of a dry screed. This type of floor has gained popularity relatively recently and is a progressive solution in the construction industry. A dry screed is also called a loose floor or a floating floor structure. This type of base attracts with its ease of formation and accelerated pace of work. Dry screed is performed on a planned base, which is waterproofed and then logs are laid. Fine expanded clay, slag or sifted sand are poured into the space between the joists. Then you need to pull off the bulk composition and distribute it evenly over the entire area. At the final stage of dry screed construction, OSB floor boards are laid or sheet plywood is installed. Floor screed with expanded clay is durable and prevents heat loss.
When choosing installation methods and material for the future floor, you should study the design features of the floor base, as well as analyze its advantages and weaknesses.
All types of flooring subfloors are superior to concrete flooring
Nuances of choice
Laminate consists of boards 0.6-1.2 cm thick.
Usually their width is 200 mm, and their length is in the range of 100-150 cm. The ends of each product have special locks for assembly into a single monolithic surface. This multi-layer flooring consists of the following main layers:
If you are doing the renovation yourself and decide to lay laminate flooring, it is better to choose high-quality products. The quality of the coating can be judged not only by looking at prices, but also by the thickness of the panel, the strength of the interlocking joints, the degree of moisture resistance and wear resistance.
To choose the right laminate thickness, you should know the following:
Panels with a thickness of 6 mm are a fairly flexible material that does not tolerate moisture and mechanical loads. The coating does not have very strong locks, so when making repairs, you should avoid purchasing such panels.
Products with a thickness of 7 are as flexible to me as the first option. However, when making repairs, it is worth remembering that the wooden or concrete floor for laying such panels will have to be carefully leveled in order to protect the lock from damage. The best option for DIY installation is panels 0.8 cm thick.
If you decide to choose such a laminate for the floor in your apartment, then you should not worry too much about the evenness of the base, since a reliable lock is not threatened by minor differences. It is enough to level the floor so that there are no significant deflections on it. Thicker panels (more than 8 mm thick) are also suitable for the floor in an apartment. However, the price of such coverage will be higher.
Tip: to make laying laminated boards on a wooden or concrete floor with your own hands easy, quick and high-quality, choose products with a thickness of 0.8 cm or more.
If you decide to renovate the entire apartment, then know that laminate can be either moisture-resistant or regular. The difference between them is fundamental.
Conventional panels have a base made of chipboard, fiberboard or MDF, and moisture-resistant laminate is made from HDF. However, such a coating should not be installed in a bathroom or toilet. Moisture-resistant panels can be chosen for the dining room, kitchen or hallway.
It is equally important to choose the right wear resistance class of the laminate:
Class 31 indicates low wear resistance of the product. These boards can be laid on concrete or wood floors in a bedroom or storage room. If you decide to make repairs using panels of class 31, then preference should be given to German panels. Products of class 32 are characterized by average wear resistance.
They can be used to level and cover the floor in the kitchen, hallway, bedroom or hallway. The price of such panels is slightly higher than that of the first option. Do-it-yourself installation of class 33 panels, which have high wear resistance, can be done on the floor in the hallway, office and other places with high traffic. However, this coating is not cheap, so it is rarely used in apartments.
Tip: it is impossible to distinguish the wear resistance class from a photo or appearance. This information should be found on the manufacturer's packaging.
We make floors in a private house using wood
Wooden floors are often preferred due to their attractive appearance and environmental friendliness of the material. To ensure the reliability of the plank floor, you should not only decide on the wood, but also choose a design option. Wood floors are constructed using various methods. In this case, logs made of wooden beams are an integral element of the structure.
The logs are laid on the following bases:
- beams fixed to the walls of the building;
- columnar supports made of bricks or blocks;
- concrete screed reinforced with reinforcement.
Depending on the customer’s wishes, builders construct a single-layer version of a wooden floor or form a two-layer wood base laid over a subfloor made of unedged boards or concrete. Let us dwell in detail on the technological aspects of the construction of various options for wooden floors.
Due to their attractive appearance, wooden floors are preferred
We lay floors with our own hands in a private house on the ground on beams
Beginner developers are interested in how to make floors in a house from scratch using wood. They mean the situation when the walls of the building have already been erected, the roof has been installed, and the floor base is ordinary soil.
So, the construction of a plank floor on a beam base located above the ground is carried out according to the following algorithm:
- A surface layer of soil 8-10 cm thick is removed.
- The stones are removed and the surface is ensured to be level.
- A sand-crushed stone mixture is poured onto the soil surface in a layer of 10-15 cm.
- The bedding is leveled, watered and compacted.
- A layer of waterproofing made of sheet roofing material or polyethylene is laid.
- Logs are laid ensuring an interval of 0.6-0.8 m between wooden beams.
- The joists are attached to the foundation walls using steel plates.
It is important to ensure that the joists are horizontal and that they are correctly adjusted to their level during installation. For this, wooden supports are used. A floor made of planed boards is installed on the prepared base.
Wooden floors are secured to joists
The following types of installation of the plank base are possible:
- with additional thermal insulation of the floor. The technology for arranging a wooden floor provides for the possibility of laying heat-insulating material in the space between the joists. Mineral wool, expanded clay granules or expanded polystyrene sheets are used as insulation. After insulation, finished floor boards are attached to the joists;
- without insulation of the wooden covering. With this method of installing the floor, no insulation is used. Boards are attached to the upper plane of the support beams, performing the functions of a subfloor. A second layer of finishing boards is laid on the rough base or a finishing coating in the form of OSB boards or moisture-resistant plywood is installed.
When carrying out work, gaps of 20-25 mm should be provided between the foundation base and the logs to compensate for temperature expansion.
How to make a warm wood floor on support pillars
Having decided to make a floor in a private house themselves, many people prefer a wooden structure formed on support posts. This installation method is used when it is necessary to raise the floor surface, eliminate distortions in the floor base, and also when the distance between the walls is increased. Indeed, in the absence of additional supports, there is a high probability of violation of the integrity of the joists under the influence of loads.
If it is necessary to raise the floor surface, use support posts
When constructing a wooden floor on additional concrete supports, follow the given procedure:
- Remove the fertile soil layer and level the surface.
- Determine the coordinates of the location of the support pillars.
- Extract the soil according to the markings and prepare pits for the support pipes.
- Fill the bottom of the pits with a mixture of sand and crushed stone.
- Level the bedding and compact it thoroughly.
- Assemble formwork of the required height around the perimeter of the pits.
- Place roofing felt inside the formwork for waterproofing.
- Assemble the reinforcement grid and place it in the formwork.
- Pour the concrete solution and compact it.
The concrete hardening process lasts 4 weeks. After the concrete has gained operational strength, dismantle the formwork and lay supports of the required height from bricks or blocks on the concrete surface. Lay roofing material on the surface of the formed pedestals, designed to protect wooden beams from ground moisture.
Floor on support pillars
When performing work, the following dimensions must be maintained:
- the interval between supports is 1-1.2 m;
- the distance from the foundation to the outer pedestals is 0.4 m;
- location of the base of the pits from the zero mark at the level of 0.4-0.5 m;
- thickness of crushed stone-sand cushion – 0.1-0.15 m;
- cross-section of columnar supports, amounting to 0.4 * 0.4 m or 0.5 * 0.5 m.
It is important to control the location of the upper plane of the supports at the same level. This will prevent distortions and create a flat floor. Remember that the technology allows the lags to be made in composites with the beams connected on the central support with an overlap of 0.15-0.2 m.
Tips for laying floorboards or plywood on a concrete base
Often a concrete or cement screed is used as a floor base. Massive interior items can be installed on a wooden floor formed on a base of concrete or cement. A plank, plywood or tiled floor, built on joists attached to concrete, reliably insulates the floor of the room and has an increased load capacity.
Concrete or cement screed is often used as a floor base
Follow the following procedure for constructing a wooden floor using a screed:
- Level the concrete base and seal the cracks.
- Fill with self-leveling mixture if necessary.
- After the mixture has hardened, lay down the waterproofing material.
- Mark the surface of the base for laying the lag.
- Make holes in the concrete and attach pins to secure the planks.
- Drill holes in the beams corresponding to the coordinates of the studs.
- Place the strips on the studs and check that they are level.
- Remove the parts of the studs that protrude beyond the top plane of the beams.
- Fill the space between the joists with sheet or granular insulation.
- Install a finishing covering of boards or plywood to the joists.
Do not forget to provide gaps to compensate for temperature deformations between the end plane of the joist and the walls of the room.
Calculation of mixture consumption
The consumption of self-leveling floor components is affected by the quality of the base - the worse it is leveled, the greater the consumption. High-quality application of primer in several layers also helps reduce the required materials.
The average universal value for calculating the consumption of dry mixture is 1.3-1.8 kg per 1 square meter of floor with a layer thickness of 1 mm.
A more accurate consumption can be found on the packaging of the dry mixture; it may vary depending on the type of floor and manufacturer.
Installation of wooden floors
When building a private house, many people prefer to make the floor out of wood. This desire to have high-quality wooden flooring under your feet is explained by the desire to use environmentally friendly materials, which include wood. In addition to being highly environmentally friendly, such a floor has a number of other advantages.
Wooden floors are easy to install and easy to repair during use. Due to the low thermal conductivity of the material, such a floor will retain heat inside the house without letting it out. Plank flooring made from high-quality wood has a long service life and an attractive “natural” appearance.
To make a floor in a private house, you need to choose the right wood. The choice of source materials should be based on the design features of the structure itself. The installation of a floor in a country house must necessarily include the presence of a subfloor that acts as an air gap. If such a layer is missing, the wooden floor will quickly become unusable due to exposure to moisture. In addition, for a good floor, it is important to have all the layers of the structure, including joists, rough flooring, hydro- and thermal insulation, and a finishing coating.
The floor in a private house is subject to significant mechanical loads, so for its construction it is necessary to choose wood with good technological characteristics. The boards must be well dried, the recommended moisture content is no more than 12%. Any chips or cracks on the surface of the material are not acceptable. Experts recommend giving preference to coniferous wood; pine, larch, fir, and cedar are suitable. To increase the service life of the future floor, all boards must be treated with an antiseptic and fire retardant.
Installation of a wooden floor begins with determining the locations for the support posts and their installation. The fertile layer of soil around the entire perimeter of the house is removed and removed, gravel is poured in its place, and sand is poured on top of it. Layers of gravel and sand must be compacted well. Waterproofing material is laid on the ends of the support pillars; most often, ordinary roofing felt is used for these purposes.
Backfilling with gravel.
Next, we make beams that need to be secured to the posts with metal corners. It is better to make floors in a private house with double insulation. Experts suggest first laying plywood sheets on the sides of the beams, and then placing mineral wool or other insulating material on them.
When the insulation layer is ready, you can begin laying the rough covering. The boards of this layer should fit well to each other; ordinary screws can be used to attach them to the beams. It is better to leave some distance between the flooring and the walls of the house: a gap of 1.5 cm can be considered the norm for this part of the floor. These gaps provide ventilation to the entire floor structure and protect the walls from expansion of the floor boards as they subsequently dry out.
A layer of vapor barrier made of polyethylene film with a thickness of 200 microns is laid on top of the subfloor. The joints of individual pieces of film must be taped, and the edges must be folded onto the walls to a height of about 20 cm - the height of the final coating. When the film is laid and secured, you can proceed to assembling the finished floor.
The finished floor is assembled from solid wood boards or plywood sheets. Plywood sheets are easier to attach, but in the end they don’t look very attractive. Therefore, if you want to leave wooden floors in your house, then it is best to immediately assemble the final covering from a tongue-and-groove board, and if you plan to cover it with decorative material, just secure plywood sheets. After assembling the finished floor, plank floors must be coated with varnish, which will not only protect the material from external influences of a mechanical and chemical nature, but will also emphasize the decorative qualities of natural wood.
Option #2. Parquet laying
According to GOST, the length of parquet planks should be from 21 cm to 49 cm, and the width - from 5 cm to 7.5 cm. The optimal thickness for a living room is considered to be 1.5-1.8 cm.
Parquet construction
GOST 862.1-85. Piece parquet. Technical conditions. File for download.
GOST 862.1-85
We also note that today parquet is also sold in the form of ready-made parquet panels, which are modules and fragments assembled onto a coniferous base.
Assembly of parquet panels
Preparing the base
Parquet can be laid either on plywood or directly on a concrete screed. The first option is preferable, since the plywood will serve as a stabilization layer, so this method of installation will be used. However, we note that when laying on a concrete base, a special elastic adhesive must be used, the base must be pre-sanded and coated with a primer in 2 stages.
If we talk about laying parquet boards over plywood, then there are 2 possible ways to level the surface.
Note! A leveled base is a prerequisite for high-quality installation of parquet flooring.
Cement strainer
Laying parquet with plywood on a screed
The required thickness of the leveling screed is at least 4 cm, which will allow the dowels to be fixed. If the differences are too large, then the thickness of the layer will be correspondingly greater. The same applies to drying time. So, if it takes about 2 weeks for concrete 4 cm thick to completely dry, then with each additional centimeter another 1 week is added to this period. Further work can begin when the residual moisture level of the coating reaches at least 4% (otherwise the parquet boards, which have absorbed moisture, may ripple).
After drying, the evenness of the finished screed is checked. To do this, you can put a flat board 2 m long on it: the gaps between it and the surface should be no more than 2 mm.
Floor screed. Examination
To obtain a perfectly level base, you can use self-leveling mixtures, which is especially important when laying large parquet floors.
Lags
Laying on joists
They can significantly reduce the time spent on work. The logs can be boards (even not planed) 8-10 cm wide and 2.5-4 cm thick. It is important that the boards are well dried. Before installing these elements, a waterproofing layer is laid (often roofing felt is used) to prevent the wood from rotting.
The logs are fixed with post bolts, through which vertical adjustments to the position of the boards will subsequently be made. The step should be approximately 30 cm; if you make it large, the coating may sag. Sheets of plywood are attached on top of the finished frame.
Laying plywood on joists
Plywood floor on joists
Note! After preparing the rough base (regardless of the chosen method), you can begin the actual laying of the parquet.
Instructions
Stage 1. Plywood is laid on top of the finished base, which will make the structure more reliable. The sheets are attached with special glue and then nailed down (with screws of the appropriate length for joists or dowels for screeds).
The plywood itself, by the way, must be waterproof and have a thickness of 1-2 cm. Often the thickness of the plywood backing is 0.5 cm thinner than parquet flooring.
Stage 2. The parquet needs to be glued to a plywood backing, and then additionally nailed at the ends. To do this, the surface is covered with a thin layer of two-component parquet glue (this must be done with a spatula), the latter is evenly distributed over it.
Laying without plywood
Stage 3. The parquet is glued in accordance with one of the possible schemes, after which it is additionally nailed with nails (the number of the latter depends on the length of the planks).
Herringbone pattern
Laying schemes
For example, when using the simplest “deck” scheme, the installation procedure takes from 7 to 10 days. The more complex the design, the longer the installation will take.
Laying parquet boards on a concrete floor
Artistic styling
Laying strip parquet
Stage 4. Upon completion of installation, you need to wait a week for the glue to completely dry. If the parquet flooring has absorbed moisture from the glue and become deformed, then it will have to be sanded.
Video - How to lay parquet
Further processing
Sanding can be done with drum or surface sanders, which can remove significant unevenness. After this, the surface is processed with a surface grinder to obtain a perfectly smooth coating.
Grinding
Sanding parquet with a flat sander
Then the floor covering is coated with oil or varnish in accordance with technical requirements. Varnish, which simultaneously has two functions - decorative and protective, must be applied in several layers (usually up to 5), periodically polishing each of them.
Varnishing parquet is necessary to protect it and preserve it for many years
Applying varnish
Laminate, tile and other types of flooring
Flooring is the exterior finish of a floor. They are needed to give the room an attractive look and additional insulation of the premises. Applying a topcoat to a wooden surface makes it more durable. As you can see in the photo, there are many options for flooring, available in different colors and textures. The table provides a brief description of the most popular of them.
| Name | Description | pros | Minuses |
| Laminate | Coating that imitates wooden boards. Consists of several layers: paper impregnated with resin or paraffin, HDF, decorative and protective film. Thickness – from 6 to 12 mm. |
|
|
| Linoleum | Flexible fabric produced in the form of rolls. Made from natural materials or polymers. |
|
|
| Ceramic tile | Plates based on baked clay. |
|
|
| Cork | It is made from cork tree bark in the form of slabs. |
|
|
| Wooden parquet | It has the form of plates that fit into the canvas. |
|
|
| Carpet covering | Rolled material with a fleecy surface. |
|
|
| Stone | Stone slabs of various shapes and sizes. |
|
|
Sheet vinyl flooring
Sheet vinyl, more commonly known as linoleum, is a resilient type of flooring that comes in a large roll and must be cut to fit the space.
The material is cut to fit the room
To lay such material, you should first make a floor template from old newspapers or other paper.
Where can you install vinyl flooring?
Vinyl sheeting is durable enough to be installed anywhere in the home, and its monolithic surface makes it susceptible to moisture.
Linoleum is practical and multi-purpose
How durable is this type of flooring?
There are three performance levels for vinyl sheeting with varying strength and comfort characteristics. The toughest ones feature Diamond 10 technology to resist scratches, chips and stains.
Equipped with Diamond 10 technology, durable for children's rooms
Which Vinyl Flooring Can You Choose?
Vinyl sheet is often transformed into an alternative type of flooring for homeowners who want the functionality of natural stone, ceramic tile, or durable wood. Modern printing technology allows the creation of realistic limestone, sandstone, slate, traditional hardwoods, exotic hardwoods, as well as alternative styles, patterned designs such as black and white checkerboard.
Any design can be applied to the coating
Flooring in a private home: what you need to know to make the right choice
The desire to equip your home with a durable and super-reliable floor haunts any private developer. In order to find out which floors are better in a private home, let’s briefly look at the characteristics of the most used structures. These floors can be wooden, concrete or formed on a screed base.
Wooden floors
Wood is known to retain heat well and is environmentally friendly. However, wood is not resistant to moisture, so there will be a need to use waterproofing materials.
Concrete floors
Concrete floors in a private home are considered to be the most durable. But there is a drawback here too. Such a monolithic floor must be supplemented with careful insulation, since concrete itself is a very “cold” material.
Dry floor screed
A floor with a dry screed is relatively young. Dry floor screed has excellent thermal insulation; the main thing is to lay and compact all layers perfectly so that there are no distortions.
Waterproofing
It is necessary to lay waterproofing material on the base. The latter can be durable polyethylene film or specialized materials, for example, penofol.
It is better to use penofol, as it also serves as sound insulation and also protects against harmful electromagnetic waves.
Concrete floors in a private house
Concrete floors in a private house have some complexity in their construction, so it is better to carry out all these steps with a person who has at least some experience working with this construction raw material. One of the disadvantages of such floors is labor-intensive dismantling. But such work is carried out extremely rarely, so they do not deserve special attention. Before you make a concrete floor in a private house, you need to collect important tools, such as: a concrete mixer, a shovel, buckets, a construction wheelbarrow, a trowel, a level, a rule and a wire brush. So, what does the process of concreting floors in a private house look like?
- First you need to level and compact the soil, removing any stones.
- We fill the entire area with sand mass, moisten it, press it and let it dry.
- Then we lay oilcloth (membrane) and insulation (for example, expanded polystyrene). Concrete floors in a private house may have a rough screed, which is formed on sand, in front of hydro- and heat-insulating pads.
- The reinforcing mesh is laid and filled with a well-mixed concrete solution, which will dry for at least a month. An important point: before pouring, it is necessary to form beacons from a metal profile, as shown in the photo.
- The flooded floor should be covered with plastic film to avoid rapid drying.
Kitchen floor tiles - practical advice on choosing
Stage 2. Gluing chintz
Cut the chintz fabric into pieces of the required length. To do this, you will need an assistant, with whom you can stretch the canvas from wall to wall and cut the required number of pieces.
There are a great variety of patterns and textures available - there is something suitable for every taste
Apply a thin layer of PVA or Bustilat glue to the base of the floor along the width of the canvas and wait until it dries for 10-15 minutes. After this, nail the edge of the chintz panel to the floor with small nails and begin gluing it, smoothing it along its entire length using a roller, brush or kitchen sponge. The movements should be directed from the center to the edges of the canvas in order to “drive out” air bubbles.
Cover the glued surface with a cotton cloth and iron it with a hot iron, with the temperature regulator set to ironing cotton.
The next parts of the canvas are glued in exactly the same way, matching the joints and adjusting the pattern.
In some cases, for example, in a small room with the correct shape, they resort to a simplified version of installing chintz floors. In this case, the chintz is not glued to the floor, but the fabric is stretched and nailed around the perimeter with small nails.
Requirements for floors in different types of rooms
When choosing the material and type of coating, it is necessary to take into account the purpose of the rooms. Requirements for floors in different rooms:
- Hallway. A large amount of dirt accumulates here. Floors are subject to high mechanical stress. You need to choose durable, moisture-resistant coatings that are easy to care for.
- Kitchen. The room is exposed to hot fumes, and dirt often gets on the kitchen floor. Coatings must be moisture resistant and easy to clean.
- Living rooms. For them, it is necessary to select environmentally friendly coatings that retain heat.
- Bath and toilet. These rooms have high humidity. Floors in bathrooms and toilets must be moisture-resistant and not deteriorate from exposure to household chemicals.
Vinyl tiles
Designer vinyl tile (LVT) is a type of flooring that is suitable for do-it-yourself projects. With easy installation, you can easily transform your room in a weekend. Like vinyl sheet, tile is durable, affordable and low-maintenance.
Vinyl tiles for DIY projects
Where can I install vinyl tiles?
This type of flooring can be installed on any flat, level surface except stairs, and is commonly used for kitchens, bathrooms, hallways, and playrooms.
Great option for any room
How durable is this type of flooring?
During normal home use, vinyl tiles hold up well against mechanical damage, including foot traffic, children, and fallen objects. Manufacturers of vinyl tiles provide a guarantee for their products from 5 to 10 years.
Option for a children's room
Available Vinyl Tiles Designs
Most vinyl tiles come in 30x30cm square slabs, and you can choose looks like stone tiles, porcelain tiles, engineered wood, classic geometric, checkerboard patterns, and more.
Vinyl boards can come in different colors. A non-staining shade is suitable for the kitchen.
How to make a floor using joists
Making floors in an apartment or house with your own hands using joists is much easier.
Making floors in an apartment or house with your own hands using joists is even easier, but only when the height of the ceilings allows. Many experts recommend this option, emphasizing the optimality for several reasons:
- This is a dry method that does not require screed;
- The increased speed of the entire procedure allows you to move on to finishing work without much time investment.
If you do everything correctly, your new flat floor will be ready in just a matter of days. But first, they putty, fill cracks, chips, etc. Then waterproofing and installation of logs. For this purpose, a beam with a height of up to 70 mm is used, set in a horizontal plane. The process will be facilitated by placing the two outer lags with stretched transverse threads - it is easier to align the intermediate elements using them without losing their height and evenness.
After preparing the sheathing, lay a layer of insulation and waterproofing between the joists, attached directly to the bars, and any material of your choice is placed on top of the structure. For example, if you want a wooden floor in your apartment, take boards, but for heated floors you will need to make a solid foundation:
How to properly screed a floor in an apartment?
- Plywood sheets;
- OSB;
- Boards.
The sheathing is adjusted for sheets and slabs so that each element covers three bars: one in the middle, two at the edge. The support must be strong, but the tile material should be laid out, slightly shifting it. This improves the distribution of the load; it will fall evenly over the entire area of the base. You will have to decide what and how much material to take yourself, calculating the area to be covered. It is convenient to install floors on joists in a new apartment, starting a renovation from scratch and in a room where the floors are pretty worn out. The option is extremely economical, especially when using expanded clay as a heat insulator, while the materials are lightweight, which means there will be no extra weight on the floors.
But there are a number of points that must be fulfilled:
- The tree is coated with an antiseptic;
- The top side of the plywood is coated with hot drying oil so that the base always remains dry;
- Fastening with self-tapping screws along the joists will ensure strength;
- The joints are sealed with dry construction tape and puttied.
Important! If you want to make a solid floor, you can lay plywood in 2 layers, but in this case, self-tapping screws and glue are used for the top sheets. Now the coating is ready for final finishing and you can lay parquet, laminate, carpet or tiles. To make the process even clearer, watch the video.
Is there a need for a screed?
Most are sure that the floor screed is the part of the floor that is solely responsible for the evenness of the surface, but in fact the screed is responsible for various criteria. The main purpose of the floor screed:
- Load. The screed is also responsible for distributing the loads that appear on the surface of the floor covering. But she takes on the main load.
- Leveling the surface. The main purpose of the screed is considered to be leveling the base. This is necessary for unhindered laying of coatings. If the screed is uneven and finishing material is laid on it, it will soon deteriorate and become unsuitable for further use.
- Sound insulation, thermal insulation and waterproofing. It is the screed that significantly improves the quality of such factors.
- Hiding communications. It is easy to hide pipelines, underfloor heating systems and electrical wiring under the screed. Due to this characteristic, the interior of the room is not disturbed.
A screed is also used to raise the floor level to the required height.
And so we’ve figured out the types of screeds and why they are needed, now we’ll tell you how to do a floor screed with your own hands using step-by-step instructions.
Self-leveling floor coverings
Floors that contain a polymer are traditionally called poured floors. There are options when the polymer is mixed with traditional cement and sand. And there are entirely polymer materials.
Mixed types of poured floors include the so-called self-leveling ones. In addition to cement and sand, their composition includes a small amount of polymer plasticizer, which increases the fluidity of the solution. This allows the coating to form a perfectly horizontal surface without leveling, which is very convenient. Pour the self-leveling mixture in a more or less even layer over the entire room - and relax. The coating will spread on its own and form a smooth surface without blemishes. Such floors are becoming increasingly popular.
There are several types of polymer bulk mixtures:
- highly filled floor, which is especially durable;
- epoxy coating - resistant to mechanical and chemical influences;
- polyurethane flooring is very elastic, but does not tolerate contact with chemicals;
- methyl methacrylate from acrylic resins - hardens in just a couple of hours.
Polymer self-leveling floors are usually made in industrial or public buildings. They are very technologically advanced and allow you to fill huge rooms with an even, mirror-like layer without seams. It is very beautiful, especially if there is a large enough open space.
In a private city or country house, large open spaces are rare, and self-leveling floors do not look so impressive. A smooth, mirror-like surface subjectively looks slippery and cold. Therefore, self-leveling floors are used relatively rarely in private housing construction.
Video: a visual example of installing a subfloor
Wooden floor on the ground
A wooden floor is also installed on the ground. For this, there is a scheme, based on which you can draw up a work plan.
Approximate diagram of laying a wooden floor on the ground
- The soil in the underground must be compacted well, and a cushion of sand, gravel or medium-fraction crushed stone, 20 to 40 centimeters thick, placed on top of it, and then compacted again.
- Rigid waterproofing, for example, roofing felt, is laid on the compacted cushion. If desired, you can lay reinforcement mesh under it for greater strength. Waterproofing should extend to the walls at least 10 centimeters.
- For waterproofing, bricks or concrete blocks are placed on the mortar, which will subsequently become a support for the beams. The supports are placed in such a way that the beams are at a distance of 60 centimeters from each other (standard insulation width).
- The first layer of insulation is laid around the bricks - this can be 50÷100 mm polystyrene foam or mineral wool.
- Wooden beams are installed on bricks, or better yet, on concrete blocks, leveled, and secured with a corner.
- Between the laid beams, for greater insulation, you can additionally lay mineral wool slabs.
- A vapor barrier film is secured on top of the insulation.
- Then lay the floorboard, which is secured with nails carefully driven into its side.
- The board is laid at a distance of one to one and a half centimeters from the wall to ensure ventilation.
Wooden floor on concrete screed
When installing a floor on a concrete screed or slab, the logs can be laid directly on the concrete or, if you need to raise the floors to a small height of 10-20 centimeters, on threaded studs.
When laying floors on concrete, you cannot skimp on joists - they must be quite massive, then the floors will be reliable and non-creaky.
It should immediately be noted that with such a floor arrangement, it must be made of two layers, i.e. with the subfloor described above, otherwise it will be very cold.
- First, a preliminary marking of the location of the joists is made on the concrete surface. They should be installed at a distance of 60 centimeters, taking into account future insulation. Marking is done by marking a line with color.
- Next, marks are made on the broken lines at a distance of 30-40 centimeters.
- At these points, holes are drilled into which studs are installed with clamps located at approximately the same height from the floor - they will hold the beams.
- Holes are drilled in the beams themselves at a measured distance corresponding to the location of the studs mounted into the surface of the concrete, after which the beam is placed on the studs.
- Then, using a level, tighten the clamps in one direction or the other, bringing all the beams to an ideal horizontal level, controlling it with a level.
- The nuts are tightened on top of the studs, driving them into the prepared recess, and the excess part of the studs is cut off with a grinder.
- The next steps are the installation of the subfloor, insulation and laying of the finished floor.
Features of wooden flooring material
The first thing you need to start preparing for laying a wooden floor is the right wood. In addition to the fact that you should choose only dry, not rotten wood, you also need to decide on its variety. An important factor in resolving this issue will be your financial potential, since valuable wood costs a lot of money. You can also opt for a budget option that will serve you for decades.
| Floor board. Name, material, size | Price, rub./m2 |
| Floorboard Pine K1-2 (25×90) 1.8m | 250 |
| Floorboard Pine K1-2 (25×90) 1.0m | 250 |
| Floorboard Pine K1-2 (28×130) 1.8m | 290 |
| Floorboard Pine K1-2 (28×130) 2.0m | 480 |
| Floorboard Pine K1-2 (28×130) 6.0m | 480 |
| Floorboard Pine K1-2 (32×100) 5.4m | 570 |
| Floorboard Pine K1-2 (32×130) 5.85m | 570 |
| Floorboard Larch K2-3 (27×90) 5.4m | 460 |
| Floorboard Larch K2-3 (27×90) 5.1m | 460 |
| Floorboard Larch K2-3 (27×90) 4.8m | 460 |
| Floorboard Larch K1-2 (27×130) 3.0m | 560 |
| Floorboard Larch K1-2 (27×110) 3.0m | 560 |
| Heat-treated pine LUNAWOOD (Finland). Floor board (tongue and groove) 26x92 | 195 rub. /linear m |
| Europol (pine, 32 mm) | grade 0 (Extra) 970.56 rub/m2; grade 1 (Prima) 676.80 rub/m2; grade 2 (B) 460.00 rub/m2; grade 3 (C) 384.00 rub/m2; grade N/K (D) 301.76 rub/m2. |
The buyer is offered several types of wood to choose from. These are mainly beech, pine, ash, larch, spruce, and maple. Let's look at the characteristics of each of them.
| Wood type | Description |
| Ash | floorboards made from this type of wood will delight the owners of the house with their density and elasticity in use; but, despite the fact that it is treated with steam, it still remains susceptible to atmospheric phenomena; such a floor definitely needs a coating - it can be varnish or paint |
| Oak | the oak speaks for itself; Some castles still have oak floorboards dating back to the 14th century! This material is very durable, it is practically not subject to changes in temperature and humidity, and has several colors and textures. |
| Larch | Larch is one of the favorites among other types of wood that are used for wooden flooring; it is durable, water- and frost-resistant, and is not damaged by insects |
| Maple | lovers of unusual patterns on the floor often choose maple wood as a floor covering; Maple wood is also moisture-resistant and easy to process, so craftsmen like to cover maple floorboards with different types of paint or simply matte it to look like silk |
| Beech | beech is the main competitor for oak; despite its lower cost, it does not differ much in quality characteristics: durable, has a wide range of colors, is easy to paint, does not change its color after varnishing, imitates mahogany or walnut |
| Pine | pine flooring is by far the most affordable and therefore widespread; pine has medium density and a pleasant yellowish color; Parquet and floorboards are made from pine wood |
If you have decided on the type of wood, then you can move on to the next stage - its direct selection.
Choosing a technology for constructing a new screed
Insulating the room during renovation will reduce heating costs.
The basic requirements for screed for all floor coverings are evenness, reliability and durability. There may also be additional requirements for moisture resistance, insulation, and the possibility of laying communications in the underground space. There are several options. Each method has its own pros and cons, which must be taken into account when determining the technology for preparing the base.
Pouring wet (concrete) screed
Advantages:
- strength;
- durability;
- versatility.
Flaws:
- labor intensity of the process;
- heavy weight;
- severe contamination of premises;
- It takes time for the solution to harden.
Laying sheet materials on joists
Leveling the floor with chipboards
Advantages:
- easy leveling and adjustment of floor level;
- availability of space for laying communications;
- possibility of additional insulation and sound insulation.
Flaws:
- the height of the room decreases;
- Reliable waterproofing is required to prevent the lag from rotting.
Floating screed device
Advantages:
- ease of installation;
- absence of deformations during shrinkage of the building structure;
- additional shock-absorbing effect that increases walking comfort;
- high-quality insulation and sound insulation.
Flaws:
- low floor strength;
- significant change in room height.
It is recommended to lay a new ceramic tile floor in the bathroom on a concrete screed. Under laminate or linoleum, it is enough to level the flooring with plywood or OSB boards. The most comfortable and warm floor for a children's room will be carpet laid on a “floating” screed.
Installation of concrete screed
There is no strict thickness of the expanded clay layer, however, it must be at least 40 mm. It is worth noting that the larger the fraction, the thicker the expanded clay layer should be. The thickness also depends on the local climate, in some cases the thickness of such a layer can reach 100 mm. If you cannot decide on the thickness yourself, then use the universal size of 80 mm.
There is no need to dwell in detail on the construction of a concrete screed, because our website provides many articles about its installation. A solution made from sand and cement, or a ready-made mixture, is poured between the beacons installed directly on the expanded clay. Remember that it will take several weeks for the screed to dry completely. This base can last for decades; in addition, it extends the life of the floor itself.
What repairs and when to do them
Repairing a floor on your own is a rather complex, time-consuming and responsible process. First you need to understand the types of manipulations that will have to be carried out
To do this, it is important to assess the condition of the structure and decide what needs to be done: cosmetic or permanent. repair
Owners of new buildings have a floor with a ready-made and well-made screed. In this case, it will be possible to get by with cosmetic repairs: if necessary, fill in the leveling mixture and lay the floor covering.
An old apartment often requires capital. floor repair, especially if wood was used as a covering. Wooden floors have a limited service life; over time, the floorboards begin to creak or collapse when walked on. There can be no talk of cosmetically finishing a wood covering that has expired.
Types of floor repairs largely depend on the type of coating that will be used. There is a standard classification of coatings used in floor repairs. It includes such materials as parquet, laminate, ceramic tiles, linoleum, solid boards, stone coating, carpet, self-leveling floors.