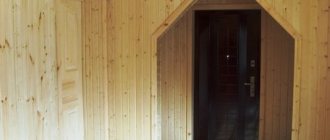
Wallpaper on the floor is one of the most amazing life hacks. And at the same time practical, despite the absurdity of the idea of wallpapering floors, and not just walls, ceilings and furniture facades. A floor finished with durable, high-quality wallpaper and varnished performs excellently in use; in addition, wallpaper on the floor can look much more interesting than any floor covering available on the market, since no other finishing material can compare with the variety of styles, patterns and color palette of wallpaper . Original, unique, beautiful and cheap - these are a few reasons to choose creative wallpaper for your floors. But here are a few arguments against: wallpaper on the floor is cheap only in terms of material, and that’s not a fact (high-quality odorless varnish is not cheap, and you need to varnish a lot, at least 3 times); this is incredibly labor-intensive and is only possible if the base of the floor is perfectly smooth.
For wallpapering, you need a flat and smooth floor without a single defect or piece of debris or dust, otherwise there will be no sexual aesthetics and all your work will go to waste. Whether to choose wallpaper as a floor finish under varnish - you need to think carefully; In any case, only people who take risks and are not afraid of failure ask themselves this question.
Advantages
Using wallpaper for flooring has several undeniable advantages:
- Low cost . The cost of wallpaper is much lower than laminate and parquet. In addition, there is no need to spend money on the services of specialists - you can do the work yourself.
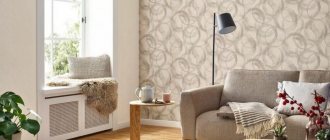
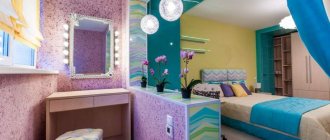
- Nice appearance. Correctly selected color and texture of wallpaper design allows you to harmoniously fit it into any room in the apartment. By choosing different designs, you can easily visually divide the room into several zones.
- Smooth surface . Varnish applied to the wallpaper will make the surface as smooth and pleasing to the eye as possible.
- Originality . The use of such a coating will create a unique atmosphere in any room.
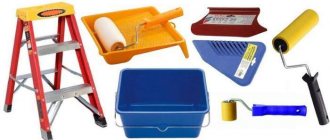
Required tools and materials
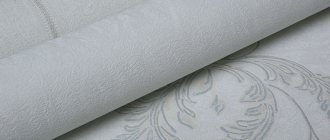
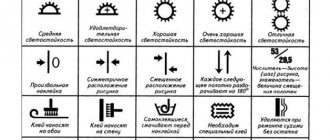
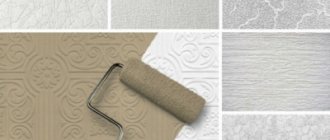
Only paper wallpaper without decorative elements on the surface is suitable for covering the floor. Non-woven or vinyl materials are not recommended, as they are airtight and may peel off during use.
Wallpaper patterns are selected based on your own taste and the overall decoration of the room. This can be a traditional imitation of wood or natural stone, as well as any ornaments, including 3D options.
To work you will also need:
- PVA glue;
- putty;
- spatulas - small and wide;
- sandpaper;
- several brushes for applying glue and varnish;
- rubber roller;
- dry rags;
- water based varnish.
Surface treatment
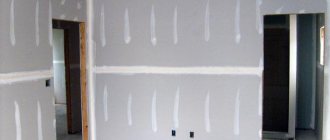
The disadvantage of wallpaper is that it reflects all the unevenness of the surface on which it is located. Therefore, you first need to carefully treat the floor. Make sure there are no uneven spots on it. Chipboard and fiberboard sheets are ideal for work. If you find cracks, crevices or gaps between the slabs, you need to putty them. Act quickly and remove excess putty in a timely manner, because once it dries, removing it will become problematic.
Important! Pay attention to protruding nails and creaking spots on the floor. The nails need to be driven in or removed, and self-tapping screws must be screwed into places that creak.
When the surface is ready, wash it thoroughly and treat it with an antiseptic composition - it will protect the floor from mold and mildew.
Photo wallpaper on the floor
The idea of covering floors with photo wallpaper is not new; many home craftsmen have already tried this budget-friendly method of creating a super-floor. Externally, photo wallpaper on the floor is difficult to distinguish from self-leveling flooring.
With skillful application and creative choice, photo wallpaper on the floor looks luxurious and can turn even a boring bathroom into a bright and stylish room.
Wallpapering
Having dealt with the surface, you can begin the actual work.
- Cut the wallpaper into pieces of the desired length, do not forget to leave a few centimeters of margin.
- Cover the material with panel varnish - it will strengthen the wallpaper and make it quite smooth.
- Treat the inside of the wallpaper with glue diluted with water; it is recommended to use PVA glue.
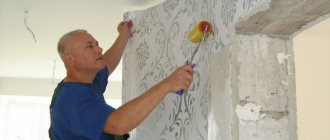
- Carefully stick the wallpaper so that it matches each other in design and creates an overall picture. Make sure that there are no air bubbles: they must be smoothed out with a spatula or an unnecessary rag.
Advice! If there is an air bubble in the middle of a piece of wallpaper that you cannot get rid of, do the following. Draw a little glue into the syringe and, piercing the bubble with the needle, inject it inside. Then gently iron and remove excess.
- After all the wallpaper has been pasted, treat it with panel varnish. You need 3 layers of varnish, each of which must dry completely.
Attention! Wallpaper on the floor must be varnished every 1.5-2 years. This procedure will avoid damage and keep the surface smooth.
Wallpapering a floor is an inexpensive and not too labor-intensive procedure. If you want to update your renovation for little money, we recommend turning to this option.
Wallpaper floor under varnish (1 video)
Key points when using wallpaper for the floor
To paste the floor surface, the coating must be perfectly smooth so that the wallpaper looks neat in the end result.
First, the concrete base is covered with fiberboard sheets, which visually level the entire surface.
Wooden boards for wallpaper are not suitable because the distance between them will show through and the material will lose its strength. Each sheet of material is thoroughly processed with a grinding machine to avoid burrs.
Steps to make paper floors
1. To make your floors look beautiful and original, be creative. Think in advance about the style and color combinations of the cover layer. To implement creative ideas, you can use various techniques:
You can tint the paper with tea, coffee, food coloring or watercolor, which does not smudge after drying. When the paper is smoothed out after crumpling, many veins appear, which create a beautiful texture for the floor covering.
How to combine wallpaper and floor
So that you can decorate the premises as best as possible, you need to know the basic rules that should be followed when decorating walls and floors:
- Dark wallpaper under a light floor is suitable in cases where the room is very spacious, but the ceiling must be light, otherwise the space will lose its shape.
- Light wallpaper on a light floor allows you to visually expand the space and give it additional volume; this option is suitable for small rooms and rooms with insufficient natural light. The floor may be dark, but the wallpaper and ceiling must be light.
- You should not use dark wallpaper under a dark floor, as this option makes the room gloomy. The only exception would be the use of this option in high rooms with very good natural light.
Let’s answer one more question: what comes first – the floor or the wallpaper? It is better, of course, to make the walls, since if the floor is ready, then when finishing the walls it will have to be covered, which is not very convenient.
A paper floor is not fantasy, but reality.
Making paper floors is quite labor-intensive, but the results are worth it. It is important to understand the technology and you can create an unusual coating that will have no analogues anywhere else. In an era of shortages of building materials and tight budgets, craftsmen came up with an original way of creating paper flooring.
What do you need for work?
Paper
To make a floor with your own hands, use craft paper (packaging) or paper wallpaper. Both materials are cheap and available. Used packaging bags can be collected for a certain period of time and then used. For wallpaper coverings, old products that have turned yellow and aged right in the rolls are suitable.
Kraft paper is used to create an imitation of natural stone. To do this, it is torn into large pieces, crushed, creating bizarre kinks. Before use, the pieces are placed under a weight to slightly straighten them.
Wallpaper is applied directly in strips from rolls, if the pattern allows. Sometimes canvases are combined by color or texture. Thick, smooth products with imitation wood patterns are suitable for flooring. The end result is a homemade laminate.
To fix paper fragments, you need PVA, which is used to glue furniture parts together. For 5-6 sq.m. the surface to be glued will need 1 kg. The glue is diluted with water 1:1.
Advice! To check the quality of the glue and purchase the optimal composition, take 1 package and check it on site with the wallpaper (packaging) that will be glued.
When using PVA, it is important to ensure that the paper adheres firmly and that there are no stains from bleed-through glue.
Varnish
The varnish fixes the paper picture and protects it from damage during use. To create the original coating, a colorless parquet composition is used. Nowadays, preference is given to water-based products. They do not emit a strong specific odor and dry faster. However, some craftsmen recommend using ship varnish. It provides the greatest reliability and durability of the coating.
stain
A paper floor is covered with stain to give it a certain color scheme and enhance the imitation of wood. The color of the pigment composition is chosen based on personal preferences and the desired result. Sometimes it is enough to buy colored varnish and not use stain.
Preparation
The plane to be pasted over must be perfectly flat and without the slightest flaws. On the surface of such a thin material, all irregularities will become very visible. Therefore, you will have to stock up on patience, materials and free time. In principle, the procedure is quite simple and boils down to obtaining a smooth and even surface. This can be done using different materials:
- Simple putty if the defects are minimal.
- Self-leveling building mixtures.
- Thick plywood or chipboard.
With putty compounds and self-leveling solutions, everything is approximately clear - there is a whole range of “wet” work to be done, which is not too complicated in essence, but requires a lot of time. With plywood or chipboard it is a little more difficult - you have to lay them so that the joints between the sheets are minimal and there are no height differences in these places. After installation, it is necessary to carefully treat all joints with putty and sand the surfaces with sandpaper.
What does it look like
In principle, it is impossible to show what you can do. Each decision is different and completely individual. However, several photo examples presented below can give a general idea of this method of finishing the floor and what the result could be.
Which floor paper to choose?
To construct paper floors, materials with different technical characteristics are used.
DIY wallpaper for floors
Be sure to choose paper wallpaper. The cheapest ones will do, the main thing is that the color matches the overall color scheme of the room. Floor coverings with floral or geometric patterns, images of flowers or the underwater world, and paintings with ethnographic motifs look great.
Paper waste for designer floors
Scraps of any paper products will be used: newspapers, magazines, notebooks, advertising materials.
Paper bags for a stylish floor
Quite a budget option - just buy a roll of wrapping paper or take several brown paper bags, which often accumulate in the house just in case.
Pasting instructions
In order for it to turn out beautifully and efficiently, you need to follow a certain sequence of actions.
- Surface preparation . It is necessary to remove all dust and uneven surfaces to maximize traction.
- Pasting wallpaper on the floor . All actions are performed as usual: a strip of wallpaper is smeared with glue, then applied to the floor. Be sure to smooth it with a roller or scraper when laying it to eliminate bubbles. Allow the coating to dry for about 2 days.
- Sand the wallpaper . Use fine-grained paper to carefully walk over the pasted surface, without pressing too hard.
- Wood stain . This is not a required step. It is used to enhance the depth of color or change the color of wallpaper.
- Prime . For this purpose, white NC primer is used. After drying, it is necessary to sand it a second time, removing paper fluff and other irregularities. Apply a second layer of NC.
- Cover with varnish . It is produced with EP parquet varnish in three layers. Experts recommend using an oil-based product at the last stage of varnishing.
Preparing the base for paper floors
Before starting work on arranging the floors, the old paper covering is removed. To obtain reliable and durable floors, certain requirements are imposed on the bases: • they must be smooth and have good adhesion; concrete, cement and plywood bases are considered the best; • skirting boards are removed; • if there are significant defects, the bases are puttied; the putty contains water-based panel varnish and chalk; • the smooth surface is not entirely suitable for ensuring reliable adhesion of the paper to the base, so it is subjected to light processing with a grinding machine; • before gluing paper layers, the surface is thoroughly cleaned.
DIY paper floors
In this article we will talk about such an unusual design solution as floors made of paper or wallpaper. Home renovation is a good opportunity to show your creativity. The variety of options for their manifestation is truly limitless, especially in your home or apartment, where you can do whatever your heart desires.
One of the ways to give your living space an original and impressive look is to install paper floors . Creating such floors is labor-intensive, but interesting and creative. The technology itself is similar to the method of creating self-leveling floors, only significantly less materials are spent.