Finishing ceilings and walls with clapboard, be it wood, plastic or metal, involves performing successive stages of work. By following the correct technological processes, you will receive high-quality and durable coating.
If you choose wooden materials, they are environmentally friendly and have a lot of useful properties, your home will be filled with a wonderful woody aroma. This is a chance to reconnect with nature and old traditions. Give warmth and comfort to your family and loved ones!
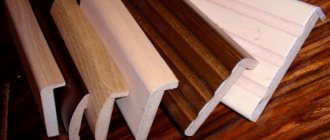
Classification of lining
Depending on the type of material from which the lining is made, it is divided into the following types.
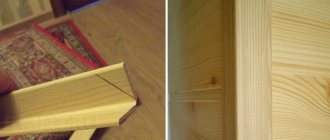
Wooden
This material has many subspecies, the difference of which is in the varieties and species of wood. It is environmentally friendly and suitable for framing any surfaces; it is often used for cladding partitions in apartments. Easy to install.
The only disadvantages include the need for pre-treatment and subsequent careful care.
Plastic
The plastic option saves your budget. Suitable for both walls and ceilings. It looks aesthetically pleasing and fits almost seamlessly.
The disadvantages of the material are its short service life. It fades in the sun and cracks in frost.
Metal
Such panels are made of aluminum and steel, which have an additional protective layer. The color scheme and texture can satisfy any buyer.
Aluminum products are designed to last quite a long time. Ideal for outdoor use. As for steel, if the integrity of the protective coating is compromised, corrosion processes will begin and the metal will rot.
What is the difference between lining and eurolining
Both the first and second options allow you to finish any surface with high quality. However, eurolining differs in some characteristics:
- Euromaterial is produced from other types of wood using other technological processes;
- has an elongated groove for fastening;
- it has other geometric parameters;
- products undergo higher quality drying and special processing;
- characterized by an additional ventilation function;
- has a system for removing accumulated moisture, which protects the wood from destructive processes (special grooves are made on the back side of the panel so as not to disturb the aesthetics of the wood);
- has a higher cost.
Preparatory stage
Before you begin attaching the lining to any wall, you should carefully prepare.
Processing of wooden products
Initial wood processing is very important and comes first:
- If you use coniferous wood, it is first degreased and the remaining tar stains are removed. Acetone works well for these manipulations. Then everything is wiped with a damp cloth and dried.
- To achieve the same shade of wood, treat it with a solution of oxalic acid and pharmaceutical peroxide.
- It is best to immediately repair existing flaws with wood putty.
- To preserve the natural texture and add richness to the shade, stain or similar special impregnations are ideal.
If you miss the moment of processing, clapboard-lined walls can bring a lot of trouble in the future! Chemical compositions, which is very important, protect against fungal infections and the activity of various insects that destroy the structure of the tree.
Preparing walls and ceilings
High-quality prepared walls and ceilings are the key to a successful outcome of the work and durability of the coating. Therefore, we proceed step by step:
- All surfaces are cleaned of dust and other contaminants; you can use both a home and industrial vacuum cleaner.
- Concrete and brick, in order to further prevent the proliferation of fungal colonies, are treated with antiseptic and water-repellent agents. Antibacterial and antipyrite (fireproof) solutions are suitable for wood surfaces.
- Waterproofing on walls is necessary to create a water barrier in houses such as log houses or other wooden materials. Others do not need such protection. A vapor barrier layer (roofing felt, polyethylene, foil) is immediately laid on concrete and brick surfaces. The vapor barrier is mounted on fixed and leveled strips measuring 15x30 mm. How they will be installed - vertically or horizontally - depends on which orientation you prefer for the lining.
On a note! If the lining for the walls will be located vertically, the sheathing is mounted horizontally, and the strips for the vapor barrier are already in a vertical position and vice versa.
The vapor barrier is secured using a stapler. Make sure that the material is not too stretched, otherwise when temperature changes it may sag and condensation will accumulate there.
Construction and renovation
Basically, lining is divided into two types:
A – lining of a traditional “European” profile (tongue and groove), and B – “American” profile (overlapping). American is convenient for external cladding. It has a wider and thicker overlap, which better prevents flowing water from penetrating inside, but it is more difficult to join along the length due to the fastening features. The joining of the ends outside the fastening to the posts (sheathing) will not be so strong.
The European profile, on the contrary, can be built up almost anywhere by tightly compressing the ends of the joint boards in the grooves with the lower and upper boards. This allows you to use the material more efficiently, reducing the remaining trim to a minimum.
In our country, “European” type lining is widespread, and American type is less common.
Using eurolining as an example, we will look at the various subtleties and possible pitfalls of working with this material. In fact, the handling of such varieties as Imitation timber, Blockhouse, will be similar.
Selection of lining in the store.
Eurolining is usually sold in plastic packages of various lengths and is divided into three categories A, B, C. There is also a fourth category, “extra”. The difference in cost between the first three categories is negligible. Extra costs an order of magnitude more.
However, in practice, the manufacturer’s subjective factor prevails when sorting, and you must be prepared for the fact that having bought category A lining, you will find that it is roughly and often unevenly trimmed, its surface is rough, and the exact dimensions and number of knots do not correspond to the declared standard. This is normal, in fact, you are buying a “pig in a poke.” These defects can be explained by the level of conscientiousness of a particular work shift, the degree of sharpening of the cutting element in the equipment and many other factors. Very often, on the front side (if it is outward) of the first lining in the pack, the inscriptions from the label are clearly imprinted:
In fact, you bought 10% less lining - you can’t put such a board in a visible place!
In fact, specimens that are completely impossible to put into action are extremely rare.
More serious defects can be detected through the packaging if it is transparent. These are chips along the grooves and longitudinal cracks at the ends. They are usually clearly visible. Such packages should be set aside. It is also important to pay attention to the conditions in which the lining is stored, whether it has gotten wet in the rain. If you have a lot to buy, then it makes sense to make a “test purchase” and then take everything from one batch if the quality is good.
In my practice, there have been cases when, for example, one company’s category A at the beginning of summer was much better than that of its closest competitors, and at the end of summer, vice versa. It’s like with food, it’s either rotten or not very good or good - you look at it when you buy it. The brand and the manufacturer don’t rule here!
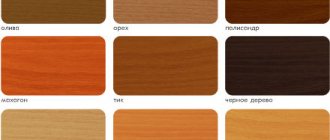
In addition to dividing the lining according to the quality of workmanship and wood defects, the lining differs in the type of wood itself. Standard lining is made from pine and spruce, and it is advisable to treat it with antiseptics. Lining made from aspen and linden is in demand for finishing paired rooms. It is even externally distinguished by a small number of knots and an even texture; it is much more expensive. Even more expensive is lining made from larch and other rare wood species.
Calculation of lining needs.
very roughly estimate the need for lining by the area to be sheathed, adjusted for scraps.
In reality, things are somewhat more complicated. It is necessary to take into account the actual dimensions of the planes that are to be sheathed, and combine this with the standard dimensions of the lining that is commercially available. By spending a little time on this, you can save a lot by reducing losses from scraps.
Let me give you an example.
Suppose you need to cover a wall 312 cm wide. Standard lining, 300 cm long, will be short. The next available size on the market is 400 cm. There are also 200, 210 and 270 cm. What and how much to buy? As one of the options for patterning a wall, we can offer the following diagram:
We buy 210 cm lining, based on the fact that we will still have to trim it to 209 cm, cut it in half, with trim to 103 cm. In total, we will have two rows covered with three boards. Two whole and one in half. For a run of ten rows (90cm), we need 15 boards or one and a half packs. In this case, the net waste for (subsequent heating of the stove) will be 5 cm by 420 cm, or a little more than 1%. True, depending on the number of rows in the remainder, a trim of 103-105 cm and an “extra” board may be necessary. But such single excesses can easily be added when covering the next wall or room.
When determining the need for lining and its dimensions for each wall, it is important to consider the sequence in which these walls should be This sequence is determined by the convenience of corner fastenings, depending on the individual characteristics of each specific corner. Here's an example:
In option A, when the wall W is sheathed first, and then N, it will be much more convenient for you to hammer in nails than in option B. All such cases must be thought out and taken into account in advance.
It is important to immediately decide which wall, and in what sequence, to begin covering correctly. It may happen that you will have to beat the room in the sequence of walls: 3-1-4-2 clockwise and nothing else, and the dimensions for each wall can differ up to 2 times the thickness of the lining.
Checking the base for the lining.
The basis to which the lining is nailed in a frame house is usually the racks of the frame itself. In most other cases, the basis will be a special sheathing. Already when installing the racks, this must be taken into account, especially if the frame and cladding will be made by different teams of builders. This shouldn't happen:
Practical advice on nailing lining.
Hammering nails...
The most common method of attaching lining is with special finishing nails. They come in different lengths. The longer the finish nail, the more likely it is to bend when driven. Therefore, it is not advisable to buy finishing nails longer than 50 mm. They bend easily and always at the wrong time.
If you need to strengthen the structure of a house using lining, then in some cases it makes sense to use ordinary galvanized nails of the same size with a head in key areas rather than long finishing nails.
Nail thin finishing nails correctly with a regular hammer (not a lightweight version), using short blows with a small swing amplitude. The swing is wrist! The hammer should be held in the middle of the handle. The combination of a relatively heavy hammer along with a short swing allows you to drive a nail much more accurately than using a light hammer, where you will inevitably try to increase the amplitude and force of the swing and miss out on the accuracy of the blow. The most important thing when driving finishing nails is to achieve consistently identical, monotonous strikes. The hammer grip is something like this:
If you feel that the nail has rested on a knot, then in most cases the knot will “break through” if you increase the frequency of impacts and reduce their amplitude. The more monotonous the hammer blows, the less likely it is to bend the nail.
The vector of the applied blow must go strictly along the nail being driven. If you break this rule, the nail will immediately begin to bend. If you notice this in a timely manner, the nail can be straightened by changing the direction of the blows:
As the nail straightens, the direction of the blows also changes. After several attempts, this technique easily becomes automatic. The finishing nails are thin and soft; in addition, they are not sharpened “in the center”, but simply cut into the rod diagonally. That's why they tend to bend all the time.
Dark spots - marks from hammer blows - also look very untidy If, before the final two or three blows of the hammer, you wipe its working surface at least on your pants, then there will be no stains. You can wipe the hammer on a board (pad).
In order to press the lining closer to each other, it is “knocked out”. So as not to spoil the work board. For padding, it is convenient to use an unusable piece of lining:
Also, you should not completely nail the lining the first time. Usually it is “finished off” when the next board is fitted on top (or below) and pre-fixed. If something goes wrong, you can return the situation back without loss of quality.
In recent years, clamps have become popular - special clips that work according to the following scheme:
First, the standard lining A , the clamps are inserted into the groove, pressed and finally screwed (you can use nails, but the meaning of the principle of disassembly of the structure itself is lost). Then board B and the operations are repeated. The clamps are selected to match the thickness of the lining.
The clamps allow you to work cleanly. Of course, this beauty costs more. I would not say that laying the lining on clamps is more difficult and takes longer. But I don’t use them myself for the following reasons:
Clippers are more expensive than finishing nails. Finishing nails do not spoil the appearance of the nailed lining at all; they are lost among the texture of the wood and knots. Finishing nails make the structure stronger: clamps use only a third of the total thickness of the board, then judge for yourself. Using the finishing nails, you can always later clarify where the racks are located under the sheathing if you need to hang a heavy shelf on the wall or something else for that matter.
And one more nuance. For the first time I saw how my neighbors' builders laid the lining in the room horizontally on clamps. I was surprised why their lining is turned upside down with the groove up and the tenon down? Moisture will accumulate. It turned out that laying the boards in a way that is convenient and natural for them - from the bottom up with clamps - is almost impossible. Correctly laying the lining can only be done by moving from the ceiling to the floor. Similarly, for a right-handed person, it will be very inconvenient to pull the wall from left to right.
Are we working by level or what?
When the walls and ceiling are perfect rectangles and the floor is perfectly horizontal, you can work by level. In real conditions, a wooden house on a light foundation rarely has similar characteristics. Minor errors may always occur. Therefore, before you start covering, you should carefully check the geometry of the wall and decide how you will monitor the correct fastening of the boards. I will give an example when, working strictly according to the level, having reached the ceiling, you can see the following picture:
In the first case (A), the forcing was driven from bottom to top, strictly according to the level, and upon reaching the top, they discovered that the ceiling had a slight slope. As a result, we only emphasized the curvature of the room. In the second case, we controlled the situation and reduced the difference millimeter by millimeter. As a result, an error of a couple of centimeters is not visually visible and the room seems to be of the correct shape.
In a situation where the plane does not have the shape of a regular rectangle, the base of which ideally coincides with the horizon line, the level will only get in the way. It is safer to use a regular staff with marked marks, or a meter-long (or better yet, a little longer) building level.
In this case, you work in a “local” coordinate system and strive to always focus on it and correspond to it. Control measurements for making amendments can be made through a row, two, from the floor, from the ceiling, or even from a control board that has already been correctly nailed.
Horizontal or vertical?
How to nail the lining horizontally or vertically? In practice this is already predetermined. And this is the most decisive factor.
It is stupid to make additional lathing in a frame house specifically to nail the lining vertically (of course, if you did not plan additional insulation). The horizontal arrangement of the lining inside and outside is the most reasonable solution for a frame house, based on the design features of the euro-lining itself. Possible options for timber and log houses.
In addition to the purely aesthetic preference of the owner, the following arguments can be made in favor of vertical or horizontal placement of the lining. The vertical arrangement gives the feeling of greater wall height, which can be advantageously used for interior spaces. That's a plus. But being in such a projection relative to the windows, the shadows at the joints turn out to be more contrasting - this is a minus that disappears under artificial lighting.
The penetration of moisture inside, especially over time, when the structure dries out, is more noticeable with vertically positioned boards. With external cladding, the need for a ventilation gap is more important in this case. In this position, the horizontal arrangement is somewhat advantageous.
The accumulation of moisture both outside and inside in a vertically located lining is much more uneven within the same board. This occurs both for the outer cladding, when drying out after rain, and for the inner cladding (the temperature difference between the floor and the ceiling is an uneven thermal effect).
Bottom up or top down?
Should I nail the paneling from bottom to top or top to bottom? By and large, this is not important. A matter of taste.
For most people, it is more convenient to sheathe the wall from the bottom up. This makes it easier to knock out boards and more convenient to do all operations. You can do the job alone, and even handle long boards with ease.
But there is a slight subtlety here. I will demonstrate it with a simple example:
Sheathing the gable from the inside under the roof. If you start from the top (option A), then there will be no problems. If you are upholstering from below, then it will not be easy to install the last board in place, unless you create a triangle from several boards as a whole (option B).
In this situation, working from the bottom up, you will have to constantly solve the problem of inserting a larger groove of the upper board onto the tenon of the lower board, which is shorter.
The “excessive” dimensions of the lining turn out to be much larger than it seems at first glance. This factor must be taken into account when cutting such planes that have a tapering cone. Otherwise there will be unsightly gaps.
To accurately mark the angle at which the lining should be trimmed when it rests on an inclined plane of a ceiling or wall, a very simple and precise technique is used:
Take a small piece of clapboard (B) and insert it into the groove of the board close to the bevel. Then another board (A) is taken and pressed against the sloping wall (ceiling) overlapping board B. A line is drawn. The exact template for the specific angle is ready. At the same time, do not forget to make allowances for the increase in size by recessing the lining into the groove during the final cut.
Any complex cutouts are marked in the same way. Mark and saw the imaginary end of the future large board using a small scrap as an example.
Attach the resulting trim to the place, and if you are satisfied with everything, you can make cuts in the finishing board using the existing template.
{jcomments on}
How to make sheathing for lining
To correctly align the beams under the sheathing, follow the recommendations below:
- saturate the beams with a fireproof solution and protect them from fungal infections, as described above;
- install the slats perpendicular to the lining;
- maintain the same distance, the step between the bars should be 40–50 cm;
- leave gaps between the floor and ceiling;
- the frame must be perfectly level, use plumb lines or a level to check;
- The gaps that arise between the beams and the wall at the fastening points are filled with special spacers.
Installation of insulation
The insulation technology is quite simple. The most optimal combination of layers would be:
- insulation;
- vapor barrier;
- lining.
The existing sheathing greatly facilitates the process of additional insulation; the material is attached between the already installed racks.
One of the most popular and sought-after insulation materials is polystyrene foam, but it is not at all suitable for rooms such as bathhouses. Here it is better to use basalt wool. It has excellent characteristics, and, most importantly, does not burn.
Ways to fasten the lining
As a rule, any facing material has a tongue-and-groove system; it is designed for high-quality fixation of the planks among themselves. But the lining should also be nailed to the sheathing frame. To do this, use nails, clamps, staples or screws. In addition, the attachment points can be made hidden or open. It is important to ensure that the entire structure is properly fixed and that the planks are not damaged.
Mounting stapler
Using a mounting stapler, fasten the lining quickly and conveniently. The staples fit into the grooves and connect the facing elements well with the sheathing.
Kleimers
This method allows you to cover walls with clapboard very neatly, but is one of the most difficult. The nails must be driven directly into the grooves so they remain hidden.
The clamps securely fix the plank, but it is very important to initially accurately select the nails in size. Typically, sets of clamps already include nails; if they are not available, the choice should be based on the thickness of the grooves.
Self-tapping screws and nails
This option involves diagonal fastening. The working strip is fixed in the groove of the previous one, and the head of a nail or self-tapping screw presses it to the base.
Screws
Special decorative screws are used to secure the board on the front side. To make your walls and ceilings look aesthetically pleasing, installation should be done extremely carefully.
Vertical finishing method
Do-it-yourself lining and its installation are shown in numerous videos on our website; watching such videos will make installation much easier, and you should not neglect the advice of the masters in such a video.
When installing panels vertically, you should start installing them from the corner. The head panel of the lining is fixed with nails in the corner, but do not worry about the aesthetic beauty, since the caps will be hidden by the decorative corner. If you decide not to use such corners, then you should bite off the fastening caps with wire cutters. Subsequent profile boards should be secured using clamps. A clamp, previously attached to the frame rail, must be inserted onto the back wall of the groove. For convenience, any other fastening is allowed.
Fix the trim panels until the entire required surface is covered. The work is practically no different from horizontal finishing; each subsequent element is inserted with a tenon into the groove of the previous one, after which it is fixed with fasteners. As with horizontal trim, the final profile is cut to size and nailed to the sheathing.
After the installation of the lining is completed, all that remains is to decorate the covering with skirting boards, special decorative panels and profile corners. These elements will perfectly disguise the joints and allow you to beautifully design the corners.
Installation of accessories
Finishing ceilings and walls with clapboard also involves installing fittings that allow you to hide the edges of the material. Often, a fillet or plinth is used for these purposes; they are secured with small nails.
Basic installation rules:
- floor connecting strips are fixed to the floor;
- products for ceilings are fixed accordingly;
- strips for corners, when the adjacent clapboard wall in the room is not sheathed, are mounted to this wall;
- strips for corners located between sheathed walls are installed on the shorter one.
When working with plastic lining, the fittings are glued together.
Clamps
Clamps (sometimes spelled “clamps”) are fasteners in the form of a Z-shaped steel or aluminum bracket with mounting holes for mounting on the sheathing. Used for wooden lining. The clamp profile is designed to meet certain parameters of the lining panels, and is not universal.
Clamps are a convenient way to fasten lining
Usually in construction supermarkets, clamps are sold simultaneously with the type of lining purchased. Clamps are mounted only on already installed sheathing using screws or self-tapping screws with a countersunk head. It is for this reason that nails are not used when installing claymores.
Each panel of material will require two clamps. Each next panel of the lining is placed on the clamps attached to the sheathing, after which it is manually pressed against the sheathing slats or simply against the bracket itself.
With a slight increase in financial costs (aluminum clamps are more expensive, but are insensitive to changes in relative air humidity), the process of installing the lining itself is quick and simple. True, all measurements and installation of the clamp itself must be carried out very accurately.
We cover the wall with clapboard
It is very important, before starting cladding, to keep the wooden material in a dry room for about 48 hours. If you get down to business right away, you risk getting the structure deformed. Make sure that during the working process the temperature is above zero and the air humidity is at least 60%.
Horizontal arrangement
How to properly attach the lining to the wall:
- Typically, the planks are installed in a horizontal direction. In this regard, we place the first bottom board with the tenon facing up.
- Fastening is carried out from the far corner (relative to the entrance to the room).
- To avoid visible defects on the top panel, we carefully monitor the horizon and vertical, starting from the first board.
- We fix the first element and again check the level for possible errors.
- Then we insert it into the grooves and secure the subsequent planks.
Vertical arrangement
As a rule, the lining is attached in the same way, both horizontally and vertically. Therefore, based on the instructions described above, we perform the following steps:
- We expose the panels from the far corner. Let's fix the first one.
- We drive the subsequent panels into the grooves and also fasten them. Be sure to monitor the density of the joint by lightly tapping the edge of the board.
- Wide panels are better suited for this option. With their help you can create a beautiful plane with a small number of joints.
An experienced craftsman can complete such work within a day. When installation is completed, baseboards and corners are installed. Then the walls are treated with stain and varnish.
Frame installation
The main thing you have to face at this stage is the choice of the location of the sheathing
.
- horizontally;
- vertically.
To do this, you need to proceed from how you will attach the material to the wall:
- if the lining is located vertically, then the sheathing must be fixed in a horizontal position;
- if the lining is placed horizontally, then, accordingly, the frame must be mounted vertically.
- prepare wooden blocks with a thickness of 1 centimeter and drill holes in them with a minimum pitch of 50 centimeters, they should be approximately 1.5 mm smaller than the diameter of the screws;
- attach the bars to the wall and mark points through the holes for subsequent drilling;
- drill holes in the wall according to the marks and insert the prepared dowels;
- fix the bars to the dowels, controlling the accuracy of fastening using a level; you can also make a plywood spacer under the batten for convenient work, or buy wedges for leveling in the store and install the sheathing in this way with minimal effort.
Features of fixing lining to the ceiling
We looked at what clapboard-lined walls look like, but how to sheathe ceilings correctly? Attaching the planks to the ceiling follows the same pattern as for vertical surfaces. Self-tapping screws and a screwdriver are very helpful here; sometimes small nails are used.
If the sheathing for the panels is made of wood, it is mounted in the same way as for the wall. However, it is better to leave the distance between the bars large. When a metal frame is planned, special hangers are installed, and the guide profile is fixed to them.
Advice! To finish the ceiling, get a second person to help. The work is not difficult, but it is quite difficult to hold the panels correctly and fasten them yourself.
Fastening methods
The photo shows the installation of wooden slats for installing wall panels
Over the long history of construction work, a large number of methods for attaching wood to concrete have been tested. Among the current and widely used methods, we note the use of specialized assembly adhesives and the use of fastening hardware.
Let's look at the features of implementing these methods and find out which materials are optimal for carrying out such work.
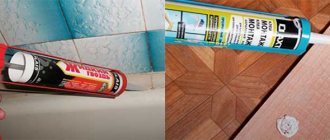
Application of specialized adhesives
Installation of wood on concrete stairs
If reinforced concrete was cut with diamond wheels, and now you have to install wooden parts that are small in size and weight, you can use special assembly adhesives.
A properly selected adhesive composition allows you to reliably fix not only baguettes or baseboards, but also overlays on stair steps. However, you need to understand that the range of adhesive compositions is wide, and therefore you should count on the optimal result only if you select the right product.
If you need adhesive for concrete and wood, pay attention to the following compositions:
- Construction adhesive “Liquid Nails” is a relatively inexpensive and at the same time effective solution for working with materials of interest to us. “Liquid nails” are presented on the market in several modifications, namely, “Universal”, “Express”, “Super strong”, “Extra strong”, “For panels”, etc.
Assortment of glue “Liquid nails”
If the question is how to attach a wooden block to a concrete wall, the best choice would be a particularly vicious and universal modification.
The universal type of Liquid Nails adhesive is an excellent choice for interior use. For example, with this tool you can successfully glue wall panels made of lumber to pre-cleaned and dust-free concrete.
But if you are interested in how to glue wood to concrete at sub-zero temperatures, you will need “Liquid Nails,” which are especially strong with a gripping force of up to 70 kg per 1 m². This glue will hold the wood even on uneven concrete at temperatures down to -17°C.
- Moment glue is a wide range of different compositions with different technical and operational properties.
The photo shows the two-component composition “Epoxilin Duo”
Of particular interest is the “Epoxylin” modification, which is a two-component composition that works with a wide range of materials including concrete and wood.
After drying, the composition not only reliably holds the glued surfaces, but can also be sanded or subjected to other mechanical processing without compromising the adhesion strength.
How to properly attach the lining in a bathhouse
Typically, the construction of bathhouses is made of pine wood. Many people are interested in the question of how to properly line interior walls with clapboards with their own hands. You should know that pine needles are no longer suitable for finishing a steam room; at high temperatures, they begin to release resin. When the evaporation is still weak, this aroma has a calming effect and encourages relaxation. But rich odors lead to heavier air, which is not at all good. Therefore, it is better to use birch or alder as a finishing material, which emit medicinal aromas that have a lot of useful properties.
It is also important to use special wooden nails for covering the steam room. Everyone knows that metal products become heated when the room is heated and upon contact with the skin they can cause a burn.
If you familiarize yourself with the main rules and approach the process competently, cladding the walls of your own home is not at all difficult, it is even interesting. It doesn’t matter which profile you prefer, you now know how to attach both wooden and plastic lining.
Believe that everything will work out! Good luck! And see you again!
Fastening with finishing nails
Finishing nails are special nails of small thickness. They easily enter the material without causing cracking. Their distinctive feature is a reduced cap, which is easily recessed into the thickness of the part. Unlike construction nails, finishing nails cannot withstand increased loads and are used only for hidden fastening of finishing materials in structures that will not be subject to shrinkage, tearing and bending. This installation method is not suitable for installing temporary coverings, since it is almost impossible to remove a thin nail from the panel.