Wallpaper and other finishing materials sit best on primed horizontal surfaces. For any repair, the consumption of primer mixtures is quite large, so many people prefer to make a primer based on PVA glue. PVA itself is a colorless and harmless polyvinyl acetate, and glue made on its basis can be used for construction, furniture and stationery (often used in offices and for crafts). For a homemade primer that increases the level of adhesion of the coating, a universal or construction variety is used.
What is PVA and what is it used for?
PVA glue is a mixture of polyvinyl acetate and water, presented in the form of an emulsion and containing various additives, modifiers and plasticizers. The glue is almost odorless, non-toxic, and fireproof. It does not spoil after freezing and can be used as it defrosts. The not too thick texture without lumps allows you to apply PVA in a thin layer, which after drying does not leave yellow spots or streaks.
PVA glue is widely used in construction and repair. It can be used to glue completely different materials, which is why it is considered universal. PVA is suitable for fastening paper, cardboard, corrugated paper, wood, leather, as well as for gluing wallpaper. In industrial conditions it is used for the manufacture of paint, primer, putty, and concrete mixtures. At home, you can also make a primer for walls, as well as a number of putties.
Similar materials
Adhesive for porcelain tiles: how to choose the right one
Granite ceramic tiles are a material with a fairly low level of water absorption and therefore conventional cement-based mortar and adhesive are not suitable for laying them.
Porcelain tiles - Spain is the best manufacturer
Porcelain tiles are widely used in construction today. These slabs have a wide range of characteristics that make them a universal material for construction.
Which sand is best to use for plaster?
Many who have already encountered the use of plaster know that it is made from various materials. These can be lime-sand, cement-sand, gypsum, clay, as well as mixed cement-lime-sand mortars.
Why make your own primer?
After drying, the glue forms a thin film on the surface of the treated material. A homemade primer will work in a similar way, only the film will be thin, because the glue is heavily diluted with water. PVA-based soil has a number of positive properties, so it’s worth making it yourself:
- increasing the level of adhesion;
- giving the base additional protection from moisture;
- more even paint application;
- reducing the consumption of decorating or other material.
Homemade primer turns out to be very affordable in price. This will save on repairs, and will also help you spend less paint and do a better job.
Advantages of homemade soil
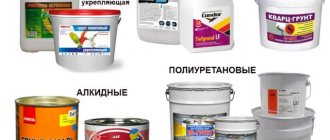
PVA primer has positive properties:
- increasing the degree of adhesion (adhesion) between coatings;
- reducing the level of moisture permeability of the base;
- formation of an additional protective layer in the form of a film;
- a way to save finishing materials themselves.
Treated walls become smoother, and the process of covering with paint or wallpaper becomes more efficient and durable. The low cost of the materials used is also one of the advantages of PVA-based primer.
Flow calculation
To determine the amount of primer required, it is necessary to calculate the area of the walls minus the openings of doors and windows. Multiply the resulting amount by 2 (the number of passes) and multiply again by a factor of 1.1 (unforeseen losses of 10% are included).
Then, using the table below, calculate (approximately) the number of canisters or bags of primer. A more accurate figure can be obtained directly when purchasing a primer - the packaging indicates the consumption in g/m2 or ml/m2.
| Type of primer | Wall type | Consumption in g/m2 |
| Thinned acrylic | wood, iron | 40 |
| Unthinned acrylic | plywood, chipboard, OSB, sawn wood | 140 |
| Alkyd | brick, concrete | 135-150 |
| Acrylic | for all types of material except wood | 100 |
| Universal | for all types of walls | 65-100 |
How to dilute glue and prime walls
- Pour less cold water than indicated in the table on the pack. !In warm water, the glue clumps more strongly. The approximate consumption of glue for a room with a ceiling area of 16 m² is two packs of 250 g. (priming the walls + gluing wallpaper on the walls).
- First, use a stick or paint mixer to create a quick swirl. Continuing mixing, pour the glue in a medium stream from a height of ~30 cm into the whirlpool in a minute, making sure that the glue immediately gets wet and loose, without having time to curl into lumps. Stir for about five minutes, dilute with water and stir again. Dilute with water as follows: for priming walls - kefir-like; for gluing - closer to sour cream, in accordance with the table on the package; like sour cream - only for adding to PVA.
- Leave the mixture for 5-10 minutes.
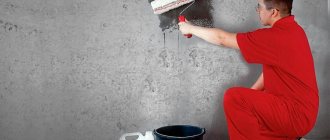
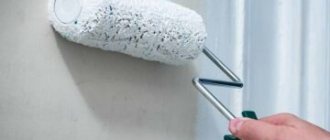
- Prime the walls with wallpaper glue using a façade roller.
Priming walls with wallpaper glue, due to its reversibility, promotes faster thickening (setting) of the glue spread on the wallpaper and more glue is involved in their gluing. Never neglect this step!
- Putty any defects in the walls while they are damp, but not wet.
How to make a PVA primer with your own hands
It is unacceptable to use PVA as a primer without dilution, since a too thick film is formed on the surface of the wall, which will quickly peel off. The glue consumption will also be high, and it is inconvenient to apply a thick composition on the surface. Therefore, dilution with water is required.
What you need for work
First you need to prepare all the necessary materials and tools:
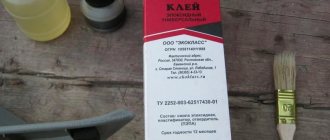
- PVA glue. Construction compositions are sold in packages of 0.5-10 liters. The consumption of the finished primer is small, a liter is enough for about 10-15 square meters of area. If you plan to apply the product in 2 layers, the consumption will double. To prepare the soil, it is advisable to choose adhesives that were manufactured no later than 4 months ago.
- Water. A non-hard, warm liquid that does not contain foreign impurities is required.
- Capacity. You can take any bucket or pan, as long as it is clean and has a shape convenient for mixing.
- Wooden stick or construction mixer. Professionals mix any building compositions using a mixer, but in the absence of one, the glue will completely dissolve with manual stirring.
To apply the primer, you need to prepare a roller or brush. It is better to have both tools so that you can work on smooth areas with a roller and hard-to-reach areas with a brush. For the ceiling you will also need a roller extension or a wooden stick. To pour the glue, you need a paint bath, which helps to evenly distribute the composition over the roller.
Preparation of the solution
Making a primer is very easy. It is necessary to pour the glue into a container, add water at the rate of: 1 part PVA, 2 parts water. The composition must be mixed until it becomes homogeneous. Clots floating on the surface of the liquid must be removed immediately. You should prepare as much solution as can be used at one time; such soil cannot be stored for long periods of time.
Next, it is recommended to do a test application of the primer. A small area of the wall is treated with it, the quality is assessed: the composition should be well absorbed and be absolutely white. After drying, you should try to tear off the resulting film: if possible, add more water to the primer.
Applying PVA primer
Before starting work, the surface is carefully prepared. The walls must be smooth, not have large holes, chips, or defects - the latter must be repaired with putty and then sanded. The wood is sanded and, if necessary, the cracks are covered with a special wood putty.
The composition is applied with rollers and brushes, choosing the desired size of tools. Be sure to go well in corners, areas near baseboards, behind pipes and radiators. The first layer is left to dry for 2 hours. If wood has been processed, the surface must be inspected for the presence of “fringe” (water lifts some of the wood fibers). If the smoothness of the base is damaged, it is sanded with fine sandpaper and primer is reapplied. It is recommended to apply the second layer to all surfaces, regardless of the base material. Next, let the wall and other types of bases dry for 24 hours.
Tips for working with primer
There are several recommendations to get an effective result. This applies to:
- preparing solutions in a warm room without drafts, away from sparks and fire;
- water must be added to the glue gradually with mandatory stirring (so that a surface water layer does not form);
- choosing containers in the form of large buckets or canisters with a wide neck opening;
- a wooden spatula for manual stirring can be replaced with a construction mixer with an electric drill.
PVA primer can only be used for interior work.
Before starting work, the surfaces must be cleaned of remnants of old coating and dust. For this you may need a spatula, sandpaper, or a hair dryer.
First you need to apply a little mixture to the coating area and check whether the glue will peel off. If the solution is too thick, it can be diluted with water. The primer should remain dense and adhere well to the surface (walls or ceiling). It is better to avoid spraying the adhesive composition immediately, since the coating should be carried out evenly and without gaps. Cement is often added to the composition if the floor will be treated.
Source
When not to add
PVA glue is not used to complement solutions intended for use in rooms with hot or humid steam. These include saunas, baths, swimming pools and other buildings exposed to high humidity. Steam helps accelerate the hydrolysis of polyvinyl acetate, converting it into alcohol.
Also, PVA is not placed in mortars prepared for building walls. Intolerance to frost does not allow the mixture to be used for external work - plastering, formwork, etc. It makes no sense to put glue in ready-made (they contain it) and plaster mixtures.
When preparing cement mortar yourself, add glue for building materials. Use a dispersion with a polymer content of at least 50%. The dispersion is sold packaged (from 1 kg to 30 kg) and is good for six months.
With the help of adhesive connections, building mixtures acquire additional properties. They are more durable and strong, make laying materials easier, and fill cracks and other surface irregularities. How much PVA glue to add to the cement mortar depends on what you plan to use it for. Usually put from 5 to 20% of the adhesive contents of the total volume of the solution.
Substrate treatment
Priming with a DIY PVA solution in the usual manner:
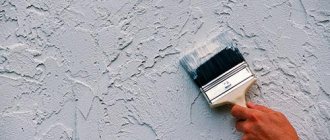
- Initially, treat all corners and other hard-to-reach areas of the surface with a brush;
- The main plane is covered with a roller;
- After complete drying, reapply the primer solution.
For careful processing, use a special tray, the surface of which is ribbed and slightly inclined. By rolling the roller in such a bath, excess liquid will be squeezed out, and there will be no unwanted streaks left on the floor and walls.
Primer for plywood
Plywood is classified as a natural material, so it can change its state, as well as shrink and expand as a result of exposure to high humidity or fluctuating temperature changes. As a result of unfavorable conditions, the veneer layer will be covered with cracks, which can expand and contract due to changes in moisture conditions. To avoid troubles, it is necessary to apply a primer against moisture and apply various paints with favorable properties for plywood. This is why primer for plywood is so important.
- polymer;
- adhesives;
- oils;
- special additives.
PVA adhesive for office use
The letter “K” is added to the designation of this glue. Its composition is almost identical to household glue. It can also be combined to create various kinds of compositions from cardboard, multi-colored paper and fabric. The manufacturer offers it in the form of bottles with a volume of 50 to 250 grams, as well as in the form of an adhesive stick. It is important that the pencil has good contact with the surface. To do this, add a small proportion of glycerin to the dry composition.
Why is it added to concrete?
The adhesive emulsion is used as a plasticizer. It does not have a pronounced odor or toxic substances, so no dangerous compounds are released into the air. According to experts, with the addition of glue, adhesion to the base increases 3 times, and wear resistance further increases to 50%. As for strength, it becomes 1.5 rubles. more than the original. And the addition of 5% PVA reduces the abrasion of concrete by 2 times. A solution with the addition of an aqueous vinyl acetate emulsion has the following characteristics:
With such a component, the material becomes homogeneous.
- uniformity;
- plastic;
- acts as a tie between the particles of the mixture;
- strength;
- wear resistance.
Features of applying homemade primer
When working with a homemade primer mixture, you need to prepare the surface well: there should be no depressions, cracks or other defects. To do this, the base is carefully puttied.
The most difficult areas that require special attention are corners, baseboards, spaces behind radiators; here the primer is applied with a brush.
Each layer of adhesive primer is left to dry for a couple of hours, after which the degree of smoothness of the surface is checked and any defects found are eliminated before reapplying the solution.
During the application of the solution, it is necessary to monitor the degree of its viscosity, because sometimes it is necessary to dilute the glue with water in a ratio greater than 1 to 2.
The final drying of the screed occurs in two days.
The role of primer in a quality repair is very important: the volume of work is large, and so is the consumption of materials. Therefore, many people decide to save money by making a primer solution themselves, using universal or PVA construction adhesive as a basis. Somewhat inferior in quality to industrial solutions, this solution is very economical. It cannot be applied to all surfaces (therefore, if there is any doubt whether it is possible to prime a floor or walls with PVA glue, it is better to turn to specialized primer mixtures), however, there are techniques that can enhance the properties of such a primer.
Self-activity should not be neglected
Anyone who has ever faced a repair understands the importance of priming. A special composition penetrates into the small crevices of the base and makes it durable, and allows you to apply any paint and varnish material. This type of repair is guaranteed to last.
Applying a homemade PVA primer solution makes the base smoother and increases its adhesion. Which is reflected in saving paint materials and finances.
There is no doubt about preparing the mixture with your own hands, because the process is simple and does not require any chemical skills.
Tips for diluting and using PVA primer
After applying the first layer, there is no need to rush to complete the second. To begin with, it is important to make sure that the coating is completely dry and does not peel off, otherwise the result of the work will not be satisfactory. It is better to apply PVA primer on monolithic concrete, but on cement it gives less pronounced strengthening properties and may be subject to cracking.
When diluting the soil, do not be afraid to add more water. Some adhesives are sold in a thickened form, and after the first layer is completed, the polyvinyl acetate film begins to separate. Therefore, the 2:1 proportion with water is not always correct, and sometimes it is necessary to introduce water in a larger volume.
Disadvantages of the method
Despite the obvious advantages, the soil also has a lot of disadvantages. Compared to deep penetration agents, this composition weakly penetrates the structure of wood and concrete, working mainly on the surface. If the base is of low hygroscopicity, there is no point in using PVA at all.
Homemade soil will not have antiseptic properties, unlike store-bought ones, which already contain antiseptics and fungicides. This is of great importance for wood, because over time mold, pests, and microbes can settle in it. Many brands of PVA gradually turn yellow, and light finishes are not able to cover these stains. Also, the finished coating will be afraid of direct and frequent contact with water, will not withstand the action of steam, and cannot be used in damp rooms.
Drying time
Many people are interested in the question of how long it takes to glue wallpaper after priming. This directly depends on the percentage of water in the mixture. Other indicators are also important: the optimal temperature in the room is 20 degrees Celsius, atmospheric humidity is 70%.
It is best to follow the drying times indicated on the label, since with a similar name from different manufacturers, the solution may contain special substances that affect the drying speed. Approximate drying times for different materials are presented in the table.
| View | Surface | Time |
| Concrete contact | All | 6 hours |
| Latex | All | 40 min |
| Universal acrylic | concrete | from 1 to 3 hours |
| drywall | 12 h | |
| brick | from 6 to 8 hours | |
| plaster | from 2 to 4 hours | |
| Deep penetration primer | All | 24 hours |
| Mineral | concrete | from 2 to 6 hours |
| Alkyd | tree | 10-12 h |
| metal | 10-15 h | |
| Glyphthalic | metal | 24 hours |
The main mistakes made when drying:
- drafts - open windows and doors will cause uneven drying;
- using a hairdryer or heat gun - the outer layer of the mixture will dry faster than the inner one;
- temperature changes - the lower the temperature drops, the slower the material dries.
Photo: Instagram @diamantekg
The walls should dry naturally.
Flaws
Although the solution is absorbed into the surface, it is not a deep penetration primer. Inferior in efficiency to more expensive options from hardware stores. An equally important nuance is the lack of protective antiseptic properties. Because of this, surfaces are not protected from the proliferation of fungal microorganisms and mold.
You can prime the walls with a solution if you take into account in advance that as a result, yellow spots and streaks may appear on the finish. The mixture is also not suitable for rooms with high humidity levels, such as bathrooms, saunas or swimming pools.
Some of the shortcomings can be easily corrected. For example, adding a disinfectant to the solution (100 ml of whiteness per 2 liters of liquid) will provide an antiseptic effect. If you add liquid glass to PVA (3% of the total mass), the penetrating ability of the primer itself increases. You can prime utility and non-residential premises.
Due to the risk of yellowing, it is better to avoid this method when using expensive wallpaper and putty in living rooms, bedrooms and the kitchen. Appearing yellowness can ruin the entire interior.
We make a more complex primer for wallpaper.
- table salt 200 gr.
— unslaked lump lime 1 kg.
- copper sulfate 100 grams.
- dry glue 1 pack, (you can use the cheapest wallpaper glue)
And so, the most forgettable moment, the primer for the wallpaper is made.
We heat three or five liters of water and first dissolve salt in them, then lime, add glue until it is completely dissolved, and copper sulfate. Stir this whole brew until completely dissolved and let cool. Then filter through cheesecloth and pour into a container for use or storage. This is how you can easily prepare a primer at home and avoid buying it in a store at an inflated price through several intermediaries.
There is a third, more complex method by which you can make a real primer.
. I don’t see any point in describing it, since you can get acquainted with it in full in the topic - “How to make a primer*”. The material is supported by an excellent video, so the preparation process, the necessary ingredients for the primer and all the points that interest you are present there. Good luck!
With random materials on repair and construction:
Wallpaper glue helps strengthen the surface and reduce its absorption
( 2 ratings, average 4.5 out of 5 )
What will you need?
Before you make your own primer mixture, you need to prepare the components and tools that will be needed in the process of creating it.
Strengthening
The primer mixture to strengthen the surface layer consists of the following components:
- copper sulfate – 100 g;
- wood glue – 0.5 l;
- laundry soap 60% – 1 bar (200 g);
- water – 7 l.
Deep penetration
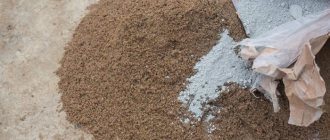
This primer solution can be prepared from:
- PVA construction glue – 1 l;
- clean water – 8 l;
- cement - one trowel.
All components must be mixed thoroughly.
Adhesive (on wood)
The primer used to enhance the bond strength of materials consists of:
- alum – 1/4 kg;
- drying oil – 30 g;
- water – 1 l;
- dry paint glue – 200 g;
- laundry soap – 1 bar (200 g);
- chalk – 2 kg.
For painting
To get 10 liters of primer solution for lime paint, you need the following components:
- quicklime – 1.8 kg;
- laundry soap – 1 bar (200 g);
- water – 10 l;
- drying oil – 100 g.
Recipe for making a primer for adhesive paint:
- powdered or crushed chalk – 2.5 kg;
- dry glue – 200 g;
- laundry soap – 200-250 g;
- copper sulfate – 150 g;
- drying oil 25 g;
- water – 10 l.
Why is it worth making a primer for walls at home?
Many of us want to renovate without spending a fortune. Well, now, when the crisis has become part of the life of almost every resident of Russia and the post-Soviet space, saving is becoming especially relevant. If we use PVA glue, which is quite cheap, we get the opportunity not only to save on buying a store-bought primer, but also to spend less paint. After all, saving paintwork, coupled with increasing the durability of the applied finish, is the most important quality of a primer.
Pros and cons of this composition
First of all, you must figure out whether such a primer is suitable for your situation. Let's start with the advantages of a homemade solution:
- Cheap . PVA construction adhesive is inexpensive and can be diluted with plain water. The result is a budget solution. If you need to make repairs at minimal cost, then this is exactly what you need;
Primer with PVA glue, which is diluted with water - the cheapest solution for preparing surfaces
- Increases surface adhesion . Treatment with a homemade composition allows subsequent finishing to hold more firmly. This is very important in cases where work is carried out on highly absorbent surfaces, which, without priming, will quickly absorb moisture and thereby reduce the strength of painting or plastering the walls;
- Improves the moisture-proof properties of the base . PVA glue is capable of creating a thin film on the bases that does not allow moisture to pass through and at the same time allows fumes to escape from inside the walls. This treatment allows you to protect structures from changes in humidity.
PVA primer is also suitable for wooden elements
This primer cannot be used in damp areas. In this case, it is better to use a special composition, since PVA does not provide the necessary reliability with constant moisture.
The homemade solution also has disadvantages:
- The composition does not penetrate into materials . The soil is absorbed literally a few millimeters and is not able to strengthen surfaces with low density, as deep penetration acrylic compositions do. In addition, the solution is also poorly absorbed into substrates with a smooth surface;
- The primer may peel off . If you violate the proportions during the preparation of the solution, a film will form on the surface, which peels off easily and does not impart strength to the surface. To prevent this from happening, follow all the recommendations outlined below;
- Does not have antiseptic properties . If you need to provide protection against fungus or mold, then you should look for a specialized option. PVA does not have these characteristics;
- The surface may turn yellow . If you glue cheap paper wallpaper to the walls or apply a thin layer of putty, there is a chance that yellow spots will appear in certain areas over time.
Stains can appear anywhere - this is the main disadvantage of PVA primer
Primer for walls made from PVA glue: additional recipes
According to technology, PVA glue can only be part of a deep penetration primer, and not replace it. You can make a PVA primer yourself like this:
- Before you make a PVA primer, you need to prepare the main ingredients that make up it. This is PVA glue, clean water and cement.
- According to the recipe, PVA and water are taken in a ratio of 1:8. You will need a little cement.
- Combine water and glue.
- Carefully pour in the cement.
- To stir thoroughly.
This deep penetration primer recipe is considered the simplest. A deep penetration primer containing PVA is ready for use immediately after its preparation. This solution also has one drawback. It can be stored for no longer than 24 hours. It is not possible to produce it in advance. How to determine how correct the proportions of a homemade primer for walls were? There is one trick. Apply the solution to a small area of the wall and leave until completely dry. Then evaluate: the surface should not be covered with a thick film.
Trial processing of the base
Initially, it is recommended to carry out a test application of the PVA primer solution, prepared by yourself, on a small area. This will allow you to check the composition for bond strength to the base. A transparent mark with a slight whitish tint will remain on the wall. If the composition turns out to be thick, add a small amount of liquid and mix thoroughly.
When the mark applied to the base becomes the desired color and is absorbed normally, wait until it dries completely and pick up the edge with a sharp object or fingernail. If peeling of the formed film is observed, dilute the solution with more liquid. If not, then feel free to process the base plane.
Peeling of material