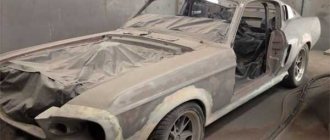
Do-it-yourself metallic car painting (base and varnish) in the garage
Painting a car in a garage, and even with your own hands, is undoubtedly a complex process, burdened by the small space of the garage, the lack of a normal exhaust hood, etc. Let's look at how to paint a car with base and varnish to get a decent result.
Naturally, this work should not be considered as a masterpiece in painting or as the ultimate truth. I don’t pretend to be the last word in painting technologies and there will probably be people who have eaten more than one “dog” with this technology for painting a car in the garage. But, constantly stepping on the rake in this matter, eventually gained a lump called experience. But, since the rake was above the waist (Thank God!), therefore, the lump turned out to be in the brain area.
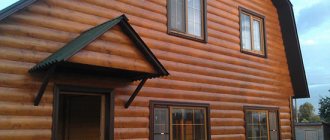
We prepare and paint cars in combat conditions or close to them, i.e. in garages. Therefore, you won’t be frightened by heat or cold; the lack of exhaust hood puts us in a state of euphoria!
The results we achieve, even when painting close to zero degrees Celsius, sometimes exceed the results of painting in ideal conditions of a paint booth, with its supply and exhaust ventilation filters and dryers. I am in no way belittling the advantages of spray booths, this is what you need to strive for, but, unfortunately, there is a financial issue, and then, sometimes a person just needs to do a one-time job, for example, paint a couple of mirrors or a bumper. Therefore, I think this article will be somewhat useful to you, especially if you work in the same conditions - garages, i.e. in combat.
Let's assume that all the elements intended for painting are already ready (that is, primed, sanded and degreased). The room, in our case the garage, is prepared for dust-free painting.
Some useful rules: If we are painting with a simple metallic paint, then the primer should be the same shade as the base (i.e., for a light metallic paint - a white primer, for a dark metallic paint - a black primer, further, shades of gray can be selected by mixing white and black soil of the same brand). If we paint with PEARL, then a special pigment is placed under the base, which must correspond to the factory settings (well, these subtleties will have to be explained to you by the tinting specialist from whom you will order the paint, and you will buy this pigment from him). If all of the above does not raise questions... Then let's start painting!
For example, let’s take a car hood for painting work.
The first thing we must do is dilute the pigment (base) with the supplied solvent. By the way, here is the first remark: when the painter asks you - should you add solvent to the base or give it separately? Categorically refuse mixing (of course, give it separately!), I’ll explain why below. Stir very thoroughly, just like brushing your teeth. We don't save time!
For example: The base is mixed with the solvent 1:1. You bought 200 grams from the colorist. base and you were given 200 grams for it. solvent. In ideal conditions, let me remind you that this is a paint booth, everything would be like this! Mix 1:1, and the golden key is in your pocket! But in our combat conditions this was not the case.
Applying pigment (base) We estimate that we will apply three layers of pigment (base).
For the first applied layer, add no more than 50% solvent to the pigment. Let's say 100 gr. base and 50 gr. solvent (as painters say, make the first layer “dry”). The “dry layer” will protect us from the appearance of such unpleasant defects on the first applied base layer, such as “fish eyes”, which can be formed from microscopic specks, as well as from swelling at the transitions of the primer and old paint. What happens when there is an excess of solvent in the pigment. Next, we wait until the first layer becomes matte (dries) for at least 10-15 minutes, maybe a little more if the ambient temperature tends to zero.
Here, it’s better to wait than not to wait!
Save to Album
Note: For precise dosing and mixing, use special measuring jars for mixing paint with solvent. You can buy them from the same paint sellers and colorists.
During this time, we add the remaining amount of solvent to the pigment so that we end up with a 1:1 ratio, as prescribed by the manufacturer (different paint manufacturers have different ratios! We ask the colorist). To do this, pour the paint (base), if any, from the paint gun into a common container and bring it to the desired consistency by adding a solvent (thinner).
We apply the second layer thickly, without fear of consequences. Because the second layer will clearly not cover the ground (it will still show through), then we dry it (wait for it to become matte) and add a third layer of pigment.
Now everything should be SUPER! True, if you come across a non-opaque paint (base, pigment), then it is possible to apply it in addition to the third and fourth layers.
Here another small question arises: What is the hiding power of the pigment? Different paint manufacturers have different hiding power. Some people are saving money, others are clearly cutting corners, or maybe the colorists are cutting corners by selling us solvent at the cost of the pigment? Here the choice is yours. As noted, newly opened tinting points (for example, on the market) are most preferable, there are fewer defects during selection (it would seem that it is easier?) and a thicker pigment.
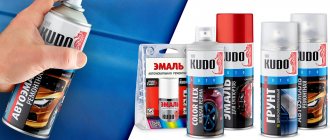
Lately we have been using selection from NOVOL, this is by no means an advertisement, but so far they have done better. At the real cost, the price – quality corresponds and the covering power is high. What will happen next - time will tell.
Applying varnish Now all that remains is to varnish our base-painted part, that is, the hood. To do this, dilute the varnish with a hardener and solvent. Here we roughly follow the same pattern as above. For the first layer we apply dry varnish. Those. Instead of the prescribed, for example, 10% solvent (usually the manufacturer indicates the % on the can), pour about half (5%) for the first layer. (The varnish will fall in small “grains”, that’s how it should be.) We fill our hood with this composition and wait quite a long time. The drying speed depends on the ambient temperature, so I can’t say for sure. Tactile, i.e. by touch, you can check it like this - in an inconspicuous place, and this can be found on every body element, in the case of the hood, this is the place, for example, where the emblem is attached. The varnish should not smear, just stick; if it still smears, then it is too early to apply the next layer, the solvent has not yet come out. The approximate drying time of the first layer is from 5 minutes in summer, to 25 minutes in winter, if the ambient temperature is slightly above zero. For the second layer, add another 10-15% solvent to the varnish, and fill our hood in an “adult” manner. If this is your first time, then I recommend that you first practice on old body parts so as not to cause any “snot drips”!
In this article on garage painting a car, I gave you some techniques and methods based on which you can paint at any ambient temperature, making allowances for the drying time of the paint and varnish. Basically, everything written above is focused on cold weather and low temperatures, of course, above zero - just above zero Celsius.
During the work, “normal” solvents (thinners) were used, i.e. with an average drying-evaporation rate. neither fast nor slow, as a result, not a single painter was injured!
Some necessary conditions, or if you want rules, the observance of which will lead you to the desired result: The temperature of the surrounding air, the element being painted, paint or varnish must be the same! This condition is mandatory! This is a requirement for success with garage painting. Do not heat the paint or heat the pre-painted element under any circumstances. Use a “sticky cloth”; there will be less debris on the lower layers of the part being painted. Be sure to use a painting suit with a hood. Sometimes holding time is the best way to combat smudges (“snot”).
Types of varnish compositions
They produce several varieties of acrylic varnishes, which are usually clear liquids that either have a strong odor or are odorless. Acrylic can be dissolved in ethanol, chloroform, water, and diethyl ethers.
Several types of acrylic varnishes are made, which differ from each other in the substance used as a diluent. Water or some organic solvent can be used for dilution. If the composition contains a solvent, the solution can be used for varnishing wood, metal, stone, brick, concrete and glass. And if the varnish is water-based, then it is not suitable for every material.
Road reagents. What you shouldn't be afraid of, but should be wary of
During the cold season, cars simply bathe in a variety of chemicals. The roads are watered with reagents, sprinkled with sand and salt, and “anti-freeze” is poured from the washer nozzles. And this cocktail ends up on the paintwork. The most dangerous component of the mixture is road reagents. They usually leave yellow stains on paintwork. They are washed during everyday washing. Particularly stubborn stain fragments can be removed with bitumen cleaners.
Rumors about the destructive properties of road reagents are in fact greatly exaggerated. Road chemicals “love” to penetrate into damage to paintwork; it actively interacts with bare metal. So, before the start of the winter season, it is extremely important to repair all chips in the paintwork and treat the car with a protective composition such as “liquid glass”.
Myth. Car manufacturers know the problem of road reagents, so modern cars are immune to them. There is no need to protect the car with coatings.
Is it true. This would be true if all countries used the same reagent for decades. Unfortunately, up to 6 types of reagents are used on the roads of Moscow alone. Almost every year a new “chemistry” is introduced, which means that the machines were definitely not specially prepared for this “new”. Therefore, on the eve of the winter season, it is customary to apply protective coatings to expensive cars. They absorb the impact of the reagents, prevent the formation of an ice crust, and repel water and dirt. In general, they preserve paintwork and save the owner’s money.
Acrylic-based water-dispersion varnishes
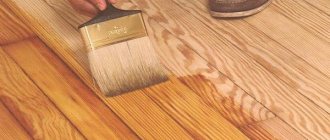
These varnish products are environmentally friendly and safe for human health, therefore they are mainly used for indoor varnishing. Such mixtures emphasize the natural texture and pattern of wood if applied to wooden parquet, furniture sets, caissons, wood panels, etc. Water-based varnishes are very easy to apply, dry relatively quickly, and have excellent adhesion to wood. The varnished coating has good strength, is resistant to abrasion, physical stress and chemicals, and perfectly decorates surfaces.
Many people are interested in whether it is possible to dilute acrylic varnish with water? It is possible only if the mixture already contains water, that is, if it is a water-dispersed solution. It is necessary to dilute the varnish composition with water if it has thickened too much or if it initially had high viscosity. It is allowed to use aqueous thinner in a volume of no more than 10% of the varnish mass. If you use more thinner, the characteristics of the paint and varnish material will deteriorate.
Water-dispersion solutions should not be mixed with other types of varnishes. In addition, it is prohibited to add white spirit, acetone, drying oil, gasoline, and other organic thinners as a thinner.
Filtering
The prepared paint and varnish material must be filtered before filling into the tank of the spray gun, as it may contain foreign inclusions that got there during the preparation process, clots, etc. Otherwise, it is impossible to guarantee a high-quality coating, because all this debris may ultimately end up on the surface being painted.
For filtration, it is convenient to use disposable paper funnels with a nylon filter insert (mesh size, usually 190 microns). I inserted the funnel directly into the tank, strained it - ready, you can paint!
We fill the paint tank only using a filter funnel.
Varnishes with organic solvents
Such acrylic products are diluted with ketones, esters and aromatic hydrocarbons, and in some cases plasticizers are added. After drying, varnish compositions with organic solvents form a very durable protective layer that does not turn yellow and can be applied to various materials.
These solutions have excellent adhesion to various surfaces, are applied in an even layer, and after drying form a moisture-resistant protective coating. These mixtures can be used for both internal and external finishing works. The disadvantage of organic solvents contained in the varnish solution is the characteristic sharp, unpleasant odor. However, when the varnish layer is completely dry, the smell disappears.
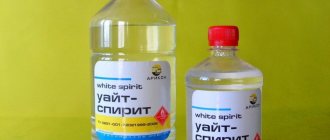
How can you dilute varnish that contains organic solvents? A similar organic solvent can be used as a diluent for such an acrylic solution. In many cases, a universal eluent, turpentine, white spirit or toluene, is suitable. In any case, what can be used to dilute acrylic varnish should be indicated in the instructions or on the packaging.
It is advisable to apply varnish materials with organic solvents in two or three layers. When applying the first coat, thin the mixture by approximately 30 percent with a suitable thinner. This will increase the wear resistance of the protective varnish coating. One-component and two-component acrylic compositions are produced. If the solution is two-component, then before using it you need to mix both components, located in different containers, with each other.
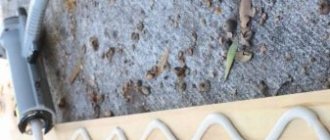
4. Metal dust. Rust that washes off
Owners of light-colored cars may experience a slight shock when they discover traces of rust appearing on the exterior of the paintwork. Is it really time to sell the car?! Before you panic, try washing off the rust. Often the appearance of “spiders” is caused by pieces of metal soldered into the paintwork. This is usually metal chips that fly from the brake pads. It is hot and, when it gets on the varnish, it instantly sticks to the surface. Then, under the influence of moisture, the metal dust oxidizes, and rust spots appear on the paintwork.
This is the very case when you need to use only special tools. Both Liqui Moly and KochChemie have good cleaners for removing block dust.
Myth. Metal chips from the pads are harmless. It can be washed with ordinary detergents at the cottage or at a self-service car wash.
Is it true. The dangers of metal dust should not be downplayed. It is soldered into the varnish and leaves microcraters on it. It cannot be scrubbed, as metal particles will scratch the varnish. Places where metal dust is localized should be treated with a special agent that will dissolve the metal. The ideal way to solve the problem is to wash the car at a detailer from time to time, so that specialists wash not only the body, but also the wheel rims, which are covered with metal coating from the pads, with a special composition. If this is not done, the discs will quickly lose their appearance - they will look old and rusty.
What is the difference between solvents and thinners
There is a big difference between these two products: the solvent affects the hardness of the varnish solution, and the thinner affects its viscosity. It is important to know what exactly can be used to dilute the varnish mixture - an organic solvent or water.
Water-based varnish materials are diluted with glycol ether or plain water. And these compounds are dissolved using xylene or a combined solvent composition. Those varnishes that are based on an organic solvent can be diluted with the solvent material that is already contained in the composition.
We recommend
DOCKER LACK is an industrial varnish remover. Effectively removes all types of varnish from wood, metal, stone. Deep penetration wash. Gel. Without smell.
Table of contents
Manufacturers of car shampoos claim that their detergent is capable of creating a real miracle - washing off any dirt from the car body without touching the paintwork. Only people who do not have cars believe such statements unconditionally. Drivers know that there are a good dozen types of contaminants that are resistant to even the most caustic car shampoos.
Rules and recommendations for varnishing
Experts recommend adhering to the following rules when applying acrylic-based varnish mixtures:
- before you start varnishing, you need to stir the solution well, especially if it contains any pigment;
- Before starting work, you must wear personal protective equipment such as gloves, goggles and a respirator. These products are needed even if an odorless water-dispersed material will be applied;
- the varnished surface must be dry, clean, free of greasy stains and crumbling old material;
- the air temperature should not exceed 25 degrees, and the humidity should not be more than 50%;
- to apply the mixture, you can use a spray bottle, roller or brush;
- water-dispersion mixtures are diluted with clean water, and white spirit, xylene or toluene is added to varnish solutions with organic solvents as a diluent, in a volume of no more than 10% of the volume of the varnish;
- the paint and varnish material must have the same base as the primer, tinting, or other chemicals applied to the surface.
By following these simple recommendations, the protective layer will be strong, reliable, durable and attractive.
Most modern cars have two- or three-layer coatings, in which the last layer is clear varnish over the colored enamel. In this multi-layer “pie”, the varnish layer performs several important functions, both protective and decorative. The general idea of the repair carried out greatly depends on the quality of varnish application. After all, one painter’s varnish shines, while another’s is dull, one’s is smooth, like a mirror, and another’s has an “orange peel” sticking out. In general, this is the layer that can reflect both the professionalism and inexperience of the painter.
Today you will find out
Lime. White spots that can't be washed off
Ceilings in parking lots are usually whitened with lime. It protects floors from fungi and mold. But when water flows from above through the ceilings onto the cars, lime flows along with it. And she is famous for her causticity. Whitish spots usually appear after the stains have dried. If the lime is removed immediately, it will not have time to cause significant harm. But there are cars that don’t leave the parking lot for weeks. And if lime is spilled on such a vehicle, serious risks arise. On cars with hard varnish, lime leaves stains that can be removed by polishing. On cars with thin soft varnish, complete destruction or peeling of the varnish layer may occur. In this case, defects are removed by painting.
Lime stains should not be rubbed as they contain abrasive particles. But they can be dissolved using a liquid descaler or household limescale cleaner. They are applied using a sprayer. But they must be used extremely carefully so as not to dissolve the varnish along with the lime.
Myth. You can remove lime stains yourself with a solution of citric acid or vinegar.
Is it true. It’s better not to take risks, because trying to remove stains on your own complicates the work of specialists who will ultimately have to bring this matter to a happy ending. Yes, acidic compounds are used to remove lime, but these are special substances that need to be used skillfully and competently. In addition, very often, after removing the lime, whitish spots still remain on the varnish, but this is no longer dirt, but matted areas with damaged varnish. They need to be polished. In cases of catastrophic bad luck, lime damage has to be painted over.
If there are lime stains on your car and you don’t have anything at hand to wash it off, use regular lemon juice or vinegar. Using a spray bottle will speed up the process.
His Majesty - varnish
Modern varnishes face quite varied requirements. The varnish must have high mechanical strength, but at the same time be elastic. It must be resistant to various chemicals and weather conditions, have high transparency and excellent gloss.
By the way, about shine. What is glitter anyway? One interesting experiment described in R. Pohl’s textbook “Optics and Atomic Physics” will help us figure this out.
The experiment boiled down to the following. A smoked fine wire mesh was installed at a distance of a few millimeters from a sheet of matte orange-red paper, and the resulting structure was illuminated with bright white light.
At the same time, interesting things happened: in one position, through the loops of the mesh, the shadows of its wires (the brightness of which was low) were visible, and because of this, it seemed to the observer that it was not the mesh that was visible, but a warped, shiny copper plate. In a different position, the unshaded part of the paper became visible through the loops and this was subjectively perceived as a bright shine of the surface.
It turns out that shine is only an “appearance” and not a physical property of the surface of an object! This is the unexpected conclusion that was drawn from this experiment.
Bird droppings. Extreme causticity
Drivers know how dangerous bird excrement is, so they try to remove it from paintwork immediately. Problems begin if droppings fall on a car, which, for example, has been standing idle for a long time. If the droppings are not washed off immediately, they will corrode the varnish, penetrate the base coat of paint, and even oxidize the metal. Therefore, if such dirt is detected, you should immediately pour cola on it and wipe it off with at least a damp cloth, or better yet, wash it off with plain water or a handy detergent. If marks appear on the varnish, do not try to clean them off. It’s better to show them to a specialist so that he can tell you how best to remove them. Most often, defects from droppings are removed by polishing.
There are many special means to combat bird droppings. If the car comes under a powerful bird attack, urgent measures need to be taken. From available means, you can use the same Coca-Cola or a similar drink. If you have dishwashing detergent, you can use that too. The faster the droppings are washed away, the less harm it will cause.
If bird droppings are not removed immediately, then these ugly marks may remain in its place. Defects of this depth can only be removed by painting.
Application of MS varnishes
MS series varnishes work very similar to 2K acrylic enamels. The methods for applying them are, in fact, no different: in optimal conditions for painting, two full wet coats are applied with an intermediate exposure of 10 minutes between them.
Here and below, optimal conditions for painting mean the following: air temperature +20°C, humidity 80%.
These varnishes can be dried either naturally or by force. The only thing is, before hot drying, do not forget to give the applied coating an additional 15-minute exposure. For what?
About exposure before hot drying and between layers
To understand this, let's imagine the process of drying paintwork itself.
Drying a paint coating is, firstly, the evaporation of all added solvents and thinners from the layer. Secondly, this is the formation of bonds between molecules of resins and hardeners (if we are talking about two-component materials) or molecules of resins and oxygen (during oxidation drying, characteristic of one-component alkyd materials).
As you know, as the temperature increases, the evaporation process accelerates. And since the evaporation of solvents occurs only from the surface of the layer, the drying at the top is more intense, and a film forms on it, on the surface. In this case, the creation of a surface film with increasing temperature is somewhat faster than the evaporation of all solvent particles from the coating layer. Thus, the higher the rate of formation of the surface film, the more solvents will remain “underneath”, simply not having time to evaporate.
But according to all the laws of physics, solvents are simply obliged to leave the layer, which is what they are trying to do. Passing through the resulting film, their particles form a large number of tiny pores in it. These pores are very small and do not look like craters; they are practically invisible to the human eye, but the entire paintwork, dotted with such pores, becomes matte. This phenomenon is called "boiling".
“Boiling” of varnish. The main culprits are insufficient rest between coats or before drying.
Holding before accelerated drying allows us to avoid this defect. Let's just not drive the horses, let the volatile substances evaporate and no boiling will occur.
The same applies to drying between layers, since insufficient drying between layers can also lead to boiling. So after applying the first layer, you shouldn’t rush headlong and immediately apply the second one. Otherwise, we will block the exit of solvents from the bottom layer, which will inevitably lead to rupture of the film.
Therefore, we repeat, for MS varnishes we must leave about 10 minutes between coats for evaporation (at 20°C). And the worse the ventilation in the painting room and the lower the temperature, the longer it will take. For example, for 15°C this interval should be on average at least 15 minutes.
The surest sign is that the first layer should be touch-dry. After which you can safely apply the second layer.
Basic mistakes when working with MS varnishes
The main mistakes when working with MS varnishes are associated with both insufficient exposure between layers and before hot drying, and with inadequate layer thickness. We have already said what the former lead to, now let’s talk about the latter.
Often painters apply the first layer thinner than recommended, after which they apply the second - with good flow and gloss, which they would like to preserve. With such an application, most often there is an increase in the permissible thickness of the second layer, which threatens the same “boiling” and clouding of the varnish, and the coating itself turns out to be insufficiently hard, highly susceptible to chipping and abrasion during operation.
Therefore, do not forget that the correct use of clear varnish belonging to the MS series is the application of two full layers of equal thickness with exposure between them.
That is, we apply the first layer in the same way as we would apply the last one - with good flow and gloss, wait for it to dry “touch-free”, after which we apply exactly the same second layer.
MS varnishes, like acrylic enamels, are applied in two wet layers of equal thickness
Bitumen and tar. Red spots on a snow-white reputation
The flakes and flecks of bitumen are best seen on white paint. Regular car shampoos don’t remove them, but the right special cleaner washes them off in one go. The main condition: before use, read the manufacturer’s instructions so as to remove dirt and not damage the varnish. Usually, after treating stains, you need to wait for the product to work, and then the stain can be easily removed from the varnish.
Despite its stickiness, bitumen is one of the most harmless pollutants. Even after a month or a year, the bitumen stain is washed off without a trace, and the paintwork underneath remains intact.
Myth. The bitumen must be washed off immediately, otherwise it will eat through the varnish, and then nothing can wash it off.
Is it true. The age of the bitumen stain does not matter. Fresh and old dirt can be removed equally easily and quickly. Most likely, this myth arose due to the use of ineffective cleaners. A good special product removes bitumen without a trace.
How to wash bitumen and tar stains? It is ideal to use special cleaners. They wash away such contaminants quickly and without a trace. If you need an economical option, then instead of special cleaners you can use any solvent such as white spirit, diesel fuel or kerosene.
Kerosene and diesel fuel wash away bitumen without harming the paintwork. It is better not to experiment with solvents at random.
Application of HS varnishes
HS series materials are more concentrated than MS, they contain less organic solvents, they are denser and more viscous, therefore the methods of working with them differ from those adopted when working with MS varnishes. When HS varnishes just began to come into use, for many painters who had cut their teeth on MS varnishes, moving away from the familiar and proven technology caused a lot of trouble.
Most HS varnishes are applied using the “one and a half layer” technology. The main issue here is the correct understanding of what these “layer and a half” should be.
Main mistakes when working with HS varnishes
First of all, it is important to understand that any two-component acrylic varnish (like 2K acrylic paint) has the property of “memory of the first layer.” That is, with whatever shagreen we apply the first layer, with the same shagreen we will get the finished coating.
We mention this because painters often like to apply the first coat very dry, without gloss (akin to a smoky base coat), and then apply a second, very thick coat, essentially applying all the material in one operation.
In this case, firstly, a too dry first layer (representing a layer in the form of unfused drops) can greatly spoil the subsequent painting, and the shagreen after applying the second layer will turn out to be very sharp. Secondly, with this application option, it is very likely that the permissible thickness of the second layer will be exceeded and corresponding defects will occur: boiling and loss of gloss, smudges, and a long set of hardness.
Another common mistake is to apply two full layers of varnish - like MS materials, which is also undesirable.
But the truth, as is usually the case, is somewhere in the middle. The first layer of HS varnish should be applied thinly, but with pouring, with a uniform formation of light shagreen over the entire surface. At the same time, there should not yet be a full gloss - a sort of “semi-gloss”. And after three to five minutes, a second, full layer is applied with good coverage.
Mechanical method
This method can be divided into two.
The first is manual cleaning using a grinder. A special attachment is put on the grinder and gradually, with its help, the layer of varnish is removed.
And second, when a sandblasting machine is used. Depending on the material on which sandblasting work will be carried out, this device is filled with abrasive, then the jet is directed to the surface.
Both types of this method help to quickly get rid of the coating, but they often leave defects on the surface itself, which is extremely undesirable for the car body. In addition, this is an expensive method.
Application of UHS/VHS varnishes
Among other varnishes, materials in this group are distinguished by the lowest content of volatile substances (Low VOC) and, accordingly, the highest content of dry residue. This allows them to be applied in thicker layers without the risk of smudges. Often, just one full layer is enough to cover the surface with such varnish.
UHS varnishes are applied either in one or one and a half layers. Only, unlike HS varnishes, these are slightly different 1.5 layers. Here the first layer should be very light, weightless, after which a full layer is applied immediately, without a pause. The first layer is needed not to gain the required thickness, but to impregnate the base in order to avoid micro-subsidence of the main layer
It is this single-layer nature that determines some of the features of working with UHS materials.
These features appear already from the preparation of the material. The fact is that UHS varnishes practically do not require additional dilution. In fact, their viscosity is established during production, so adding a thinner for such materials is either minimal (up to 5%) or not recommended at all.
It is not recommended to do this for the following reasons. UHS varnishes have very high thixotropy. For such thick-layer materials, this property is simply vital: it allows, with large application thicknesses, to avoid the occurrence of smudges, especially on vertical surfaces. And even if you make a leak on purpose, as it dries, it will seem to stretch and turn into only a completely unnoticeable smooth bulge.
Adding a large amount of thinner makes the material more liquid and reduces its thixotropy, which means the likelihood of smudges and sagging increases. In addition, excess thinner accelerates the formation of a surface film during evaporation, which can lead to boiling of the material.
The second feature appears during drying.
Firstly, it is desirable that drying (as well as application) of UHS varnish takes place in a spray booth. In general, any varnish dried in a chamber or by IR drying will have higher strength and visual characteristics than those cured in natural conditions.
But if MS and HS materials forgive us quite a lot of mistakes in conditions of poor air exchange and the absence of any forced drying (in other words, in garage conditions), then UHS varnishes are much more demanding in this regard. This is understandable: we have one thick layer hanging on the car, we simply have to warm it up thoroughly throughout its entire thickness. Otherwise, the process of gaining full hardness may exceed all reasonable technological time frames.
Secondly, before starting drying, a holding time of at least 15-20 minutes will be required with mandatory air exchange (somewhere at the level of 20,000 m³/h) to help the solvents get out of this thick 50-60-micron mass (and in liquid form, that’s all 100 µm). With poor ventilation (or lack thereof), solvents may not have time to leave the depths of the layer before the formation of a surface film begins, as a result - boiling, which is familiar to all of us.
This often happens when a painter rushing home at the end of his shift, in order not to waste time and not wait for the drying to finish, heats up the camera and then turns it off, believing that in his absence the car will “get there.” In the morning, a terrifying picture appears before him - the varnish has boiled. The lack of ventilation did not allow the solvent particles to evaporate in time and they remained under the film, and then riddled it. Moreover, on vertical surfaces the defect practically does not appear, since evaporation on them does not occur so intensely, but all horizontal ones (hoods, roof) are damaged.
In a word, UHS varnishes are good, they have exceptional hardness and durability, the highest degree of gloss, but they require respectful treatment.
In order to reduce the labor intensity of the process, experts recommend polishing such varnishes within an hour after drying the varnish in a chamber at 60°C.
Making a batch
Before filling the gun, you should mix the components of the purchased paint.
For proper mixing of the components, which produces a painting material of the required viscosity, the following conditions must be met.
Dishes
It is important that the container in which we mix is strictly cylindrical in shape (flat bottom and vertical walls). Only in such a container can you mix the components evenly and measure their quantities correctly.
It is better if it is a special measuring container in the form of a transparent plastic jar with a lid. Such cans are marked with markings that allow mixing materials in the required volume ratio (1:1, 2:1, 3:1, 4:1, 5:1, etc.).
Measuring container for preparing paints and varnishes
Also, for dispensing and mixing paints and varnishes, it is convenient to use a special ruler with marks that determine the volume fractions of the components.
Pour the base into a cylindrical container to a certain division, and then add the hardener (if added) to the required mark, then the solvent. Mix everything with the same ruler - and you're done. Often, a measuring ruler is sold along with a set of paint, and all branded cans indicate the proportions according to these rulers.
It is convenient to measure the required amount of components using a measuring ruler. Then I chatted with the same ruler - and that’s it.
Proportions
Given the abundance that has reigned on the paint and varnish market, it is, as they say, impossible to give one recipe for all occasions by definition. Yes, and you don’t need to do this. There is TDS - you know who the rest is from.
However, it would be useful to provide some general guidelines. In principle, we already talked about them a little higher: up to 50% hardener and 10-20% thinner are usually added to two-component products. The degree of dilution of base enamels usually ranges from 50-80%. Well, look at the exact proportions in the instructions for a specific product: all can varnishes and enamels have instructions in the form of pictograms that inform you in what proportion you need to dilute the paint with the hardener (if the material is two-component) and thinner.
Let me remind you: only thinner is added to one-component materials (alkyds, base enamels, 1K primers); in two-component ones (acrylic enamels and varnishes, 2K primers), a hardener is first added, then the mixture is brought to the desired viscosity with a thinner.
If you order paint for selection in a laboratory, then you will be given a set of components (usually ordered as a set), by mixing which you will get a ready-to-use material with a working viscosity - as they say, “for a spray.” Or they will give you paint that has already been diluted (of course, this only applies to the base, since the lifetime of two-component materials after mixing is strictly limited).
Supplements
A description of recipes for preparing paint cocktails would be incomplete without mentioning additives - materials used to change the individual characteristics of enamels, varnishes or primers.
For example, to create a rough surface - very often plastic bumpers of SUVs are painted this way - there are structural additives of varying degrees of granularity. In general, to prevent paint on plastic from cracking, 20-40% plasticizer must be added to it. There are matting elasticizers designed to reduce the shine and color of plastic parts such as side trims on Mercedes-Benz cars.
When painting with spectacular two-layer coatings, these additives must be mixed with the topcoat varnish (it is recommended to add a plasticizer to the filler primer as well). Read more about supplements and their uses here.
Concrete. Evil squared
You can get into concrete anytime, anywhere. There is always a risk of catching a drop of liquid solution from a “mixer” driving ahead; you can park unsuccessfully near a house whose facade is being repaired. What to do if you're unlucky?
Construction cleaners for concrete should be used with caution, as they can aggressively interact with car enamels. Before cleaning the paintwork, try applying the cleaner to the body in a place where the defect will not be noticeable. For example, there are suitable surfaces in the engine compartment.
High-quality concrete mortar sets very quickly, hardens and has good adhesion. If the stain has not completely set, you can try to dissolve it with an epoxy grout cleaner. This product is used by master builders to remove stains from freshly laid tiles. If it doesn't help, you need to go to specialists. Most likely, they will remove the stain with acid. It is dangerous to carry out this operation on your own. Working with professional acid-based cleaners requires certain knowledge and skills. After cleaning, the location of the stain will require polishing, since it will not be possible to fully protect the varnish layer from the negative effects of sand and acid.