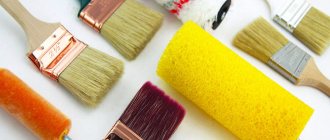
Three types of tools are used to paint walls: brushes, rollers and spray guns. Which of these tools should you prefer if you are going to paint the walls in your apartment yourself? For this type of painting work, any specialist will recommend choosing a roller. Why?
The brush works on the surface slowly and often has to be dipped into paint. At the same time, achieving a uniform and even surface with its help is quite difficult. The spray gun copes well with the task of painting large areas and can create a perfectly even layer of paint. But it is quite expensive, and not everyone will decide to buy this unit for one-time work. The golden mean between simplicity and quality of work is the choice of roller. It can be called a unique tool because, having a simple design and low cost, it is incredibly effective.
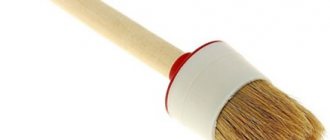
Roller device
A roller for painting walls is a simple structure consisting of three parts:
- through cylinder made of wood, aluminum or plastic;
- absorbent coat;
- a handle consisting of a handle for holding the roller in the hand and a rod on which the cylinder is attached.
When an instrument is dipped in paint, the coat absorbs it over its entire surface. During operation, the cylinder rotates on a rod, ensuring uniform rolling of paint across the walls. Painting with a roller is a pleasure because it is almost effortless and does not require special skills. Thanks to the features of its device, this tool allows you to work quickly and save paint.
Lever
The length of the roller handle is usually from 30 to 50 cm. If it is necessary to lengthen the handle, for example, to paint the top of a high wall or ceiling, a special telescopic rod is used. It can be made of aluminum, plastic-coated metal, or fiberglass.
According to their design, handles are divided into two types:
- clasp;
- double-armed.
The clasp handle is, in fact, a curved metal rod on which an attachment is attached - a cylinder with a fur coat. A special coupling or pin is used to secure the nozzle.
USEFUL INFORMATION: What color to paint the walls in the kitchen
The double-arm handle is a fork that holds the nozzle on both sides.
Attaching the nozzle
Depending on the method of attaching the nozzle, the rollers are:
- detachable;
- hard.
The detachable roller allows the use of replaceable attachments. This is very convenient, because under one handle you can select attachments with different coats and change them as needed.
The rigid roller is a one-piece structure. After the coat wears out, such a tool will have to be thrown away entirely, since the handle and the nozzle are inseparable from each other.
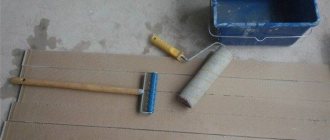
Preparing walls for painting, painting with a roller
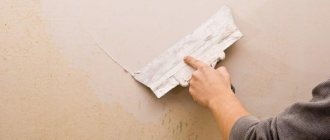
Prepare the base before painting
To use a roller to paint walls, you must first prepare the room. It is necessary to remove curtains and furniture (or move them, cover them with film or special covers).
If necessary, cover the floor with cardboard paper, cover the doors and windows with plastic film (you can use cloth, but there is a possibility of leakage), and cover the baseboard with paper tape.
Preparing the walls comes down to a number of operations:
- after turning off the power supply, remove the covers from switches and sockets;
- Cover the remaining “insides” with masking tape;
- if necessary, remove heating radiators;
- cleaning and making the surface smooth: removing wallpaper (if any), hiding defects with putty, sanding dried walls.
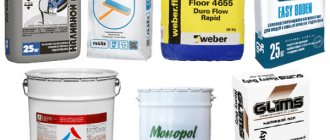
Pallet for paint
The work requires the presence of basic and auxiliary equipment:
- screwdriver, knife, paint tray;
- set of rollers, sanding accessories.
After all the preparations, having chosen a roller for the walls, you can start working:
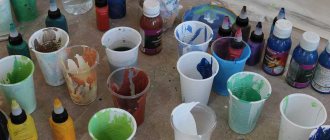
- the tray is filled with a small amount of dye;
- the roller is dipped and rolled out to remove excess and distribute the coloring matter evenly over its surface;
- painting begins from the corner, then spreads in any convenient direction;
- to avoid the appearance of streaks, move the tool smoothly, without pressure, from top to bottom and back;
- The corners are painted with a brush. For information on the types of rollers, watch this video:
The remaining layers are applied only after the first has dried.
Classification by size
Rollers can be divided into three groups depending on the width and diameter of the nozzle:
- Mini rollers. They have a small width of the working part - up to 150 mm. Designed for painting small surfaces or hard-to-reach places, such as corners.
- Midi or medium size rollers. The width of the nozzle of such a tool is from 150 to 200 mm, the diameter can be from 40 to 70 mm. This type is the most common and versatile, since it represents the optimal combination of good coverage area and low weight.
- Facade rollers have the largest size, their width exceeds 250 mm, the diameter of the nozzle is more than 80 mm. Large rollers are a professional tool; they have a thickened shaft and a high-quality coat. A facade painting tool soaked in paint has a decent weight, so it requires a certain skill.
Types of rollers and their prices
Each construction roller can be classified into one of the following types:
- Painting – used for applying paint and varnish coating. The price depends on the material of the fur coat, ranging from 100 to 1200 rubles and above.
- Special – for performing other tasks.
The first option, depending on the fur coat or the design of the clasp, can be:
Universal
Suitable for working with any flat surfaces, including ceilings and walls, capable of applying enamels, varnishes and paints.
For working with specific compositions, for example, exclusively for applying water-based paints.
Radiator
Roller on a wire extended handle with a thin roller.
Purpose – painting the back surfaces of pipes and radiators, where it is impossible to reach with a regular clasp roller.
The cheapest one will cost 50 rubles.
Facade
Its characteristic feature is the large diameter of the roller, which increases the working surface area, a long handle, and most importantly, the presence in the design of a bearing that slows down rotation at high speeds.
As a rule, such a roller has a longer pile, and in combination with other characteristics, it increases the convenience and speed of processing surfaces with a large area.
Facade tools are often produced with a telescopic handle, which largely distinguishes them from models for interior work.
Price – from 200 rubles.
Angular
It has a small width roller that resembles a wheel, which allows you to easily paint corners and similar hard-to-reach places.
Price – from 130 rubles.
Special rollers include the following options:
Pressing (smooth)
They are used for applying adhesives, but mostly to remove air bubbles from under the material, mainly wallpaper.
This type of wallpaper roller has a rubber or polyurethane roller coating, also called a rolling roller.
The tool comes with a conical roller or a “barrel” shape.
At the same time, the rollers for wallpaper and for wallpaper seams are different.
Price – from 70 rubles.
Needle
There are several types of tools depending on their purpose.
For example, a drywall roller has sharp spikes on the working surface, which pierce the surface when rolled.
This is done so that the inner layer is better saturated with moisture for the subsequent giving of a certain shape to the sheet, say, under an arch.
Options for self-leveling floors can be studded with soft needles designed to remove air bubbles from the thickness of the poured material.
Price – from 200 rubles.
Textured
The general name for rollers for forming textured surfaces.
Thus, a structural tool has a coat that gives plastered and putty surfaces (in principle, from any structural composition) a decorative texture.
Another name is decorative roller.
Paneled (patterned)
It is quite rare on sale, and its purpose is decorative painting, excluding the use of a stencil.
This painting tool is designed for applying paneling.
The frame type of construction allows you to install a roller with any pattern of interest.
In addition to the classic mechanical rollers, which periodically have to be dipped into a tray of paint, there are options with a refill function.
They are designed to work with liquid water-based compositions, and the roller design has a side cover that locks the internal cavity into which paint is poured.
On the one hand, such a roller is convenient to use, on the other hand, it is disposable, since even if you rinse it well after use, the next time you use it, the paint will no longer appear on the fur coat with its original effectiveness.
How to choose the length of the pile
The length of the roller pile determines the amount of paint it can absorb and, accordingly, the thickness of the applied paint layer. Long pile has thicker threads, short pile has thinner threads. The choice of pile length depends on the texture of the walls being painted.
- For a rough surface - putty, concrete, wood - a fur coat with a pile of medium length - 5-20 mm - is best suited.
USEFUL INFORMATION: Stages and features of apartment renovation in new buildings from scratch
- For smooth walls made of metal, plastic or plasterboard, you will need a fur coat with a pile length of up to 5 mm;
- Large-relief surfaces, for example, those covered with textured plaster, are painted with a tool with a pile length exceeding 20 mm.
Which roller to paint the ceiling with
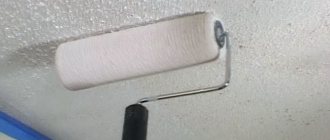
The roller for ceilings must be selected according to the same criteria as for walls. Typically, a ceiling roller, unlike a wall paint tool, has a relatively short or medium-sized handle. The quality requirements for ceiling painting are usually higher, so the roller needs to be chosen more carefully. Most often, rollers with slightly elongated soft pile are used for painting ceilings. It is very good if such pile is made from natural materials, for example, wool. Pile that is too short does not pick up enough paint. You can use a foam roller for the ceiling, but it is not the best choice: it creates “bubbles”.
Paint applied to a roller cannot be rolled out directly onto the ceiling, as this will lead to unevenness of the layer. It must first be rolled out on a sheet of linoleum, hardboard or other similar material specially prepared for this purpose. This can also be a special painting tray if the roller size is small.
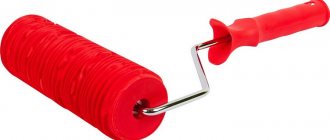
Textured rollers
Relief and structural rollers can be distinguished into a separate category. These tools are designed for additional decoration of the surface to be painted. The attachment of such a roller can be made of rubber, leather, foam rubber, wood, and has a protruding pattern applied to it. When rolled evenly over fresh paint, it leaves imprints on it.
Using a relief tool, you can apply a design or pattern to painted walls using paint in a contrasting color. Texture rollers are also used to create a certain texture on decorative plaster, paint, and liquid wallpaper.
Choosing the width and diameter of the roller for acrylic paint
If your choice is acrylic, the length and material of the tool must be selected more carefully. Why do most masters advise choosing a roller? The main reasons are:
- quick application to the surface;
- does not leave stains or streaks;
- blends paint perfectly;
- The acrylic composition can be applied to any surface;
- painting a large area with acrylic or any other liquid;
- you can create various effects: orange peel, notches, bulges.
The roller for acrylic paint should depend on the volume of the surface to be painted. In general, manufacturers create instruments of various sizes: from 5 to 40 cm in diameter. When choosing a device, you need to be guided only by this rule: the larger the surface area you are going to process, the wider and larger the device should be. If you need to paint the ceiling, you should choose a device no more than 30 cm wide, since a larger tool will cause inconvenience.
And also, we must not forget about the extension cord for the handle. It is extremely inconvenient to work on a chair, so it is necessary to purchase such a device. The length of the handle should reach 30 or 40 cm.
Important! When purchasing repair tools, you cannot limit yourself to just one roller. There are hard-to-reach places on the walls that can only be painted with a brush. You should purchase several brushes of different types at once. These should be oblique, curved and radiator brushes.
How to choose a quality roller
Construction stores offer a huge variety of rollers from different manufacturers, and it is often difficult for a novice craftsman to understand which tool is of better quality. In order to make the right choice, you need to remember several features that a good tool should have:
- When squeezing the fur attachment, it should quickly restore its original shape.
- The coat of the roller should look neat, individual threads or hairs should not come out of it, and the seams should not stand out.
- Pay attention to the stripes on the fur coat. Longitudinal stripes indicate that the fur coat is sewn and can be replaced if necessary. Such coats are made for high quality instruments. Transverse and oblique stripes mean that the fur coat is glued and cannot be replaced.
- The number of stripes indicates resistance to aggressive components of paints and varnishes. The more there are, the higher the stability of the roller.
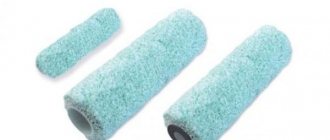
Types of rollers based on fur coat material
The main aspect when choosing a paint roller should be the material from which the coat is made. The quality of coloring depends on this. Based on this parameter, the following types of paint rollers are distinguished:
- Polyamide. It is made of artificial fiber, which is characterized by increased wear resistance. The length of the pile of such models can vary from 8 to 20 mm. An excellent option for water-dispersion paints.
- Made from natural fur. Sheepskin is most often used. It copes well with oil and water-dispersion paints and varnishes.
- Velor roller. It is most often used to apply the finishing layer. Suitable for oil paints and alkyd enamels.
- Polyacrylic. Its characteristics are similar to polyamide. Suitable for painting any surfaces with paints containing a small amount of aggressive components.
- Foam roller. It is allowed to be used only for water-dispersion paints. Requires caution when working. Excessive pressure on the tool may cause paint runs. Moreover, the performance of such models is significantly higher compared to taxes made from other materials.
- Terry rollers. Made from polyester. This is one of the cheapest options. Synthetic fiber cakes quite quickly, so the service life of such models is short. Such products can be used when working with acrylic or water-dispersion paint.
- Flocked. This is a short pile roller. It is ideal for working with waterborne varnishes. It is prohibited to use it for water-based paints. It is chosen for painting flat surfaces of small areas.
All types of rollers have their own advantages and disadvantages. It is necessary to choose a specific model based on the structure of the surface and the type of paint used.
Polyacrylic and polyamide rollers are considered the most durable and resistant to aggressive paints. They are allowed to be used with varnishes and enamels.
Ceiling preparation
To repair a ceiling, you must first identify all its shortcomings and understand how to work with it. One of the most common situations has the following signs: the plaster has crumbled abundantly, there are noticeable darkenings in the corners, and the ceiling itself has practically no differences in height.
In this case, preparing the ceiling for painting will consist of the following steps:
- First you need to remove the old coating. If the ceiling was previously covered with whitewash or plaster, then the ceiling will need to be cleaned. To do this, the ceiling is moistened with water and left in this state for some time.
- When all the water has been absorbed into the coating, you need to scrape it off with a metal spatula. The need for preliminary wetting with water is due to the fact that in this case the coating peels off from the concrete floor much more easily. In the case of wallpaper, the technology will look the same, but you will have to remove not only the wallpaper, but also the glue that held it in place.
- If the ceiling was previously covered with a water-based composition, then not only water will be required, but also wind - the room will need to be exposed to a draft after wetting the ceiling. The combination of water and air will swell the emulsion, making it much easier to clean up. An alkaline solution with soda is best suited for rinsing.
- After cleaning the ceiling, you can proceed to the next stage of work - applying a primer with an antiseptic. Today, there are many variations of primer compositions - for example, some of them contain chlorine, which is an excellent antiseptic. However, such compositions do not fully perform their functions for long. When choosing a primer, you must make sure that it is compatible with the paint used to cover the ceiling.
- When the base layer of primer has dried, you need to cover it with a primer - a polymer primer that improves the quality of the coating. The standard technology for this stage consists of applying the first layer of starting putty, sanding, another layer of starting solution, finishing putty and final sanding, during which you need to level the surface of the ceiling to a perfectly smooth state.
Having completed the preparation of the ceiling, you can begin painting it with water-based paint.