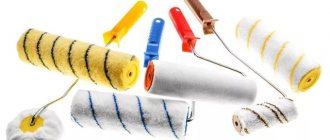
Textured and structural rollers - what they are, features of their use
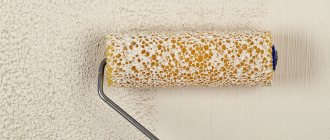
The device consists of a rotating cylinder on a curved handle with a variety of coatings that create artistic elements. The textured roller imprints a three-dimensional pattern on the newly applied plaster layer. For example, this way you can imitate brickwork or, using a variety with fur, create an aesthetic roughness. A structural roller is used to apply repeating decor with paint on a dry surface; working with this technique may seem more difficult due to the fact that you need to avoid smudges, but it is easy to learn. This technique is used to decorate wood and fabric.
The textured roller imprints a three-dimensional pattern on the newly applied plaster layer.
Roller knurling rules
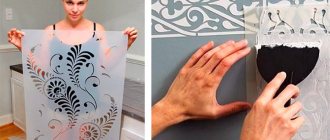
To use stencil rollers more efficiently, it is best to make a special device in the form of a machine consisting of two rollers. One roller will contain a rubber stencil, and the second should be smooth, made of porous rubber or a rubber sponge. They should be pressed tightly together so that they rotate freely.
Before starting work, the roller is soaked in paint, after which the excess paint is squeezed out. Next, the roller is inserted into the machine and work begins. After this, the machine is placed with a stencil roller on the surface to be painted. To apply decor efficiently, you should apply a certain amount of pressure while moving the roller along the wall.
Effective use of screen rollers
For ease of use, you can supplement a machine with two rollers with a paint reservoir, which will constantly supply paint to the tool with a stencil. This addition allows you to paint for much longer. The design of the machine makes it possible to adjust the pressure that is used to press the rollers against each other. Thanks to this, you can change the saturation of the pattern and make it the same over the entire surface of the walls.
This technique is called the color knurling technique. Using stencil rollers, you can achieve a crumpled surface effect that will add originality to your interior.
Classification of decorative rollers by pattern texture
Rollers for decorative plaster can recreate almost any motif. Thus, they are used to imitate marble or other stone, brick, wood, textiles, and sand. The thicker the layer of plaster coating and the deeper the coil is pressed, the more voluminous the pattern is.
There are more tricky patterns:
- Waves;
- Braids;
- Shells;
- Ferns and dried flowers;
- Birch bark.
In addition to all kinds of forms presented in stores, the designer can develop a stencil to create an exclusive ornament on a single object, or even several.
Rollers for decorative plaster can recreate almost any motif.
Painting with a texture roller is like creating your own wallpaper design. Typically, floral or abstract themes are chosen, but, if desired, images of birds, waves, and leaf veins can be applied.
Also, tools come in different widths; the wider, the process goes faster there, but narrow ones allow you to repeat the pattern in stripes and provide a clear depiction of small details.
Painting with a texture roller is like creating your own wallpaper design.
Materials for making decorative rollers
The production of rollers with patterns from all kinds of materials opens up enormous possibilities for flights of fancy. By type of stamps, almost everything is used. What varieties can be found in construction stores:
Rubber or silicone
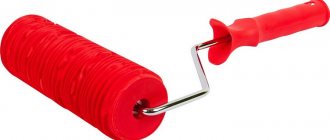
They are the ones most often purchased to create three-dimensional ornaments. The price for them is approximately twice as high as for all the others, but as you proceed, it becomes clear why. Patterned rollers intended for coloring compositions are called rigid decorative ones.
They are the ones most often purchased to create three-dimensional ornaments.
Foam rubber
Foam rubber usually has deep pores, the spongy structure allows you to create a mark that looks like tiny craters. The plaster should not contain large fractions or solvents, otherwise the desired effect cannot be achieved, and aggressive substances will destroy the structure, then fragments of foam rubber will remain in the most visible place. Embossed polka dots do not create the expected imprint due to their softness. To treat a large area, purchase several pieces.
Foam rubber usually has deep pores, the spongy structure allows you to create a mark that looks like tiny craters.
Foam
Inexpensive. Disadvantage: it quickly fails, the embossing is flattened, and does not come out at all as expected. You need to buy more and be on guard all the time.
It quickly fails, the embossing is flattened and does not come out at all as expected. You need to buy more and be on guard all the time.
Leather
Leather is used for Venetian techniques, it can form a beautiful marble relief. It is important to choose a natural material of high quality; artificial analogues can slide without giving any result or quickly fail.
Leather is used for the Venetian technique, it can form a beautiful marble relief.
Wooden
Mixtures do not stick to wood, so it is suitable for those who are taking up creativity for the first time. It does not react with chemicals, but does not last long, as it absorbs moisture and delaminates.
Mixtures do not stick to wood, so it is suitable for those who are taking up creativity for the first time.
Plastic
A budget option, they become deformed and crack during use. They are suitable for decorating a small area with an ornament, but it is unclear how the plastic will react to the composition of solutions and paints.
A budget option, they become deformed and crack during use.
fleecy
Made from a variety of materials. Natural fur does not mix well with lime in solutions. Artificial - has a good distribution, but a short-lived coat. Polyamide ones are selected according to the length of the pile, they can be cleaned and can serve for quite a long time. Velor ones leave a barely noticeable mark. The longer the pile, the more textured the effect. At the finish, the same rollers are used to paint walls with a textured pattern.
Low-quality products often fall apart right on store shelves. It is better to immediately refuse the purchase, since it will be impossible to remove lint and pieces of foam rubber from the plaster.
The longer the pile, the more textured the effect.
What are the sizes of a paint roller?
The purpose and size of the roller are characteristics that are directly related to each other, since the convenience of work in each specific case depends on the correct choice. For example, if you need to paint a large, flat surface, then it would be wiser to use a roller, the working part of which is as wide as possible. But for working with corners, a small tool is better. So, there are the following sizes of rollers for decorative painting of walls:
- mini rollers. With their help it is extremely convenient to work in small areas and with complex surfaces. The diameter of the roller in this case does not exceed 15 cm, and the width of the working surface is usually no more than 150 cm;
- midi rollers. This tool has a slightly larger working surface (from 150 to 250 mm). The roller diameter can range from 50 to 90 mm. Such rollers are considered universal, as they are great for most jobs and are quite easy to use. They are purchased more often than others;
The size and coat of the paint roller must be selected based on the type of surface that needs to be painted.
- façade rollers. These are the largest and widest tools, the working surface of which exceeds 250 mm. The roller diameter can reach 80 mm. Such rollers are considered professional and are almost never used at home. Moreover, in order to work with such a tool, you must have certain skills and some experience.
It is necessary to choose a roller by size taking into account the individual capabilities and experience of the master, as well as the characteristics of the surface with which to work. At the same time, the midi roller almost always fits perfectly and copes with all the tasks without any problems.
Helpful advice! The larger the working surface of the roller, the more paint it can absorb. Therefore, you should not choose models that are too large, as some difficulties may arise during the work, and you will quickly get tired.
To paint walls in an apartment, it is better to use a medium-sized roller
What to look for when purchasing
A rubber roller designed to form a deep impression can be compared to a pressure paint roller. For such activities, a rubberized handle is desirable, since some effort will have to be made for a long time. The design must be strong and not bend when pressed.
To style it like a fur coat, select a roll with long pile, and the plaster can be applied with a broom. Complex floral patterns are applied with a wooden or rubber roller, but it should be taken into account that wood absorbs water from the paint, among other things. The stencil design on the print must be clear, closed in a circle, have smooth edges, without cracks or scratches. The fibers on textile rollers should be smooth, not caked or crumble.
To create voluminous motifs, the relief on the roller with a pattern for wall decor must match the thickness of the decorative layer.
The fibers on textile rollers should be smooth, not caked or crumble.
Beautiful doesn't mean expensive
Yes, this phrase fits our proposal perfectly. And it consists of decorating the walls using decorative plaster, paint and a textured roller. That's how simple it all is.
Why is it cheap?
- Firstly, the plaster mixture is one of the cheapest finishing materials, just like paint for its decoration.
- Secondly, even a non-professional can do the job, which means there is no need to hire a team. And thirdly, you can also make a roller yourself.
If you don't want to DIY, no problem. Just visit a hardware store or order online, for example here.
How to make your own decorative roller
Using scrap materials to make a textured roller with your own hands is an exciting activity; it is recommended to first test such a device on paper or plywood. Some modification methods:
- Wrap a pressure roller or wooden roller (or a rolling pin) with rubber cords or silicone sealant. The print will be slightly uneven, but will not irritate with too clear geometry. If you take thick threads and a fluffy paint roller, you will get something like flowing splashes or streams. For the same purpose, you can use old transparent tights;
- A plastic bag wound on a reel, secured with a vegetable net. The result will be a picture of uneven wrinkles. Using this conversion, you can apply small splashes of paint of a similar color;
- The leather instrument is made with a large number of voluminous folds, intercepted with wire. You can also fasten the skin in the form of triangles, squares and other shapes with free edges. This can be done with pin buttons or another method of fixation that can withstand all manipulations;
- A real designer exclusive can be cut from a rubber roller. To do this, you need to transfer the motif using carbon paper or a stencil and purchase cutters for linography. The task is very painstaking and requires artistic skills;
- Another skillful option may appeal to woodcarving craftsmen: create an engraving with a depth of 0.5 cm on a cylinder with a hole inside;
- Cut out circles, squares and stars from a silicone mat. Secure with silicone glue. Glue on a piece of burlap or matting with a large weave;
- Cut grooves in the old foam roller;
- The tamponing method can replace the coil; for these purposes you can use: natural sponges, rough cloth, crumpled plastic bags;
- Stripes can be drawn with a stiff brush or comb - massager.
Even indoors, it is recommended to maintain temperature and humidity levels. Do not proceed with operations in abnormally scorching sun or fog.
Using scrap materials to make a textured roller with your own hands is an exciting activity.
How to apply paint
To do everything right, the process is divided into three standard sequential stages: preparation, laying the primer and painting.
Preparation
Algorithm of actions:
- If the surface has previously been subjected to decorative finishing, then the old layer is completely removed.
- The general condition of the coating is assessed. Minor damage and cracks are covered with putty. You can paint a wall with textured paint even if there are minor defects and distortions, but they should not exceed 2 mm.
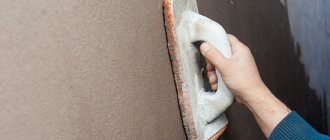
Before finishing the wall is thoroughly cleaned - If there are significant problems, the layer of plaster is removed and a new one is laid.
- Dirt and dust are removed and the work site is prepared. In order not to paint adjacent areas and other elements, they are sealed with masking tape.
The surface must be smooth and free of defects. If you want to enhance the visual effect, then the base is given the required geometry in advance. An example would be a small slope of a wall from top to bottom, which would be an excellent addition to horizontal straight or wavy stripes.
Applying primer
Priming is an important procedure that ensures reliable adhesion of the applied composition. The deep penetration solution is applied with a roller; all areas must be treated. The number of layers varies from 2 to 3; before applying the next coating, wait until the previous one has completely dried.
Applying primer is a mandatory procedure for any artistic decoration
It is better to choose a composition from a well-known and trusted manufacturer, this will guarantee a good result.
Coloring
To get beautiful textured walls exclusively with your own hands, you need to follow some rules, especially when using special texture compositions:
- The preparation of the solution is carried out exclusively according to the manufacturer's instructions. It is not recommended to dilute such mixtures, only if necessary, but the amount of thinner should not exceed 1-2% of the total paint volume.
- The surface is divided into conditional sections. Due to the rapid setting of the composition (15 minutes), the mixture should be applied to an area of no more than 2–3 m2. This will allow you to form the desired relief.
- The design is thought out in advance and the necessary texture is selected.
If any pattern is provided, then markings are carried out before applying the compositions.
General painting technology:
- The base coat is applied first. A water-based acrylic composition is suitable for this. The need for such a layer is determined individually.
- Then the base is laid. Using a suitable tool, the desired relief is formed.
- After drying, the surface is covered with wax or varnish.
There are 4 basic ways to apply texture to a wall.
You can simplify the work by inviting a partner who will be responsible for the texture or applying the composition.
You should know! An important detail is lighting. You should paint with exposed light sources, this will allow you to evaluate the resulting texture and, if necessary, make adjustments.
To get an excellent result, coloring should be done in good lighting.
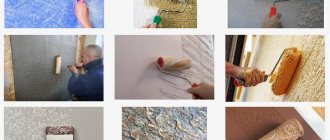
Technique for applying plaster with a structural roller
The process is gradual and does not involve arbitrary breaks due to the pot life of the solutions. First, you should determine the motive and create a sample so that you can repeat its contours if you need to do the drawing not in stripes, but in a conditionally chaotic manner.
Prepare the necessary plastering supplies: rule, level, corner leveler, scoop, spatula, textured roller for decorative plaster. Particular attention should be paid to the kneading device; if there is no mixer, attach a whisk attachment to the drill. Check the compliance of the quantity of purchased mixtures with the area of work, and the compatibility of the compositions.
As with all plastering work, high-quality preparation is necessary, cleaning surfaces from old coatings, chemical stains, and removing dust. Then the cracks and chips are sealed and rough leveling is carried out with grinding. The dry surface is primed and beacons are placed.
Then a starting leveling layer of plaster is applied. It is recommended to prime the wall again before applying decorative layers. At the next stage, you can add color, or if you plan to apply several layers or paint, then start creating a relief.
It is recommended to prime the wall before applying decorative layers.
Each method will be different. For example, for a fur coat, you need to apply the composition with a broom and evenly treat the entire wall with a roller. The complexity of the method is that it is necessary to ensure that the solution is applied evenly. Punching the pattern can be done immediately if the plaster is of normal consistency; as a rule, it takes 10-15 minutes for the master to level one plane. The design can be applied using a paint spatula or a patterned roller, and the movements can be wavy or strictly straight.
Venetian plaster has its own application and tinting technology, which is more complex than other types.
Punching the pattern can be done immediately if the plaster is of normal consistency.
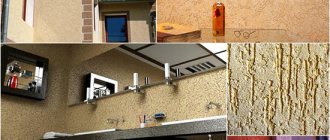
Types of textured paint
According to the type of decorative effects created, textured paints are divided into the following types:
- Mizuri. In addition to acrylic, the substance contains modified starch, which makes it possible to obtain both a structural and smooth effect when applied. This or that texture depends on the laying tool used.
Textured paint "Mizuri" - Marseille wax. With this paint you can achieve a very realistic imitation of natural stone and balsa wood. Like Mizuri, Marseilles wax can produce a smooth or textured effect. To be fair, it is worth noting that in this case it will not be possible to obtain a completely smooth surface - the small depressions will still remain after smoothing. To protect against moisture and increase decorative qualities, a layer of wax is applied to the dried surface.
Textured paint “Marseille wax” - Atacama. The material has outstanding external qualities: the finish plays with numerous colors when viewed from different angles. This effect is achieved thanks to the quartz sand included in the paint and special metallized additives that form a reflective layer. In appearance and when touched, the finish creates a velvety feeling.
Textured paint "Atacama" - Relief. Acrylic components in this case are reinforced with quartz sand and a number of other substances, which makes it possible to create pronounced patterns. Relief paint is not suitable for creating a smooth surface. It is this finishing option that is considered the most striking representative of textured paint.
Textured paint “Relief”
Technology for correct coloring of textured surfaces
If the color is not mixed with the plaster solution, then a special painting technology will be required. The wall at this stage is matte and white. What colors are selected:
- Oily. The coating is thick with a slight gloss, but has many disadvantages: they do not allow air to pass through and therefore can peel; in order to make a new repair you will have to remove it, and this is a long and unpleasant task; the smell is pungent and toxic, long drying time;
- Alkyd. The advantage over drying oils is only in the setting time: 1-2 days;
- Water-dispersed based on acrylic or silicone. After just a few hours, you can apply a second layer; it becomes lighter as it dries;
- Acrylic. They don't dry for long and are great for all-over coloring. Mother-of-pearl and sparkles are sometimes added to the compositions;
- Azure. They are used for toning, add depth to the relief, and take a long time to dry.
If the color is not mixed with the plaster solution, then a special painting technology will be required.
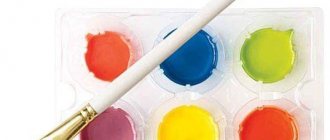
If you plan to work using several colors, you should prepare a set of brushes for each color.
For painting you will need: rollers, sponges, brushes, containers, masking tape on baseboards, paper or cloths for tools. The decorative layer is dried for at least two days, cleaned of dust particles, and a suitable primer is applied. Paints are mixed with one or more colors. Monochrome. Surfaces with shallow relief are painted using a roller. Two or three colors. The lightest base color is applied to the entire wall area. Using a sponge or roller, apply a darker shade so that the first color remains in the recesses. In the finale, you can use glaze or decorative coatings.
If you plan to work using several colors, you should prepare a set of brushes for each color.
Dry brush. After painting the base color, a wide brush without excess paint is brushed across the wall, touching only the tips of the bristles, as a result, the protruding parts of the pattern stand out.
Wax can be tinting and finishing, and can be part of a decorative mixture. It extends service life, can change color, make the surface matte or glossy. As a final layer, take a little wax on a spatula and level it, polishing it with a cloth.
Wax extends service life, can change color, make the surface matte or glossy.
The varnish protects against dust and moisture, has various effects: glitter, mirror gloss, satin, cracks or can be tinted.
The more prominent the wall, the more paints are required.
The varnish protects against dust and moisture and has various effects.
Preparing textured paint
Before applying textured paint, you must carefully read the attached instructions. It contains information about drying time, preparation procedures and application recommendations. This type of material is usually sold in plastic buckets.
Textured paint
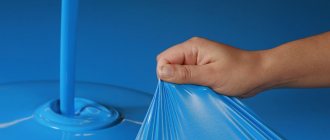
The consistency of the structural composition is characterized by decent density, so before application, add a little water to it and stir with a drill with a mixing attachment. It is important not to overdo it with water, because... a substance that is too liquid simply will not stay on the base (this is especially true for the ceiling). According to the recommendation of experts, the volume of added water should not exceed 1/10 of the total amount. As practice shows, usually an average of 4% is enough for stirring.
Adding water to textured paint
If, according to the design idea, the surface to be painted should have a different color (not white), the corresponding pigment is added to the paint composition. It is best to entrust this procedure to professionals in the store where the material is purchased. When tinting paint yourself, it is important to be very careful when introducing the pigment substance in small portions.
Adding colored pigment to textured paint
After each portion, you need to pause to stir and check the resulting shade. If its intensity is insufficient, the procedure is continued further. Checking the level of color intensity is carried out by applying a stroke of paint to the wall (you can use a hairdryer to speed up the drying of test strokes). The best pigmentation quality is achieved when using a color from the same company as the paint.
Mixing colored pigment with paint
Caring for a textured roller
This instrument must be washed and dried before each use. Mixtures and paints should not dry on it. This is easy to do if the roller is rubber; the wood requires high-quality drying, preferably in fresh dry air.
This instrument must be washed and dried before each use.
Using the technique of embossing a pattern with a textured roller does not require serious preparation and the purchase of expensive mixtures and tools. You can evaluate your abilities by taking a small board for sketching. If plastering technology is followed, the interior will remain unchanged for many years.