Does your child love to paint, or is he just getting acquainted with this exciting process?
Prepare natural and safe paints for creativity that can be used in different ways - for finger painting, creating masterpieces on the tiles in the bathroom while bathing, for making souvenirs and gifts for loved ones. Surely the following 8 DIY paint recipes will be appreciated by both children and parents!
Peculiarities
Regardless of the type, most people perceive paint as a purchased product, but making it with your own hands at home is not so difficult.
As a rule, such a mixture contains only 2-3 main ingredients that must be included, which can be purchased on the market without any problems. Expensive paints and varnishes from the best brands can show much higher quality due to inclusions of various additives, but for unpretentious use, homemade paint will also work.
Making your own paints allows you to significantly save on buying expensive paint and make the product exactly the type and color you need.
It is quite possible that such a material will be somewhat inferior to expensive industrial analogues, say, in terms of durability or the ability to withstand negative external influences, however, for relatively minor repairs in the garage, this option is ideal.
Recommendations for parents: what do you need to make creative materials at home?
In order for the creative process to take place in a calm environment, you need to think about creating a harmonious atmosphere:
- Before you start drawing, you need to choose a well-lit place in the apartment where you can sit with your child. So that after playing you don’t have to wash surfaces and wash clothes, cover the floor or table with newspapers, and put on your baby an apron or clothes that you don’t mind getting dirty.
- Playing with texture and colors. Finger painting is a way to experiment by mixing colors or diluting the mixture with water.
- Comment on your actions to the baby, tell him about tactile sensations, praise him for his efforts and successes.
- Make a hand and foot print of your baby as a keepsake.
- Drawing is an effective way to learn and learn new things. Finger painting is not only a way to bond with parents, but also an opportunity for creative self-expression, development of fine and gross motor skills, and strengthening the muscles of the fingers and hands.
There are many proven recipes for making children's paints. To make creative materials at home, you will need:
- Newspaper or old wallpaper to protect the work surface;
- Apron;
- Food coloring in powder or gel form;
- Wet wipes or paper towels for cleaning hands;
- Drawing paper;
- Base for paints, such as flour, shaving foam, liquid soap, etc.
Ingredients for finger paints
Manufacturing methods
There are many recipes for making your own paint at home - it all depends on the type of paint and varnish material that you plan to prepare. It should be noted that it is better to buy too complex types of paint (such as facade or heat-saving) because they contain a huge amount of additives. You can and should try to do everything else yourself.
Slate
Chalkboard paint paints any surface in such a way that it creates an imitation of a chalk board. There can be quite a few ways to practically use such a finishing material, but first of all, children’s eyes should light up - it’s very convenient to write on a painted surface with chalk!
The composition is absolutely non-toxic even in the factory version, so its use in a nursery is quite appropriate. The home version differs from the sold one only in that the surface scratches faster.
The simplest method involves simply adding two spoons of cement to a glass of any acrylic paint.
There is a more complex recipe: to three parts of acrylic paint, add one part of matte varnish based on the same acrylic, cement (or putty, or grout) and water. In both cases, the mixture is thoroughly mixed. The creator chooses the coloring at his own discretion .
To turn a wall or furniture into a full-fledged slate, you can add a small amount of magnetic chips to the cement - then the resulting substance will be able to attract metal objects . It is not difficult to calculate the amount of such crumbs: the more there is, the higher the magnetic properties of the dye.
Oily
The paints used by artists for oil painting are very similar in their formulation to their construction counterparts, and people of art traditionally prepared materials for creativity on their own.
The most difficult thing to get is pigments, that is, coloring substances. You won’t be able to prepare them yourself, so all you have to do is buy them in a store or order them online. The manufacturing process can be toxic, so you should take care of personal protective equipment in advance : a respirator and gloves.
The procedure should be carried out only in a well-ventilated area.
Separately, it is worth saying that the finished composition can react with metal, so metal utensils are not suitable for such operations .
Then everything is simple: the pigments are thoroughly mixed with linseed, nut, poppy or hemp oil. There is no exact proportion, but the manufacturer’s task is to completely wet the pigments and bring them to a homogeneous liquid state with a minimum of oil used, otherwise the paint will quickly turn yellow when dried. For kneading, use a glass rod or a special artistic tool - a palette knife .
You can also add a little wax (provides a matte finish), resin (adds shine) or turpentine (helps thin the mixture).
Acrylic
Making acrylic paint is not difficult in words, but its composition includes many ingredients that are unlikely to be found in the home of an ordinary person. As in the case of oil paint, you will have to independently find and select ready-made pigments that are mixed with water to obtain a colored paste. After this, the resulting liquid dye is combined with an acrylic dispersion, which will also have to be purchased specially. The thickness of the composition is adjusted by adding the required amount of water.
Since going to the store for complex ingredients is a must, you can explore the possibility of using other additives. Special antifreezes will help the paint and varnish material better withstand low temperatures, fire retardants will make the composition resistant to high temperatures and fire.
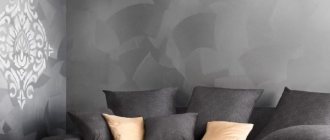
Textured
Stylish modern renovations are characterized by the use of textures that differ significantly from smooth and even surfaces. To decorate walls, special textured paint is often used, which is a cheaper substitute for expensive repairs using natural stone, sand, and so on.
The variety of finished products cannot be replicated at home, but the simplest varieties can be made yourself.
The basis for such experiments will be acrylic paint of any type. To give it a characteristic rough texture, you need a filler, which can even be made from ordinary putty.
For something more intricate, you can go to a hardware store to buy granite crystals or building sand, which will add texture to the paint.
Experts pay special attention to the fact that the use of ordinary river or sea sand instead of pure construction options is not recommended due to the heterogeneity and size of the fraction, and this does not contribute to good adhesion.
Benefit or harm?
Finger paints are a way of creative self-expression, a new experience, and amazing tactile sensations for children of all ages. We can talk endlessly about the benefits of children's creativity, however, poorly selected material can cause harm. Industrial paints for painting may contain toxic substances - waxes, polymers and other chemical additives that can be absorbed into the skin, causing inflammation and irritation. In addition, the composition may contain allergens that cause a reaction in particularly sensitive children - wheat, soy, corn. These factors indicate that the use of even premium quality products may have a negative impact on health. Finger paints, prepared independently, will be a worthy alternative to industrial dyes.
Pay attention to: Choosing paint in a spray can for painting a car: main problems and methods for choosing the composition
Other options
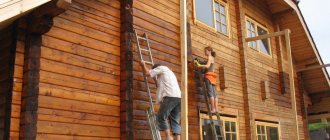
Recipes for different types of paints are quite numerous and strongly depend on the type of surface to be painted and the required properties. In particular, the so-called Finnish paint has gained enormous popularity for outdoor work . It is heat-resistant and designed primarily for wood, but is also suitable for concrete and various types of roofing .
A large bucket of such paint requires: 8 liters of hot water, 1 kg of rye flour, 1 kg of iron sulfate, 120 g of kitchen salt, 0.8 liters of drying oil and 4 kg of ocher. The same recipe can be found everywhere on the Internet, although in each case the proportions may differ slightly. For painting roofs, a Finnish recipe with twice the drying oil content is usually used.
Decorative types of paints are often made for home use, for example, stained glass or for glass painting . In most cases, the base is the same acrylic paint, and all that remains is to understand what to add so that the composition acquires the desired properties. Thus, marker paint is obtained by adding polyurethane and epoxy resin to an acrylic dispersion, which provide it with smoothness and elasticity combined with water-repellent properties.
Any paint becomes fireproof by adding the right types of fire retardant , and the metallic color can be complemented with a characteristic texture by adding metal chips.
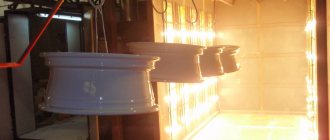
Rubber and powder paints , widely used in the automotive industry, are perhaps the only paint and varnish materials that are usually not made at home due to the complexity of the process and the impossibility of obtaining all the necessary ingredients of proper quality.
Getting started - preparing the palette, brushes and paints
To properly prepare your workplace and choose work clothes, you need to know the features of acrylic. When dry, it becomes water resistant. If the drops get on your shirt or on a wooden table, it will be impossible to clean them. Therefore, before starting work, you should put on an apron, wrap the table with cling film and cover the floor with thick paper. If acrylic does get on clothes or furniture during work, try to quickly wash the stain with water or fill it with solvent.
For work you will need the following materials:
- base: paper, cardboard, plywood or canvas;
- set of acrylic paints;
- thin and thick brushes;
- palette;
- glass of water.
For beginners, it is better to take thick paper with a rough texture or white cardboard as a basis: it is easier to draw on them. Having mastered the basics of acrylic technique, you can move on to canvas, wood and other materials.
If the painting surface is a little dark, prime it before starting work. Art and construction stores sell special white acrylic primer. Apply it evenly to the surface with a wide brush and let it dry completely before painting.
Acrylic paints are sold in individual tubes and in sets. For beginners, a set of 12 colors is suitable. It’s worth buying an additional jar or tube of white acrylic: this is the most popular color, it runs out earlier than others. For specific surfaces (fabric, wood, glass, plastic), it is worth choosing the appropriate set: the type of paint should be indicated on the box. Any paints are suitable for drawing on paper and white cardboard.
For those who are just learning to paint, it is recommended to choose brushes made from squirrel fur as a material, although brushes made from fox fur are more common on sale.
Palettes for acrylic paints are sold in art stores. Most often it is a white plastic board with a hole for your fingers. This palette is easily washed off from paint that has not had time to dry. Sometimes palettes are made of plexiglass: they are in no way inferior to plastic ones, but are heavier in weight. You can make your own palette from scrap materials (even from a disposable plastic plate).
Before starting work, put a little paint from each jar on the palette. To make it convenient to mix colors, artists place white paint in the upper left corner, warm shades (yellow, orange, red, brown) along the upper border of the palette, cool colors (green, blue, purple) along the left border. It is better to lay out black paint after blue or purple.
Artistic brushes differ in size, shape (round or flat), composition (synthetic or natural), and hardness (bristles and synthetics are stiffer than ponies and squirrels). Since acrylic paints are dense and heavy, medium-hard synthetic brushes hold them better.
Beginner artists should stock up on 3-4 brushes of different sizes. A wide flat brush is convenient for painting the background. Use a wide round brush to make textured strokes. Medium brushes are useful for painting most objects, while thin brushes are useful for drawing details. High-quality round brushes, even large ones, have a thin, elegant tip. It allows the artist to change the thickness of the line and move from broad strokes to drawing small details without changing the tool.
Brushes should be rinsed in clean water. Pour water into 2 cups, so that in one you wash off most of the paint, and in the other you completely rinse your brushes. Renew the water regularly as it becomes dirty. Place a clean, dry cloth next to the cups to blot your brushes and remove excess moisture.
What types are there?
In every specialized store you can find three types of paints:
- Highly artistic. These are paints that are purchased by professionals in their field. They consist only of high-quality components, and therefore have a high cost. But for a good painting you need good paints that will not lose their shine or change color over time.
Related article: Techniques for painting with acrylic paints on fabric
- Studio. They are no less in demand than the first option and behave well on canvas. Suitable for both professional and beginner artists.
- Sketchy. They are more suitable for beginners in the art business, since at a low cost you can purchase a sufficient number of paints and choose your own application technique.
Manufacturers of oil paints are located in many countries around the world. Experienced artists have already selected for themselves the options that are suitable for the job. Many people combine their sets from different companies, which is also acceptable.
Oil paints are also divided into transparent and opaque. The latter are denser in structure and therefore do not allow light to pass through them. Each package must have special markings. For example, the designation “*” indicates the durability and longevity of the paint on the canvas. The more such symbols on the paint, the longer the finished canvas will last. The best paints last more than 100 years.
The symbol in the form of a filled black square indicates that the paint is not transparent; if it is half transparent, it is translucent.
The pigments that give paint a particular color can be divided into organic and inorganic. The first type gives brighter shades, and the second gives natural colors. With a good ratio of pigments, manufacturers achieve beautiful and high-quality shades.
For the production of oil paints, imported linseed oil is usually used, since flax, which does not grow on the territory of the Russian Federation, has unique properties, thanks to which art paints have their own unique quality characteristics.
On video: how to choose paints for oil painting.
Pearlescent paint
Pearlescent paints are used mainly to give the interior an interesting look due to their unusual ability to refract light, creating a pearlescent effect. At different times of the day and from different angles, the light always looks interesting.
An interesting iridescence of colors is given to the paint by the pigments included in the paint, which are isolated from mica and glass. At their core, these pigments consist of granules invisible to the eye.
What can you paint with acrylic paints?
Acrylic is suitable for any idea. You can paint landscapes, still lifes or portraits from nature or copy from photographs. An art set with a palette of natural shades is suitable for conveying the beauty of nature and people as naturalistically as possible.
For fantastic scenes, it is better to additionally take a special set of decorative acrylic paints. They have specific properties (for example, a fluorescent glow or metallic luster) and are suitable for drawing details and bright accents.
With acrylic you can apply a decorative pattern to fabric or glass, paint wooden furniture or decorate plastic items. The dried drawing adheres to any surface quite reliably. An art store employee will tell you how to select materials for any design idea: from decorating leather shoes to decorating Christmas tree balls.
But from frequent contact with hands or other surfaces, the drawing will sooner or later be erased. Therefore, acrylic should not be used for painting silicone smartphone cases or cutlery: the paint will quickly crack or wear off.
Photographic quality drawing
High quality painting with acrylic paints
Drawing with acrylic paints
The art of realistic painting
Realistic drawing of animals with acrylic paints
Sketches with acrylic paints
Drawing as a method of self-expression
Interior paintings with acrylic paints
How to get pink color when mixing
Before you get the pink color, to understand how this is achieved, you need to decide on the shade that is needed for the job. Pink stands out for its variety of options from dark to light, it can be bright and pale.
Pink is obtained from red, which is one of the three basic tones that cannot be made without special pigments and is created during production. For this reason, mixing will require the presence of a given paint color, but the relationship with the basic ones makes the paint a must-have in any palette.
Red is an aggressive shade by psychological definition, rich and bright, which when added with white can become soft, and this is how basic pink is created.
If the work is done with watercolor paints, then you will only need to dilute the consistency with water, then the necessary pallor and pinkishness will be acquired.
But for building materials, adding the desired color tints or mixing paints together is used. To change the shade, the mixing ratio changes; the more red, the brighter the option. But some types may require the use of other paints.
Pink is obtained from red, which is one of the three basic tones that cannot be made without special pigments and is created during production.
Basic principles of acrylic painting
Acrylic painting can be airy and transparent - like watercolor, dense and bright - like gouache, voluminous and rich - like oil. Beginners should first make a sketch in pencil, and then cover the drawing with paint. The easiest way is to take a wide brush or palette knife and fill the background with broad strokes, and then add small details.
To see the pencil sketch, you can add more water to the palette and create a light, translucent watercolor background, and then gradually paint over it. The more water you add, the lighter and more transparent your brushstrokes will be.
Brushes should be washed frequently and thoroughly. When acrylic dries, it becomes viscous, resulting in rough brush strokes. Do not leave dirty brushes: they will dry out unnoticed and become hopelessly damaged.
Use a spray bottle of water to keep your palette moist to keep your paints from drying out longer. But under no circumstances splash water on the paper: it will get wet and go in “waves.”
Leave the finished drawing on the table until completely dry. Carefully put the remaining clean paint that was not used during the painting process back into the jars. And if you need to take a short break during your painting session, simply cover your palette with cellophane or cling film.
How to make yellow from watercolor paints
Watercolor is a watery paint that produces light translucent tones. The paint is mixed on a palette and placed on a landscape sheet, where you can clearly see whether the desired yellow tint was achieved. A more saturated color is obtained by layering several layers on top of each other.
A standard watercolor set already contains pure yellow and 3 of its shades. Most often it comes in straw, wax and saffron tones. No less in demand is the golden hue, which is less common, so you have to create it yourself.
How to make yellow from watercolor paints - a golden hue
Here's how to create a golden hue:
- Apply yellow base to a clean palette.
- Use a thin brush to take a few drops of red.
- To stir thoroughly.
- Place the contents on a landscape sheet.
- Add red color as needed (add gradually, in small doses, otherwise instead of golden you will get a dirty brownish tint)
Proportion – 9:1 (yellow + red). To create a more noble color, you need to add white. In this case, the red tone is introduced last.
Tips and tricks to help with acrylic painting
Acrylic dries quickly. Do not keep jars or tubes open while painting. It’s better to put the required amount of acrylic of all the shades that you plan to use in your work on the palette, close the containers tightly and open them next time only when the paint on the palette runs out.
To prevent the paint from drying out longer, use special acrylic solvents. Add a drop of thinner to the palette as you mix colors to achieve the desired shade. This will increase the drying time of the paint and make it more flexible.
When purchasing paints and solvents, ask how these types and brands fit together.
Acrylic has good covering properties (almost like gouache or oil). This means that you can paint with it in several layers to correct a bad part of the drawing. Unlike watercolor, acrylic allows you to paint with light shades over a dark background.
When drying, acrylic becomes noticeably darker. How much depends on the quality of the material and the manufacturer. Therefore, choose a shade that is a half-tone lighter than you need (add a drop of white when mixing shades). After drying, evaluate the result and, if necessary, darken the drawing.
Precautionary measures
When using paints that contain non-food ingredients, the following precautions should be observed:
- Make sure that during drawing the mixture does not get into the child’s eyes. If this does happen, rinse them with plenty of warm water.
- When painting in the bathroom, place a rubber mat or diaper on the bottom, as it can be slippery after paint gets in.
- It is not recommended to give non-edible paint to kids who like to taste everything.
- If possible, use hypoallergenic ingredients to prepare the composition.
Pay attention to: Bathroom paint: types and characteristics of paint and varnish compositions, tips for choosing
About drawing techniques
Preparing for creativity does not take much time, especially since in modern art stores you can purchase everything you need for work. Already stretched and primed, canvases can be found in any size - from the smallest to the largest.
A painting done with oil paints looks very impressive. The strokes applied by the artist look as if they are separate from each other. Many people think that oil painting is a fairly simple activity, but this is absolutely not the case. Let's try to figure out how to learn to paint with oil paints.
Related article: Amazing acrylic painting on glass for beginners
How to make paints for painting at home
You will need the following ingredients:
- 0.5 cups starch (or flour)
- 0.5 glasses of water
- Food coloring (can be taken from the egg coloring kit or purchased separately at the store)
Also suitable as a dye are the following products: juices of beets, carrots, berries (raspberries, strawberries, cherries), the spice turmeric (ochre).
You can also add salt (1 tsp) and vegetable oil (1.5 tbsp).
Preparing paint for painting:
Combine water and starch. Mix with a fork so that there are no lumps. Pour the resulting mixture into jars (for example, baby food), add your own color (dye) to each. Stir again.
Advantages of homemade paints:
- Not expensive
- Natural, simple ingredients
- Any quantity can be made
- Safely
- Funny
Now you know how to make your own paints quickly and easily! You can start drawing!
How to make finger paints for painting
Another option for paints that you can easily make with your own hands at home, using simple ingredients that any housewife can find. Finger paints in the store are relatively expensive (500 - 700 rubles), but they don’t last long. It happens that in one go a child can use up all the cans of paint in a creative impulse. And the creative process must not be interrupted under any circumstances.
What you will need:
The ingredients are the same as for the first option, but in a different proportion
- Wheat flour - 1 cup
- Salt - 1 tablespoon
- Vegetable oil - 1 teaspoon
- Water - 100 ml. (0.5 cup)
- Food coloring (a set for coloring Easter eggs, or juices from vegetables (beets, carrots) or berries.
How to do:
Mix flour, salt and butter with a whisk, gradually adding water. The consistency will be thick sour cream. Next, pour the mixture into prepared separate jars (you can take it from other empty paints or use baby food jars). Add your own dye to each and mix thoroughly. Ready. Let's start drawing!
See how easy it is to sew an apron with your own hands for a child so that he doesn’t get his clothes dirty while creating - Pattern of a children’s apron.
Hair dye
Hair dye is the main product used by all beauty salons. Nowadays, many people want to change their hair color partially or completely, however, even in ancient times, a person was ready to emphasize his status with a different color.
Modern hair dyes offer a person an incredibly large palette of colors, but we can tell you how to make hair dye yourself
Recipe for henna dye with the addition of basma
This type of dye is considered one of the safest for your hair; it does not destroy the structure and gives a healthy shine. However, sometimes it happens that one application of this paint is not enough, and two or three attempts are required.
Hair dye composition
- ¼ cup of henna of the required shade;
- 2.5 tablespoons of crushed basma leaves;
- Egg yolk;
- Corn or olive oil;
- ¼ cup cold water.
Process of making and applying paint
Boil water, carefully pour henna and basma into glass or ceramic dishes.
Gradually add water, stirring to avoid the formation of lumps.
- Pool finishing: description of all types and features of modern finishing
- How an independent examination of construction work is carried out: an overview of all stages
Fasteners for the construction of frame houses: features of the right choice
ATTENTION! Add water until you get a porridge consistency. Let the mixture cool, then add the egg.
We treat the hair and scalp with oil so as not to burn or dry it out.
We apply our homemade dye along the entire length of the hair and put on a disposable shower cap. Let stand from one to several hours depending on the desired color.
We wash off the dye, wash your hair with shampoo and dry it.
How to make material
“Puffy” paints for painting are a popular activity in preschool educational institutions. With their help, you can create interesting pictures that your child will like. Paint recipes will be especially useful for those who are already bored with painting with gouache and watercolors. You can make creative materials at home using one of the recipes below.
Foam paints
The cosmetic product has an unconventional application - it is suitable for creating three-dimensional paints for children. To prepare them from shaving foam you need to take:
- foam itself - 2 parts;
- PVA glue – 1 part;
- any color (food color, gouache).
It is enough to mix the glue and pigment, dissolve the latter well so that no veins remain, then add foam. The finished product should be voluminous, so it must be mixed carefully.
Puffy flour paints
This recipe is also easy. It is necessary to prepare the following components:
- pancake flour – 1 part;
- salt – 1 part;
- water;
- dry pigments.
The easiest way is to take colors from Easter sets; they have rich colors and give very bright shades.
If you don’t have pancake flour, you can use regular flour, although the former gives a more pronounced volume. First you need to combine flour, salt, mix. Afterwards you need to add water a tablespoon at a time so that the mass is like thick sour cream. It is poured into glasses and pigments are added. To create luminous paints, fluorescent dyes are used, which are sold in office supply stores and supermarkets. Instead of salt, you will need baking powder, mix it in equal parts with flour, add water in small portions, then add colors. The difference with regular paints is this: luminous paints are painted in the dark with the UV lamp turned on so that the fluorescent dyes begin to appear.
Volumetric salt paints for painting
These paints allow you to create voluminous, “plump” paintings; children really like them.
The child's age is 2-7 years.
What you will need:
- 1 part flour.
- 1 part salt.
- Required amount of water for kneading.
- Food colorings.
How to cook:
- Mix flour with salt.
- Add water in small portions and stir until smooth.
- As a result, the mass should resemble pancake batter - flow from the spoon in large drops.
- Divide the mass into different containers, add dyes to each part.
Drawing a three-dimensional picture
For drawing you will need cardboard, thick paper, thick disposable plates. You can also work on fabric, but it should not be too thin either. First, you need to prepare a sketch - a sketch of the drawing, then you can draw lines using 3D paints on it. They do this in the following ways:
- Cotton swab, brush. These are the easiest methods that do not require special preparation. You just need to take your equipment and start the creative process.
- An envelope. You can make an envelope from a file (multifold). The file is folded diagonally, one side is sealed with tape. The required amount of paint is placed inside and tied with a rubber band. The tip of the file is cut off, after which the material will be easily squeezed out.
- A bottle. Take a thin plastic bottle of office glue with a spout and fill it with paint. Used for drawing.
Strokes are applied generously to the paper, without skimping: they should be juicy and bright. After completing the picture, it must be dried. If foam and PVA were used to create the materials, the design is simply laid to dry for 3 hours on a flat surface. “Flour” paints are dried in the microwave for 10 seconds at maximum power. After turning off the device, you can notice that the picture has increased in volume and acquired a 3D effect. It will look original and beautiful, which will certainly interest your baby!
Volumetric shaving foam paints
To prepare you will need:
- shaving foam;
- PVA glue;
- coloring (food or any paint).
Mix glue and shaving foam in equal proportions. Divide the mixture into cups and very carefully, so as not to knock off the foam, mix in the dye.
It is best to draw on thick cardboard using cotton swabs or ice cream sticks. You can invite your child to first draw a picture with a pencil and paint it with airy paints. Or you can make an application. This paint will take several hours to harden.
wonderbaby.org
Puffy flour paints
You will need:
- Wheat flour;
- baking powder;
- salt, water and dye (food or paint).
Prepare small containers for paints, pour 1 tablespoon of flour, 3 teaspoons of baking powder, 1 tablespoon of salt into each. Mix everything well, add a little water to the consistency of thick sour cream and coloring.
Now you can draw, paint or make appliqués. After the child finishes drawing, the drawing will need to be placed in the microwave (or oven) for 10 to 30 minutes so that the paints swell well.
blogspot.com
happyhooligans.ca
For convenience, the paint can be poured not into jars, but into tubes with a narrow spout, spread out a large Whatman paper for the children and give freedom to creativity.
Tips for children's creativity
- If you add a drop of glycerin to the finished paints, then after drying the drawing will acquire a beautiful glossy shine. Glycerin can be bought at any pharmacy. This is interesting: glowing paint.
- Some types of homemade finger paints can take up to 24 hours to dry. If you plan to save children's drawings, then after drawing, put them in a dry, warm place.
- The ideal consistency of paints for finger painting is similar to thick sour cream. If desired, you can make the mixture thicker by adding dry ingredients, or thinner by using more water.
Glycerol
Natural dyes
Natural dyes are isolated from animal and plant sources by physical means. Such coloring compositions are actually not subjected to chemical modification, only in exceptional cases when it is necessary to preserve the product longer (in factory production conditions). Root vegetables, berries, leaves, flowers and other plant products are often used as raw materials for producing natural food coloring.
Fruits, vegetables and vegetation for coloring desserts
In mass production conditions, dyes of natural origin are produced in the form of granules, powders, liquids or oils.
The brightness of coloring compositions in such a production process depends on the time of year the product is harvested, its growing conditions, and other things. The main advantage of coloring compositions of natural origin is the fact that they can be prepared independently at home. Look around, because you will probably find a whole set of everything you need in the refrigerator or on the shelves in the pantry.
Products for coloring confectionery products
Creating Shades
Use lemon to lighten colors and baking soda to darken them. The acidity of the lemon will change the pH of the color and bring it to almost neon levels, while the bicarbonate of soda will make the dye more alkaline and the color more saturated.
Creamy chocolate cake on salted crackers with plum jam: dessert recipe
The main principles of the zodiac signs: “If you can help, help!” in Gemini
Three best performances of Muslim Magomayev’s songs in the entire history of the show “The Voice” (video)
For convenience, you can create a watery paste from soda and squeeze lemon into separate bowls and add your watercolor paints to them in the process.
Natural dyes: list of primary colors
To color culinary products with natural food compositions, the primary colors are used: yellow, red and blue. Yes, they are not as bright and rich as products of synthetic origin, but they are clearly safer for the human, and especially children's, body.
Below in the photo you can see a rainbow cake, the biscuits of which are colored exclusively with natural products.
Sponge cakes colored with natural food colors
From the main three colors, a gradation of other tones is obtained, and it is worth figuring out how to do this with your own hands at home. Let's look at some colors using the example of the cake presented above. To color the biscuit dough, we use one tablespoon:
- carrot juice;
- beet juice;
- spinach juice;
- blueberry juice;
- blackberry juice;
- chicken yolk.
Juice must be obtained from fresh produce by squeezing the grated composition. We can get juice from frozen berries by simply defrosting them in the microwave.
Products used for coloring sponge cakes
The dough is kneaded in a single bowl, then poured into different containers, and colored with different natural food colors. We get these muted, beautiful undertones that will become pronounced in contrast to each other.
Natural dyes may not be bright, but they are environmentally friendly
The shortcakes are baked like regular biscuit bases until done. And we make such beautiful biscuits.
The resulting range of colored cakes thanks to natural dyes
Now let’s take a closer look at the origins of each natural color:
- We can get red from cranberries, lingonberries, raspberries, cherries, strawberries, dogwoods and even currants.
It is acceptable to use wine, red cabbage or beets to tint the dessert red. Currants for food coloring
Preparing food coloring is very simple: finely chopped selected ingredients are poured with acidified water in a small amount. The mass is placed on the fire and brought to a boil, after which the composition is filtered. Another option for extracting red juice: the product is finely grated or kneaded in a mortar and strained to remove the pulp.
Vibrant color from natural ingredients
- Pink dye, as we understand, is also obtained from similar products, only less concentrated formulations are used: diluted with water or in smaller quantities.
- Blue color can be isolated from blackberries or blueberries, but in different tones.
We can see such halftones in the photo of the rainbow cake. The same boiled red cabbage, dark grape variety and frozen eggplant skin also help to obtain a blue coloring composition for food production. Products for producing rich blue and purple tones
The pure blue color is obtained from indigo paste mixed with starch. On a food production scale, Indigo Carmine paste (black-bluish color) is used, which forms a pure blue solution. The indigoid dye is isolated from certain types of mollusks.
Food coloring paste Indigo
- Yellow is extracted from lemon zest or pure egg yolk is added (yellow sponge cake in the photo of the cake).
Saffron, diluted in warm water (alcohol or vodka), will also give the hostess a yellow tone. Saffron as a natural food coloring
- The beautiful green color comes from spinach leaves.
Since spinach may not be in all refrigerators at home, we simply mix yellow (diluted saffron) with blue (dark grape or wine juice) and create a green undertone. Spinach for a rich green natural coloring
- Brown dye can be obtained from the “Zhzhenka” we examined - burnt sugar, which is diluted with water and filtered.
A strong coffee solution will also tint dessert mixtures brown. Coffee not only colors desserts, but also paints
- The orange color is obtained by grating carrots on a fine grater and squeezing the juice out of the mixture.
You can also use orange or tangerine zest. Products for making natural orange food coloring
Although orange colors for coloring culinary products can be obtained from a whole range of products, both familiar and familiar to us, and those that are not readily available. Look at all the types of ingredients presented in the photo, you will recognize each of them, but not all of them will be found on the shelves of retail outlets.
Available products for obtaining natural dyes
When creative culinary inspiration strikes, you can experiment and try to make new colors for coloring desserts.
For example, a deep purple tone is obtained by combining red and blue dye of natural origin. Orange tones are very easy to identify from carrots, and also if you mix red juice with a yellow mixture.
Healthy carrot natural dye and juice
Unfortunately, bright colors cannot be obtained from natural ingredients. And it is not possible to store these, so use the juice and mixtures immediately after extraction to prepare desserts.
Picking flowers
You'll only need one or two buds of each color you want to paint with - don't take too many. Try to use flowers with large petals to minimize the number of petals. You don't need more than one type of each color. For example, three different shades will produce colors so similar that they cannot be distinguished on paper.
How snails eat: scientists have found that teeth stabilize each other
In Singapore, scientists managed to develop a device for connecting people and plants
Scientists have simulated an unusual scenario for the origin of life on Earth
Flowers are best used fresh. Carefully remove the petals from each stem and place into bowls. Pour a small amount of boiling water into each, just enough to cover the petals. You want to have a maximum of half a centimeter of water in the bowl, otherwise the color will be too diluted and won't show up on the paper.
The color should stand out immediately, but if it doesn't, take the sticks and push the petals through. This can be done with your hands if your skin is not too sensitive.
When the flowers are soft, set aside and leave for about half an hour. Leave the petals in the bowls while painting as they will continue to release color.
How to prepare a natural shade
The color scheme of the additive will depend on the color of a particular product. For example, beet juice will give a raspberry color, and lemon zest will give a yellow color. And there are many such products, you just have to squeeze the juice out of them and add them to the cream.
Red
To do this, take currants, strawberries, beets and other products. Of course, it’s much easier to “extract” juice from beets. To do this, root vegetables should be boiled until tender. Grate with the smallest holes. Place the grated mass in cheesecloth (you can do this using a juicer) and squeeze. It wrings out easily and the color is rich.
Yellow
To obtain a yellow tint, you can use turmeric by adding powder, for example, to a protein mass. Lemon zest, from which the juice is squeezed out and the cream is colored, can also come to the rescue.
Beige
To do this, you can use tomato paste, without any doubt that it will change the taste of the dessert (for example, if it is cream).
Green
It's easy to make this color yourself. To do this, take spinach leaves, chop them, boil them and rub them through a sieve. Squeezing the mixture produces a green dye.
Blue
This shade is easily obtained from blueberries. Squeezing out the juice.
Brown
After melting the chocolate, beat it, for example, with protein cream and the mass will acquire a brown tint. You can use cocoa powder.
Color mixing options to create shades of gray
The tone that is obtained by combining white with black is considered classic. The finished color can be changed as follows:
- introduce a drop of blue or green, making it cold, pearlescent,
- add yellow or ocher to get a warm ash color,
- make a duet of mouse and antimony to create a metallic shade,
- combine gray with pink to create a beautiful ash pink, dusty color.
If you add red to black and white, you will get an interesting copper-gray tone. Also, an unusual ash color is prepared by combining yellow, white, and violet - this combination also ultimately gives an achromatic shade. When mixing watercolors, gray comes from the duo of blue and brown. The scope for imagination is quite rich, and many experiments ultimately make it possible to produce the shade the artist needs!