Rust stains are not a reason to throw away your microwave. The inner surface can be painted, thereby extending the life of the household appliance.
So, how to paint the inside of a microwave from rust at home?
What colors are there?
There are several types of paints that can be used to restore the inside of a microwave oven.
Food grade or organic
The best option for painting the inside surface of a microwave is food-grade, organic enamel.
Made on the basis:
- silicone varnish,
- ethyl silicate alcohol solution,
- color pigment,
The paint perfectly withstands sudden changes in temperature and humidity, and does not release toxic substances hazardous to human health when heated.
Food-grade enamel adheres perfectly to aluminum surfaces and is approved for use by the Ministry of Health.
Electrically conductive
Conductive paints include aluminum, zinc and even silver . When dry, electrically conductive enamel coats the inside surface of the microwave with a thin but very durable layer that is resistant to high temperature and humidity.
Shungite
Particularly durable, dense in structure, shungite paint is particularly heat resistant (withstands heating up to +300°C), has electrically conductive properties, this paint :
- absolutely safe for health,
- does not emit toxic substances,
- does not burn.
By covering the inner surface of the microwave, it helps not only to remove existing defects (chips, abrasions), but also creates a durable, energy-saving layer.
Acrylic car
Acrylic car paints have gained particular popularity due to their simplicity and ease of application (the paint is sold in aerosol cans), as well as its availability (the cost is low compared to other enamels).
A wide color palette of car paints allows you to perfectly match the desired shade . Acrylic car paint (or rather a primer) creates a durable layer on the inside surface of the microwave that is resistant to high temperatures.
Features of microwave coating
Depending on the type of internal coating in the microwave, the method of its restoration is determined. The interior of the ovens can be enameled, stainless or ceramic. Each material has its own characteristics:
- Microwaves with an enamel chamber are very popular due to their moderate cost. However, surfaces made from such material do not last too long, as they quickly begin to peel off as a result of exposure to steam and grease. The enamel coating is also easy to damage as a result of mechanical stress.
- Stainless steel material has the following advantages: it looks presentable, is practically resistant to mechanical damage, can withstand high temperatures, and lasts a long time. The downside is that it’s difficult to remove grease and stains; this requires special products.
- Ceramics are particularly strong and durable unless subjected to rough mechanical stress. Easy to clean and has grease-repellent properties. Resistant to high temperatures.
Not all of the surfaces presented are worth restoring. The stainless steel base cannot be peeling - a huge number of small scratches and damages simply accumulate grease and spoil the internal lining of the equipment. But sometimes restoration is appropriate here too. You can paint a microwave with an enamel or ceramic interior without question.
How to properly restore? To begin with, you need to choose the right materials for this. Most often, paint is chosen for restoration, but not ordinary, but special.
Which one and when to choose?
At the slightest spots of rust, the surface must be coated with paint (this will help stop the corrosive destructive process).
Suitable paint for a microwave oven is:
- composition without harmful, toxic substances (when heated, they are released into the environment, causing irritation of the mucous membranes and even poisoning of the body);
- composition with high resistance to high temperatures and humidity;
- a composition whose color matches the shade of the previous coating.
Before purchasing, do not forget to study the manufacturer's label on the paint can.
What are microwave ovens coated with during their production?
It is advisable to understand what kind of microwave paint was used by the manufacturer. Then it will be easier to choose the appropriate option for updating the damaged layer. The following types of coatings are commonly used:
- Enamel is the most popular option due to its low cost. However, from time to time they become covered with bubbles, and the surface becomes peeling, and the coating is also easy to scratch;
- Stainless steel is wear-resistant, flaws do not harm the coating, but the presence of scratches leads to the rapid formation of dirt, which is difficult to remove;
- Ceramic and bioceramic coating is smooth, easy to clean, resistant to temperature, but may chip from impact.
Thus, microwave enamel and ceramics require a new coat of paint so that the performance of the device does not suffer. Stainless steel can work without problems, but it will be difficult to clean the surface if it has scratches.
It is advisable to understand what kind of microwave paint was used by the manufacturer.
Top 5 best
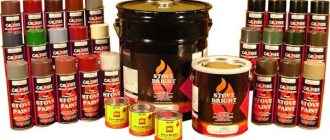
Construction hypermarkets offer a wide selection of metal paints. TOP 5 best paint options for painting the inside surface of a microwave:
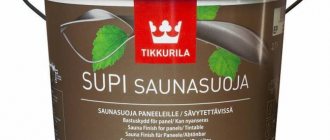
KUDO
Heat-resistant enamel KUDO organosilicon . Ideal for painting metal surfaces. Due to the fact that the enamel is sold in an aerosol can, the composition is easily applied to hard-to-reach places.
The paint layer can withstand heating temperatures up to 650°C. The enamel dries quickly under natural conditions, does not crack or peel, and creates a perfectly smooth surface.
The average cost is 160 rubles. (570 ml can). Read reviews here.
Decorix
Decorix universal acrylic enamel is a high-quality composition intended for painting:
- metal,
- glass,
- mineral surfaces.
After application, it forms a thin but very durable coating that is resistant to fading and high temperatures. Dries quickly (one coat - thirty minutes). A variety of enamel shades allows you to select the desired option in each specific case.
The average cost of a can of enamel (520 ml) is 200 rubles. Read reviews here.
Elcon
Elcon heat-resistant enamel is intended for painting metal surfaces that are subject to sudden temperature changes and high humidity during operation.
The paint is resistant to aggressive environments (mineral oils, soluble salts). Can be used for painting household appliances (does not emit toxic fumes). Complete drying time does not exceed 72 hours.
The average cost is 470 rubles. (1 liter jar). Read reviews here.
Certa
Paint Spectrum Certa heat-resistant enamel is an excellent solution for treating metal surfaces exposed to high temperatures (up to +1000°C).
In addition to thermal insulation properties, the paint has high protection against moisture and aggressive environments. No primer required during application.
The average cost is 350 rubles. (spray can 520 ml). You will find reviews here.
Panzer
Panzer rust paint contains components that smooth out rust-affected surfaces, forming a perfectly smooth coating that is resistant to high temperatures. The paint is environmentally friendly and suitable for interior work.
The average cost of a can of paint (volume 750 ml) is 650 rubles. You will find reviews here.
Factor two - the volume of the working chamber
To make your choice correctly, you must take into account the technical characteristics of the microwave. The most important parameter here is the internal volume of the chamber. The recommendations here are as follows:
- If the equipment is used by one person, then the volume can be in the range of 12-14 liters. Such stoves are also called “solo”;
- For two family members, 17-20 liters of volume will be enough;
- For a family of 3-4 people, 20-25 liters will be enough. Perhaps microwave oven models with this volume can be called optimal in terms of price, functionality and capacity;
- Those who cook often and a lot should buy a model with a volume of more than 30 liters, then even a whole bird will fit inside. The same recommendations apply if there are 5-6 people in the family.
How to paint?
To achieve the most durable, smooth inner surface of the microwave, it is important to follow a certain sequence of actions .
Preparatory stage
The preparatory process is an important stage, the quality of which determines the final result of painting the inner surface of the microwave.
In addition to paint in a can or spray can, you need to prepare:
- brush or narrow roller;
- alcohol-containing product or solvent (necessary for degreasing the surface);
- fine-grained sandpaper;
- masking tape;
- protective gloves and glasses.
If a large area of the microwave is affected by rust, an acid converter will help to quickly remove it.
Once everything necessary for work is prepared, you need to carry out the following steps:
Unplug the household appliance from the outlet.- Cover with tape those elements that should not be touched by paint (ventilation window, lock and hinges, glass on the door).
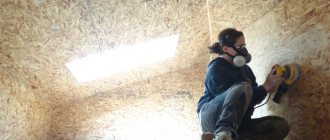
- All places where the paint has peeled off and rust has appeared are thoroughly cleaned (sandpaper is used for this process).
- After traces of corrosion have been cleaned, the inner surface is wiped with a cloth to remove dust and dirt.
- Using a soft sponge or rag soaked in an alcohol-containing composition or solvent, degrease the surface to be painted.
Work with solvents is carried out only with gloves and in a well-ventilated area.
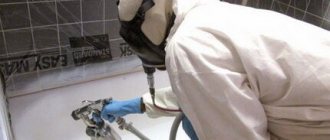
Coloring
Painting the inner surface of the microwave begins from the far wall, smoothly moving towards the door. It is important to apply the paint in a very thin layer (in this case it dries faster) . To do this, use a small foam roller or enamel in a spray can.
Use a thin brush to paint only the corners inside the household appliance. When using spray paint, you must ensure that your hand does not linger in one position (the movements should be zigzag).
After the first coat of paint has been applied, it is important to wait for it to dry completely and only then can the second coat be applied.
At the end of the restoration work, the household appliance is left aside for some time so that the paint dries thoroughly. Only after this can you remove the masking tape from the microwave (otherwise there is a high risk of smearing wet paint over the surface).
If smudges or paint stains are found on the walls of the microwave, they can be carefully removed by wiping with a cotton swab dipped in solvent.
This video will show you how to paint the inside of a microwave:
Painting stages
We found out how to restore the original beauty and integrity of the surface. All that remains is to find out how to apply paint correctly. The process can be divided into 4 successive stages:
- Sandpaper is used to clean surfaces from rust, bubbling, and peeling paint.
- Degrease with an alcohol solution.
- All holes inside the chamber are sealed with tape.
- Dye is applied. Wait for it to dry completely. If necessary, cover with a second layer.
As it turns out, the main reason for premature microwave wear is careless maintenance. If you properly clean the microwave oven chamber from grease deposits, there will be no problems. Do not rush to throw away the oven due to defects in the coating. Choose one of the dyes discussed above and paint it quickly - don’t wait for it to break.
What to do to prevent rusty deposits from appearing again?
You can extend the life of a microwave oven, subject to certain rules:
- Do not use abrasive dry powders when cleaning the internal surface. They leave scratches that will soon become covered with a rusty coating.
- The microwave oven must be cleaned regularly. Acidified fat and other contaminants destroy the inner surface (the enamel begins to bubble and peel), which leads to the rapid appearance of rust spots.
- To make the microwave less dirty when heating food, the plate must be covered with a special plastic lid.
- Cleaning with warm water will prevent the interior surface of the microwave from prematurely showing signs of corrosion (cold water causes the enamel to crack faster).
Careful, regular maintenance guarantees the safety of the inner surface of the microwave from rust.
Recommendations for care after painting the surface
Restoring enamel in the microwave, inside and out, is only half the battle. Proper care of household appliances is necessary so that a similar problem does not appear after a short period of time. After applying the paint, you need to follow expert recommendations:
- do not use the microwave oven for three days from the moment of painting, since turning it on prematurely may cause cracks to appear, since the paint has not completely hardened;
- every user is interested in ensuring that the new coating lasts as long as possible; to do this, you need to clean the heat chamber and use special covers;
- Experts categorically prohibit washing microwave ovens with excessively cold water, as this causes sudden temperature fluctuations that lead to damage to the surface;
- Be extremely careful with detergents and cleaning products; do not use hard brushes.
The person painting the microwave must follow safety precautions. Handle the surface while wearing protective gloves. Ensure proper ventilation of the work area.
Adviсe
A few tips will help improve the quality of painting the inside of a microwave from rust:
After painting, the microwave oven cannot be used for three days. Ignoring this condition may cause cracks in uncured paint.- When painting a microwave, the table on which the household appliance stands and the flooring around it must be covered with plastic wrap. This will help avoid additional cleanup after painting work.
Restoration work must begin as soon as the first spots of rust appear. Otherwise, there is a high risk of rapid spread of corrosion and complete failure of the household appliance.
Is it possible to use a microwave with damaged enamel?
When the paint inside the microwave peels off and peels, the owners do not refuse to use it. The walls of the heat chamber are covered with enamel to protect food heated in the oven from electromagnetic radiation. To restore the original level of protection, you need to paint the inside of the microwave.
Electromagnetic waves will not penetrate into the heat chamber through minor cracks. However, the microwave will still have to be repaired. Gradually the number of damaged areas will increase. Is it possible to use a microwave if the enamel has peeled off? Theoretically, yes, but as the deformation increases, the furnace will have to be restored or disposed of. Is peeling enamel in the microwave harmful to humans? The remains of the material themselves do not pose a threat to the body, but microwaves penetrate through the cracks, which negatively affect the heated products.
Preparing for work
As with any other painting work, the surface of the microwave should be pre-prepared before painting. This will avoid the appearance of microdefects and irregularities. The paint applies more evenly to the prepared surface and will last longer.
First you need to clean the surface. It is necessary to remove the old coating. A metal brush, scrapers or coarse sandpaper is suitable for this. Particular attention should be paid to areas with damage: scratches, bubbles, spots with “torn edges” of paint around the perimeter. Stainless steel does not need to be cleaned.
Cleaned areas should be sanded. It is especially worthwhile to walk along the border between “bare” areas and places with preserved covering. Zero-grit sandpaper is suitable for these purposes.
The surface to be painted must be degreased. This can be done with a special solution, which is sold in any hardware stores and household goods (it’s called a “degreaser”), as well as acetone or solvent.
Advice! During operation, the microwave should be tilted forward so that all debris and dust come out without clogging the internal mechanisms.
Summarizing
There is no doubt that updating a refrigerator is much cheaper than purchasing a new one, and doing this work yourself is more convenient than hiring professionals. Moreover, it is not a fact that the hired workers will do everything better. It was not for nothing that old people said: “If you want to do it well, do it yourself.” In addition, such work does not require special skills. The main thing is that a specific idea for renovation is formed in your head, and bringing it to life will not be difficult.
We hope that the information presented in today's article was useful to our dear reader. In the discussions below you can ask questions if you have any while reading. Our editorial team will be happy to answer them as quickly as possible. There you can also share your experience in painting or decorating a refrigerator, if you have one. This will be very useful for beginning home craftsmen. Write, communicate, share, ask. And we suggest consolidating the information received by watching a short but very informative video on how to paint a refrigerator at home.
Other ways to update the appearance of your refrigerator
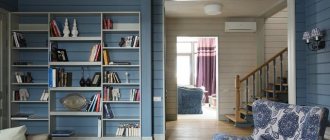
If a DIYer knows how to paint, you can update your refrigerator using acrylic pigments without resorting to full painting. The door and walls of the refrigeration unit can be painted with various patterns - acrylic is perfect for this. However, it should be understood that the pattern must be protected by covering the surface with varnish. We offer you to see what old refrigerators updated with your own hands look like using photographic examples.
If the home craftsman does not have artistic skills, you can use a stencil that you make yourself or order from art workshops. In this case, to apply paint you can use either a roller with a brush (or a sponge as an option) or the same aerosol can. A good option would be stickers with different designs.
What to do if you licked the middle of the farb in Mikrokhvilivtsi: farb technology
If in the middle of the micro-curling there is a layer of tarpaulin applied at the factory, it is necessary to remove the old surface using a spatula and brushes or coarse sandpaper. After this process, sand the inner walls of the microfiber oven with fine grain sandpaper. You need to work with care to prevent damage to the metal.
Before further preparation, it is necessary to lighten the walls with acetone or special solutions. For this purpose, you can also use universal degreasers. Before the time of processing the cooked giblets, place the microwave in the microwave, so that the particles of the enamel are not lost in an area that is easily accessible for cleansing.
The plots that do not need to be prepared should be sealed with tape in advance, as well as the ventilation grill. After this mixture is applied, starting from the far wall and moving in the process to the doors. The farbe ball must be as thin as possible, and since the purpose of the farbe does not look like an aerosol, it is necessary to apply the farbe with a pencil or special foam rollers. If the first ball is dry, you can apply another farbi ball. At the end, the robots remove the tape and identify any defects in the preparation.
Is it possible to paint a refrigerator at home?
Often an old, but still fully functional refrigeration unit spoils the entire interior. Taking into account the level of income in our country, it is safe to say that not everyone can afford to purchase new household appliances. In this case, you can get out of the situation by painting the equipment in the desired color. You just need to understand how to repaint a refrigerator and what paint to use.
The simplest way to update a refrigerator to the Loft style
Painting is a simple job; to perform it, a home craftsman does not require any special skills or abilities. The main condition is to choose the right color and paint composition and be careful in your work. Let's try to figure out what kind of paint can be used to paint the outside of the refrigerator.
An excellent upgrade to old-style refrigeration equipment. This refrigerator will add charm to any interior.