After construction work, and in particular the construction of facilities, additional measures are required to equip the structures. These include preparing the facility for further operation. It is worth noting that this class of work involves a wide range of funds and building materials.
Regarding the latter, they are represented by special sealants. These materials belong to a separate class of products that represent a special adhesive mass. They are widely used to perform the following operations:
- for filling cracks and seams;
- for sealing joints of parts;
- to improve the performance properties of individual elements of the facility.
Typically, sealant is packaged in tubes and cylinders. There is also sealant in soft packaging. But to use the latter, special construction tools are required.
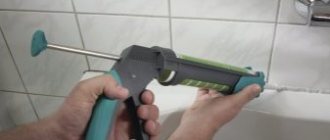
To solve household purposes, sealant in rigid packaging. To use this product, a construction gun to squeeze it out of the tube. But today we will tell you how to use silicone sealant without a gun , and also provide recommendations for choosing the right material.
Features of choice
If your work involves renovating apartments, offices and houses, it is recommended to purchase an electric or cordless gun. Its price is quite high, but is fully justified by both the technical characteristics of the device and its service life.
If you are limited to housework, a regular hand gun will do the job. The main thing is to make sure that its structure is strong (the skeletal frame should not bend under pressure). The ideal choice would be a model with a semi-open cylindrical groove. Such a pistol is comfortable to hold in your hand and, as a rule, it lasts much longer and does not deform.
As for the professional sphere, you will need an air pistol. It can be used to fill large gaps and assembly joints on floors and bays.
When choosing a pistol, make sure of the following:
- The stroke of the rod should be smooth and uniform. Otherwise, you will not be able to monitor material consumption.
- There should be no squeaking noise when you press the lever. This is not a fundamental factor, but it will certainly be unpleasant to hear this sound constantly. If you have already purchased a “squeaky” gun, lubricate the moving elements with machine oil.
- The spring should easily return the lever to its original position, otherwise you will be tired of constantly pressing it by hand. Just press the lever a few times and check the accuracy of its movement.
- The frame must be perfectly level. If possible, ask the seller to fill the tube with sealant. This will help ensure that the packaging lies flat and does not bend.
- The weight of the tool must be optimal. If the gun is too heavy, you will quickly get tired when working with it and will not be able to get to hard-to-reach places.
Don't buy a model with a lever stroke that is too long. If you have difficulty pressing fully, this tool will not work. A caulk gun should make the job easier, not more difficult. If you move the lever too far, your hand will get tired very quickly and your fingers will start to hurt.
The range of these useful devices today is very large, so do not rush to purchase the first model you come across. Compare them with each other and make sure that the gun fully meets all the requirements given above.
Briefly about the main thing
Liquid nails are used everywhere. They are used both for small creative works and for repairing some things in the house. Liquid glue is able to firmly connect several elements, which then form one single part
It is very important to pay attention to the characteristics of liquid nails and their technical parameters
This will determine how quickly the composition sets and how durable the finished product will be. For installation, you will need a special gun to squeeze out even pieces of glue. However, if it is not possible to purchase it, then you can cope with improvised means. The main thing is to follow the instructions clearly and follow the prescribed steps.
How to refill a caulk gun
Most often, all sealants and similar substances are offered on the modern market in standard release forms, in tubes, tubes and bags, which are ideal for mechanical and electromechanical devices. Therefore, there should not be any problems with how to insert the sealant into the gun. Most likely, instructions will be immediately drawn on the tube, according to which you can act and not be afraid of ruining either one or the other. So, let's figure out how to put the gun on the sealant:
First, you will have to figure out how to open the sealant gun, and to do this you need to pull out the metal rod, which will subsequently work as a piston and squeeze the sealant out. However, it is held in place by a plate with a lock located at the rear of the gun. You need to turn it, pressing it against the frame, and pull the rod out with your fingers until it stops. In the tube itself you will have to cut off the cap, and also pierce the special membrane located under it, otherwise it will simply not be possible to push it through. A tube with sealant is inserted into the body of the gun, which can be a frame or a hollow cylinder, so that it is parallel to the gun. The rod lock at the back of the tool must be pressed again, and then the piston must be firmly inserted into place so that its front edge takes the correct position inside the tube
It is important to press the piston all the way so that it pierces the cartridge, otherwise the substance will not pass through.
All that remains is to remove the cap from the spout of the package, and if necessary, cut off its edge with a sharp knife. After this, everything is ready for use, you just need to press the trigger, and the substance will be dispensed from the spout. If even after reading the algorithm of action, you still don’t understand everything, the video will help you figure out how to insert the sealant into the gun; after watching, there will definitely be no mysteries or secrets left. This video also explains how to remove the sealant from the gun to replace it.
How to use sealant without a gun
Many difficulties arise here. Firstly, you can immediately forget about using soft packaging. It is unlikely that you will be able to squeeze out a small amount of sealant, and you will have to apply it with your hands or an improvised tool, which is extremely inconvenient. Secondly, there is a high probability that the packaging will crack and the product will come out.
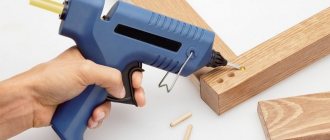
If you don't have a gun, you can use a regular medium-sized hammer. The end of the handle is inserted into the tube, and the firing pin rests on the shoulder. In this case, you need to pull the packaging towards you, then the sealant will be squeezed out through the nozzle.
Among the disadvantages of this method, the following should be highlighted:
- your hands get tired very quickly and begin to shake, which will not allow you to make an even layer;
- after just a few minutes of work, the shoulder begins to ache very much;
- If the striker is not pressed tightly enough, it may slip, resulting in injury;
- This method makes it very difficult to squeeze out the sealant evenly, especially when the package is half empty.
It was in order to avoid such difficulties that the pistol was invented. Even if you use sealant extremely rarely (once every few months), it will be useful to purchase this practical device.
Universal liquid nails
Polyurethane foam: how to use without a gun
Universal type liquid nails will be excellent helpers for repairs and problems in everyday life. With the help of one tube you can solve several everyday issues at once that you never had time for. Repair experts recommend the following options.
BISON Expert KM-100
The composition from a domestic manufacturer has a long service life and has a powerful adhesive function. ZUBR Expert glue is not only capable of firmly connecting parts, but also filling existing voids, which significantly increases the service life of the connection. This gluing option is resistant to humidity and temperature changes, withstands frost and direct sunlight, and is also resistant to any accidental mechanical damage. It is recommended to apply this glue at temperatures no higher than +30 degrees. And the temperature during operation can be from -30 to +80 degrees Celsius. This type of liquid nails can be used for wood, metal, plastic, chipboard, fiberboard, porcelain, ceramics and other materials. The composition of a light beige shade behaves well even in professional installation work. The cost of a 300 ml bottle is about 200 rubles.
BISON Expert KM-100
pros
- long service life;
- good connection quality;
- suitable for various materials;
- resistant to temperature changes.
Minuses
The beige shade does not look attractive in any work.
Liquid nails BISON Expert KM-100
Titebond Multi Purpose
American liquid nails differ from other glue options by being especially durable. Titebond Multi Purpose adhesive is suitable for both internal and external finishing and repair work, and can also be used to connect surfaces made of various materials - metal, tiles, concrete, wood, MDF, chipboard and others. Liquid nails glue the necessary surfaces in just 20-30 minutes, creating a super-strong connection that is resistant to moisture, mechanical damage and temperature changes. The glue has a milky beige color and does not have a strong odor. The cost of a 300 ml bottle is about 250 rubles.
Titebond Multi Purpose
pros
- super strong connection;
- non-toxic and does not cause allergic reactions;
- suitable for various materials;
- frost-resistant;
- resistant to moisture;
- dries completely in just 30 minutes.
Minuses
a light beige shade is not visually suitable for all finishing work.
Titebond Multi Purpose Liquid Nails
Torque Installation Universal
Liquid nails from the most famous domestic manufacturer have a pleasant ratio of decent quality and low price. A universal type adhesive does an excellent job of gluing various materials - wood, concrete, tiles, brick, chipboard, metal, fiberglass, polystyrene foam, etc. The glue sets in just 15-30 minutes, depending on the material. And after complete drying, the compound can withstand a load of up to 40 kilograms per square meter. meter. The glue is resistant to temperature changes from -30 to +60 degrees. The average cost of a 400 ml bottle of glue will be only 230 rubles.
Torque Installation Universal
pros
- cost/quality ratio;
- economical consumption;
- high connection strength;
- the connection can withstand heavy loads;
- sets quickly;
- resistant to moisture;
- frost-resistant;
- elastic;
- convenient packaging with a spout;
- versatility of use;
- Suitable even for uneven surfaces.
Minuses
- toxic;
- has a pungent odor.
Liquid nails Moment Installation Universal
Types of sealant guns
Sealing mechanisms can be classified depending on their design features.
In this situation, several types can be distinguished.
Tubular. The presented models were made to seal joints using viscous silicone or acrylic mass. Such a device is equipped with a rod and a cylinder with a void inside. This is where the sealant is poured. As a certain advantage of this mechanism, it is worth highlighting the lack of need for frequent refills.
Sealant guns can also be classified according to other criteria. If we consider these mechanisms according to the principle of supplying the substance, we can distinguish several types of pistols.
Mechanical. These are devices that have a universal design. This mechanism can be used by both professionals and beginners for domestic use. To squeeze the compound out of the gun, you need to press the rod with a certain force.
Cordless, which are usually used by professional workers. Such models are used in cases where a large amount of work is expected. The pistol functions similarly to the previous version. The difference is the use of a battery in operation.
Possible mistakes
If you know how to work with the composition correctly, you can quickly and accurately finish any seam or joint. But there are a few more nuances, without which the desired result will not be achieved.
The following errors may occur when working with the composition:
- the area where the mass is applied is not properly cleaned of dirt and dust;
- the product is applied to a dry surface;
- before filling the seam, masking tape was not glued on both sides, limiting the line for applying the sealant;
- the spatula or finger is not lubricated with soapy water to prevent the mass from sticking.
Working with silicone sealant is not difficult, the main thing is to get the hang of it and squeeze it out exactly as much as needed, using a gun or without this tool
It is important to avoid common mistakes, then the process of sealing seams and joints will go quickly, without complications
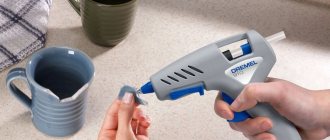
What is glued with a hot-melt gun?
The main function of the hot-melt gun is quick connection with hot glue.
Final hardening occurs within 5 minutes, and not after 24 hours, as with most analogues in tubes. Compared to instantaneous, the probability of “making friends” with your fingers is reduced to zero. You can glue almost any natural and synthetic materials:
- tree;
- metal;
- stone;
- cardboard;
- glass;
- ceramics;
- cork;
- skin;
- plastic.
How does this miracle work? The gun contains a thermal heater. A round glue stick - a rod - touches it through the feeding device. Another name is cartridge: after all, it is with them that pistols are loaded. When the device is plugged into a 220 W network, a temperature of 105 o –210 o C is created in the thermal heater. The glue melts and flows through the nozzle when the trigger is pressed.
Components of a hot glue gun
Properties
The basis of the seal is silicone polymer. It determines the characteristics of the sealant:
- Elasticity. Thanks to this, the compactor can be used on moving bases. The composition compensates for deformation movements at the joints.
- Strength, resistance to mechanical and tensile loads.
- Good adhesion to ceramics, glass, metal, wood, concrete, plastic.
- Weather and UV resistant. Thanks to this, silicone sealant can be used outdoors.
- The temperature range at which silicone can be used is from -50 to 200˚.
Basics of craftsmanship: how to use sealant without a gun
Before you figure out exactly how to use mechanical devices for work, it is worth understanding that there are methods for using sealant without a gun and they have the right to life, like all others. True, you need to be fully prepared for the fact that it will take much more time, and in general, the process will be much more labor-intensive than you can imagine. There are times when it is simply impossible to purchase a pistol, but you have to act quickly, and that is when you should resort to similar, albeit difficult, but still ways that will help to urgently solve the problem.
A short step-by-step instruction will tell you how to use silicone sealants and other similar products without a gun:
- Take a tube with silicone or any other substance and remove the cap from the spout, which must be there, and pierce the protective membrane.
- You will need any tool, such as a screwdriver, hammer, nail puller, etc., that you can use to rest against the piston of the tube, which is located in its back.
- Place the hammer handle inside the tube and press gently while holding it firmly with your other hand. It takes significant effort, but results can be achieved.
The video located just below will tell you in more detail and clearly about how to use sealant without a gun. Everything is shown there as it will be in life, so watch and learn. True, it is much easier to prepare for all surprises in advance, purchase a mechanism and figure out how to use a mounting gun for sealant, so as not to go to all the trouble later. This will allow you to not worry at all about how to squeeze out the sealant without a gun, which, as we have already said, will be quite problematic.
Product examples
There are several trusted manufacturers that produce special glue for plastic:
Moment crystal
- Universal adhesive for plastic Kleiberit on synthetic resins. Sold in tubes with a convenient nozzle. It has an affordable price, but it fixes PVC well, is not afraid of moisture and dries quickly. The composition is safe.
- Glue "Moment-crystal". Also a universal adhesive, it can attach a plastic panel to almost any base. The advantage of the composition is that it is transparent.
- Another Moment glue is liquid nails (“Installation”). Lives up to its name. It will firmly connect even poorly compatible materials. There are samples for both interior and exterior work.
- "Emphikol" is a special composition for working with polyvinyl chloride. Colorless, viscous, forms a strong connection between the plastic and the surface.
- MitreFix is an alternative composition that is moisture resistant. Forms a strong seam.
MitreFix
The main thing in choosing an adhesive is the mark on the packaging that the composition is suitable for working with plastic. If you are not sure of the glue’s abilities, contact a specialist consultant and read the instructions. It is recommended to buy glue only in construction departments, so as not to receive a fake or low-quality product.
Follow safety rules
Glue guns, for the most part, are power tools, with rare exceptions - gas models, which are not so often found on sale. Therefore, it is not recommended to use it for work in a damp room, where the floor covering acts as a conductor and there is a danger of electric shock.
Almost the entire outer part of the tool is made of plastic that does not heat up to a temperature at which you can get burned. But the spout through which the molten glue is supplied is made of metal and it comes into contact with the heating element. Therefore, during operation, you should avoid touching the nozzle of the gun to avoid burns, as it heats up to a high temperature.
It wouldn't hurt to make a small stand. Its design is not complicated and can be made using the same glue gun from scraps of wood or cardboard.
When working with a glue gun, adhere to the following safety precautions:
- Before connecting the tool to the network, make sure that its wire and body are intact; to do this, it is enough to carry out a visual inspection;
- remove any remaining adhesive from the spout after each use until it cools with a thick cloth or other similar material;
- do not allow children to be nearby, as hot-melt adhesive heats up to high temperatures and the child may accidentally get burned;
- place foil or other material under the nozzle of the switched-on tool that will collect the flowing adhesive mass;
- do not touch the metal parts of the gun with your hands during operation;
- Loose clothing is not recommended. Preference should be given to durable and dense fabrics, which, in case of emergency, will protect against burns;
- long hair should be removed, jewelry should be removed;
- do not touch the newly applied glue with your bare hands, let it cool;
- It is advisable to wear heat-resistant gloves on your hands.
Polymer adhesive does not emit toxins dangerous to the human body. But it poses another danger - when heated, it can easily leave a burn if handled carelessly. Make sure that the tool, or rather its nozzle, is always facing away from you.
Drying speed of the composition
Another very important characteristic that you should pay attention to when choosing a composition is the speed at which it will dry.
This is important because if the finished part is needed in the near future, then it is better to use stronger and quick-drying compounds. Liquid glue sets differently, it all depends on the composition
Therefore, you must read the instructions on the package very carefully. It specifies the drying speed during setting and the time after which the finished part can be used.
Liquid glue sets differently, it all depends on the composition. Therefore, you must read the instructions on the package very carefully. It specifies the drying speed during setting and the time after which the finished part can be used.
Using liquid nails without a gunSource irecommend.ru
In order for the composition to set correctly, after applying the glue and installing liquid nails, you need to squeeze the elements together and hold for several minutes. The composition finally sets at least a day after gluing, but some models of liquid nails can handle it in 18 hours. The longest period of gluing is 7 days.
Therefore, you need to calculate in advance how many days it will take for the glue to completely dry and immediately make the part. A large amount of composition will not help the finished work dry faster, so you should not add more glue than necessary.
Using liquid nails at homeSource proraboff.rf
Tools and Supplies
To make a tool for processing tile and interpanel seams, filling up chips, cracks, defects, and sealing joints, you need to prepare the following list of accessories:
- PVC sewer pipe with a diameter of 5 cm;
- a piece of plywood 1 cm thick;
- furniture persistent nut M8;
- M8 pin;
- M6 washer;
- M6 bolt;
- 4 M8 nuts;
- 3 M6 nuts;
- small screws;
- a piece of rubber tube;
- plastic bottle with a volume of 5 liters;
- spout from a bottle, can of glue, ketchup;
- piece of steel sheet;
- hot melt glue or other reliable adhesive;
- compass and pencil;
- hacksaw (saw);
- screwdriver;
- sandpaper or grinding wheel;
- hammer.
Basic classifications
Based on the type of compartments for cartridges (that is, containers with the mixture), the tool is divided into two categories:
- leafy;
- framed
The latter are more popular because they fix the cartridge more securely. Depending on the method of squeezing out the mixture, guns are divided into four more categories.
- Cordless tools are characterized by their autonomy, because, as the name suggests, they operate on batteries (mostly lithium-ion). The mixture is squeezed out and adjusted using a sensitive handle - the harder you press, the more intense the tool works.
Electric-type devices are characterized by the absence of batteries, since they operate from the mains. With their help, the sealant is applied quickly and accurately, thereby saving consumables. Typically used by professionals, they allow the use of various types of cartridges. They are, of course, expensive, so it is not advisable to buy them for renovations in an apartment.
In air pistols, extrusion occurs due to air pressure after pressing the trigger. They have a simple design, but are often equipped with various limiters that make it possible to obtain a strip of material of the required thickness. They are good because they work with various containers.
Mechanical (or hand) tools are the most accessible, but at the same time the most short-lived. In fact, they only allow you to squeeze out a few cartridges, so they are not used on large objects.
Finally, according to the design features, pistols can be:
- skeletal (designed for cartridges with a volume of 310 milliliters);
- half-body (the volume is the same, but the mechanism is simpler; designed for several cartridges, but extremely inconvenient to use);
- tubular, working with any cartridges.
Note! The best option is a skeleton pistol. It costs a little more, but is more durable
But how to choose the right option? Let's get a look.
Extrusion method independent of tube size
A suitable homemade extruder can be made in a few minutes using the following components:
- A steel ring with a thickness of at least 4...5 mm, which can be freely placed on the tube spout.
- Synthetic flexible cable.
- Bolt with a diameter of M20 and a length of at least 80 mm.
The container is first fixed on a suitable bracket. The ring is tied on both sides with a cable, both ends of which - left and right - must be the same. A bolt is inserted from the opposite side of the container with sealant, which is firmly connected to the cable. Having securely tightened this connection, you should gradually press the head of the bolt onto the inner valve of the tube. To ensure uniform pressure along the edges of the cable, loops are made into which two wrenches are inserted (or other steel objects: they will act as levers). When the cable is twisted, the bolt will begin to move and, acting on the valve, squeeze the sealant out of the spout.
It should be noted that both options for impromptu squeezing out sealant will require significant effort from the worker. However, the answer to the question - how to squeeze out sealant without a gun - is still possible.
Before purchasing sealants for sealing joints and cracks, it is worth understanding how to use silicone products and what is required to perform the work efficiently
In order to avoid mistakes when applying compounds, it is important to understand how to work with sealant in the absence of a gun
Definition, history of origin.
The direct adhesive liquid nails itself is a regular adhesive solution with the addition of chalk or white clay, which are added to the liquid nails adhesive to level the porous surface of the material being glued or glued. From which it follows that liquid nail glue can be used when working on almost any surface, but more on that later.
Liquid nail glue is nothing more than just a dense adhesive mass placed in plastic tubes for convenience. Now let’s talk about where ordinary construction adhesive got its name from.
Initially, when it was first produced, liquid nails adhesive was just an ordinary universal construction adhesive for different surfaces! But since this construction adhesive was produced by a company with a name like Liquid Nails, those who know English understand, those who don’t, I’ll explain:
– Liquid Nails is nothing more than liquid nails and our people, or maybe marketers, added glue to the word, liquid nails. It's that simple.
Well, now some useful links on the topic:
The color of liquid nails and how to change it.
Liquid nail glue is available in various colors. It can be found in white, translucent or transparent, gray, brown, yellow and even black. In general, in those color schemes that are more often used in the interior.
In turn, white color is great when working with plastic, baguettes, and baseboards.
Brown glue is used when working with wood. When varnishing wood, it fits perfectly into the tone of the varnish. Very convenient when working on cranes, when installing trim* on doors.
Yellow liquid nail glue is convenient when working with colored materials: siding or plastic.
There is also transparent and translucent liquid nail glue, but it is not particularly strong. It is used for applying to plumbing fixtures, gluing various kinds of interior parts, in general, where you would not like to see any distinctive features of the fastener.
After the liquid nail glue has dried, it can be painted any color. The paint adheres perfectly to its surface!
But you can additionally try to paint it in the tone you want.
To do this, you will need to remove the “heel” from the tube. The one on which the rod presses. You can take it out by screwing a self-tapping screw into it and pulling it towards yourself with pliers*. It is better to tint with liquid dyes, taking into account the supply of no more than one drop into the tube. You can stir with anything, but we did it using a small kitchen mixer.
sealant. I opened it and can’t squeeze it out of the tube, am I lacking the strength or am I doing something wrong??
You need to cut off the plastic tip with a knife.
dig a hole))) maybe it wasn’t hermetically sealed - it’s frozen
If the hole is made and is not squeezed out, then it is “SHIT”, expired, dried out. Either take it to the store or throw it away.
Did you even put it in the gun?
well, actually the sealant is inserted into the gun
If it is in a tube, you need to poke through the protective membrane under the cap. If it is not expired, it will be squeezed out. If it is in a tube, before screwing on the spout you need to cut off the tip with a knife after the thread and insert the tube into the gun.
Yes, we ourselves recently encountered such a problem))) from ignorance... It turns out that a special gun is needed there!! ! and we squeezed it out with a hammer, it’s true that we need to apply a heroic strength)))
gun for tuik piobreti - and there will be no problems!!
touch.otvet.mail.ru
Instructions for use
This tool is characterized by ease of use.
Beginners should read the step-by-step instructions before using this mechanism.
First of all, you need to take care of protective measures. You need to wear gloves and cover objects and surfaces near the work area with film or cloth. This will protect them from getting sealant. In the future, you need to prepare everything in order to apply the composition. In this situation, you must be guided by what is written on the back of the cartridge. The only thing is that you first need to remove the previous coating from the surface, and this can be done with a sharp knife
To remove crumbs, you can use a brush or vacuum cleaner, but the surface must be degreased. It is then important to remove the limiters. Then you need to remove the rod from the device. To do this, you need to press the lever and remove the part.
You need to install the cartridge in the free space and apply a few small pressures on the hook. This will allow the container to fit tightly into the gun. It is important to note that these instructions are provided for a skeletal view. Other ways of using this device differ only in the method of inserting the cartridge. Then you need to make a small hole in the container through which a straight line of sealant will come out. To do this, you need to make an incision into the existing cone.
The method of using a tube-type gun should be separately considered.
Initially, you need to create a hole in the pipe with sealant. If you choose a material that is packaged in bags, then one corner must be cut off as carefully as possible. Otherwise, the mixture will probably leak out. You need to squeeze the sealant into the tool itself, but before that you will need to remove the rod in the same way as described in the previous version. Typically, such pistols come with several different attachments, which are characterized by the presence of tips of different types. You should choose the appropriate option for the job and tighten the cylinder with it. If there is no hole on the tip, you can make it yourself. To do this, take a sharp knife and make a cut at an angle of 45 degrees.
Please note that it is necessary to predict the size of the future hole. This is necessary so that the resulting seam has the required diameter.
This will make it easier to apply the mixture.
Extrusion method independent of tube size
A suitable homemade extruder can be made in a few minutes using the following components:
- A steel ring with a thickness of at least 4...5 mm, which can be freely placed on the tube spout.
- Synthetic flexible cable.
- Bolt with a diameter of M20 and a length of at least 80 mm.
The container is first fixed on a suitable bracket. The ring is tied on both sides with a cable, both ends of which - left and right - must be the same. A bolt is inserted from the opposite side of the container with sealant, which is firmly connected to the cable. Having securely tightened this connection, you should gradually press the head of the bolt onto the inner valve of the tube. To ensure uniform pressure along the edges of the cable, loops are made into which two wrenches are inserted (or other steel objects: they will act as levers). When the cable is twisted, the bolt will begin to move and, acting on the valve, squeeze the sealant out of the spout.
It should be noted that both options for impromptu squeezing out sealant will require significant effort from the worker. However, the answer to the question - how to squeeze out sealant without a gun - is still possible.
Before purchasing sealants for sealing joints and cracks, it is worth understanding how to use silicone products and what is required to perform the work efficiently
In order to avoid mistakes when applying compounds, it is important to understand how to work with sealant in the absence of a gun
Sequence of gluing parts
To release the glue from the tube, you need to press the gun handle with frequent hand movements.
The threaded head of the tube is cut off with a sharp knife or the membrane is pierced with a sharp object. A conical tip is screwed onto the head and the cap is removed from it. The edge of the tip is cut at an angle of 45°, and the cap is put on again. The glue cartridge is ready for use.
Before inserting the cartridge into the gun, the operating rod must be relaxed. The tube is inserted into the device; by pressing the trigger, the rod is clamped until it stops. The cap is removed. By frequently pressing the handle, the glue is applied to the surface in an even strip or dotted fragments. To glue large surfaces, a mesh or snake is applied.
The surfaces to be glued are pressed and, if necessary, fixed with additional devices. Individual flat parts can be pressed down with a press. Some types of glue set within 1-2 minutes.
The total bonding time of the parts is usually 12-24 hours.
The area of surfaces prepared for gluing should be taken into account. Do not completely cover large surfaces to be glued with glue and do not apply excess glue. This will increase the setting time of the composition. To glue decorative parts, the cut is made with the smallest distance from the end of the cone.
Excess glue that appears is wiped off with a rag soaked in solvent. Glue stains remaining on wood parts can be washed off with a special cleaner. The glued structure can be used no earlier than after 24 hours.
In any large-scale repair, we resort to the help of assembly adhesive, however, not everyone knows how to use this composition correctly. It is likely that each of us will figure out how to open the mounting adhesive
, but not everyone knows how to insert it into a gun. Adhesive joints in repair work are simply irreplaceable when attaching laminate or parquet boards, wall and ceiling panels, baseboards, stucco moldings, and various decorations.
Modern adhesive compositions sold as “liquid nails” are cartridges with a volume of 400 to 310 g; there are also more economical options - 200 g, which are suitable for small jobs. Any product indicates how to use the composition correctly and what materials it is best suited for, but not all manufacturers indicate how to use a glue gun
Correctly opening the mounting adhesive:
- So, first you need to strictly follow the instructions on the cartridge label: the nozzle should be cut at an angle of 45° to the mark.
- The membrane is opened with a knitting needle or other sharp object.
- Then we install the nozzle on the opened cartridge and insert it into the mounting gun - loosen the working rod of the tool, insert the tube into the niche and clamp the rod all the way, the main thing is not to create strong tension in the tube.
In general, nothing complicated, now you know how to insert mounting adhesive into the gun
. The glue is applied in dotted drops, a process similar to driving in regular nails. For bonding strength, a continuous application of the adhesive composition to the surface is not required; to fasten heavy parts, the composition is applied in a thin strip.
To remove the liquid nail cartridge from the gun, you need to press the locking tab and, holding it, pull the rod towards you until it stops. Then we move the cylinder forward a little and pull it out of the gun.
Please note that after completing work with liquid nails, it is recommended to immediately clean your hands and tools of the adhesive, otherwise, after drying, this will be quite difficult to do. Organic-based construction adhesive is best washed off with acetone, white spirit and toluene; water-soluble compounds can be rinsed well with water. If you are unable to figure out how to use a liquid nail gun
If you are unable to figure out how to use a liquid nail gun
or you think that you can handle it on your own and are not planning to purchase this tool, we recommend that you study in detail the instructions for working with the composition. For a small amount of repair work this is quite possible.
How to use liquid nails without a gun?
If you open a new tube of mounting adhesive, you can easily squeeze out the contents by pressing your finger; otherwise, you will need a stick, for example, the handle of a hammer. The main thing is to be careful; you cannot turn over the cap that closes the container, otherwise all the adhesive will spread and the tube can be thrown away.
Some people don't quite understand how to use liquid nails.
This is not surprising, since this device is relatively new on the building materials market.
The article explains how to use liquid nails and which ones are best to choose.
Which liquid nails are best to use: advantages of Titebond
Glue has become an indispensable assistant in repair and construction work of varying complexity. It allows you to glue elements made of stone, concrete, metal, wood. Liquid nails are applied to various surfaces.
The greatest effectiveness of glue is achieved by using the appropriate brand for a particular situation. The instructions describe in detail the areas of application of the products. But among the large number of species, common characteristics are distinguished:
- Practicality and ease of use. People who do not have the skills to carry out repair and construction work will be able to use “Titebond”;
- Applying material to uneven surfaces. In this case, the load is distributed evenly along the entire perimeter. This reduces the pressure exerted on the bonding site;
- Construction adhesive remains flexible after drying;
- Titebond liquid nails withstand vibration and are resistant to deformation;
- Retain properties for many years. Construction adhesive is resistant to temperature changes and chemical influences - acids, alkalis, salts.
Sealant gun operating instructions
First, a little advice. If at the right time the gun is suddenly not at hand, then in order to knock the sealant out of the cartridge, you can use any available tool. For example, a hammer.
To use the gun successfully, follow these steps, which we have illustrated with pictures.
Step 1. First, take care of personal protection - at a minimum, wear gloves.
Step 2. Next, prepare the surface to apply sealant. In this case, we cannot advise anything specific, since everything depends on the instructions of the cartridge manufacturer. Everything should be written on the back of the latter. To remove the previous coating, use a sharp knife or triangular scraper. Remove remaining crumbs with a brush or use a vacuum cleaner.
In addition, the working surface must be degreased.
Step 3: Next, remove the limiters. If we are talking about a half-body or skeleton pistol, then this procedure will happen quickly. First, make sure that the tube does not have a special bottom-limiter. And if it is still present, then remove it.
Step 4. Let's figure out further how to use a sealant gun. Then pull out the rod in the device. To do this, press the lever and remove the part. Place the cartridge in the place that was vacated by the rod and apply a few gentle pressures on the hook to finally strengthen the container.
Installing a cartridge in a skeleton sealant gun (photo)
Step 5. Next, make a hole in the container through which the sealant will be supplied to the cone, which, in fact, ensures a uniform and even line.
Note! In most cases, such cones come sealed. And if you also have it sealed, you will have to cut off the end of the cone to form the required seam diameter
It is important that the cut dimensions are smaller than required for the job. But if you decide to use a tubular or syringe tool for work, then you should use it slightly differently
But if you decide to use a tubular or syringe tool for work, then you should use it slightly differently.
Installing a cartridge into a tubular (syringe) gun for sealant
Photo - diagram of a tubular gun
Step 1: First, make a hole in the sealant tube. If you are using packaged material or a “sausage”, then cut off one corner/end with extreme care so that the mixture can easily come out of the bag.
Step 2. Next, place the prepared container with the material into the tool itself, but so that it is the cut end of the container that goes to the tip, through which, in fact, the strip of material will be squeezed out.
Step 3. Of course, before this you need to remove the rod - do this in the same way as with a skeletal-type device.
Step 4. Guns are often equipped with several nozzles with such tips. Choose one of them and screw it onto the cylinder. If you notice that there is no hole on it (the tip), then take a utility knife and cut the tip, but strictly at an angle of 45 degrees. Of course, you also have to guess the size of the future hole in order to get a seam of the required diameter.
Be that as it may, if you have a sealant gun on your hands, then you must also have the manufacturer’s instructions. Take the time to familiarize yourself with it, since manufacturers often equip tools with some improvements and developments that are not provided in standard models.
You might be interested in this
Previously, we looked at the characteristics of self-adhesive penafol, which is very often used for insulating premises. We advise you to look at this article